
Popular categories
Looking for a yarn?


|
||||||||||||||||||||||
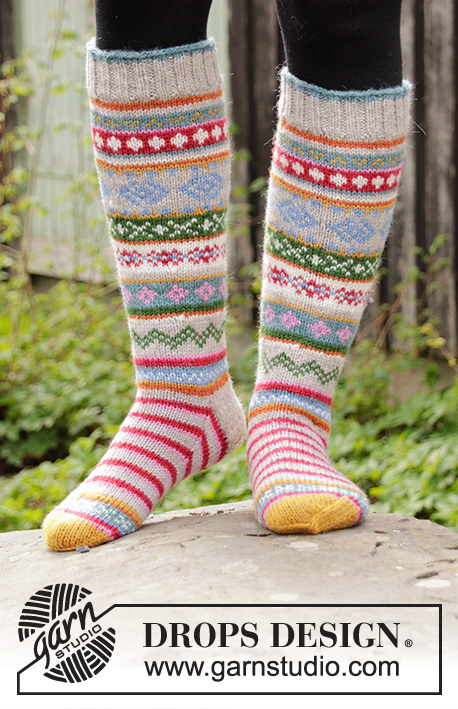
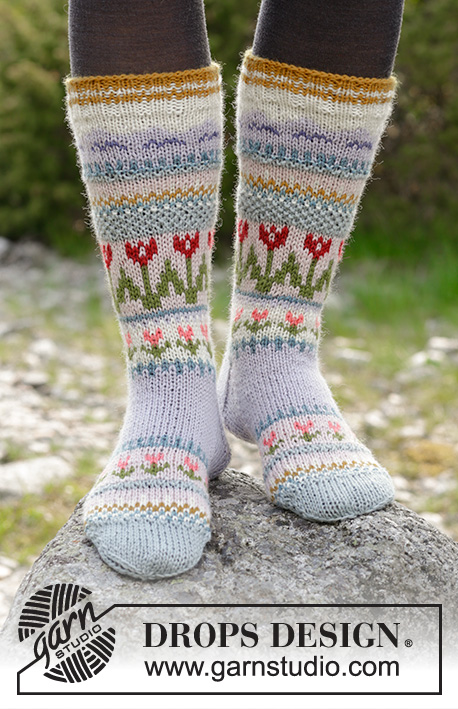
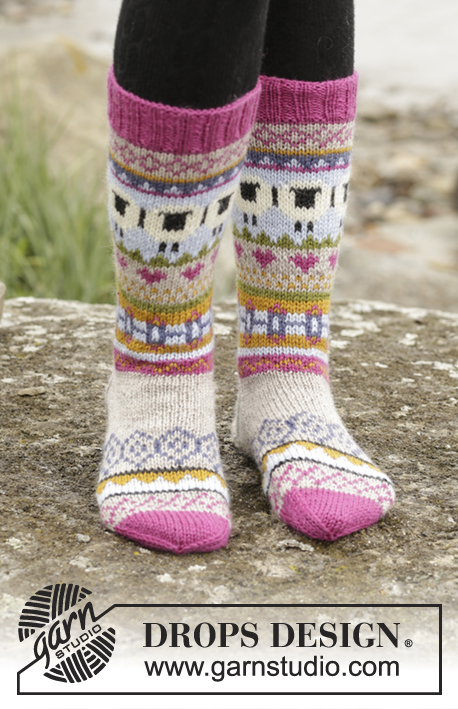
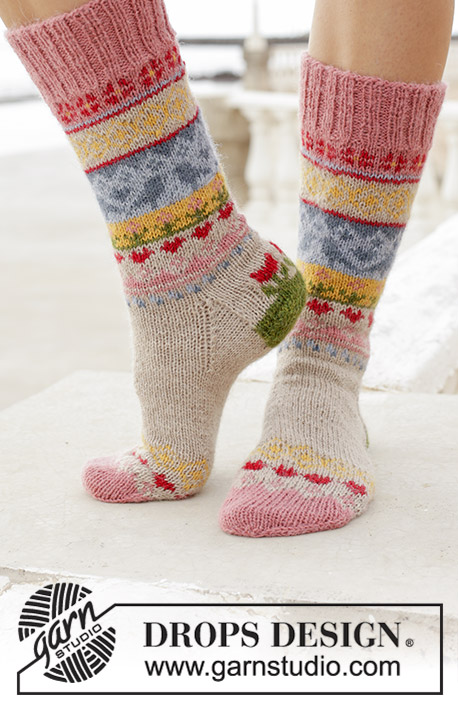
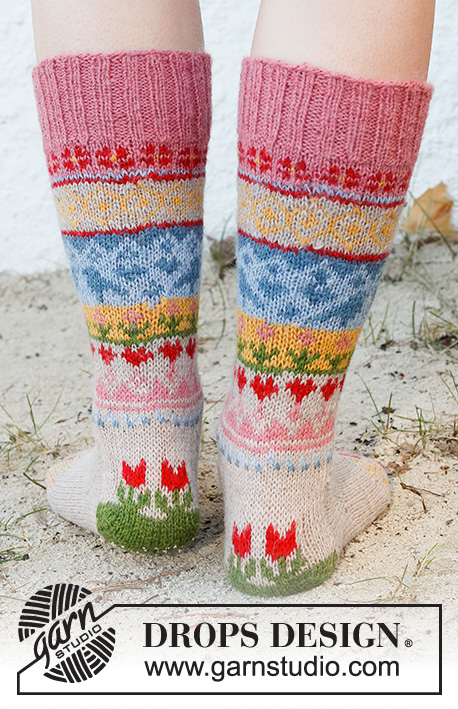
Enchanted Socks |
||||||||||||||||||||||
 |
 |
|||||||||||||||||||||
Knitted socks with multi-coloured pattern. Size 35 to 43 Piece is knitted in DROPS Nord.
DROPS 189-23 |
||||||||||||||||||||||
|
INFORMATION FOR PATTERN: PATTERN: See diagrams A.1 to A.8. Work all diagrams in stocking stitch. DECREASE TIP: Decrease 1 stitch by knitting 2 together. To calculate how to decrease evenly, use the total number of stitches on needles (e.g. 72 stitches) and divide stitches by number of decreases to be done (e.g. 6) = 12. In this example knit approx. every 11th and 12th stitch together. HEEL DECREASE: ROW 1 (= right side): Knit until 7-8-8 stitches remain, slip next stitch as if to knit, knit 1, pass slipped stitch over stitch knitted, turn piece. ROW 2 (= wrong side): Purl until 7-8-8 stitches remain, slip next stitch as if to purl, purl 1, pass slipped stitch over stitch purled, turn piece. ROW 3 (= right side): Knit until 6-7-7 stitches remain, slip next stitch as if to knit, knit 1, pass slipped stitch over stitch knitted, turn piece. ROW 4 (= wrong side): Purl until 6-7-7 stitches remain, slip next stitch as if to purl, purl 1, pass slipped stitch over stitch purled, turn piece. Continue decrease like this with 1 stitch less before each decrease until there are 14-14-16 stitches on needles. ---------------------------------------------------------- SOCK: Worked in the round on double pointed needles. Cast on 72-72-80 stitches on double pointed needles size 2.5 mm with old pink. Knit 1 round. Continue with rib = knit 2/purl 2 for 5 cm. Knit 1 round AT THE SAME TIME decrease 6-6-8 stitches evenly - read DECREASE TIP = 66-66-72 stitches. Then work according to diagram A.1 (= 6 stitches) 11-11-12 times on round. REMEMBER THE KNITTING TENSION! Work A.2 (= 3 stitches) over the first 3-3-0 stitches, repeat A.3 (= 18 stitches) over the next 54-54-72 stitches (= 3-3-4 times) AT THE SAME TIME decrease 6-6-0 stitches evenly on first round and finish with A.4 (= 3 stitches) over the last 3-3-0 stitches = 60-60-72 stitches. When A.2 to A.4 have been worked 1 time vertically, piece measures approx. 16 cm. Work A.5 (= 6 stitches) 9-10-11 times in total on round AT THE SAME TIME decrease 6-0-6 stitches evenly on first round = 54-60-66 stitches. When A.5 has been worked 1 time vertically, continue with light beige. When piece measures 24 cm (= leg), decrease 0-2-4 stitches evenly on next round = 54-58-62 stitches. Now keep the first and last 13-14-15 stitches on needle for heel and slip the remaining stitches on a stitch holder (= mid on top of foot) = 28-30-32 stitches on top of foot and 26-28-30 stitches for heel. Work in stocking stitch back and forth over heel stitches for 1 cm. Then work next row from right side as follows: Work 4-5-6 stitches as A.6, A.7 (= 17 stitches) 1 time and 5-6-7 stitches as A.6. Continue pattern like this. When A.6 and A.7 have been worked 1 time vertically, finish heel with lemongrass. When heel measures 5-5½-6 cm, insert 1 marker in the middle of last row. Now work HEEL DECREASE - see explanation above. After heel decrease work in the round in stocking stitch with light beige. Work next round as follows: Work stitches from heel, pick up 13-14-16 stitches along side of heel, work stitches from stitch holder and pick up 13-14-16 stitches along the other side of heel = 68-72-80 stitches. Insert 1 marker on each side of the 28-30-32 stitches on top of foot. Then decrease in each side as follows: Knit the last 2 stitches before first marker on top of foot twisted together and knit the first 2 stitches after last marker on top of foot together (= 2 stitches decreased). Repeat decrease every other round a total of 8-8-10 times = 52-56-60 stitches. Work until piece measures 12-13-15 cm from marker on heel (= 10-11-12 cm remain on sock). Work A.8 (= 6 stitches) 8-9-10 times in total on round, AT THE SAME TIME on first round decrease 4-2-0 stitches evenly = 48-54-60 stitches. When A.8 has been worked 1 time vertically, piece measures approx. 18-19-21 cm from marker on heel (= 4-5-6 cm remain on sock). Insert 1 marker in each side so that there are 24-27-30 stitches both on top of foot and under foot. Continue in stocking stitch with old pink and decrease for toes on each side of both markers as follows: Before markers: Knit 2 together. After markers: Knit 2 twisted tog (= 4 stitches decreased per decrease). Decrease like this in each side on every other round a total of 4-7-9 times and then on every round a total of 5-3-2 times = 12-14-16 stitches. On next round knit all stitches together 2 by 2 = 6-7-8 stitches. Cut the yarn and pull it through the remaining stitches, tighten together and fasten. Work the other sock the same way. |
||||||||||||||||||||||
Diagram explanations |
||||||||||||||||||||||
|
||||||||||||||||||||||

|
||||||||||||||||||||||

|
||||||||||||||||||||||
|
Have you made this or any other of our designs? Tag your pictures in social media with #dropsdesign so we can see them! Do you need help with this pattern?You'll find tutorial videos, a Comments/Questions area and more by visiting the pattern on garnstudio.com. © 1982-2024 DROPS Design A/S. We reserve all rights. This document, including all its sub-sections, has copyrights. Read more about what you can do with our patterns at the bottom of each pattern on our site. |
||||||||||||||||||||||


With over 40 years in knitting and crochet design, DROPS Design offers one of the most extensive collections of free patterns on the internet - translated to 17 languages. As of today we count 304 catalogues and 11422 patterns - 11422 of which are translated into English (UK/cm).
We work hard to bring you the best knitting and crochet have to offer, inspiration and advice as well as great quality yarns at incredible prices! Would you like to use our patterns for other than personal use? You can read what you are allowed to do in the Copyright text at the bottom of all our patterns. Happy crafting!
Comments / Questions (11)
Bonjour, Est-ce qu'on peut utiliser une aiguille circulaire à la place des aiguilles doubles pointes ?
30.06.2020 - 18:01DROPS Design answered:
Bonjour Mme Castel, tout à fait, mais il vous faudra utiliser la technique du magic loop - et donc une aiguille de 80 cm. Bon tricot!
30.06.2020 - 18:40Hi. Only charts for A5 and A8 are now showing all the others have disappeared! Please would you restore them
29.07.2018 - 08:45DROPS Design answered:
Dear Jane, you should be able to see all diagrams, shouldn't you, try to clean your cache and try again. Shouldn't it still work, please let us know wich browser/system you are using. Thank you!
31.07.2018 - 10:29Your note says "This pattern is written in American English. All measurements in charts are in cm." Can't be both American and cm--so is cm a typo that should read inches?
06.07.2018 - 16:10DROPS Design answered:
Dear Mrs Matthews, the US-English patterns are written with American English wording, but when there is a chart with all measurements in each size (this doesn't apply here for the socks) the measurements in the chart are taken in cm, not in inches. Happy knitting!
09.07.2018 - 09:29Åsa wrote:
Hur får man tag i mönsterdelarna A5 och A8? Jag kommer inte vidare....
10.05.2018 - 10:31DROPS Design answered:
Diagram A.5 och A.8 hittas längst ner under de övriga diagrammen.
01.06.2018 - 15:45A5 o A8??? Sitter just nu och saknar ovanstående info...
10.05.2018 - 01:23DROPS Design answered:
Hej Åsa, både A5 og A8 ligger nu nederst under de andre diagrammet. God fornøjelse!
15.05.2018 - 16:02Diagram A5 + A8 ?
09.05.2018 - 20:09DROPS Design answered:
Dear Mrs Presttun, Diagrams A.5 and A.8 are now online, thank you. Happy knitting!
11.05.2018 - 09:13Puuduvad skeemid A.5 ja A.8 tulevad.
08.05.2018 - 23:56Prachtig zomers motief. Lijkt me leuk om te breien!
31.12.2017 - 19:31Very sweet motifs and colors. I would love to knit this on a wintery day, looking forward to spring.
19.12.2017 - 21:53Motifs originaux que nous ne voulons peut-être pas garder dans notre jardin secret
13.12.2017 - 12:30