
Popular categories
Looking for a yarn?


|
|||||||||||||||||||||||||
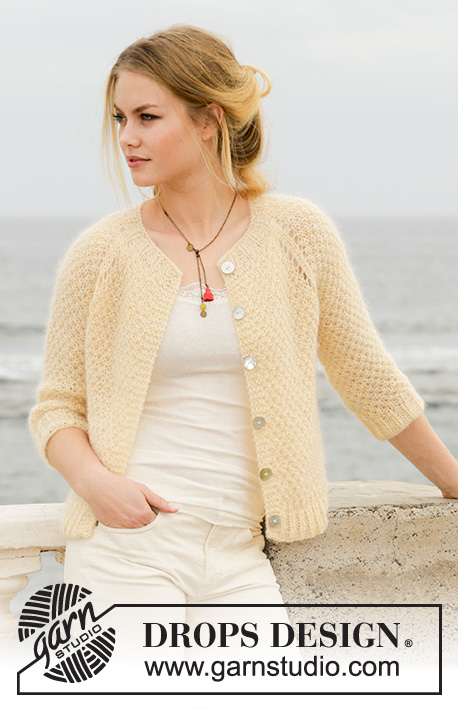
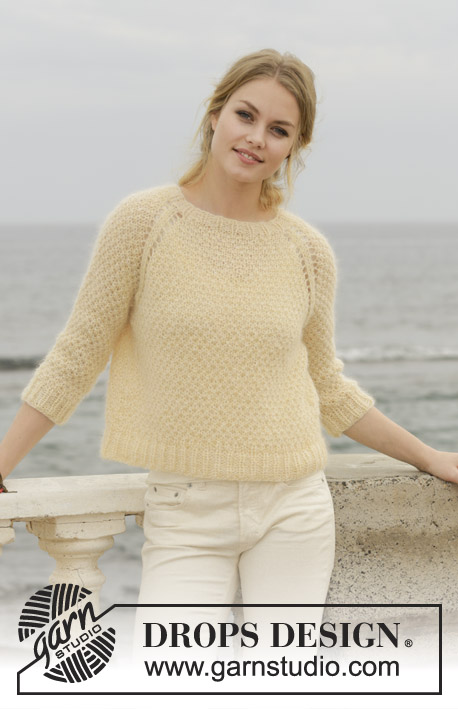
Embrace of the Sun |
|||||||||||||||||||||||||
|
|
|||||||||||||||||||||||||
Dress with lace pattern round yoke and short sleeves, worked top down. Sizes S - XXXL. The piece is worked in DROPS Muskat.
DROPS 191-5 |
|||||||||||||||||||||||||
|
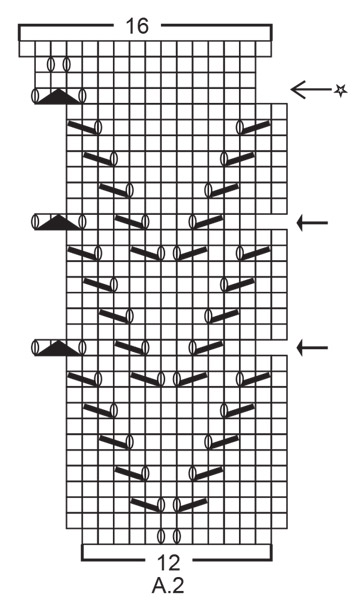
INFORMATION FOR THE PATTERN: SEED STITCH: Round 1: * Knit 1, purl 1 *, work from *-* to end of round. Round 2: Purl over knit and knit over purl. Repeat round 2. INCREASE TIP-1: To work out how to increase evenly, count the total number of stitches on the needle (e.g. 121 stitches) and divide by the number of increases to be made (e.g. 15) = 8.1. In this example, increase by making 1 yarn over after approx. every 8th stitch; on the next round knit the yarn overs twisted to avoid holes. PATTERN: See diagrams A.1 to A.3. Choose diagram for your size (applies to A.1 and A.3). RAGLAN: Increase to raglan on each side of the 4 marker threads in each transition between body and sleeves as follows: Start 1 stitch before the marker thread, make 1 yarn over, knit 2 (the marker thread sits in the middle of these 2 stitches), make 1 yarn over (= 2 stitches increased). On the next round knit the yarn overs twisted to avoid holes. DECREASE TIP (for the body): Start 4 stitches before the marker thread, knit 2 together, knit 4 (the marker thread sits in the middle of these 4 stitches), slip 1 stitch as if to knit, knit 1, pass the slipped stitch over the knitted stitch (= 2 stitches decreased). INCREASE TIP-2 (for body): Increase 1 stitch by picking up the stitch from the previous round and knitting the new stitch. When you increase after the first and third marker threads, pick up 1 stitch in the first stitch loop after the marker thread. When increasing before the second and fourth marker threads, pick up a stitch in the last loop before the marker thread. ---------------------------------------------------------- DRESS: The yoke and body are worked in the round with circular needle, top down. The sleeve edges are worked in the round with double pointed needles/short circular needle. NECK EDGE: Cast on 121-125-129-135-145-149 stitches with small circular needle size 3.5 mm / US 4 and Muskat. Knit 1 round. Then work SEED STITCH – see description above, for 2 cm / ¾". Knit 1 round where you increase 15-19-23-17-15-19 stitches evenly on round – read INCREASE TIP-1 = 136-144-152-152-160-168 stitches. Change to circular needle size 4 mm / US 6 and knit 1 round. Then work the yoke as described below. YOKE: Work A.1 in the round (= 17-18-19-19-20-21 repeats of 8 stitches). REMEMBER THE GAUGE! When A.1 has been completed, there are 204-216-228-228-240-252 stitches on the needle and the piece measures approx. 10-10-10-11-11-11 cm / 3⅞"-3⅞"-3⅞"-4 ¼"-4 ¼"-4 ¼" from the cast on edge. Now insert 4 markers in the piece for raglan as follows (do this without working the stitches): The first marker is inserted after the first 31-32-34-36-39-43 stitches (= ½ back piece), 2nd marker after the next 40-44-46-42-42-40 stitches (= sleeve), 3rd marker after the next 62-64-68-72-78-86 stitches (= front piece) and the 4th marker is inserted after the next 40-44-46-42-42-40 stitches (= sleeve). There are 31-32-34-36-39-43 stitches after the last marker for half the back piece. Work stockinette stitch in the round. AT THE SAME TIME on the first round increase to RAGLAN – see description above (= 8 stitches increased). Increase like this every 2nd round a total of 0-3-5-11-11-12 times and then every 4th round a total of 6-6-6-4-5-6 times. After the last increase to raglan there are 252-288-316-348-368-396 stitches on the needle. Knit 1 round where you increase 4-4-0-0-4-0 stitches evenly on round = 256-292-316-348-372-396 stitches. Continue working until the piece measures 19-21-23-25-27-29 cm / 7⅜"-8 ¼"-9"-9 ¾"-10⅝"-11⅜" from the cast on edge mid front. The next round is worked as follows: Work 38-42-45-51-56-61 stitches stockinette stitch (= ½ back piece), place the next 52-62-68-72-74-76 stitches on 1 thread for sleeve, cast on 8-8-10-10-12-14 new stitches on the needle (= in side under the sleeve), work 76-84-90-102-112-122 stitches stockinette stitch (= front piece), place the next 52-62-68-72-74-76 stitches on 1 thread for sleeve, cast on 8-8-10-10-12-14 new stitches on the needle (=in side under the sleeve) and work the remaining 38-42-45-51-56-61 stitches in stockinette stitch (= ½ back piece). Cut the strand. Body and sleeves are finished separately. THE PIECE IS NOW MEASURED FROM HERE! BODY: = 168-184-200-224-248-272 stitches. Insert 1 marker thread at the beginning of the round and 1 marker thread after 84-92-100-112-124-136 stitches (= in the sides of the dress). Work stockinette stitch in the round. When the piece measures 2 cm / ¾" from the separation, decrease 1 stitch on each side of both marker threads – read DECREASE TIP (= 4 stitches decreased). Decrease like this every 2 cm / ¾" a total of 4 times in each side = 152-168-184-208-232-256 stitches. Remove all markers and marker threads in the piece, except the marker thread at the beginning of piece. When the piece measures 15 cm / 6" from the separation, insert 4 new marker threads in the piece as follows: The first marker thread is inserted after the first 15-18-21-26-31-36 stitches, 2nd marker thread after the next 46-48-50-52-54-56 stitches, 3rd marker thread after the next 30-36-42-52-62-72 stitches and the 4th marker thread is inserted after the next 46-48-50-52-54-56 stitches. There are 15-18-21-26-31-36 stitches left on the round after the last marker thread. On the next round, increase after the first and third marker threads and before the second and fourth marker threads – read INCREASE TIP-2 (= 4 stitches increased). Increase like this every 4-5-3½-3½-3½-3½ cm/1½"-2"-1¾"-1¾"-1¾"-1¾" a total of 7-6-8-8-8-8 times = 180-192-216-240-264-288 stitches. When the piece measures 44-45-46-45-46-46 cm / 17 ¼"-17⅝"-18"-17⅝"-18"-18" work A.2 in the round (= 15-16-18-20-22-24 repeats of 12 stitches). On each round with arrow in A.2 the beginning of the round is displaced 2 stitches towards the left, i.e. lift the 2 first stitches over to the right needle without working them, then work A.2 in the round. The 2 stitches that where lifted over to the right needle will be worked in the last repeat of A.2. On next round knit all stitches. Then start the round as normal. When A.2 is worked there is 240-256-288-320-352-384 stitches on the needle. Now work A.3 in the round (= 15-16-18-20-22-24 repeats of 16 stitches). When A.3 has been completed, there are 315-336-378-380-418-456 stitches on the needle. Knit 1 round where you increase 14-15-17-19-21-23 stitches evenly on round = 329-351-395-399-439-479 stitches. Change to circular needle size 3.5 mm / US 4. Work seed stitch in the round for 2 cm / ¾". Bind off with knit over purl and purl over knit. The dress measures approx. 87-90-93-96-99-101 cm / 34 ¼"-35⅜"-36⅝"-37 ¾"-39"-39 ¾" from the shoulder down. SLEEVE EDGE: Place the 52-62-68-72-74-76 stitches from the thread on the one side of the piece on double pointed needles size 3.5 mm / US 4 and, in addition, knit up 1 stitch in each of the 8-8-10-10-12-14 stitches cast on under the sleeve = 60-70-78-82-86-90 stitches. Knit 1 round and at the same time decrease 1 stitch on this round = 59-69-77-81-85-89 stitches. Work seed stitch in the round for 3 cm / 1". Bind off with knit over purl and purl over knit. Work the other sleeve edge in the same way. |
|||||||||||||||||||||||||
Diagram explanations |
|||||||||||||||||||||||||
|
|||||||||||||||||||||||||

|
|||||||||||||||||||||||||
|
|||||||||||||||||||||||||

|
|||||||||||||||||||||||||

|
|||||||||||||||||||||||||
|
Have you made this or any other of our designs? Tag your pictures in social media with #dropsdesign so we can see them! Do you need help with this pattern?You'll find tutorial videos, a Comments/Questions area and more by visiting the pattern on garnstudio.com. © 1982-2024 DROPS Design A/S. We reserve all rights. This document, including all its sub-sections, has copyrights. Read more about what you can do with our patterns at the bottom of each pattern on our site. |
|||||||||||||||||||||||||


With over 40 years in knitting and crochet design, DROPS Design offers one of the most extensive collections of free patterns on the internet - translated to 17 languages. As of today we count 304 catalogs and 11422 patterns - 11417 of which are translated into English (US/in).
We work hard to bring you the best knitting and crochet have to offer, inspiration and advice as well as great quality yarns at incredible prices! Would you like to use our patterns for other than personal use? You can read what you are allowed to do in the Copyright text at the bottom of all our patterns. Happy crafting!
Comments / Questions (37)
Jeg mener kjolen må bli alt for kort hvis man skal starte med A2 når den måler 44 cm. Jeg var heller ikke ferdig med økningen når jeg kom til 44 cm. Har regnet ut at fra A2 er det igjen ca 23 cm på det resterende, og den skal bli 87 cm i full lengde.
05.05.2019 - 21:49DROPS Design answered:
Hei Marie. Bærestykket måler 19 cm fra oppleggskanten. Når bolen måler 15 cm settes 4 merker, og det økes ved hvert merke. Videre skal du øke hver 4 cm 6 ganger til (=totalt 7 ganger). Dvs, du øker over de neste 24 cm. Når alle økinger er ferdig måler bolen 39 cm. Fortsett uten økinger til bolen måler 44 cm (hel lengde: 44 + 19 = 63 cm). Så strikkes A.2 (32 omganger) og så A.3 (22 omganger) = ca 19 cm, før det avsluttes med 2 cm perlestrikk. Arbeidet måler nå: 63 + 19 + 2 = 84 cm fra oppleggskanten, og 87 cm fra skulderen og ned. Dette stemmer overens med målene oppgitt i målskissen. God fornøyelse
07.05.2019 - 14:49Dobry den,nerozumim postupu uvedenem v TIPu PRIDAVANI 2 (trup).Co konkretne presne znamena "nabereme 1 oko z první poloviny oka za značkou" a "nabereme 1 oko z druhé poloviny před značkou". Jak se nabira z poloviny oka,existuje nejaky video navod?Dekuji
30.03.2019 - 07:37DROPS Design answered:
Dobrý den, Pletařko, jde o nabrání oka z oka o řadu níž, kdy nenabíráme celé oko, ale jen jeho polovinu, jednu nitku - tu, která je blíže značce a víc "na povrchu" pleteniny. Pro větší názornost přikládám video-ukázku. Hodně zdaru! Hana
31.03.2019 - 18:55Bonsoir, Juste une question... Combien de pelotes faut il pour faire la taille S ? Je ne trouve pas.... Merci d'avance. J'ai hâte de m'y mettre... 😊
11.03.2019 - 01:30DROPS Design answered:
Bonjour Mme Fedorenko. Il vous faut 600 g (12 pelotes) de DROPS Muskat. Bon travail!
11.03.2019 - 08:50Beskrivelsen på A1 er det bare for hullmønsteret .? Jeg skal prøve meg på denne kjolen fordi jeg liker fasongen; men uten hullmønsteret
20.02.2019 - 19:53DROPS Design answered:
Hei Oddrun. Ja, alle diagrammene inneholer hullmønster. Om du ikke ønsker dette kan du enkelt la vær å strikke dem, men behold økningene (som ikke inngår i hullmønsteret) slik at maskeantallet blir korrekt. God fornøyelse
21.02.2019 - 13:23Mustri kehaosa kirjelduses peale kasvatusi esineb viga. Õige oleks: kui töö pikkus on 44-45-46-45-46-46, koo ringselt skeemi A.2.
11.02.2019 - 15:02Hei! Jeg har begynt å strikke denne kjolen, men etter å ha strikket A1, så har jeg 219 masker i stedet for 216, som mønsteret sier. Mønsteret stemmer. Er det en feil i mønsteret? Hvordan blir plasseringen av merketrådene da?
06.02.2019 - 22:43DROPS Design answered:
Hei Nina. Før du strikker A:1 har du 144 masker. Du strikker A.1 over alle maskene = 18 rapporter i bredden, med 8 masker i hver rapport. Du øker totalt 4 masker i hver rapport av A.1, så når du har strikket A.1 en gang i høyden har du 12 masker i hver rapport. 12 x 18 = 216. Så dette stemmer. God fornøyelse
11.02.2019 - 10:58Cd.: Mogło się to wziąć z dosłownego tłumaczenia z angielskiego (cast on edge), ale to tak naprawdę znaczy górny brzeg robótki.
06.08.2018 - 22:54W opisie KARCZKU jest napisane:Dalej przerabiać aż dł. robótki od rzędu nabierania oczek wynosi 19-21-23-25-27-29 cm, mierząc po środku przodu. To mylące, bo chodzi o 19cm od początku robótki. Sformułowanie ,od rzędu nabierania oczek, po polsku może sugerować, że należy mierzyć od ostatniego rzędu, w którym zostały dodane równomiernie 4-4-0-0-4-0 oczka.
06.08.2018 - 22:54Beim Rumpfteil, wo man die Markierer anbringen soll, verstehe ich die Aufteilung nicht ganz. Da steht, es sollen die Seiten markiert werden. Heisst das, ich bringe die Markierer unter den Armausschnitten an? Weil mein Rundenbeginn wäre eigentlich am Rücken, so würde ich die Rückenmitte und die Vorderseitenmitte markieren und dort die Abnahme stricken. Aber die Abnahme müsste an den Seiten geschehen, oder?
13.07.2018 - 03:52DROPS Design answered:
Liebe Nadine, Beim Rumpfteil beginnen jetzt du Runden unter dem Armauschnitt (an einer der Seite)= 1. Markierung, 2. Markierung wird nach der Hälften der Maschen eingesetzt, die Markierungen sind jeweils in der Mitter der neu angeschlagenen Maschen unter den Ärmeln. Viel Spaß beim Stricken!
13.07.2018 - 07:23Et smukt mønster som virkelig kræver klarsyn for at hulmønster lykkedes. Er dog en perfekt kjole til vores smukke sommer også i forhold til navnet på mønster, hvis bare man havde startet lidt tidligere :-)
10.07.2018 - 04:11