DROPS Nord
DROPS Nord
45% Alpaca, 30% Polyamide, 25% Wool
from 3.85 $ /50g
DROPS Kid-Silk
DROPS Kid-Silk
75% Mohair, 25% Silk
from 6.75 $ /25g
Get the yarn to make this pattern from 53.00$.

The yarn cost is calculated from the pattern’s smallest size and the yarn’s cheapest product type. Looking for an even better price? You might find it on the DROPS Deals!

DROPS SS24

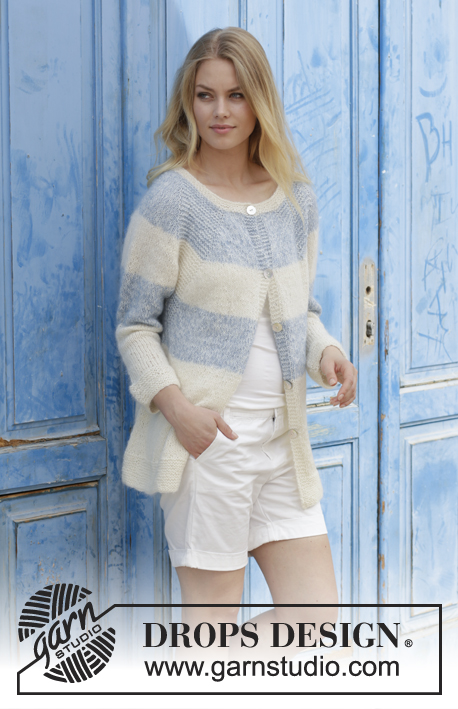
Sailor's Luck Cardigan

Knitted jacket with raglan and stripes, worked top down. Sizes S - XXXL. The piece is worked in DROPS Nord and DROPS Kid-Silk.

DROPS 191-27
DROPS Design: Pattern no-010
Yarn group A + A or C
-----------------------------------------------------------
Sizes: S - M - L - XL - XXL - XXXL
Materials:
DROPS NORD from Garnstudio (belongs to yarn group A)
250-250-300-300-350-350 g color 01, off white
And use:
DROPS KID-SILK from Garnstudio (belongs to yarn group A)
75-75-100-100-100-125 g color 01, off white
50-50-50-50-50-75 g color 08, gray blue

The piece can also be knitted with yarn from:
"Alternative yarn (Yarn group A)" – see link below.

DROPS DOUBLE POINTED NEEDLES AND CIRCULAR NEEDLE (80 cm / 32") SIZE 5 mm/US 8 – or the size needed to get 17 stitches and 22 rows stockinette stitch with 1 strand of each quality on 10 cm / 4" in width and 10 cm / 4" in height.

DROPS DOUBLE POINTED NEEDLES AND CIRCULAR NEEDLE (80 cm / 32") SIZE 4.5 mm/US 7 for the garter stitch – or the size needed to get 18 stitches and 23 rows stockinette stitch with 1 strand of each quality on 10 cm / 4" in width and 10 cm / 4" in height.

DROPS MOTHER OF PEARL BUTTONS, Arched (white) NO 522: 5 items in all sizes.

-------------------------------------------------------
Color combinations shown are:
A) DROPS Alpaca 100, DROPS Kid-Silk 01, 04.
B) DROPS Alpaca 100, DROPS Kid-Silk 01, 18.
-------------------------------------------------------

-------------------------------------------------------

Alternative Yarn – See how to change yarns here
Yarn Groups A to F – Use the same pattern and change the yarn here
Yarn usage using an alternative yarn – Use our yarn converter here

-------------------------------------------------------

DROPS Nord
DROPS Nord
45% Alpaca, 30% Polyamide, 25% Wool
from 3.85 $ /50g
DROPS Kid-Silk
DROPS Kid-Silk
75% Mohair, 25% Silk
from 6.75 $ /25g
Get the yarn to make this pattern from 53.00$.

The yarn cost is calculated from the pattern’s smallest size and the yarn’s cheapest product type. Looking for an even better price? You might find it on the DROPS Deals!

Pattern instructions

NOTE: This pattern is written in American English. All measurements in charts are in cm. For conversion from inches to cm - click here. There are different terms for crocheting in American and British English. If this pattern includes crochet, click for "crochet terms" here. For this pattern in British English, please click here.
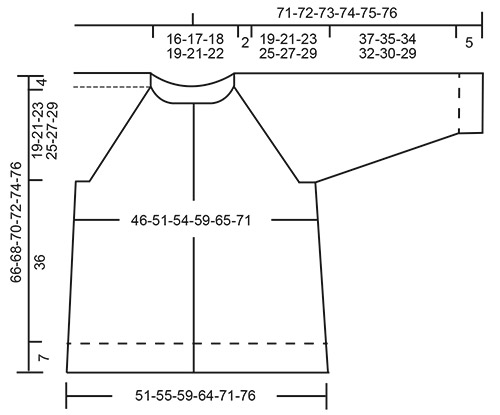
INFORMATION FOR THE PATTERN:

RIDGE/GARTER STITCH (worked in the round):
1 ridge = 2 rounds. Knit 1 round and purl 1 round.

RIDGE/GARTER STITCH (worked back and forth):
1 ridge = Knit 2 rows.

INCREASE TIP-1 (evenly spaced):
To work out how to increase evenly, count the total number of stitches on the needle (e.g. 92 stitches) minus the bands (e.g. 10 stitches) and divide the remaining stitches by the number of increases to be made (e.g. 4) = 20.5.
In this example, make 1 yarn over after alternately the 20th and 21st stitch. On the next row work the yarn overs twisted to avoid holes.

INCREASE TIP-2 (for sides of body):
All increases are made from the right side!
Work until there are 2 stitches left before the marker thread, 1 yarn over, knit 4 stitches (the marker thread sits in the middle of these 4 stitches), 1 yarn over. On the next row purl the yarn overs twisted to avoid holes. Then work the new stitches in stockinette stitch
STRIPES:
11-11-11-12-12-12 cm / 4½"-4½"-4½"-4¾"-4¾"-4¾" with 1 strand off-white Nord and 1 strand gray blue Kid-Silk.
11-11-11-12-12-12 cm / 4½"-4½"-4½"-4¾"-4¾"-4¾" with 1 strand off-white Nord and 1 strand off-white Kid-Silk.
11-11-11-12-12-12 cm / 4½"-4½"-4½"-4¾"-4¾"-4¾" with 1 strand off-white Nord and 1 strand gray blue Kid-Silk.
Then work with 1 strand off-white Nord and 1 strand off-white Kid-Silk to finished length.

RAGLAN:
All increases are made from the right side!
Increase 1 stitch on each side of the 16 stitches in garter stitch in each transition between body and sleeves (= 8 stitches increased on the row). Increase 1 stitch by making 1 yarn over. On the next row purl the yarn overs twisted to avoid holes. Then work the new stitches in stockinette stitch.

DECREASE TIP (for sleeves):
All decreases are made from the right side!
Decrease 1 stitch on each side of the marker thread as follows: Work until there are 3 stitches left before the marker thread, knit 2 stitches together, knit 2 (the marker thread sits in the middle of these 2 stitches), slip 1 stitch as if to knit, knit 1, pass the slipped stitch over the knitted stitch.

BUTTONHOLES:
Work buttonholes on the right band (when the garment is worn). Work from the right side until there are 3 stitches left on the row as follows: Make 1 yarn over, knit 2 together and knit the last stitch. On the next row knit the yarn over to leave a hole.
The first buttonhole is worked when the garter stitch edge in the neck measures approx. 2 cm / ¾". Then work the next 4 buttonholes with approx. 11-11-11-12-12-12 cm / 4½"-4½"-4½"-4¾"-4¾"-4¾" between each (= in the transition between each of the stripes + 1 buttonhole 11-11-11-12-12-12 cm / 4½"-4½"-4½"-4¾"-4¾"-4¾" after the last stripe).
----------------------------------------------------------

JACKET:
The piece is worked back and forth on circular needle, top down. The sleeves are worked in the round with double pointed needles.

YOKE:
Cast on 92-95-98-101-107-112 stitches with circular needle size 4.5 mm / US 7 and 1 strand off-white Nord and 1 strand off-white Kid-Silk (= 2 strands). Purl 1 row from the wrong side, then work 3 RIDGES - see description above - remember BUTTONHOLES! Change to circular needle size 5 mm / US 8. Work 1 ridge where, on the first row, you increase 4-13-18-19-17-16 stitches evenly on row – read INCREASE TIP-1 (evenly spaced) = 96-108-116-120-124-128 stitches.
Now work STRIPES – see description above, work pattern and increase to RAGLAN – see description above, from the right side as follows: 5 band stitches in garter stitch, 5-8-10-11-12-13 stitches in stockinette stitch (= left front piece), make 1 yarn over, 16 stitches in garter stitch (= raglan line), make 1 yarn over, 1 stitch in stockinette stitch (= sleeve), make 1 yarn over, 16 stitches in garter stitch (= raglan line), make 1 yarn over, 10-16-20-22-24-26 stitches in stockinette stitch (= back piece), make 1 yarn over, 16 stitches in garter stitch (= raglan line), make 1 yarn over, 1 stitch in stockinette stitch (= sleeve), make 1 yarn over, 16 stitches in garter stitch (= raglan line), make 1 yarn over, 5-8-10-11-12-13 stitches in stockinette stitch (= right front piece), 5 band stitches in garter stitch.
The first increase to raglan is now finished (= 8 stitches increased on row). Continue back and forth in this way and increase to raglan every 2nd row a total of 21-23-25-27-30-32 times = 264-292-316-336-364-384 stitches. When all the increases to raglan are finished, the piece should measure 21-23-25-27-29-31 cm / 8¼"-9"-9¾"-10⅝"-11⅜"-12¼" from the cast-on edge measured down mid front. If the piece is shorter than this continue with pattern as before (without increasing number of stitches) until the piece has the right length.

The next row from the right side is worked as follows (continue the pattern as before): Work 41-45-47-51-55-59 stitches (= left front piece), place the next 55-61-69-71-77-79 stitches on a thread (= sleeve), cast on 6-6-8-8-10-12 new stitches on the needle (= side under sleeve), work the next 72-80-84-92-100-108 stitches (= back piece), place the next 55-61-69-71-77-79 stitches on a thread (= sleeve), cast on 6-6-8-8-10-12 new stitches on the needle (= side under sleeve), work the remaining 41-45-47-51-55-59 stitches (= right front piece).

BODY:
= 166-182-194-210-230-250 stitches. THE PIECE IS NOW MEASURED FROM HERE! Insert a marker thread in each side (= middle of the new stitches cast on under each sleeve = 3-3-4-4-5-6 new stitches on each side of the marker thread).
Continue back and forth with stockinette stitch and garter stitch over the 5 band stitches in each side towards mid front and over the 10-9-7-8-8-9 stitches which remain on the front and back pieces (from the garter stitch section along the raglan lines),
AT THE SAME TIME on every 2nd row make 1 yarn over on the
outside of each garter stitch section towards mid front and towards mid back (=a total of 4 stitches increased on row) and decrease 1 stitch in each garter stitch
section by knitting the 2 outermost stitches in garter stitch section towards the side of garment together (= 1 stitch decreased in each garter stitch section towards the side, a total of 4 stitches decreased on row). NOTE! The number of stitches stays the same, but the stitches in garter stitch will gradually disappear
and there will be more stitches in stocking stitch, (i.e.4 stitches increased and 4 stitches decreased on every 2nd row).
When all the stitches in garter stitch are gone, continue with stockinette stitch and 5 band stitches in garter stitch in each side towards mid front, AT THE SAME TIME on the first row from the right side increase 1 stitch on each side of the marker threads in each side – read INCREASE TIP-2. Increase like this every 8-8-9-9-7-7 cm / 3"-3"-3½"-3½"-2¾"-2¾" a total of 4-4-4-4-5-5 times = 182-198-210-226-250-270 stitches. Continue working until the piece measures 36 cm / 14¼" in all sizes. Change to circular needle size 4.5 mm / US 7. Work garter stitch for 7 cm / 2¾". Bind off with knit from the right side. You can use a size larger needle to bind off to avoid the bind-off edge being tight. The piece measures approx. 66-68-70-72-74-76 cm / 26"-26¾"-27½"-28⅜"-29⅛"-30" from the shoulder down.

SLEEVE:
Place the 55-61-69-71-77-79 stitches from the thread on the one side of the piece on double pointed needles size 5 mm / US 8 and, in addition, cast on 6-6-8-8-10-12 new stitches mid under the sleeve = 61-67-77-79-87-91 stitches on the needle. Insert a marker thread in the middle of the new stitches – THE PIECE IS NOW MEASURED FROM HERE! Work stockinette stitch over stockinette stitch and garter stitch over garter stitch; at the same time decrease the stitches in garter stitch in the same way as on the body (the number of stitches stays the same). When the stitches in garter stitch have gone, work stockinette stitch over all stitches, at the same time on the first row decrease 2 stitches mid under the sleeve – read DECREASE TIP. Decrease like this approx. every 6-5-3-3-2-2 rounds a total of 12-13-18-18-20-22 times = 37-41-41-43-47-47 stitches.
Continue with stockinette stitch in the round until the piece measures 37-35-34-32-30-29 cm / 14½"-13¾"-13½"-12½"-11¾"-11½". Change to double pointed needles size 4.5 mm / US 7. Work garter stitch for 5 cm / 2". Bind off with knit. You can use a size larger needle to bind off to avoid the bind-off edge being tight. The sleeve measures 42-40-39-37-35-34 cm / 16½"-15¾"-15¼"-14½"-13¾"-13½". Work the other sleeve in the same way.

ASSEMBLY:
Sew openings under the sleeves. Sew buttons onto left band.

This pattern has been corrected.

Updated online: 16.03.2018
Correction in increase tip-2.
Updated online: 04.06.2018
The colour number for DROPS Alpaca off-white has been corrected to 100 (previously 01)

Diagram

All measurements in charts are in cm.

diagram measurements

Each of our patterns has specific tutorial videos to help you.

Do you have a question? See a list of frequently asked questions (FAQ)

Knitting tension is what determines the final measurements of your work, and is usually measured per 10 x 10 cm. It is provided like so: number of stitches in width x number of rows in height - eg: 19 stitches x 26 rows = 10 x 10 cm.

The knitting tension is very individual; some people knit/crochet loosely while others work tightly. You adjust the knitting tension with the needle size, which is why the suggested needle size only serve as a guide! You need to adjust this (up or down) to ensure that YOUR knitting tension matches the knitting tension provided in the pattern. If you work with a different knitting tension than provided you will have a different yarn consumption, and your work will have different measurements than what the pattern suggests.

The knitting tension also determines which yarns can replace each other. As long as you achieve the same knitting tension you can replace one yarn with another.

See DROPS lesson: How to measure your tension/gauge

See DROPS video: How to make a gauge tension swatch

The required amount of yarn is provided in grams, eg: 450 g. To calculate how many balls you’ll need you first need to know how many grams are in 1 ball (25g, 50g or 100g). This information is available if you click on the individual yarn quality on our pages. Divide the amount required with the amount of each ball. For example, if each ball is 50g (the most common amount), the calculation will be as follows: 450 / 50 = 9 balls.

The important thing when changing from one yarn to another is that the knitting/crochet tension remains the same. This is so that the measurements of the finished piece will be the same as on the sketch provided. It is easier to achieve the same knitting tension using yarns from the same yarn group. It is also possible to work with multiple strands of a thinner yarn to achieve the knitting tension of a thicker one. Please try our yarn converter. We recommend you to always work a test swatch.

Please NOTE: when changing yarn the garment might have a different look and feel to the garment in the photo, due to individual properties and qualities of each yarn.

See DROPS lesson: Can I use a different yarn than the one mentioned in the pattern?

All our yarns are categorised into yarn groups (from A to F) according to thickness and knitting tension – group A contains the thinnest yarns and group F the thickest. This makes it easier for you to find alternative yarns to our patterns, should you wish to switch yarn. All yarns within the same group have a similar knitting tension and can easily replace each other. However, different yarn qualities have different structures and properties which will give the finished work a unique look and feel.

Click here for an overview of the yarns in each yarn group

At the top of all our patterns you’ll find a link to our yarn converter, which is a helpful tool should you wish to use a different yarn than suggested. By filling in the yarn quality you wish to replace, the amount (in your size) and number of strands, the converter will present good alternative yarns with the same knitting tension. Additionally it will tell you how much you’ll require in the new qualities and whether you’ll need to work with multiple strands. Most skeins are 50g (some are 25g or 100g).

If the pattern is worked with multiple colours, every colour will have to be converted separately. Similarly, if the pattern is worked with several strands of different yarns (for example 1 strand Alpaca and 1 strand Kid-Silk) you will have to find alternatives for each, individually.

Click here to see our yarn converter

Since different yarns have different qualities and textures we have chosen to keep the original yarn in our patterns. However, you can easily find options among our available qualities by using our yarn converter, or simply pick a yarn from the same yarn group.

It is possible that some retailers still have discontinued yarns in stock, or that someone has a few skeins at home that they would like to find patterns for.

The yarn converter will provide both alternative yarn as well as required amount in the new quality.

If you think it's hard to decide what size to make, it can be a good idea to measure a garment you own already and like the size of. Then you can pick the size by comparing those measures with the ones available in the pattern's size chart.

You'll find the size chart at the bottom of the pattern.

See DROPS lesson: How to read size chart

The needle size provided in the pattern serves only as a guide, the important thing is to follow the knitting tension. And since knitting tension is very individual, you will have to adjust the needle size to ensure that YOUR tension is the same as in the pattern – maybe you’ll have to adjust 1, or even 2 needle sizes, up or down to achieve the correct tension. For this, we recommend that you work test swatches.

Should you work with a different knitting tension than the one provided, the measurements of the finished garment might deviate from the measurement sketch.

See DROPS lesson: How to measure your tension/gauge

See DROPS video: How to make a gauge tension swatch

Working a garment top-down provides more flexibility and room for personal adjustment. For example it is easier to try the garment on while working, as well as making adjustments to length of yoke and shoulder caps.

The instructions are carefully explaining every step, in the correct order. Diagrams are adjusted to the knitting direction and are worked as usual.

The diagram depicts all rows/rounds, and every stitch seen from the right side. It is read from bottom to top, from right to left. 1 square = 1 stitch.

When working back and forth, every other row is worked from the right side and every other row is worked from the wrong side. When working from the wrong side, the diagram will have to be worked reversed: from left to right, knit stitches are purled, purl stitches are knit etc.

When working in the round every round is worked from the right side and the diagram are worked from right to left on all rounds.

See DROPS lesson: How to read knitting diagrams

The diagram depicts all rows/rounds, and every stitch seen from the right side. It is worked from bottom to top, from right to left.

When working back and forth every other row is worked from the right side: from right to left and every other row is worked from the wrong side: from left to right.

When working in the round, every row in the diagram are worked from the right side, from right to left.

When working a circular diagram you start in the middle and work your way outwards, counter clockwise, row by row.

The rows usually start with a given number of chain stitches (equivalent to the height of the following stitch), this will either be depicted in the diagram or explained in the pattern.

See DROPS lesson: How to read crochet diagrams

Instructions for working several diagrams after each other on the same row/round, will often be written like so: “work A.1, A.2, A.3 a total of 0-0-2-3-4 times". This means you work A.1 once, then A.2 is worked once, and A.3 is repeated (in width) the number of times provided for your size – in this case like so: S = 0 times, M = 0 times, L=2 times, XL= 3 times and XXL = 4 times.

The diagrams are worked as usual: begin with the first row in A.1, then work the first row in A.2 etc.

See DROPS lesson: How to read knitting diagrams

See DROPS lesson: How to read crochet diagrams

The total width of the garment (from wrist-to-wrist) will be larger in the larger sizes, despite the actual sleeves being shorter. The larger sizes have longer sleeve caps and wider shoulders, so there will be a good fit in all sizes.

The measurement sketch/schematic drawing provides information regarding the full length of the garment. If it’s a jumper or a jacket the length is measured from the highest point on the shoulder (usually closest to the neckline), and straight down to the bottom of the garment. It is NOT measured from the tip of shoulder. Similarly, the length of yoke is measured from the highest point on the shoulder and down to where yoke is split into body and sleeves.

See DROPS lesson: How to read a schematic drawing

Diagrams are often repeated on the round or in height. 1 repeat is the diagram the way it appears in the pattern. If it says to work 5 repeats of A.1 in the round, then you work A.1 a total of 5 times after/next to each other in the round. If it says to work 2 repeats of A.1 vertically/in height you work the entire diagram once, then begin again at the start and work the entire diagram one more time.

Chain stitches are slightly narrower than other stitches and to avoid working the cast-on edge too tight, we simply chain more stitches to begin with. The stitch count will be adjusted on the following row to fit the pattern and measurement sketch.

The rib edge is more elastic and will contract slightly compared to, for example, stocking stitch. By increasing before the rib edge, you avoid a visible difference in width between the rib edge and the rest of the body.

It’s very easy to cast off too tightly, and by making yarn overs while casting off (and simultaneously casting these off) you avoid a too tight cast off edge.

See DROPS video: How to bind off with yarn overs (yo)

To achieve an even increase (or decrease) you can increase on, for example: every 3rd and 4th row alternately, like so: work 2 rows and increase on the 3rd row, work 3 rows and increase on the 4th. Repeat this until the increase is complete.

See DROPS lesson: Increase or decrease 1 st on every 3rd and 4th row alternately

Should you prefer to work in the round instead of back and forth, you may of course adjust the pattern. You’ll need to add steeks mid-front (usually 5 stitches), and follow the instructions. When you would normally turn and work from the wrong side, simply work across the steek and continue in the round. At the end you’ll cut the piece open, pick up stitches to work bands, and cover the cut edges.

See DROPS video: How to knit steeks and cut open

Should you prefer to work back and forth instead of in the round, you may of course adjust the pattern so you work the pieces separately and then assemble them at the end. Divide the stitches for the body in 2, add 1 edge stitch in each side (for sewing) and work the front and back pieces separately.

See DROPS lesson: Can I adapt a pattern for circular needles into straight needles?

Pattern repeats can vary slightly in the different sizes, in order to get the correct proportions. If you’re not working the exact same size as the garment in the photo, yours might deviate slightly. This has been carefully developed and adjusted so that the complete impression of the garment is the same in all sizes.

Make sure to follow instructions and diagrams for your size!

If you have found a pattern you like which is available in women’s size it’s not very difficult to convert it to men’s size. The biggest difference will be the length of sleeves and body. Start working on the women size that you think would fit across the chest. The additional length will be worked right before you cast off for the armhole/sleeve cap. If the pattern is worked top-down you can add the length right after the armhole or before the first decrease on sleeve.

Regarding additional yarn amount, this will depend on how much length you add, but it is better with a skein too many than too few.

All yarns will have excess fibres (from production) that might come off as lint or shedding. Brushed yarns (ie hairier yarns) have more of these loose, excess fibres, causing more shedding.

Shedding also depends on what is worn under or over the garment, and whether this pulls at the yarn fibres. It’s therefore not possible to guarantee that there will be no shedding

Below are some tips on how to get the best result when working with hairier yarns:

1. When the garment is finished (before you wash it) shake it vigorously so the looser hairs come off. NOTE: do NOT use a lint roller, brush or any method that pulls at the yarn.

2. Place the garment in a plastic bag and put it in your freezer - the temperature will cause the fibres to become less attached to each other, and excess fibres will come off easier.

3. Leave in the freezer for a few hours before taking it out and shaking it again.

4. Wash the garment according to the instructions on the yarn label.

Pilling is a natural process that happens to even the most exclusive of fibers. It's a natural sign of wear and tear that is hard to avoid, and that is most visible in high friction areas of your garment like a sweater's arms and cuffs.

You can make your garment look as new by removing the pilling, using a fabric comb or a pill/lint remover.

Still can't find the answer you need? Then scroll down and leave your question so one of our experts can try to help you. This will be done normally within 5 to 10 working days.
In the meantime, you can read the questions and answers that others have left to this pattern or join the DROPS Workshop on Facebook to get help from fellow knitters/crocheters!

You might also like...

Post a comment to pattern DROPS 191-27

We would love to hear what you have to say about this pattern!

If you want to leave a question, please make sure you select the correct category in the form below, to speed up the answering process. Required fields are marked *.

Comments / Questions (17)

country flag Sigrid Grohmann-Kraus wrote:

Guten Tag, werden die unter den Ärmeln neu angeschlagenen Maschen ebenfalls kraus rechts gestrickt?

08.04.2024 - 16:33

DROPS Design answered:

Liebe Frau Grohman-Kraus, die neu angeschlagenen Maschen werden glatt rechts gestrickt, die kraus rechte Maschen werden nach und nach abgenommen bis alle Maschen glatt rechts gestrickt sind. Viel Spaß beim Stricken!

09.04.2024 - 08:31

country flag Ritva wrote:

Lisäysvikki 2. Norjalaisessa ohjeessa kerrotaan että neulo kunnes jäljellä 2 silmukkaa merkkilankaan. Suomenkielisessä 4 silmukkaa joka mielestäni on väärin.

06.09.2022 - 14:18

country flag Gunilla Wiese wrote:

Hej! Undrar om de 6 nya maskorna under ärmarna ska stickas i rät- eller slätstickning? Blir snyggare om de stickas i rätstickning då det blir en slätstickning kil på både body och ärm om jag tänker rätt. Hälsningar Gunilla Wiese

23.09.2021 - 15:07

DROPS Design answered:

Hej Gunilla. Ja, de stickas i slätstickning. Mvh DROPS Design

24.09.2021 - 09:04

country flag Anja wrote:

Hallo, habe die Jacke genau nach Anleitung gestrickt. Doch es irriertiert mich ich das ich am Anfang, wenn ich die Raglanzunahmen 8x gearbeitet habe und in der nächsten Hinreihe beim rechten Vorderteil wieder einen Umschlag machen muss, so ergibt die Arbeit zwei verschiedene Vorderteile. Das eine linke Vorderteil hat 12 Maschen und das rechte inzwischen schon 30 Maschen. Ist das so korrekt ? Liebe Grüße Anja

18.02.2021 - 11:28

DROPS Design answered:

Liebe Anja und Verzeihung für die verspäte Antwort, Ihre Frage wurde leider übersehen. Ich habe gerade alle Größe geprüft und habe die selbe Mascheanahl für beide Vorderteile: 5 BlendeMaschen + 5-8-10-11-12-13 = 10-13-15-16-17-18 Maschen insgesamt. Die Raglanzunahmen werden dann beidseitig von den 16 Maschen kraus rechts gestrickt. Wenn Sie nicht weiter könnten, stellen Sie bitte gerne Ihre Frage wieder, schreiben Sie uns vielleicht auch kurz mal die Größe. Danke im voraus!

26.04.2021 - 14:38

country flag Maria Stridh wrote:

Ytterligare en fråga då jag tycker mönstret 191 27 är lite svårt o förstå. Fram- och bakstycke: Gör jag ökning av 4 maskor o minskning av 4 maskor tills rätstickningen försvunnit o när det är klart påbörjar ökning som ska ske i mitt fall 4 gånger med 9 cm mellanrum. Eller sker dessa två saker samtidigt???

21.09.2020 - 14:00

DROPS Design answered:

Hej Maria. Det ser ut som om det ska ske samtidigt enligt mönstret. Mvh DROPS Design

24.09.2020 - 11:49

country flag Maria Stridh wrote:

Hej! Vid ökning omslag o på avigt varv stickas vriden avig. Ska omslaget vridas åt olika håll? Tycker intagningarna blir större på ena sidan av de 16 m dvs varannan intagninslinje är snygg o de andra mer glesa. Går tyvärr inte o infoga foto här.

08.09.2020 - 12:21

DROPS Design answered:

Hej Maria, der vil altid være lidt forskel, vi har strikket omslaget ens på begge sider. Man kan prøve at lave omslaget lidt stramt, eller så går det selvfølgelig at vride det den anden vej. Vi synes ikke forskellen er så stor at man er nødt til det. ... Men det er jo en smagssag så man gør som man vil. God fornøjelse1
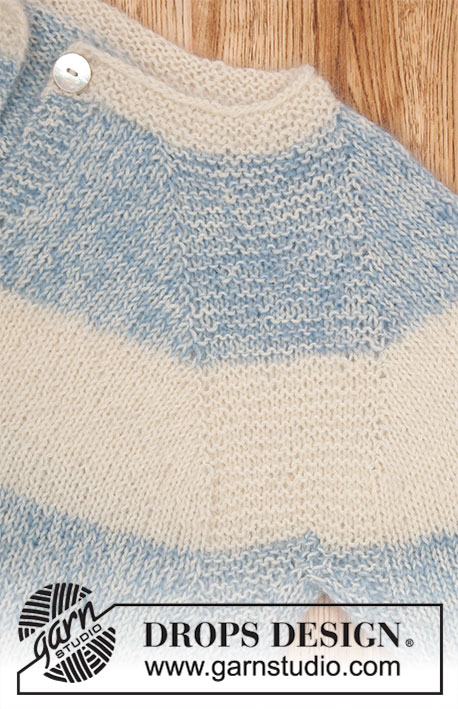
09.09.2020 - 14:45

country flag Lucia wrote:

Buongiorno, nella descrizione dello sprone si parla di gruppi di 16 maglia a maglia rasata, mentre nei suggerimenti per il raglan sono indicate 16 maglie a legaccio, come si vede anche dal particolare nella foto. Chiedo inoltre consiglio su come effettuare il cambio di colore.

14.04.2020 - 14:20

DROPS Design answered:

Buongiorno Lucia, abbiamo corretto il testo, le 16 maglie sullo sprone si lavorano a maglia legaccio. Buon lavoro!

14.04.2020 - 15:16

country flag Mette Stender wrote:

Garnforbrug er slet ikke rigtigt!!! Jeg er færdig med ryg/forstykke og har 2 ngl kid-silk tilbage i hvid, 2 ngl nord og intet kid-silk i blå. Mgl så stadig begge ærmer. Og kan ikke længere få den samme indfarvning. Garnforbrug bør rettes!!!!

03.01.2020 - 11:14

country flag Sigurveig Pétursdóttir wrote:

Förstår inte att ärmen skal vara kortare på de större storlekarna än de små. Fel?

06.10.2019 - 01:15

DROPS Design answered:

Hei Sigurveig. Man har ikke lengre ermer selv om man må ha en stor størrelse. Det er kortere mål i de større størrelsene pga bredere skuldervidde og lengre ermetopp). Mvh DROPS design

07.10.2019 - 10:41

country flag Mevel Annie wrote:

Bonjour, Je ne comprends pas le début, vous dites de faire un rang envers sur l'envers, et ensuite 3 côtes mousse, ce qui fait que l'on tricote 1 rg envers sur l'envers, puis ensuite 1 rg endroit sur l'endroit (mais là on obtient un jersey endroit sur l'endroit), ensuite bien sur on obtiendra un point mousse car tous les rangs seront à l'endroit. Y a t'il une erreur? Merci pour votre réponse. Cordialement. Annie Mével.

15.06.2019 - 19:58

DROPS Design answered:

Bonjour Mme Mevel, le tout premier rang se tricote en jersey envers (= à l'envers sur l'envers), le rang suivant sera donc l'endroit et se tricotera à l'endroit (= 1er rang des 3 côtes mousse), On tricote ensuite encore 1 côte mousse (= 2 rangs endroit) en répartissant des augmentations), le dernier rang est sur l'envers et on continue ensuite sur l'endroit en commençant à augmenter pour le raglan. Bon tricot!

17.06.2019 - 07:50