
Popular categories
Looking for a yarn?


|
|
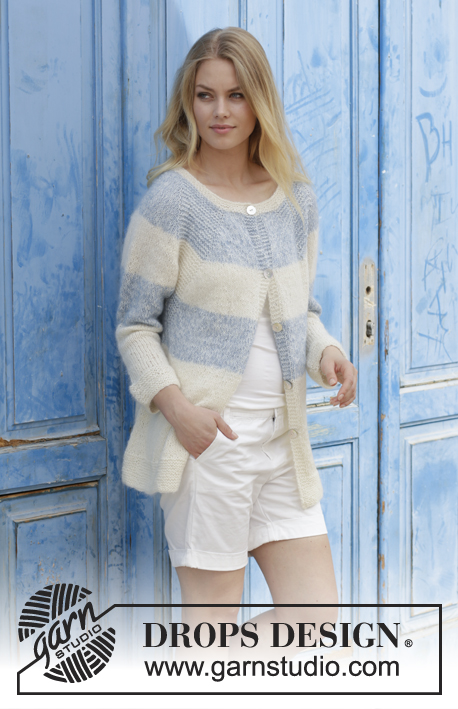
Sailor's Luck |
|
 |
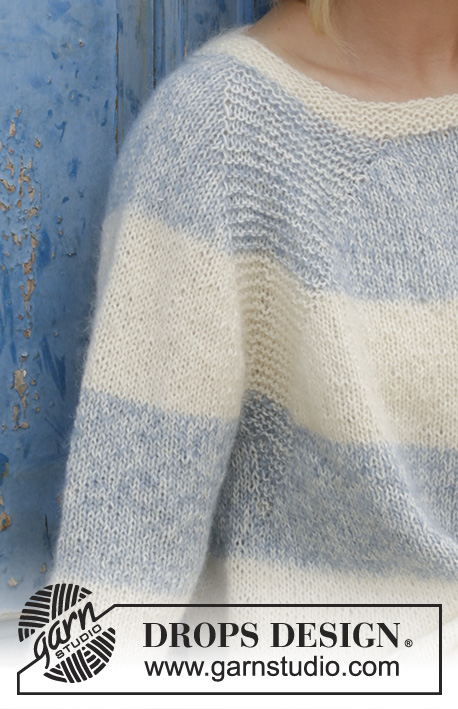 |
Knitted jumper with raglan and stripes, worked top down. Sizes S - XXXL. The piece is worked in DROPS Alpaca and DROPS Kid-Silk.
DROPS 191-2 |
|
|
INFORMATION FOR THE PATTERN: RIDGE/GARTER STITCH (worked in the round): 1 ridge = 2 rounds. Knit 1 round and purl 1 round. INCREASE TIP-1 (evenly spaced): To work out how to increase evenly, count the total number of stitches on the needle (e.g. 82 stitches) and divide by the number of increases to be made (e.g. 4) = 20.5. In this example, increase by making 1 yarn over alternately after the 20th and 21st stitch. On the next round, knit the yarn overs twisted to avoid holes. INCREASE TIP-2 (for sides of body): Work until there are 2 stitches left before the marker thread, 1 yarn over, knit 4 stitches (the marker thread sits in the middle of these 4 stitches), 1 yarn over. On the next round knit the yarn overs twisted to avoid holes. Then work the new stitches in stocking stitch. STRIPES: 11-11-11-12-12-12 cm with 1 strand off-white Alpaca and 1 strand grey blue Kid-Silk. 11-11-11-12-12-12 cm with 1 strand off-white Alpaca and 1 strand off-white Kid-Silk. 11-11-11-12-12-12 cm with 1 strand off-white Alpaca and 1 strand grey blue Kid-Silk. Then work with 1 strand off-white Alpaca and 1 strand off-white Kid-Silk to finished length. RAGLAN: Increase 1 stitch on each side of the 16 stitches in garter stitch in each transition between body and sleeves (= 8 stitches increased on the round). Increase 1 stitch by making 1 yarn over. On the next round knit the yarn overs twisted to avoid holes. Then work the new stitches in stocking stitch. DECREASE TIP (for sleeves): Decrease 1 stitch on each side of the marker thread as follows: Work until there are 3 stitches left before the marker thread, knit 2 stitches together, knit 2 stitches (the marker thread sits in the middle of these 2 stitches), slip 1 stitch as if to knit, knit1, pass the slipped stitch over the knitted stitch --------------------------------------------------------- JUMPER: The piece is worked in the round with circular needle, top down. The sleeves are worked in the round with double pointed needles. The round starts mid back. YOKE: Cast on 82-85-88-91-97-102 stitches with circular needle size 4.5 mm and 1 strand off-white Alpaca and 1 strand off-white Kid-Silk (= 2 strands). Knit 1 round then work 3 RIDGES - see description above. Change to circular needle size 5 mm. Work 1 ridge where, on the first round, you increase 4-13-18-19-17-16 stitches evenly on round – read INCREASE TIP-1 (evenly spaced) = 86-98-106-110-114-118 stitches. Now work STRIPES – see description above, work pattern and increase to RAGLAN – see description above, as follows: Knit 5-8-10-11-12-13 stitches (= half back piece), make 1 yarn over, 16 stitches in garter stitch (= raglan line), make 1 yarn over, knit 1 (= sleeve), make 1 yarn over, 16 stitches in garter stitch (= raglan line), make 1 yarn over, knit 10-16-20-22-24-26 stitches (= front piece), make 1 yarn over, 16 stitches in garter stitch (= raglan line), make 1 yarn over, knit 1 (= sleeve), make 1 yarn over, 16 stitches in garter stitch (= raglan line), make 1 yarn over, knit 5-8-10-11-12-13 stitches (= half back piece). The first increase to raglan is now finished (= 8 stitches increased on the round). Continue in the round like this and increase to raglan every 2nd round a total of 21-23-25-27-30-32 times = 254-282-306-326-354-374 stitches. When all the increases to raglan are finished, the piece should measure 21-23-25-27-29-31 cm from the cast on edge mid front and down. If the piece is shorter than this continue with pattern as before until you have reached the correct length (without increasing any more stitches). The next round is worked as follows (continue with the pattern as before): Work 36-40-42-46-50-54 stitches (= half back piece), place the next 55-61-69-71-77-79 stitches on a thread (= sleeve), cast on 6-6-8-8-10-12 new stitches on the needle (= side under sleeve), work the next 72-80-84-92-100-108 stitches (= front piece), place the next 55-61-69-71-77-79 stitches on a thread (= sleeve), cast on 6-6-8-8-10-12 new stitches on the needle (= side under sleeve), work the remaining 36-40-42-46-50-54 stitches (= half back piece). BODY: = 156-172-184-200-220-240 stitches. THE PIECE IS NOW MEASURED FROM HERE! Insert a marker thread in each side (= in the middle of the new stitches cast on under each sleeve = 3-3-4-4-5-6 new stitches on each side of the marker thread). Continue in the round with stocking stitch and work garter stitch over the 10-9-7-8-8-9 stitches left on the front/back pieces (from the garter stitch section in the raglan line), AT THE SAME TIME on every 2nd round make 1 yarn over on the outside of each garter stitch section towards mid front and towards mid back (= a total of 4 stitches increased on round) and decrease 1 stitch in each garter stitch section by knitting the 2 outermost stitches in garter stitch section towards the side of the jumper together (= 1 stitch decreased in each garter stitch section towards the side, a total of 4 stitches decreased on round). NOTE! The number of stitches stays the same, but the stitches in garter stitch will gradually disappear and there will be more stitches in stocking stitch, (i.e.4 stitches increased and 4 stitches decreased on every 2nd round). When all the stitches in garter stitch are gone continue working in stocking stitch, AT THE SAME TIME on the first round increase 1 stitch on each side of the marker thread in each side – read INCREASE TIP-2. Increase like this every 8-8-9-9-7-7 cm a total of 4-4-4-4-5-5 times = 172-188-200-216-240-260 stitches. Continue working until the piece measures 36 cm in all sizes. Change to circular needle size 4.5 mm. Work garter stitch for 7 cm. Cast off with knit. You can use a needle 1 size larger if necessary to avoid the cast-off edge being tight. The piece measures approx. 66-68-70-72-74-76 cm from the shoulder down. SLEEVE: Place the 55-61-69-71-77-79 stitches from the thread on the one side of the piece on double pointed needles size 5 mm and, in addition, cast on 6-6-8-8-10-12 new stitches mid under the sleeve = 61-67-77-79-87-91 stitches on the needles. Insert a marker thread in the middle of the new stitches – THE PIECE IS NOW MEASURED FROM HERE! Work stocking stitch over stocking stitch and garter stitch over garter stitch, at the same time as the stitches in garter stitch are decreased in the same way as on the body (the number of stitches stays the same). When all the stitches in garter stitch have gone, continue working in stocking stitch over all stitches, at the same time on the first round decrease 2 stitches mid under sleeve – read DECREASE TIP. Decrease like this every 6th-5th-3rd-3rd-2nd-2nd round a total of 12-13-18-18-20-22 times = 37-41-41-43-47-47 stitches. Continue with stocking stitch in the round until the piece measures 36-34-34-32-30-29 cm. Change to double pointed needles size 4.5 mm. Work garter stitch for 5 cm. Cast off with knit. You can use a needle 1 size larger if necessary to avoid the cast-off edge being tight. The sleeve measures 42-40-39-37-35-34 cm. Work the other sleeve in the same way. ASSEMBLY: Sew the openings under the sleeves. |
|

|
|
|
Have you made this or any other of our designs? Tag your pictures in social media with #dropsdesign so we can see them! Do you need help with this pattern?You'll find tutorial videos, a Comments/Questions area and more by visiting the pattern on garnstudio.com. © 1982-2024 DROPS Design A/S. We reserve all rights. This document, including all its sub-sections, has copyrights. Read more about what you can do with our patterns at the bottom of each pattern on our site. |
|


With over 40 years in knitting and crochet design, DROPS Design offers one of the most extensive collections of free patterns on the internet - translated to 17 languages. As of today we count 304 catalogues and 11422 patterns - 11422 of which are translated into English (UK/cm).
We work hard to bring you the best knitting and crochet have to offer, inspiration and advice as well as great quality yarns at incredible prices! Would you like to use our patterns for other than personal use? You can read what you are allowed to do in the Copyright text at the bottom of all our patterns. Happy crafting!
Comments / Questions (49)
No entiendo las disminuciones de la manga.
05.01.2024 - 16:57DROPS Design answered:
Hola Isabel, primero disminuyes las secciones de punto musgo como en el cuerpo: disminuir 1 punto en cada sección de punto musgo trabajando juntos los 2 puntos más externos de la sección de punto musgo (= 1 punto disminuido en cada sección de punto musgo ). Se mantiene el número de puntos, pero se disminuye con 2pjd en el punto musgo y se aumenta con hebras en el punto jersey. Una vez se ha quitado la sección en punto musgo, disminuir bajo cada manga como dice en TIP PARA LAS DISMINUCIONES: 3 puntos antes del marcapuntos - 2pjd, 1 derecho, marcapuntos, 1 derecho y disminución simple. Repetir cada 2 a 6 vueltas (dependiendo de la talla) las veces que se indica.
07.01.2024 - 23:14Bonjour, Depuis des années je tricote KID SILK fil que j'aimais beaucoup car très belle qualité, or depuis plus de 6 mois je me suis aperçue, que la, qualité était TOTALEMENT différente et à mon grand regret, d'ailleurs. J'anime un club tricot au seine de ma ville et je m'aperçois des deceptions de nos tricoteuses, le fil est beaucoup plus fin et très peu poilé. Quand on le tricote en fil simple agrémenté d'un glitter celui-ci est totalement transparent . Je suis désolée
22.12.2023 - 14:51B.davidsen August 11, 9:43 GMT Jeg har et spørgsmål angående opskriften : Sailor's Lick. Hvordan kommer jeg videre efter 1. udtagning til raglan er færdig? 10 Ret @ 16 ret @ 1 ret @ 16ret @ 20 ret @ 16 ret @ 1 ret @ 16 ret @ 10 ret -- 114 masker Hvor skal jeg tage ud derefter ? Hvor skal man strikke ret strikning ? Venlig hilsen Else Davidsen
16.08.2023 - 14:58DROPS Design answered:
Hej Else, jo de 16 masker i hver raglanovergang strikkes i retstrik (hver 2.omg vrang) og de andre masker strikkes i glatstrik. Du tager ud ved at lave et omslag på hver side af alle 4 overgange = ialt 8 omslag :)
18.08.2023 - 10:34Guten Tag, Ich habe 2 Fragen: 1. Stricke ich die unter den Ärmeln neu aufgenommenen Maschen kraus rechts? 2. Wenn ich in jeder 2. Runde zur hinteren und vorderen Mitte jeweils 1 Masche zunehme und zu den Seiten 2 Maschen zusammenstricke, dann sind das nur 2 Maschen pro Reihe. Sie schreiben aber etwas von 4 Maschen. Wo ist hier mein Fehler? Viele Grüße Melanie
14.02.2023 - 22:56DROPS Design answered:
Liebe Melanie, die neu aufgenommenen Maschen stricken Sie glatt rechts, man wird dann die Krausrechts gestricken Maschen vom Raglan abnehmen: vor diesen Maschen (am Anfang Vorder-/Rückenteil) / nach diesen Maschen (am Ende Vorder-/Rückenteil) 1 Umschlag (= der wird glatt rechts gestrickt) und die 2 letzten krausrechte Maschen (unter die Ärmel) zusammenstricken, so wiederholt mal 4 Mal (2 Mal an jede Seite, damit die krausrechte Maschen unter die Ärmel abgenommen werden, und die Anzahl von glattrechts gestrickten Maschen wird dann durch die Umschläge zunehmen. Viel Spaß beim stricken!
15.02.2023 - 10:02Hej.. Har slået de 88 masker op i halsen som svarer til den str jeg skal bruge.. Har strikket de første omgange ret men min hals bliver rund og ikke bådformet som på billedet… Hvordan får jeg den bådformet ?? Svarer 1 omg ret og 1 omg vrang til en retpind ?? Hilsen Tascha
22.05.2022 - 00:14DROPS Design answered:
Hei Tascha. Om du bare har strikket noen omganger til halsen er det vanskelig å se at den skal bli ovalformet og ikke rundt. Du må strikke lengre. Når det i oppskriften står: strikk 6 omgange retstrik, strikkes det 12 omganger (1 omgang ret og 1 omgang vrang x 6). mvh DROPS Design
23.05.2022 - 09:59Finns det någon möjlighet att få detta i ett mönster för barn 2-4 år?
14.03.2022 - 13:44DROPS Design answered:
Hej Marina, de her er strikket på samme måde, vælg en af disse og vælg striber og farver ifølge dametröjan: Tröjor till barn - 17 maskor - raglan - uppifrån och ner
15.03.2022 - 14:53Jag vill köpa bara mönster, hur gör jag det?
11.11.2021 - 08:25DROPS Design answered:
Hej Gun. Du kan skriva ut mönstret helt gratis direkt här på hemsidan. Har du inte möjlighet att skriva ut det själv kan du kontakta en av våra återförsäljare för att höra om de kan hjälpa dig (de kan ta en mindre kostnad för själva utskriften). Mvh DROPS Design
11.11.2021 - 11:42Hello, if I wanted to use 1 strand of Group C yarn instead of two strands of Group A yarn, how many grams would I need of each color (say I used two colors, one white and one blue like in the pictures)?
19.09.2021 - 19:41DROPS Design answered:
Dear Kirsten, you can check the following lesson to see the amount you'd need when changing yarns: https://www.garnstudio.com/lesson.php?id=14&cid=19. Happy knitting!
19.09.2021 - 22:46Bonjour, Au moment où on isole les manches, on repartit les portions de raglan entre les manches et les demi dos et entre les manches et le devant ? Soit demi dos + 8m raglan, puis 8m raglan + manche+ 8 mailles raglan, puis 8 m raglan + devant + 8 m raglan puis 8m raglan + manche + 8m raglan, et enfin 8m raglan + demi dos ? Je ne sais pas si ma question et claire...merci pour votre aide !
15.09.2021 - 17:17DROPS Design answered:
Bonjour Agathe, tout dépend de votre taille, mais effectivement, une partie des mailles point mousse des raglans va être affectée aux demi-dos/au devant et l'autre aux manches. Si votre nombre de mailles est bien exacte à la fin des augmentations du raglan, suivez bien le nombre de mailles lors de la répartition pour la division. Bon tricot!
16.09.2021 - 07:49Joli modèle, facile, mais il y a un souci avec la longueur des manches .. pour la taille XXL 29 cm, ce serai pas l'inverse 36 cm?? Je l'ai essayé cet apm, il me manque pratiquement 10 cm ... (36-34-34-32-30-29 cm copies des longueurs données dans le texte) Merci pour une correction .. Lina
31.05.2021 - 19:15DROPS Design answered:
Bonjour Lina, les mesures sont justes ainsi, les manches sont plus courtes dans les grandes tailles car l'empiècement est plus long, mais naturellement, vous pouvez ajuster à la longueur souhaitée après avoir essayé le pull; tricotez jusqu'à ce qu'il reste 5 cm avant la longueur finale souhaitée et tricotez la bordure point mousse avec les aiguilles 4,5. Bon tricot!
01.06.2021 - 08:36