DROPS Big Delight
DROPS Big Delight
100% Wool
Discontinued
find alternatives
DROPS SS24

Eiger

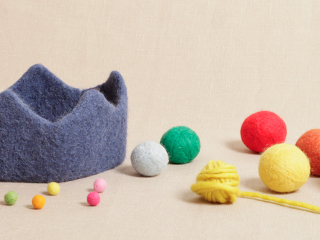
Felted and knitted slippers for both men and women. Sizes 35 – 44. The piece is worked in 2 strands DROPS Big Delight.

DROPS 185-27
DROPS Design: Pattern no db-085
Yarn group C + C or E
-----------------------------------------------------------
Sizes: 35/37 - 38/39 - 40/42 - 42/44
Foot length after felting: approx. 22-24-26-28 cm.
Height after felting: approx. 13 cm in all sizes.
Foot length before felting: approx. 37-41-44-48 cm.
Height before felting: approx. 23 cm in all sizes.
Materials:
DROPS BIG DELIGHT from Garnstudio (belongs to yarn group C)
100-200-200-200 g colour 04, marina
100-200-200-200 g colour 13, grey

The piece can also be worked with yarn from:
"Alternative yarn (Yarn group C)" – see link below.

DROPS NEEDLE SIZE 9 MM – or the size needed to get 10 stitches and 14 rows stocking stitch on 10 cm in width and 10 cm in height with 2 strands, before felting. After felting approx. 13 stitches and 24 rows.
----------------------------------------------------------

-------------------------------------------------------

Alternative Yarn – See how to change yarns here
Yarn Groups A to F – Use the same pattern and change the yarn here
Yarn usage using an alternative yarn – Use our yarn converter here

-------------------------------------------------------

DROPS Big Delight
DROPS Big Delight
100% Wool
Discontinued
find alternatives

Pattern instructions

NOTE: This pattern is written in British English. All measurements in charts are in cm. For conversion from cm to inches - click here. There are different terms for crocheting in British and American English. If this pattern includes crochet, click for "crochet terms" here. For this pattern in American English, please click here.
ANKEL ELEVATION:
From the right side: * Work 6-6-7-7 stitches, turn and work 6-6-7-7 stitches back - read KNITTING TIP! Work 10-10-12-12 stitches, turn and work 10-10-12-12 stitches back. Work 6-6-7-7 stitches, turn and work 6-6-7-7 stitches back. * Work 1 row over all stitches, repeat from *-* in the opposite side, beginning from the wrong side. Then work 1 row back from the wrong side over all stitches.

DECREASE TIP (evenly spaced):
To work out how to decrease evenly, count the total number of stitches on the needle (e.g. 34 stitches) and divide by the number of decreases to be made (e.g. 4) = 8.5. In this example, knit together alternately every 7th and 8th and every 8th and 9th stitch.

KNITTING TIP: 
Every time you have turned in the middle of a row, slip 1 stitch. Tighten the strand and continue as before. There will be a hole in the piece, but this evens out after felting.
----------------------------------------------------------

SLIPPER: 
The slipper is worked back and forth in stocking stitch. You start at the top of the foot and finish at the toe.

Cast on 38-42-44-44 stitches with needle size 9 mm and 1 strand of each colour of Big Delight (= 2 strands).
ROW1 (= right side): Knit 2 together, knit 34-38-40-40 stitches, knit 2 together = 36-40-42-42 stitches.
ROW 2 (= from wrong side): Purl 2 together, purl 32-36-38-38 stitches, purl 2 together = 34-38-40-40 stitches.
ROW 3: Work ANKEL ELEVATION over the outermost stitches in each side - see description above! REMEMBER THE KNITTING TENSION!

Work 4 rows over all stitches, AT THE SAME TIME on the first row decrease 4-4-4-2 stitches evenly on row - read DECREASE TIP = 30-34-36-38 stitches. Work 2 rows over all stitches.

NOW INCREASE TO HEEL AS FOLLOWS:
From the right side: * Work 10-10-11-12 stitches, turn and work 9-9-10-11 stitches back, work 2 stitches in the last stitch on the row. Work 6-6-7-7 stitches, turn and work 5-5-6-6 stitches back, work 2 stitches in the last stitch on the row. Work 1 row over all stitches *, work from *-* in the opposite side, starting from the wrong side.
Work from *-* 2 more times (= a total of 3 times) in each side = 42-46-48-50 stitches.

NOW DECREASE TO HEEL AS FOLLOWS:
Work the next row as follows:
* Work 10-10-11-12 stitches, turn and work 8-8-9-10 stitches back, work the last 2 stitches together. Work 6-6-7-7 stitches, turn and work 4-4-5-5 stitches back, work the last 2 stitches together. Work 1 row over all stitches *, work from *-* in the opposite side, starting from the wrong side.
Work from *-* 2 more times (= a total of 3 times) in each side = 30-34-36-38 stitches.

NOW WORK FOOT AS FOLLOWS: 
Insert 1 marker thread in the outermost stitch on one side – THE PIECE IS NOW MEASURED FROM HERE! Continue stocking stitch AT THE SAME TIME as you decrease from the right side on top of foot as follows: Work 8-8-9-10 stitches, knit together the next 2 stitches, work until there are 10-10-11-12 stitches left, knit together the next 2 stitches, work to end of row, repeat the decreases every row from the right side a total of 3-3-4-4 times = 24-28-28-30 stitches. Then continue with stocking stitch without decreases until the piece measures approx.19-21-25-29 cm, measured from the marker thread.

DECREASE TO TOE AS FOLLOWS: 
Decrease 3-4-4-4 stitches evenly on the next row from the right side. Repeat the decreases every row from the right side a total of 4-4-4-4 times = 12-12-12-14 stitches on needle. On the next row from the right side work all stitches together 2 and 2 = 6-6-6-7 stitches.
Pull the strand through the remaining stitches, tighten and fasten well.

ASSEMBLY:
Sew together mid under foot and up to the cast on edge, edge to edge (in the outermost loop of stitch), so you do not have a thick seam. 
Work another slipper in the same way.

FELTING: 
Place the slippers in the washing machine with a detergent without enzymes and optic bleaches. Wash at 40 degrees with normal centrifuge, without pre-wash. After washing, shape the slippers to the right measurements while still wet. Later, wash the slippers as normal wool garments.

AFTER FELTING:
If the piece is not felted enough and is too big: Wash the piece one more time in the washing machine while it is still wet add a terry towel that measures approx. 50 x 70 cm - NOTE: Do not use a short program.
If the piece has been felted too much and is too small: While the piece is still wet stretch it to the correct measurements, if the piece is dry, make sure to soak it first.
Remember: All subsequent washes are as a normal wool garment.
Do you have a question? See a list of frequently asked questions (FAQ)

Knitting tension is what determines the final measurements of your work, and is usually measured per 10 x 10 cm. It is provided like so: number of stitches in width x number of rows in height - eg: 19 stitches x 26 rows = 10 x 10 cm.

The knitting tension is very individual; some people knit/crochet loosely while others work tightly. You adjust the knitting tension with the needle size, which is why the suggested needle size is only meant as a guide! You need to adjust this (up or down) to ensure that YOUR knitting tension matches the knitting tension provided in the pattern. If you work with a different knitting tension than provided you will have a different yarn consumption, and your work will have different measurements than what the pattern suggests.

The knitting tension also determines which yarns can replace each other. As long as you achieve the same knitting tension you can replace one yarn with another.

See DROPS lesson: How to measure your tension/gauge

See DROPS video: How to make a gauge tension swatch

The required amount of yarn is provided in grams, eg: 450 g. To calculate how many balls you’ll need you first need to know how many grams are in 1 ball (25g, 50g or 100g). This information is available if you click on the individual yarn quality on our pages. Divide the amount required with the amount of each ball. For example, if each ball is 50g (the most common amount), the calculation will be as follows: 450 / 50 = 9 balls.

The important thing when changing from one yarn to another is that the knitting/crochet tension remains the same. This is so that the measurements of the finished piece will be the same as on the sketch provided. It is easier to achieve the same knitting tension using yarns from the same yarn group. It is also possible to work with multiple strands of a thinner yarn to achieve the knitting tension of a thicker one. Please try our yarn converter. We recommend you to always work a test swatch.

Please NOTE: when changing yarn the garment might have a different look and feel to the garment in the photo, due to individual properties and qualities of each yarn.

See DROPS lesson: Can I use a different yarn than the one mentioned in the pattern?

All our yarns are categorised into yarn groups (from A to F) according to thickness and knitting tension – group A contains the thinnest yarns and group F the thickest. This makes it easier for you to find alternative yarns to our patterns, should you wish to switch yarn. All yarns within the same group have a similar knitting tension and can easily replace each other. However, different yarn qualities have different structures and properties which will give the finished work a unique look and feel.

Click here for an overview of the yarns in each yarn group

At the top of all our patterns you’ll find a link to our yarn calculator, which is a helpful tool should you wish to use a different yarn than suggested. By filling in the yarn quality you wish to replace, the amount (in your size) and number of strands, the calculator will present good alternative yarns with the same knitting tension. Additionally it will tell you how much you’ll require in the new qualities and whether you’ll need to work with multiple strands. Most skeins are 50g (some are 25g or 100g).

If the pattern is worked with multiple colours, every colour will have to be calculated separately. Similarly, if the pattern is worked with several strands of different yarns (for example 1 strand Alpaca and 1 strand Kid-Silk) you will have to find alternatives for each, individually.

Click here to see our yarn calculator

Since different yarns have different qualities and textures we have chosen to keep the original yarn in our patterns. However, you can easily find options among our available qualities by using our yarn calculator, or simply pick a yarn from the same yarn group.

It is possible that some retailers still have discontinued yarns in stock, or that someone has a few skeins at home that they would like to find patterns for.

The yarn calculator will provide both alternative yarn as well as required amount in the new quality.

If you think it's hard to decide what size to make, it can be a good idea to measure a garment you own already and like the size of. Then you can pick the size by comparing those measures with the ones available in the pattern's size chart.

You'll find the size chart at the bottom of the pattern.

See DROPS lesson: How to read size chart

The needle size provided in the pattern serves only as a guide, the important thing is to follow the knitting tension. And since knitting tension is very individual, you will have to adjust the needle size to ensure that YOUR tension is the same as in the pattern – maybe you’ll have to adjust 1, or even 2 needle sizes, up or down to achieve the correct tension. For this, we recommend that you work test swatches.

Should you work with a different knitting tension than the one provided, the measurements of the finished garment might deviate from the measurement sketch.

See DROPS lesson: How to measure your tension/gauge

See DROPS video: How to make a tension/gauge swatch

Working a garment top-down provides more flexibility and room for personal adjustment. For example it is easier to try the garment on while working, as well as making adjustments to length of yoke and shoulder caps.

The instructions are carefully explaining every step, in the correct order. Diagrams are adjusted to the knitting direction and are worked as usual.

The diagram depicts all rows/rounds, and every stitch seen from the right side. It is read from bottom to top, from right to left. 1 square = 1 stitch.

When working back and forth, every other row is worked from the right side and every other row is worked from the wrong side. When working from the wrong side, the diagram will have to be worked reversed: from left to right, knit stitches are purled, purl stitches are knit etc.

When working in the round every round is worked from the right side and the diagram are worked from right to left on all rounds.

See DROPS lesson: How to read knitting diagrams

The diagram depicts all rows/rounds, and every stitch seen from the right side. It is worked from bottom to top, from right to left.

When working back and forth every other row is worked from the right side: from right to left and every other row is worked from the wrong side: from left to right.

When working in the round, every row in the diagram are worked from the right side, from right to left.

When working a circular diagram you start in the middle and work your way outwards, counter clockwise, row by row.

The rows usually start with a given number of chain stitches (equivalent to the height of the following stitch), this will either be depicted in the diagram or explained in the pattern.

See DROPS lesson: How to read crochet diagrams

Instructions for working several diagrams after each other on the same row/round, will often be written like so: “work A.1, A.2, A.3 a total of 0-0-2-3-4 times". This means you work A.1 once, then A.2 is worked once, and A.3 is repeated (in width) the number of times provided for your size – in this case like so: S = 0 times, M = 0 times, L=2 times, XL= 3 times and XXL = 4 times.

The diagrams are worked as usual: begin with the first row in A.1, then work the first row in A.2 etc.

See DROPS lesson: How to read knitting diagrams

See DROPS lesson: How to read crochet diagrams

The total width of the garment (from wrist-to-wrist) will be larger in the larger sizes, despite the actual sleeves being shorter. The larger sizes have longer sleeve caps and wider shoulders, so there will be a good fit in all sizes.

The measurement sketch/schematic drawing provides information regarding the full length of the garment. If it’s a jumper or a jacket the length is measured from the highest point on the shoulder closest to the neckline, and straight down to the bottom of the garment. It is NOT measured from the tip of shoulder. Similarly, the length of yoke is measured from the highest point on the shoulder and down to where yoke is split into body and sleeves.

On a jacket measures are never taken along bands, unless specifically stated. Always measure inside band stitches when measuring the length.

See DROPS lesson: How to read a schematic drawing

Diagrams are often repeated on the round or in height. 1 repeat is the diagram the way it appears in the pattern. If it says to work 5 repeats of A.1 in the round, then you work A.1 a total of 5 times after/next to each other in the round. If it says to work 2 repeats of A.1 vertically/in height you work the entire diagram once, then begin again at the start and work the entire diagram one more time.

Chain stitches are slightly narrower than other stitches and to avoid working the cast-on edge too tight, we simply chain more stitches to begin with. The stitch count will be adjusted on the following row to fit the pattern and measurement sketch.

The rib edge is more elastic and will contract slightly compared to, for example, stocking stitch. By increasing before the rib edge, you avoid a visible difference in width between the rib edge and the rest of the body.

It’s very easy to cast off too tightly, and by making yarn overs while casting off (and simultaneously casting these off) you avoid a too tight cast off edge.

See DROPS video: How to bind off with yarn overs (yo)

To achieve an even increase (or decrease) you can increase on, for example: every 3rd and 4th row alternately, like so: work 2 rows and increase on the 3rd row, work 3 rows and increase on the 4th. Repeat this until the increase is complete.

See DROPS lesson: Increase or decrease 1 st on every 3rd and 4th row alternately

Should you prefer to work in the round instead of back and forth, you may of course adjust the pattern. You’ll need to add steeks mid-front (usually 5 stitches), and follow the instructions. When you would normally turn and work from the wrong side, simply work across the steek and continue in the round. At the end you’ll cut the piece open, pick up stitches to work bands, and cover the cut edges.

See DROPS video: How to knit steeks and cut open

Should you prefer to work back and forth instead of in the round, you may of course adjust the pattern so you work the pieces separately and then assemble them at the end. Divide the stitches for the body in 2, add 1 edge stitch in each side (for sewing) and work the front and back pieces separately.

See DROPS lesson: Can I adapt a pattern for circular needles into straight needles?

Pattern repeats can vary slightly in the different sizes, in order to get the correct proportions. If you’re not working the exact same size as the garment in the photo, yours might deviate slightly. This has been carefully developed and adjusted so that the complete impression of the garment is the same in all sizes.

Make sure to follow instructions and diagrams for your size!

If you have found a pattern you like which is available in women’s size it’s not very difficult to convert it to men’s size. The biggest difference will be the length of sleeves and body. Start working on the women size that you think would fit across the chest. The additional length will be worked right before you cast off for the armhole/sleeve cap. If the pattern is worked top-down you can add the length right after the armhole or before the first decrease on sleeve.

Regarding additional yarn amount, this will depend on how much length you add, but it is better with a skein too many than too few.

All yarns will have excess fibres (from production) that might come off as lint or shedding. Brushed yarns (ie hairier yarns) have more of these loose, excess fibres, causing more shedding.

Shedding also depends on what is worn under or over the garment, and whether this pulls at the yarn fibres. It’s therefore not possible to guarantee that there will be no shedding

Below are some tips on how to get the best result when working with hairier yarns:

1. When the garment is finished (before you wash it) shake it vigorously so the looser hairs come off. NOTE: do NOT use a lint roller, brush or any method that pulls at the yarn.

2. Place the garment in a plastic bag and put it in your freezer - the temperature will cause the fibres to become less attached to each other, and excess fibres will come off easier.

3. Leave in the freezer for a few hours before taking it out and shaking it again.

4. Wash the garment according to the instructions on the yarn label.

Pilling is a natural process that happens to even the most exclusive of fibers. It's a natural sign of wear and tear that is hard to avoid, and that is most visible in high friction areas of your garment like a sweater's arms and cuffs.

You can make your garment look as new by removing the pilling, using a fabric comb or a pill/lint remover.

Still can't find the answer you need? Then scroll down and leave your question so one of our experts can try to help you. This will be done normally within 5 to 10 working days.
In the meantime, you can read the questions and answers that others have left to this pattern or join the DROPS Workshop on Facebook to get help from fellow knitters/crocheters!

Post a comment to pattern DROPS 185-27

We would love to hear what you have to say about this pattern!

If you want to leave a question, please make sure you select the correct category in the form below, to speed up the answering process. Required fields are marked *.

Comments / Questions (18)

country flag Marie wrote:

I have had the same problem as Nadette... Length just about OK but much too narrow... Trying to stretch / block after a massive effort to wedge in some shoe forms. I doubt very much my husband will be able to get his foot in them. Very disappointed ☹️... Any suggestions?

10.12.2023 - 00:27

DROPS Design answered:

Dear Marie, if the piece is too small after felting, while the piece is still wet, stretch it to the correct measurements; if the piece is already dry, make sure to soak it first before stretching it. Felted piece usually get smaller vertically than horizontally so, if the piece was wide enough before felting it shouldn't have gotten too narrow after felting. You can see here more information on felting: https://www.garnstudio.com/lesson.php?id=31&cid=19. Happy knitting!

10.12.2023 - 20:53

country flag Annie Reiling wrote:

In het patroon staat voetlengte voor het vilten 48 cm en de mindering voor de teen beginnen al na 29 cm. Bij de grootste maat. Klopt dit wel?

05.10.2023 - 11:42

country flag Elizabeth Redshaw wrote:

Thank you for answering my yarn question. Just to be sure, knitting size 40/42 I would need 11 balls of Alaska or Nepal to replace the Drops Delight Do you still knit 2 yarns together?

28.02.2023 - 08:01

DROPS Design answered:

Dear Elizabeth, yes, you need to work with 2 threads of DROPS Alaska or Nepal and you would need approx. 11 balls of the yarn. Happy knitting!

05.03.2023 - 18:35

country flag Elizabeth Redshaw wrote:

Hello Drops Team, I love this pattern and it makes such a warm, stylish slipper/sock but unfortunately Big Delight is no longer available as are the alternatives which have been suggested😩.. Is it possible to make a new pattern similar to this one using yarn that is available?

26.02.2023 - 12:39

DROPS Design answered:

Dear Elizabeth, you can use DROPS Nepal or DROPS Alaska as alternatives for Big Delight. There are no multicolor feltable yarns available right now. Happy knitting!

26.02.2023 - 20:15

country flag Nicole Mooten wrote:

Ik heb sokken gebreid met Drops Big Delight wol die zouden moeten vilten na wassen maar dat is niet gebeurd. Ik heb ze nu één keer op 40 graden gewassen. Gaan ze pas vilten in de wolwas? Of moet ik nog iets anders doen?

03.02.2022 - 10:32

DROPS Design answered:

Dag Nicole,

De sokken vilten op een normaal wasprogramma. Op een wolwasprogramma willen ze juist niet vilten. Lees hier meer informatie over vilten.

11.02.2022 - 15:20

country flag Annette wrote:

Liebes Dropsteam, können Sie mir zu dem hier empfohlenen Garn eine Alternative anbieten, die nur mit 1 Faden gestrickt werden muss, und mir dazu mitteilen wie viel Gramm ich dann für Gr. 40/42 bräuchte? Der Garn Umrechner konnte mir hier leider nicht weiterhelfen. Lieben Dank und viele Grüße.

04.11.2021 - 18:30

country flag Annette wrote:

Liebes Dropsteam, können Sie mir zu dem hier empfohlenen Garn eine Alternative anbieten, die nur mit 1 Faden gestrickt werden muss, und mir dazu mitteilen wie viel Gramm ich dann für Gr. 40/42 bräuchte? Der Garn Umrechner konnte mir hier leider nicht weiterhelfen. Lieben Dank und viele Grüße.

04.11.2021 - 12:54

DROPS Design answered:

Liebe Annette, 2 Fäden Big Delight können durch 1 Faden Garngruppe E erstetzt werden - siehe Liste von den tilzbaren Garne hier, dh z.B. Snow - und mehr Hilfe um die neue Garnmenge zu kalkulieren finden Sie hier - Gerne wird Ihnen Ihr DROPS Laden damit - auch telefonisch oder per E-Mail empfehlen & helfen. Viel Spaß beim stricken!

04.11.2021 - 15:53

country flag Knitting Momma wrote:

I love how these slipper boots made up. My husband is happily wearing them. They were HUGE, but 3 cycles in a HOT washer on high agitation shrunk them down nicely & they fit like a dream.

11.01.2021 - 04:55

country flag Pamela Gross wrote:

The slippers worked out to size but I can't understand the heel rows and the heel ended up the wrong shape bulbous both sides of the central seam.

01.11.2020 - 12:38

DROPS Design answered:

Dear Mrs Gross, not sure to see what you mean, the short rows should have been worked on each side of piece, first at the beg of row from RS, then at the beg of row from WS and you incrase then decrease that way alternately on the right/left side of piece. Maybe show your work to your store - you can also send them a picture by mail, it might be easier for them to see where it went wrong. Happy knitting!

02.11.2020 - 08:27

country flag Kerstin wrote:

Hallo, Ich habe einen Schwiegersohn mit Grösse 48. Würden Sie mir helfen, eine Anleitung für ihn zu erweitern? Es soll eine überraschung sein. Herzlichen Dank im Voraus!

02.05.2020 - 13:22

DROPS Design answered:

Liebe Kerstin, leider können wir nicht einzelne Modelle auf individuellen Wunsch hin umrechnen aber wir haben einige Modellen, die bis Grösse 48 geschrieben werden: Forest Ward; Hobbit Shoes und House Elves. Viel Spaß beim stricken!

04.05.2020 - 11:47