
Popular categories
Looking for a yarn?


|
||||||||||||||||||||||||||||
Morgan's Daughter |
||||||||||||||||||||||||||||
 |
 |
|||||||||||||||||||||||||||
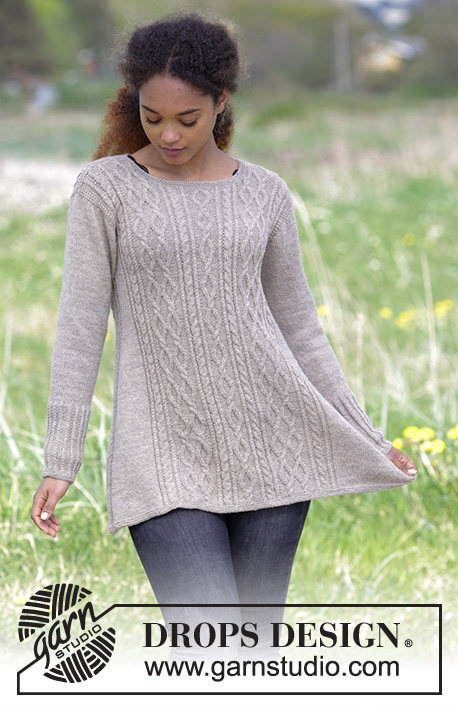
Knitted jumper with cables and A-shape, worked top down. Sizes S - XXXL. The piece is worked in DROPS Flora.
DROPS 179-3 |
||||||||||||||||||||||||||||
|
INFORMATION FOR THE PATTERN: RIDGE/GARTER STITCH (worked back and forth): 1 ridge = Knit 2 rows. RIDGE/GARTER STITCH (worked in the round): 1 ridge = 2 rounds. Knit 1 round and purl 1 round. PATTERN: See diagrams A.1 to A.9. Choose diagram for your size. The diagrams show all the rows in the pattern seen from the right side. INCREASE TIP-1: To work out how to increase evenly, count the total number of stitches to be increased over (e.g. 26 stitches) and divide by the number of increases to be made (e.g. 8) = 3.25. In this example, increase after approx. every 3rd stitch. Increase 1 stitch by making 1 yarn over, on the next row work the yarn overs twisted to prevent holes. INCREASE TIP-2 (for the armholes): All increases are made from the right side! Increase 1 stitch by making 1 yarn over, on the next row (wrong side) purl the yarn overs twisted to prevent holes. INCREASE TIP-3 (for sides of body): Start 4 stitches before the marker thread, make 1 yarn over, work 1 stitch stocking stitch, work A.8 (= 6 stitches, the marker thread sits in the middle of A.8), work 1 stitch stocking stitch, make 1 yarn over (= 2 stitches increased). On the next round, knit the yarn overs twisted to prevent holes. DECREASE TIP (for mid under the sleeve): Start 5 stitches before the marker thread, knit 2 together, work A.8 (= 6 stitches, the marker thread sits in the middle of A.8), slip 1 stitch as if to knit, knit 1, pass the slipped stitch over the knitted stitch (= 2 stitches decreased). ---------------------------------------------------------- JUMPER: The front and back pieces are worked separately back and forth with circular needle and top down. When the increases to armholes have been completed, the pieces are worked together and the body is worked in the round with circular needle to finished length. The sleeves are worked back and forth with short circular needle, top down until the sleeve cap has been completed, then are worked in the round with short circular needle to finished length, but change to double pointed needles when you have decreased enough stitches. LEFT SHOULDER FRONT (when the garment is worn): Cast on 26-26-28-28-30-30 stitches with circular needle size 3 mm and Flora. Knit 1 row from the wrong side, knit 1 row from the right side and knit 1 row from the wrong side. Knit 1 row from the right side where you, at the same time, increase 8 stitches in all sizes evenly on row – read INCREASE TIP-1 = 34-34-36-36-38-38 stitches. Work back from the wrong side with knit 3 edge stitches and purl 31-31-33-33-35-35 stitches. The next row is worked as follows from the right side: Work A.1 (= 31-31-33-33-35-35 stitches) and finish with 3 edge stitches in garter stitch towards the side. Continue the pattern in this way. REMEMBER THE KNITTING TENSION! When you have worked 10 rows in A.1 cast on new stitches to neck at the end of each row from the wrong side as shown in A.1, i.e. cast on 1 stitch 3 times and 2 stitches 3 times = 43-43-45-45-47-47 stitches. When A.1 has been completed, cast on 34 new stitches to neck at the end of the last row from the wrong side = 77-77-79-79-81-81 stitches. The piece measures approx. 8 cm from the cast-on edge. Lay the piece to one side and work right shoulder front as described below. RIGHT SHOULDER FRONT (when the garment is worn): Cast on 26-26-28-28-30-30 stitches with circular needle size 3 mm. Knit 1 row from the wrong side, knit 1 row from the right side and knit 1 row from the wrong side. Knit 1 row from the right side and, at the same time, increase 8 stitches in all sizes evenly on row = 34-34-36-36-38-38 stitches. Work back from the wrong side with purl 31-31-33-33-35-35 stitches and 3 edge stitches in garter stitch. The next row is worked as follows from the right side: Work 3 edge stitches in garter stitch, work A.2 (= 31-31-33-33-35-35 stitches). Continue the pattern in this way. When you have worked 11 rows in A.2 cast on new stitches to neck at the end of each row from the right side as shown in A.2, i.e. cast on 1 stitch 3 times and 2 stitches 3 times = 43-43-45-45-47-47 stitches. When A.2 has been completed, work the right and left shoulders together to the front piece as described below. FRONT PIECE: Place the stitches from the two shoulders on the same circular needle size 3 mm (the 34 stitches cast on to neck on left shoulder front = mid front) = 120-120-124-124-128-128 stitches. The first row is worked as follows from the right side: 3 edge stitches in garter stitch, work A.3 (= 38-38-40-40-42-42 stitches), work A.4 (= 38 stitches), work A.5 (= 38-38-40-40-42-42 stitches) and finish with 3 edge stitches in garter stitch. Continue the pattern in this way and increase to armhole as described below. ARMHOLE: When the piece measures 17-15-16-14-13-13 cm increase 1 stitch in each side to armhole – read INCREASE TIP-2, i.e. increase from the right side after 3 edge stitches in garter stitch at the beginning of the row and before 3 edge stitches in garter stitch at the end of the row. Increase in this way every 2nd row a total of 3-7-7-13-17-21 times, then cast on 3-4-6-6-8-10 new stitches at the end of the next two rows = 132-142-150-162-178-190 stitches and the piece measures approx. 19-20-21-22-24-26 cm from the shoulder down. Lay the piece to one side and work right shoulder back as described below. RIGHT SHOULDER BACK (when the garment is worn): Cast on 26-26-28-28-30-30 stitches with circular needle size 3 mm. Knit 1 row from the wrong side, knit 1 row from the right side and knit 1 row from the wrong side. Knit 1 row from the right side and, at the same time, increase 8 stitches in all sizes evenly on row = 34-34-36-36-38-38 stitches. Work back from the wrong side with knit 3 edge stitches and purl 31-31-33-33-35-35 stitches. The next row is worked as follows from the right side: Work A.6 (= 31-31-33-33-35-35 stitches) and finish with 3 edge stitches in garter stitch towards the side. Continue the pattern in this way. When you have worked 2 rows in A.6 cast on 2 new stitches to neck at the end of the last row from the wrong side as shown in A.6 = 36-36-38-38-40-40 stitches. When you have worked 4 rows in A.6 cast on 48 new stitches to neck at the end of the last row from the wrong side = 84-84-86-86-88-88 stitches. Lay the piece to one side and work left shoulder back as described below. LEFT SHOULDER BACK (when the garment is worn): Cast on 26-26-28-28-30-30 stitches with circular needle size 3 mm. Knit 1 row from the wrong side, knit 1 row from the right side and knit 1 row from the wrong side. Knit 1 row from the right side where you increase, at the same time, 8 stitches in all sizes evenly on row = 34-34-36-36-38-38 stitches. Work back from the wrong side with purl 31-31-33-33-35-35 stitches and 3 edge stitches in garter stitch. The next row is worked as follows from the right side: Work 3 edge stitches in garter stitch, work A.7 (= 31-31-33-33-35-35 stitches). Continue the pattern in this way. When you have worked 3 rows in A.7 cast on 2 new stitches to neck at the end of the last row from the right side as shown in A.7 = 36-36-38-38-40-40 stitches. When A.7 has been completed, work the left and right shoulders together to the back piece as described below. BACK PIECE: Place the stitches from the two shoulders on the same circular needle size 3 mm (the 48 stitches cast on to neck on right shoulder back = mid back) = 120-120-124-124-128-128 stitches. The first row is worked as follows from the right side (start on row 3 in A.3, A.4 and A.5 marked with star): Work 3 edge stitches in garter stitch, work A.3 (= 38-38-40-40-42-42 stitches), work A.4 (= 38 stitches), work A.5 (= 38-38-40-40-42-42 stitches) and finish with 3 edge stitches in garter stitch. Continue the pattern in this way (when A.3, A.4 and A.5 have been completed 1 time in height from row 3, repeat all rows in height to finished length). AT THE SAME TIME increase to armhole as described below. ARMHOLE: When the piece measures 17-15-16-14-13-13 cm increase 1 stitch in each side to armholes – read INCREASE TIP-2, i.e. increase from the right side after 3 edge stitches in garter stitch at the beginning of the row and before 3 edge stitches in garter stitch at the end of the row. Increase in this way every 2nd row a total of 3-7-7-13-17-21 times, then cast on 3-4-6-6-8-10 new stitches at the end of the next two rows = 132-142-150-162-178-190 stitches and the piece measures approx. 19-20-21-22-24-26 cm from the shoulder down. Now work the front and back pieces together as described below. BODY: Place the stitches from the front piece on the needle (without working the stitches), insert 1 marker thread (= in the side), place the stitches from the back piece on the needle and insert 1 marker thread (= in the side) = 264-284-300-324-356-380 stitches. The first round is worked as follows: Work 6-7-9-9-11-13 stitches in garter stitch, 3-7-7-13-17-21 stitches stocking stitch, continue A.3, A.4 and A.5 as before, work 3-7-7-13-17-21 stitches stocking stitch, 12-14-18-18-22-26 stitches in garter stitch (the marker thread sits in the middle of these 12-14-18-18-22-26 stitches), work 3-7-7-13-17-21 stitches stocking stitch, continue A.3, A.4 and A.5 as before, work 3-7-7-13-17-21 stitches stocking stitch and finish with 6-7-9-9-11-13 stitches in garter stitch. Continue the pattern in this way, but when you have worked 2 ridges over the middle 12-14-18-18-22-26 stitches in each side work the next round as follows: NOTE: Start the round 3 stitches before the marker thread in the side, work A.8 (= 6 stitches, the marker thread sits in the middle of A.8), work 6-11-13-19-25-31 stitches stocking stitch, continue A.3, A.4 and A.5 as before, work 6-11-13-19-25-31 stitches stocking stitch, work A.8 (= 6 stitches, the marker thread sits in the middle of A.8), work 6-11-13-19-25-31 stitches stocking stitch, continue A.3, A.4 and A.5 as before and finish with 6-11-13-19-25-31 stitches stocking stitch. Continue the pattern in this way. When the piece measures 32-34-36-38-40-42 cm from the shoulder (approx. 13-14-15-16-16-16 cm from the armhole), increase 2 stitches in each side – read INCREASE TIP-3 (= 4 stitches increased). Increase in this way every 6th round (approx. every 2 cm) to finished length (if the knitting tension is correct in height, this is equivalent to approx. 21 increases in each side). When the piece measures 73-75-77-79-81-83 cm there are approx. 348-368-384-408-440-464 stitches on the needle. On the next round, knit together the stitches in each cable (both the cables with 4 stitches and the cables with 2 stitches) 2 and 2 (just the cables, not the purl sections or the stocking stitch sections) = approx. 294-314-330-354-386-410 stitches. Work 3 RIDGES in the round over all stitches – see description above. Cast off with knit, but to prevent the cast-off edge being tight, you can make 1 yarn over after every 8th stitch at the same time as you cast off (the yarn overs are cast off as normal stitches). The whole jumper measures approx. 74-76-78-80-82-84 cm from the shoulder down. SLEEVE: Cast on 38-40-40-42-48-48 stitches with short circular needle size 3 mm. Work stocking stitch back and forth and cast on new stitches to sleeve cap at the end of each row in each side as follows: Cast on 3 stitches 1 time in all sizes, 2 stitches 2 times in all sizes, 1 stitch 7-8-11-13-14-17 times, 2 stitches 2-2-1-1-1-1 times and 3-4-6-6-8-10 stitches 1 time = 80-86-92-98-110-120 stitches and the piece measures approx. 8-9-10-11-12-14 cm from the cast-on edge and down. Insert 1 marker thread at the beginning of the row (= mid under the sleeve). Continue by working stocking stitch in the round, but over the middle 6 stitches under the sleeve work A.8. When the piece measures 3-3-3-2-2-1 cm from the marker thread decrease 2 stitches mid under the sleeve – read DECREASE TIP. Decrease in this way every 2½-2-1½-1½-1-1 cm a total of 11-14-15-18-22-26 times = 58-58-62-62-66-68 stitches. When the piece measures 30-30-29-29-29-27 cm from the marker thread (shorter measurements in larger sizes because of longer sleeve cap and wider shoulders) knit 1 round where you increase 22-22-23-23-24-22 stitches evenly on round = 80-80-85-85-90-90 stitches. Change to double pointed needles size 2.5 mm. The next round is worked as follows: Continue A.8 over the 6 stitches mid under the sleeve, work A.9A until there are 4 stitches left before A.8 (= 14-14-15-15-16-16 repeats of 5 stitches) and finish with A.9B (= 4 stitches). Continue the pattern in this way. When the cuff measures 12 cm decrease all purl 3 to purl 2, by purling 2 together in each purl section = 64-64-68-68-72-72 stitches. Continue working until the cuff measures 15 cm (the whole sleeve measures approx. 53-54-54-55-56-56 cm from the cast-on edge). On the next round knit together the stitches in each cable 2 and 2 = 48-48-51-51-54-54 stitches. Work 2 ridges in the round. Cast off with knit, but to prevent the cast-off edge being tight, you can cast of with double pointed needles size 3 mm or make 1 yarn over after approx. every 8th stitch as on the body. The sleeve measures approx. 54-55-55-56-57-57 cm from the top down. Work the other sleeve in the same way. ASSEMBLY: Sew the shoulder seams inside the cast-on edge. Knit up approx.116 to 126 stitches around the neck on short circular needle size 2.5 mm. Work 3 ridges and cast off with knit, but to prevent the cast-off edge being tight, you can cast of with short circular needle size 3mm. Sew in the sleeves. |
||||||||||||||||||||||||||||
Diagram explanations |
||||||||||||||||||||||||||||
|
||||||||||||||||||||||||||||

|
||||||||||||||||||||||||||||

|
||||||||||||||||||||||||||||

|
||||||||||||||||||||||||||||

|
||||||||||||||||||||||||||||
|
Have you made this or any other of our designs? Tag your pictures in social media with #dropsdesign so we can see them! Do you need help with this pattern?You'll find tutorial videos, a Comments/Questions area and more by visiting the pattern on garnstudio.com. © 1982-2024 DROPS Design A/S. We reserve all rights. This document, including all its sub-sections, has copyrights. Read more about what you can do with our patterns at the bottom of each pattern on our site. |
||||||||||||||||||||||||||||


With over 40 years in knitting and crochet design, DROPS Design offers one of the most extensive collections of free patterns on the internet - translated to 17 languages. As of today we count 304 catalogues and 11422 patterns - 11422 of which are translated into English (UK/cm).
We work hard to bring you the best knitting and crochet have to offer, inspiration and advice as well as great quality yarns at incredible prices! Would you like to use our patterns for other than personal use? You can read what you are allowed to do in the Copyright text at the bottom of all our patterns. Happy crafting!
Comments / Questions (36)
Jeg har løst problemet.
16.04.2024 - 20:45DROPS Design answered:
Hej Winnie, dejligt at høre :)
17.04.2024 - 11:32? Jeg har strikket mønstret en gang i højden jeg forstår ikke hvordan jeg skal få snoningerne til at passe \r\nDer er 5 glatstrikning men nu bliver der 7 kan det være rigtig ?
16.04.2024 - 14:42DROPS Design answered:
Hej Winnie, vi ser at du har løst problemet :)
17.04.2024 - 11:32Für die Armausschnitte auf der Vorderseite soll ich die Zunahmen mit einem Umschlag in der Hinreihe machen. Den Umschlag soll ich in der Rückreihe links-verschränkt stricken (Zunahme-Tipp 2), wodurch er ja in der Hinreihe als rechte Masche erscheinen würde. Ist das so richtig? Die Maschen in der Hinreihe sind ja ansonsten linke Maschen.
09.09.2023 - 21:53DROPS Design answered:
Liebe Frau Queren, die Zunahmen für die Armausschnitten werden glatt rechts gestrickt, so werden die Umschläge bei der nächsten Reihe links verschränkt gestrickt. Viel Spaß beim stricken!
11.09.2023 - 09:16Is there an English version of the pattern? It is so lovely!
16.02.2022 - 15:53DROPS Design answered:
Dear Mrs Bodner, sure there is, click on the scroll down menu below the picture and choose either English (UK-cm) or English (US-inch). Happy knitting!
17.02.2022 - 10:49Ich verstehe nicht, was bei dem Symbol mit dem schwarzen Diagonalfeld über zwei Maschen gemeint ist: "1 Masche auf die Zopfnadel hinter die Arbeit legen, 1 Masche rechts, 1 Masche rechts von der Stricknadel". Was passiert denn mit der Masche, die ich auf der Zopfnadel habe? Was für eine Masche ist gemeint mit "1 Masche rechts von der Stricknadel"? Ist das ein Schreibfehler und dabei vielleicht die Zopfnadel gemeint? Vielen Dank für Ihre Hilfe! Viele Grüße
04.01.2022 - 12:16DROPS Design answered:
Liebe Anja, ja genau, es war so gemeint, danke für den Hinweis, deutsche Anleitung wird korrigiert. Viel Spaß beim stricken!
04.01.2022 - 12:34I have started knitting pattern 179-3. It is so differnt knitting from the top down! I have completed the two fromt shoulder and joined them into one but I am puzzled about the next instruction. When it gets to the armhole increases is the measurement given taken from the shoulder at the very start or should it be from the neck edge.? I took the measurement from the start of the shoulder and have started to increas from that but it appears to me this may give a very small and tight armhole.!
31.10.2021 - 12:42DROPS Design answered:
Dear Catherine, unless stated that you need to measure from a specific marker stitch, you should always measure from the starting/cast on row. The length of the armhole can be modified and made longer. The armhole should measure from 19 cm (for the smallest size) and, in case you need to make it longer, you would need to modify the width of the sleeve too. Happy knitting!
31.10.2021 - 19:51Do you have a chart that shows the sizes in cm as I'm not sure which size to make.
15.07.2021 - 05:41DROPS Design answered:
Hi Kym. You can find a chart with all measurement in cm in all sizes at the bottom of the pattern. Happy knitting!
15.07.2021 - 08:59Hi, is the last row knitted for the front and back piece ( before the body is knitted) a wrong side or right side row? Thanks for all your help! You’ve been very helpful...much appreciated!
06.04.2021 - 02:22DROPS Design answered:
Dear Mich, when you put the stitches together for the body, and knit the body, you do that from the right side (thus the last back and forth knitted row should be the wrong side). Happy Knitting!
06.04.2021 - 08:25Hi, when knitting the body in the round, how does that affect the stitches? Diagrams A3/4 & 5 are to be worked from side to side (wrong and right side) In the round it’s wrong side only. Help! :-) thanks Mich
06.04.2021 - 00:58DROPS Design answered:
Dear, Mitch, all the diagrams show every stitch as you see them from the RS, so when you knittem on the round, always knit every row from right to left, as it is seen on the diagrams. The order of working the diagrams are given in the pattern. Happy Knitting!
06.04.2021 - 01:55Follow up to your response re: the three new stitches cast on sent March 24th. Question: I omitted to mention that I’m referring to the new stitches for the armhole. After I have increased one stitch at the beginning and at the end of every second row. Could you respond to include this additional information? Thanks
24.03.2021 - 12:00DROPS Design answered:
Dear Mich, the new stitches increased for armholes are worked in stocking stitch and the 3 new sts cast on on each side are knitted - they will be later worked in garter stitch - see under BODY. Happy knitting!
24.03.2021 - 12:56