
Popular categories
Looking for a yarn?


|
|||||||||||||||||||||||||||||||
Namdalen |
|||||||||||||||||||||||||||||||
 |
 |
||||||||||||||||||||||||||||||
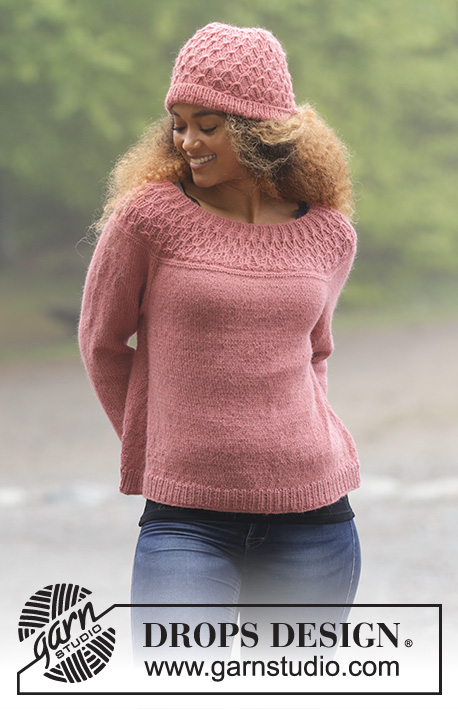
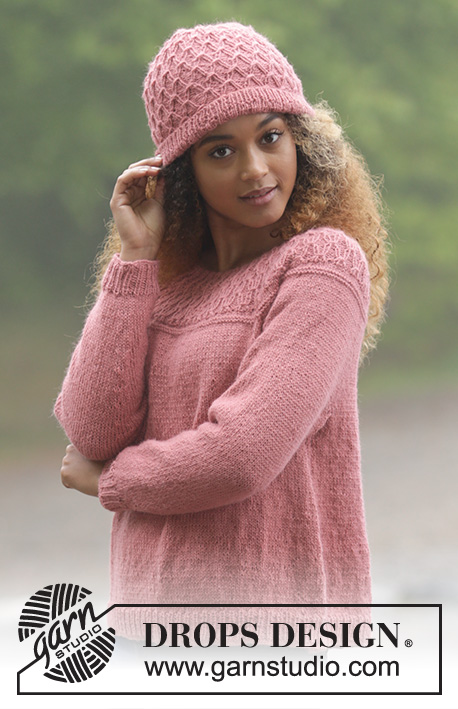
Set consists of: Knitted hat with texture and jumper with round yoke, raglan and texture, worked top down. Size: S - XXXL Set is knitted in DROPS Puna.
DROPS 179-1 |
|||||||||||||||||||||||||||||||
|
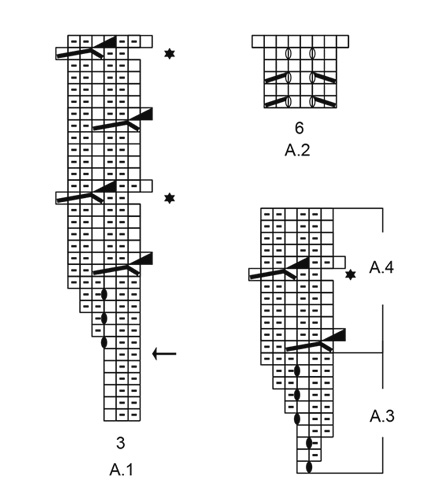
INFORMATION FOR PATTERN: GARTER STITCH (worked in the round): 1 ridge = 2 rounds. Knit 1 round and purl 1 round. PATTERN: Jumper: See diagrams A.1 and A.2. Hat: See diagrams A.3 and A.4. Diagrams show all rows in pattern seen from the right side. INCREASE TIP (evenly): To calculate how to increase evenly, use the total number of stitches on row (e.g. 240 stitches) and divide number of stitches by number of increases to be done (e.g. 8) = 30. In this example increase after approx. every 30th stitch. Increase 1 stitch by making a yarn over. On next round work yarn overs twisted to avoid holes. RAGLAN: Increase 1 stitch on each side of marker thread as follows: Work until 2 stitches remain before marker thread, 1 yarn over, knit 4 (marker thread is in the middle of these 4 stitches), 1 yarn over. Repeat at the remaining marker threads on round (= 8 stitches increased on round). On next round knit yarn overs twisted to avoid holes. DECREASE TIP (applies to mid under sleeve): Begin 3 stitches before marker and knit 2 together, knit 2 (marker is between these 2 stitches), slip 1 stitch knitwise, knit 1, pass slipped stitch over stitch worked (= 2 stitches decreased). ---------------------------------------------------------- JUMPER: Worked in the round on circular needle, top down. Beginning of round = mid back. Work sleeves in the round on double pointed needles/a short circular needle. Cast on 114-120-126-132-138-144 stitches on circular needle size 3.5 mm / US 4 with Puna. Knit 1 round. Then work PATTERN - see explanation above, according to diagram A.1 (= 38-40-42-44-46-48 repetitions of 3 stitches on first round). When 6 rounds have been worked of diagram (to and with round marked with arrow in diagram) switch to circular needle size 4 mm / US 6. REMEMBER THE GAUGE! Continue until A.1 has been worked vertically. There are 228-240-252-264-276-288 stitches on round and piece measures 10 cm / 4" from cast-on edge. Work 2 rounds in stockinette stitch and increase 2-8-16-24-20-34 stitches evenly on last round – read INCREASE TIP - see explanation above = 230-248-268-288-296-322 stitches. Work 2 ridges in GARTER STITCH - see explanation above. Insert 4 marker threads in piece without working as follows: Insert 1st marker thread after 34-36-39-43-46-51 stitches, 2nd marker thread after another 47-52-56-58-56-59 stitches, 3rd marker thread after another 68-72-78-86-92-102 stitches, and 4th marker thread after another 47-52-56-58-56-59 stitches. There are now 34-36-39-43-46-51 stitches left on round. Continue in stockinette stitch and on next round begin increase for RAGLAN – see explanation above. Increase like this every 4th round 6-8-9-10-12-13 times in total = 278-312-340-368-392-426 stitches. Continue with stockinette stitch without increasing stitches until piece measures 23-25-27-29-31-33 cm / 9"-9¾"-10½"-11½"-12¼"-13" from cast-on edge. Work next round as follows: Work first 40-44-48-53-58-64 stitches (= half back piece), slip the next 59-68-74-78-80-85 stitches on a stitch holder (= sleeve), cast on 8-8-10-10-12-12 new stitches under sleeve, work the next 80-88-96-106-116-128 stitches (= front piece), slip the next 59-68-74-78-80-85 stitches on a stitch holder (= sleeve), cast on 8-8-10-10-12-12 new stitches under sleeve, work the remaining 40-44-48-53-58-64 stitches on round (= half back piece). BODY: = 176-192-212-232-256-280 stitches. Insert a marker thread in the middle of the new stitches cast-on under sleeves in each side (= 4-4-5-5-6-6 stitches on each side of marker thread). NOW MEASURE THE PIECE FROM HERE! Work in stockinette stitch in the round. When piece measures 3 cm / 1", work A.2 (= 6 stitches) mid under each sleeve so that there are 3 stitches of diagram on each side of marker thread. For every time A.2 has been worked vertically, 4 stitches have been increased on round. Work the new stiches in stockinette stitch. Continue like this until A.2 has been worked 11 times vertically = 220-236-256-276-300-324 stitches. Piece measures approx. 27 cm / 10½". Knit 1 round while increasing 20-22-23-24-27-30 stitches evenly = 240-258-279-300-327-354 stitches. Knit 1 round. Switch to circular needle size 3.5 mm / US 4. Now work rib = knit 1/purl 2 until rib measures 4 cm / 1½". Switch back to circular needle size 4 mm / US 6. Knit 1 round and loosely bind off by knitting. To avoid a tight bind-off edge use a larger needle or make a yarn over that is casted off after approx. every 4th stitch. Jumper measures approx. 54-56-58-60-62-64 cm / 21¼"-22"-22¾"-23⅝"-24⅜"-25¼" from shoulder and down. SLEEVES: Work sleeves in the round on double pointed needles/a short circular needle. Slip the 59-68-74-78-80-85 stitches from stitch holder on double pointed needles size 4 mm / US 6. Pick in addition up 1 stitch in each of the 8-8-10-10-12-12 stitches cast on under sleeve = 67-76-84-88-92-97 stitches. Insert 1 marker thread in the middle of the new stitches (= mid under sleeve). NOW MEASURE THE PIECE FROM HERE! Work in stockinette stitch in the round. When piece measures 3 cm / 1", decrease 2 stitches mid under sleeve - read DECREASE TIP. Decrease like this every 8th-6th-5th-4th-4th-3rd round 11-14-16-18-19-20 times in total = 45-48-52-52-54-57 stitches. Knit 1 round while decreasing 0-0-1-1-0-0 stitches = 45-48-51-51-54-57 stitches. Continue in stockinette stitch until piece measures 35-33-32-30-28-27 cm / 13¾"-13"-12½"-11¾"-11"-10½" (NOTE: shorter measurements in the larger sizes because of longer yoke). Switch to double pointed needles size 3.5 mm / US 4. Now work rib = knit 1/purl 2 until rib measures 4 cm / 1½". Switch back to circular needle size 4 mm / US 6. Knit 1 round. Then bind off by knitting. To avoid a tight bind-off edge use a larger needle or make a yarn over that is casted off after approx. every 4th stitch. Sleeve measures approx. 39-37-36-34-32-31 cm / 15¼"-14½"-14¼"-13½"-12½"-12¼". Work the other sleeve the same way. ---------------------------------------------------------- HAT: Worked in the round, top down on double pointed needles. Switch to a short circular needle when increasing. Cast on 11-12 stitches on double pointed needles size 4 mm / US 6 with Puna. NOTE! Leave approx. 30 cm / 11¾" yarn end to tighten the hat at the top when finished. ROUND 1: Knit all stitches. ROUND 2: Knit 1-1, * knit 1, 1 yarn over *, work from *-* = 21-23 stitches. ROUND 3: Knit all stitches. Knit all yarn overs twisted to avoid holes. Now work PATTERN – see explanation above, as follows: Work diagram A.3 (= 1 stitch on first round) 21-23 times on round. When A.3 has been worked vertically, there are 126-138 stitches on round. REMEMBER THE GAUGE! Work diagram A.4 (= 6 stitches) over every repetition of A.3. When A.4 has been worked 5 times vertically, piece measures approx. 26 cm / 10¼". Work rib (= knit 1/purl 1) until hat measures 28-28 cm / 11"-11". Bind off stitches with knit over knit and purl over purl. Fasten off. Tighten together top of hat by basting yarn up and down in one and one stitch, tighten, fasten yarn. |
|||||||||||||||||||||||||||||||
Diagram explanations |
|||||||||||||||||||||||||||||||
|
|||||||||||||||||||||||||||||||
|
|||||||||||||||||||||||||||||||

|
|||||||||||||||||||||||||||||||
|
Have you made this or any other of our designs? Tag your pictures in social media with #dropsdesign so we can see them! Do you need help with this pattern?You'll find tutorial videos, a Comments/Questions area and more by visiting the pattern on garnstudio.com. © 1982-2024 DROPS Design A/S. We reserve all rights. This document, including all its sub-sections, has copyrights. Read more about what you can do with our patterns at the bottom of each pattern on our site. |
|||||||||||||||||||||||||||||||


With over 40 years in knitting and crochet design, DROPS Design offers one of the most extensive collections of free patterns on the internet - translated to 17 languages. As of today we count 304 catalogs and 11422 patterns - 11417 of which are translated into English (US/in).
We work hard to bring you the best knitting and crochet have to offer, inspiration and advice as well as great quality yarns at incredible prices! Would you like to use our patterns for other than personal use? You can read what you are allowed to do in the Copyright text at the bottom of all our patterns. Happy crafting!
Comments / Questions (46)
Hallo Garnstudio. Wie strickt man A.2? Vielen Dank für ihre Hilfe. Ines
24.01.2019 - 08:11DROPS Design answered:
Liebe Frau Lang, A.2 wird unter jedem Ärmel gestrickt, dh die 3 ersten M in A.2 sind vor der Markierung an der Seite gestrickt und die 3 letzten M in A.2 sind nach der Markierung gestrickt, so stricken Sie immer weiter, dh wenn A.2 1 x in der Höhe gestrickt wurde, stricken Sie A.2 von der 1. Reihe über die 6 M unter den Ärmeln wie zuvor. Viel Spaß beim stricken!
24.01.2019 - 10:21Jeg kan ikke se nogen grund til A2 mønsteret. Hvorfor disse huller under ærmerne ?
19.12.2018 - 20:55Ich würde mir gerne das Modell im Raglan von oben mit Drops love you Nr. 9 stricken. Dabei möchte ich das Muster flächendeckend am ganzen Pullover stricken. Leider weiß ich nicht wie ich das machen soll, da das Muster immer versetzt ist und es zwischen den Raglanlinien nicht richtig stimmt. Ich kann da auch keinen halben Mustersatz ansetzen.
02.12.2018 - 09:38DROPS Design answered:
Liebe Frau Tomalla-Schmidt, leider können wir nicht jeder Anleitung nach jeder individuellen Anfrage anpassen, nehmen Sie bitte Kontakt mit Ihrem DROPS Laden auf - auch telefonisch oder per E-Mail. Viel Spaß beim stricken!
03.12.2018 - 09:30Jeg forstår ikke helt møster A2. Hvordan kan en omgang med dette mønsteret gi 4 nye masker? Det økes med 6 (med kast) masker og reduseres med 4 (før og etter to av kastene). Jeg klarer ikke å få dette til å bli annet enn to økte masker. Fint om dere kan forklare meg. Har ikke funnet noen instruksjonsfilm som viser dette.
31.08.2018 - 22:54DROPS Design answered:
Hei Margrete, Du strikker A.2 midt under hvert erme, med 2 masker økt hver gang A.2 er strikket i høyden x 2. Dermed blir det totalt 4 masker økt hver gang A.2 er strikket 1 gang i høyden. Håper dette hjelper og god fornøyelse!
01.09.2018 - 12:12Diana K wrote:
Hello, I’m quite a beginner so probably I’m doing something wrong BUT The a2 diagram comes out really weird. The left side appears very different from the right side 3 stitches. The yarn over is before and after the first/last stitch (middle marker), right? It would be nice though to have a photo of this detail on the sweater.
21.05.2018 - 02:57DROPS Design answered:
Dear Diana K., on each side of jumper you will work A.2 like this: 3 sts in A.2, marker, 3 sts in A.2, the marker on the side should be in the middle of A.2 so that you will have on row 1 and 3: slip 1 as if to K, K1, psso, YO, K1, marker, K1, YO, K2 tog. When you repeat A.2 in height, work first row the same way, ie always start 3 sts before marker. Happy knitting!
22.05.2018 - 08:57Bonjour je voudrais ce pull mon 1er et je ne sais pas de quelle cote je dois lire les diagrammes et est-ce la même chose pour tout vos modèle merci
19.05.2018 - 01:15DROPS Design answered:
Bonjour Carole, sauf indication contraire dans un modèle, les diagrammes se lisent toujours en commençant en bas à droite et de droite à gauche tous les tours (de gauche à droite quand on tricote sur l'envers, mais ce pull se tricote entièrement en rond, donc toujours sur l'endroit). Cette vidéo montre comment tricoter A.1. Bon tricot!
22.05.2018 - 08:22Synes denne modellen er så fin. Jeg strikker den i bomull til meg selv og er spent på resultatet :-)
14.05.2018 - 22:05Hei jeg forstår ikke hvordan det kan bli økning 4 masker i A2. På hver pinne hvor det felles en maske og lages et kast, så blir summen da null ? kjemoefint om dere kan forklare for meg. Vennlig hilsen Vivi Busch-Christensen
14.05.2018 - 22:03Hei jeg får ikke øye på overviddemål for de forskjellige størrelser. I mitt tilfelle antagelig medium. Kan dere evt opplyse om genseren er stor eller liten i størrelsen ? Og/eller hvor i oppskriften ser jeg totalt maskeantall på bol. Vil bare ikke risikere at den blir for trang nederst :-) På forhånd takk for kjapt svar :-))
09.04.2018 - 11:01DROPS Design answered:
Hei Vivi, Det finnes et diagram på bunnen av oppskriften som viser mål på genseren i de forskjellige størrelser. God fornøyelse!
10.04.2018 - 08:10Bonjour j'aimerais savoir comment déterminer la taille que je dois faire mon tour de buste étant 113 cm et mon tour de taille est de 111 cm est-ce que les grandeurs indiquer dans le diagramme sont prisent a plat? et j'ai de la laine qui viens de nouvelle zélandes ont ma dis que c'étais entre la dk et la sport pour la grosseur de laines je sais pas si ca ressemble
26.03.2018 - 05:03DROPS Design answered:
Bonjour Mme Charland, toutes les mesures sont prises ouvrage posées à plat, en cm. Comparez ces mesures à celles d'un pull similaire dont vous aimez la forme pour trouver la taille idéale. Bon tricot!
26.03.2018 - 13:09