DROPS Fabel
DROPS Fabel
75% Wool, 25% Polyamide
from 2.30 £ /50g
Get the yarn to make this pattern from 25.30£.

The yarn cost is calculated from the pattern’s smallest size and the yarn’s cheapest product type. Looking for an even better price? You might find it on the DROPS Deals!

DROPS SS24

Swagger

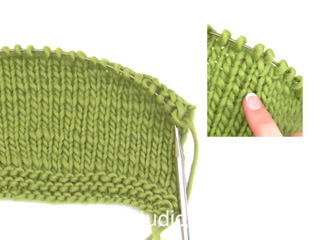
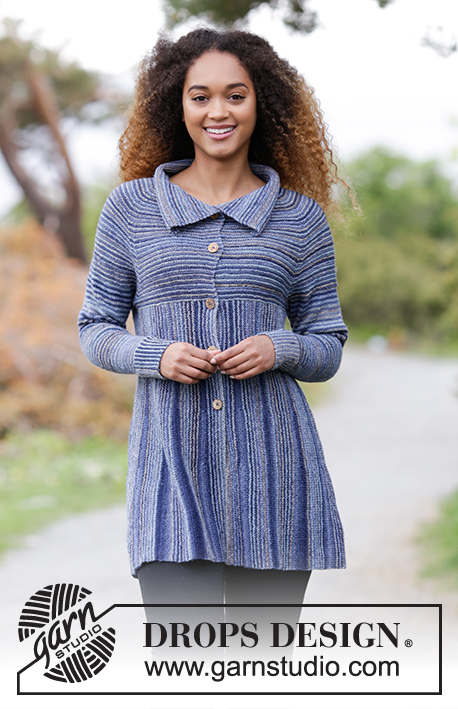
Knitted jacket with garter stitch, short rows and raglan, worked sideways. Sizes S - XXXL. The piece is worked in DROPS Fabel.

DROPS 181-27
DROPS Design: Pattern no fa-386
Yarn group A
-----------------------------------------------------------
Sizes: S - M - L - XL - XXL - XXXL
Materials:
DROPS Fabel from Garnstudio (belongs to yarn group A)
250-250-300-300-350-350 g colour 604, ocean view
300-350-350-400-450-500 g colour 917, deep ocean

The piece can also be knitted with yarn from:
"Alternative yarn (Yarn group A)" – see the link below

DROPS DOUBLE POINTED NEEDLES AND CIRCULAR NEEDLE (60 or 80 cm) SIZE 3 MM – or the size needed to get 24 stitches and 48 rows garter stitch on 10 cm in width and 10 cm in height.

DROPS COCONUT BUTTONS, NO 515: 5-5-6-6-6-6 items.
--------------------------------------------------------

-------------------------------------------------------

Alternative Yarn – See how to change yarns here
Yarn Groups A to F – Use the same pattern and change the yarn here
Yarn usage using an alternative yarn – Use our yarn converter here

-------------------------------------------------------

DROPS Fabel
DROPS Fabel
75% Wool, 25% Polyamide
from 2.30 £ /50g
Get the yarn to make this pattern from 25.30£.

The yarn cost is calculated from the pattern’s smallest size and the yarn’s cheapest product type. Looking for an even better price? You might find it on the DROPS Deals!

Pattern instructions

NOTE: This pattern is written in British English. All measurements in charts are in cm. For conversion from cm to inches - click here. There are different terms for crocheting in British and American English. If this pattern includes crochet, click for "crochet terms" here. For this pattern in American English, please click here.
INFORMATION FOR THE PATTERN:

RIDGE/GARTER STITCH (worked back and forth):
1 ridge = Knit 2 rows.

STRIPES:
*Work 1 ridge with ocean view, 1 ridge with deep ocean*, repeat from *-*

STRIPES SLEEVE:
*Work 2 rows with ocean view, 2 rows with deep ocean *, repeat from *-*.

SHORT ROWS:
The complete repeat with short rows is worked with deep ocean.
Start from the right side: Work 1 row over all stitches.
Work the first 88 stitches, turn and work back. Work over the first 66 stitches, turn and work back. Work the first 44 stitches, turn and work back. Work the first 22 stitches, turn and work back. Work 0-2-2-4-4-4 rows over all stitches. Work the first 44 stitches, turn and work back. Work the first 66 stitches, turn and work back. Work the first 88 stitches, turn and work back.
Work 3 rows over all stitches (= 18-20-20-22-22-22 rows in the bottom edge and 4-6-6-8-8-8 rows in the top edge).

INCREASE TIP:
Increase 2 stitches as follows: start 1 stitch before the marker thread, make 1 yarn over, knit 2 stitches (marker thread sits between these stitches), make 1 yarn over. On the next round knit the yarn overs twisted to prevent holes.

RAGLAN:
Decrease 8 stitches on each decrease row.
Decrease as follows:
Start 3 stitches before the marker thread, knit 2 stitches together, knit 2 stitches (= the marker thread sits between these stitches), slip 1 stitch, knit 1 stitch, pass the slipped stitch over the knitted stitch.

If the knitting tension is not right in height and the work is too tight, the decreases to raglan will be too short and the armhole too small. You can adjust this by working 1 extra row without decreases, evenly between the decrease rows.

BUTTONHOLES:
Decrease for the buttonholes on the right band. 1 BUTTONHOLE = knit the 3rd and 4th stitch from the edge together and make 1 yarn over. On the next row, knit the yarn over = hole.
Decrease for buttonhole when the piece measures:
S: 9 and 18 cm
M: 10 and 20 cm
L: 7, 15 and 22 cm
XL: 8, 16 and 24 cm
XXL: 9, 17 and 26 cm
XXXL:10, 19 and 28 cm
---------------------------------------------------------

JACKET:
The jacket is worked in two directions. First, work the bottom part sideways from mid front, then knit up stitches along the top side and work the top part of the jacket upwards.

BOTTOM PART:
Cast on 110 stitches in all sizes with circular needle size 3 mm and ocean view. Work STRIPES – see description above. Work 4 RIDGES – see description above, on the next row, decrease to buttonhole as follows – from the right side: Work 3 stitches, * knit 2 stitches together, 1 yarn over, work 24 stitches *, work from *-* a total of 2 times, knit 2 stitches together, 1 yarn over, work to end of row. On the next row, knit the yarn overs, there will be holes. Continue until you have worked a total of 9 ridges (= 18 rows), change to deep ocean and work SHORT ROWS – see description above. * Work 11-11-13-13-15-17 ridges with stripes (start and finish with ocean view). Change to deep ocean and work SHORT ROWS*, repeat from *-* until you have worked a total of 17 repeats with short rows. REMEMBER THE KNITTING TENSION! The piece should now measure 82-92-104-110-122-134 cm. If the piece measures less than this, you can work an extra repeat of garter stitch and short rows (make sure the piece ends with short rows). Finally, work 9 ridges over all stitches with stripes (start and finish with ocean view). Then cast off.

TOP PART:
The rest of the jacket is now worked upwards. Knit up from the right side 1 stitch in each ridge in the top edge of the jacket with circular needle size 3 mm and ocean view. Knit the next row from the wrong side and adjust the number of stitches to 228-245-277-294-326-358 stitches. Continue with garter stitch and stripes. THE PIECE IS NOW MEASURED FROM HERE! Work garter stitch for 2 cm, then work the next row as follows – from the right side: Work the first 56-61-68-72-79-86 stitches (= front piece), cast off the next 10-10-12-12-14-16 stitches, work the next 96-103-117-126-140-154 stitches (= back piece), cast off the next 10-10-12-12-14-16 stitches and work the last 56-61-68-72-79-86 stitches (= front piece).

Lay the piece to one side and work the sleeves.

SLEEVES:

CUFF:
Cast on 20 stitches with circular needle size 3 mm and ocean view. Work stripes and garter stitch back and forth on the needle until you have worked 50-52-54-56-60-62 ridges. Cast off. Sew the cast-on edge and the cast-off edge together.

Knit up 1 stitch in each ridge from one side of the cuff = 50-52-54-56-60-62 stitches. THE PIECE IS NOW MEASURED FROM HERE! Work stocking stitch and stripes – see description above. Insert 1 marker thread at the beginning of the round = mid under the sleeve. When the piece measures 4 cm increase 1 stitch on each side of the marker thread – see INCREASE TIP above. Increase every 2 ½-1½-1½-1-1-1 cm a total of 13-17-21-22-23-25 times = 76-86-96-100-106-112 stitches. When the sleeve measures 38-36-35-34-32-31 cm cast off 10-10-12-12-14-16 stitches mid under the sleeve (= 5-5-6-6-7-8 stitches on each side of the marker thread) = 66-76-84-88-92-96 stitches. Lay the piece to one side and work 1 more sleeve.

YOKE:
Place the sleeves on the same circular needle as the body, where you have cast off for the armholes = 340-377-421-446-482-518 stitches. Insert 1 marker thread in each transition from body to sleeves = 4 marker threads. READ BUTTONHOLE! Continue with garter stitch and stripes, AT THE SAME TIME decrease to raglan on each side of each marker thread – READ RAGLAN. Decrease to raglan on every 4th row 19-20-21-23-24-26 times and every 2nd row 6-9-12-12-14-16 times. After all the decreases to raglan there are 140-145-157-166-178-182 stitches on the needle. Knit 1 row from the right side where the stitches at the top of the sleeves are knitted together 2 and 2 and you decrease 8-7-15-18-26-26 stitches evenly on row as well = 116-120-124-132-136-144 stitches. Work 2 ridges, on the last row of the ridges, increase 20 stitches evenly on row = 136-140-144-152-156-164 stitches. Work garter stitch and stripes for 8-8-8-9-9-9 cm, then cast off.

ASSEMBLY:
Sew the openings under the sleeves and sew on the buttons to the left front piece.

Diagram

symbols = knitting direction
diagram

Each of our patterns has specific tutorial videos to help you.

Do you have a question? See a list of frequently asked questions (FAQ)

Knitting tension is what determines the final measurements of your work, and is usually measured per 10 x 10 cm. It is provided like so: number of stitches in width x number of rows in height - eg: 19 stitches x 26 rows = 10 x 10 cm.

The knitting tension is very individual; some people knit/crochet loosely while others work tightly. You adjust the knitting tension with the needle size, which is why the suggested needle size is only meant as a guide! You need to adjust this (up or down) to ensure that YOUR knitting tension matches the knitting tension provided in the pattern. If you work with a different knitting tension than provided you will have a different yarn consumption, and your work will have different measurements than what the pattern suggests.

The knitting tension also determines which yarns can replace each other. As long as you achieve the same knitting tension you can replace one yarn with another.

See DROPS lesson: How to measure your tension/gauge

See DROPS video: How to make a gauge tension swatch

The required amount of yarn is provided in grams, eg: 450 g. To calculate how many balls you’ll need you first need to know how many grams are in 1 ball (25g, 50g or 100g). This information is available if you click on the individual yarn quality on our pages. Divide the amount required with the amount of each ball. For example, if each ball is 50g (the most common amount), the calculation will be as follows: 450 / 50 = 9 balls.

The important thing when changing from one yarn to another is that the knitting/crochet tension remains the same. This is so that the measurements of the finished piece will be the same as on the sketch provided. It is easier to achieve the same knitting tension using yarns from the same yarn group. It is also possible to work with multiple strands of a thinner yarn to achieve the knitting tension of a thicker one. Please try our yarn converter. We recommend you to always work a test swatch.

Please NOTE: when changing yarn the garment might have a different look and feel to the garment in the photo, due to individual properties and qualities of each yarn.

See DROPS lesson: Can I use a different yarn than the one mentioned in the pattern?

All our yarns are categorised into yarn groups (from A to F) according to thickness and knitting tension – group A contains the thinnest yarns and group F the thickest. This makes it easier for you to find alternative yarns to our patterns, should you wish to switch yarn. All yarns within the same group have a similar knitting tension and can easily replace each other. However, different yarn qualities have different structures and properties which will give the finished work a unique look and feel.

Click here for an overview of the yarns in each yarn group

At the top of all our patterns you’ll find a link to our yarn calculator, which is a helpful tool should you wish to use a different yarn than suggested. By filling in the yarn quality you wish to replace, the amount (in your size) and number of strands, the calculator will present good alternative yarns with the same knitting tension. Additionally it will tell you how much you’ll require in the new qualities and whether you’ll need to work with multiple strands. Most skeins are 50g (some are 25g or 100g).

If the pattern is worked with multiple colours, every colour will have to be calculated separately. Similarly, if the pattern is worked with several strands of different yarns (for example 1 strand Alpaca and 1 strand Kid-Silk) you will have to find alternatives for each, individually.

Click here to see our yarn calculator

Since different yarns have different qualities and textures we have chosen to keep the original yarn in our patterns. However, you can easily find options among our available qualities by using our yarn calculator, or simply pick a yarn from the same yarn group.

It is possible that some retailers still have discontinued yarns in stock, or that someone has a few skeins at home that they would like to find patterns for.

The yarn calculator will provide both alternative yarn as well as required amount in the new quality.

If you think it's hard to decide what size to make, it can be a good idea to measure a garment you own already and like the size of. Then you can pick the size by comparing those measures with the ones available in the pattern's size chart.

You'll find the size chart at the bottom of the pattern.

See DROPS lesson: How to read size chart

The needle size provided in the pattern serves only as a guide, the important thing is to follow the knitting tension. And since knitting tension is very individual, you will have to adjust the needle size to ensure that YOUR tension is the same as in the pattern – maybe you’ll have to adjust 1, or even 2 needle sizes, up or down to achieve the correct tension. For this, we recommend that you work test swatches.

Should you work with a different knitting tension than the one provided, the measurements of the finished garment might deviate from the measurement sketch.

See DROPS lesson: How to measure your tension/gauge

See DROPS video: How to make a tension/gauge swatch

Working a garment top-down provides more flexibility and room for personal adjustment. For example it is easier to try the garment on while working, as well as making adjustments to length of yoke and shoulder caps.

The instructions are carefully explaining every step, in the correct order. Diagrams are adjusted to the knitting direction and are worked as usual.

The diagram depicts all rows/rounds, and every stitch seen from the right side. It is read from bottom to top, from right to left. 1 square = 1 stitch.

When working back and forth, every other row is worked from the right side and every other row is worked from the wrong side. When working from the wrong side, the diagram will have to be worked reversed: from left to right, knit stitches are purled, purl stitches are knit etc.

When working in the round every round is worked from the right side and the diagram are worked from right to left on all rounds.

See DROPS lesson: How to read knitting diagrams

The diagram depicts all rows/rounds, and every stitch seen from the right side. It is worked from bottom to top, from right to left.

When working back and forth every other row is worked from the right side: from right to left and every other row is worked from the wrong side: from left to right.

When working in the round, every row in the diagram are worked from the right side, from right to left.

When working a circular diagram you start in the middle and work your way outwards, counter clockwise, row by row.

The rows usually start with a given number of chain stitches (equivalent to the height of the following stitch), this will either be depicted in the diagram or explained in the pattern.

See DROPS lesson: How to read crochet diagrams

Instructions for working several diagrams after each other on the same row/round, will often be written like so: “work A.1, A.2, A.3 a total of 0-0-2-3-4 times". This means you work A.1 once, then A.2 is worked once, and A.3 is repeated (in width) the number of times provided for your size – in this case like so: S = 0 times, M = 0 times, L=2 times, XL= 3 times and XXL = 4 times.

The diagrams are worked as usual: begin with the first row in A.1, then work the first row in A.2 etc.

See DROPS lesson: How to read knitting diagrams

See DROPS lesson: How to read crochet diagrams

The total width of the garment (from wrist-to-wrist) will be larger in the larger sizes, despite the actual sleeves being shorter. The larger sizes have longer sleeve caps and wider shoulders, so there will be a good fit in all sizes.

The measurement sketch/schematic drawing provides information regarding the full length of the garment. If it’s a jumper or a jacket the length is measured from the highest point on the shoulder closest to the neckline, and straight down to the bottom of the garment. It is NOT measured from the tip of shoulder. Similarly, the length of yoke is measured from the highest point on the shoulder and down to where yoke is split into body and sleeves.

On a jacket measures are never taken along bands, unless specifically stated. Always measure inside band stitches when measuring the length.

See DROPS lesson: How to read a schematic drawing

Diagrams are often repeated on the round or in height. 1 repeat is the diagram the way it appears in the pattern. If it says to work 5 repeats of A.1 in the round, then you work A.1 a total of 5 times after/next to each other in the round. If it says to work 2 repeats of A.1 vertically/in height you work the entire diagram once, then begin again at the start and work the entire diagram one more time.

Chain stitches are slightly narrower than other stitches and to avoid working the cast-on edge too tight, we simply chain more stitches to begin with. The stitch count will be adjusted on the following row to fit the pattern and measurement sketch.

The rib edge is more elastic and will contract slightly compared to, for example, stocking stitch. By increasing before the rib edge, you avoid a visible difference in width between the rib edge and the rest of the body.

It’s very easy to cast off too tightly, and by making yarn overs while casting off (and simultaneously casting these off) you avoid a too tight cast off edge.

See DROPS video: How to bind off with yarn overs (yo)

To achieve an even increase (or decrease) you can increase on, for example: every 3rd and 4th row alternately, like so: work 2 rows and increase on the 3rd row, work 3 rows and increase on the 4th. Repeat this until the increase is complete.

See DROPS lesson: Increase or decrease 1 st on every 3rd and 4th row alternately

Should you prefer to work in the round instead of back and forth, you may of course adjust the pattern. You’ll need to add steeks mid-front (usually 5 stitches), and follow the instructions. When you would normally turn and work from the wrong side, simply work across the steek and continue in the round. At the end you’ll cut the piece open, pick up stitches to work bands, and cover the cut edges.

See DROPS video: How to knit steeks and cut open

Should you prefer to work back and forth instead of in the round, you may of course adjust the pattern so you work the pieces separately and then assemble them at the end. Divide the stitches for the body in 2, add 1 edge stitch in each side (for sewing) and work the front and back pieces separately.

See DROPS lesson: Can I adapt a pattern for circular needles into straight needles?

Pattern repeats can vary slightly in the different sizes, in order to get the correct proportions. If you’re not working the exact same size as the garment in the photo, yours might deviate slightly. This has been carefully developed and adjusted so that the complete impression of the garment is the same in all sizes.

Make sure to follow instructions and diagrams for your size!

If you have found a pattern you like which is available in women’s size it’s not very difficult to convert it to men’s size. The biggest difference will be the length of sleeves and body. Start working on the women size that you think would fit across the chest. The additional length will be worked right before you cast off for the armhole/sleeve cap. If the pattern is worked top-down you can add the length right after the armhole or before the first decrease on sleeve.

Regarding additional yarn amount, this will depend on how much length you add, but it is better with a skein too many than too few.

All yarns will have excess fibres (from production) that might come off as lint or shedding. Brushed yarns (ie hairier yarns) have more of these loose, excess fibres, causing more shedding.

Shedding also depends on what is worn under or over the garment, and whether this pulls at the yarn fibres. It’s therefore not possible to guarantee that there will be no shedding

Below are some tips on how to get the best result when working with hairier yarns:

1. When the garment is finished (before you wash it) shake it vigorously so the looser hairs come off. NOTE: do NOT use a lint roller, brush or any method that pulls at the yarn.

2. Place the garment in a plastic bag and put it in your freezer - the temperature will cause the fibres to become less attached to each other, and excess fibres will come off easier.

3. Leave in the freezer for a few hours before taking it out and shaking it again.

4. Wash the garment according to the instructions on the yarn label.

Pilling is a natural process that happens to even the most exclusive of fibers. It's a natural sign of wear and tear that is hard to avoid, and that is most visible in high friction areas of your garment like a sweater's arms and cuffs.

You can make your garment look as new by removing the pilling, using a fabric comb or a pill/lint remover.

Still can't find the answer you need? Then scroll down and leave your question so one of our experts can try to help you. This will be done normally within 5 to 10 working days.
In the meantime, you can read the questions and answers that others have left to this pattern or join the DROPS Workshop on Facebook to get help from fellow knitters/crocheters!

You might also like...

Post a comment to pattern DROPS 181-27

We would love to hear what you have to say about this pattern!

If you want to leave a question, please make sure you select the correct category in the form below, to speed up the answering process. Required fields are marked *.

Comments / Questions (41)

country flag Marielle wrote:

Bonjour, dans le patron je ne trouve pas les explications pour l'emplacement des boutonnières sur l'empiècement. Je fais la taille L , les premières boutonnières sont donc à 7, 15 et 22 cm, mais je ne sais pas où faire les 3 suivantes. J'ai lu dans un commentaire que ces explications figuraient dans le patron par taille, mais j'ai beau lire et relire je ne les trouve pas. pourriez vous m'aider svp? Merci

13.01.2024 - 16:19

DROPS Design answered:

Bonjour Marielle, les boutonnières du bas se trouve dans le paragraphe PARTIE DU BAS:, c'est le rang tricoté ainsi: sur l'endroit: Tricoter 3 mailles, *2 mailles ensemble à l'endroit, 1 jeté, tricoter 24 mailles*, tricoter de *-* 2 fois au total, 2 mailles ensemble à l'endroit, 1 jeté, tricoter les mailles restantes du rang. Bon tricot!

15.01.2024 - 09:13

country flag Susanne wrote:

In der Anleitung des unteren Teils steht dass die Arbeit nun 104 cm (habe Größe L gewählt) messen sollte. Aus der Zeichnung geht leider nicht hervor, wo man diese 104 cm messen sollte: oben, wo der obere Teil angestrickt werden soll oder unten am Saum? Danke im voraus für die Antwort und liebe Grüße Susanne.

27.03.2023 - 11:07

DROPS Design answered:

Liebe Susanne, messen Sie an der Seite wo es kürzer ist (= oben, wo man später die Maschen auffassen wird). Viel Spaß beim stricken!

27.03.2023 - 11:41

country flag Mareike wrote:

Hi, Ich bin dabei diese Jacke zustricken. Aber ich finde die Angaben hier fr die Knopflöcher im oberen teil fallen sie viel zu klein aus im vergleich zm unteren. Das heißt entweder verschieden knöpfe oder sie fallen unten raus oder passen oben nicht rein.

27.02.2023 - 19:16

country flag Tanja Meyer wrote:

Wo beginnen die verkürzten Reihen an beim unteren Teil der Jacke bei 88 maschen

26.01.2023 - 19:55

DROPS Design answered:

Liebe Frau Meyer, beim Unterteil stricken Sie zuerst 18 Reihen, dann stricken Sie die "Streifen" mit verkürzten Reihen: *11 bis 17 Krausrippen (siehe Größe), die verkürzten Reihen wie am Anfang beschrieben*, und von *bis* insgesamt 17 Mal wiederholen , und mit 18 Reihen kraus rechts enden. Viel Spaß beim stricken!

27.01.2023 - 08:58

country flag Betty Mundbjerg wrote:

Jeg kunne godt tænke mig at strikke den som en vest. Men hvor og hvordan strikker jeg så ærmegabet? Jeg tror nemlig at modellen vil være flot som en ærmeløs vest.

01.09.2020 - 09:08

DROPS Design answered:

Hej Betty, du kan evt strikke overdelen som bærestykket men uden ærmerne. vi kan desværre ikke hjælpe med at ændre i opskrifterne :)

01.09.2020 - 14:09

country flag Agneta Åhlin wrote:

Hej ! Stickade koftan i storlek L. Den känns för liten tyvärr. Bedömer att man ska ha en annan beskrivning för den storleken.

03.08.2020 - 15:15

country flag Osmont wrote:

Bonjour, est-il possible de tricoter ce modèle en point jersey au lieu du point mousse initialement prévu ? Merci

29.04.2020 - 09:36

DROPS Design answered:

Bonjour Mme Osmont, pas vraiment, car ce modèle a été écrit pour une tension point mousse et non jersey, le rendu serait complètement différent. Bon tricot!

29.04.2020 - 11:26

country flag Nicole Saulniet wrote:

Je ne comprend pas comment intégrer les manches sur la jupe. Est ce qu’il y a une vidéo qui explique comment faire? Sinon, quelle technique dois-je utiliser?

07.04.2020 - 23:43

DROPS Design answered:

Bonjour Mme Saulniet, cette vidéo montre comment ajouter les mailles des manches sur la même aiguille circulaire que le dos et les devants, au-dessus des mailles rabattues pour les emmanchures. Les premiers rangs sont parfois un peu serrés à tricoter (n'hésitez pas à utiliser une autre aiguille circulaire si besoin), mais après quelques rangs, c'est plus facile. Bon tricot!

09.04.2020 - 16:18

country flag Lone Møller wrote:

Hej jeg spørger om det samme som Elisabeth Bergensen. Når nederdelen måler 134 cm. eks. vis, skala måle på den kant oppe hvor man skal samle masker op ganske rigtig som du skriver fra opslagning til aflukning. Eller er det midt på nederdelen eller nederst på nederdelen? Logisk nok er den øverste kant kortere end den nederste kant. jeg synes ikke at jegkan se det ud fra måleskemaet. mvh Lone

08.09.2019 - 20:42

DROPS Design answered:

Hej Lone, du skal måle arbejdet rundt i livet, altså på den korteste del. God fornøjelse!

12.09.2019 - 15:50

country flag Elisabeth Bergersen wrote:

Hei! Når jeg har steikket alle rapportene i nederdelen; skal det måles øverst mot oversiden, eller nederst?

08.08.2019 - 13:11

DROPS Design answered:

Hei Elizabeth, Du måler fra oppleggskanten og til siste rad strikket. God fornøyelse!

09.08.2019 - 09:55