
Popular categories
Looking for a yarn?


|
|||||||||||||||||||
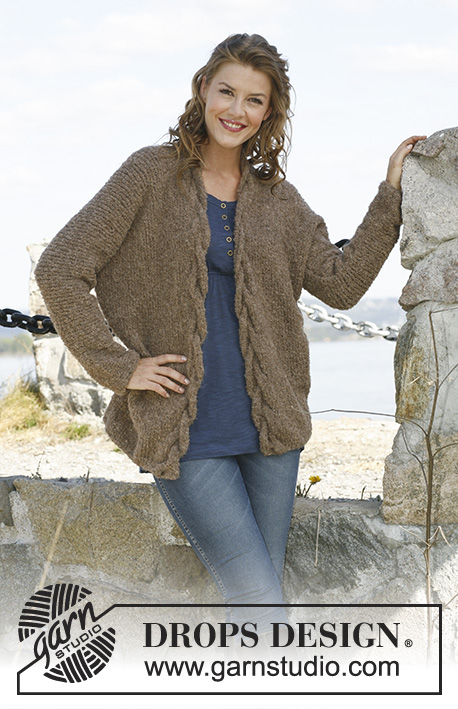
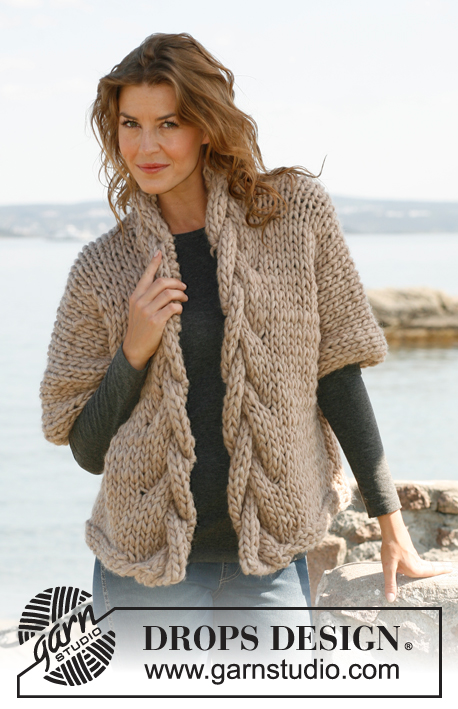
London Fog |
|||||||||||||||||||
 |
 |
||||||||||||||||||
Knitted jumper with cables and shawl collar. Sizes S - XXXL. The piece can be worked in 2 strands DROPS Brushed Alpaca Silk or 1 strand DROPS Melody.
DROPS 181-3 |
|||||||||||||||||||
|
INFORMATION FOR THE PATTERN: DECREASE TIP: Decrease 2 stitches by each marker as follows: Work until there are 3 stitches left before the marker, slip 1 stitch as if to knit, knit 1, pass the slipped stitch over (= 1 stitch decreased), knit 2 (the marker sits in the middle of these stitches), knit 2 together (= 1 stitch decreased). PATTERN: See diagrams A.1 to A.3. The diagrams show all the rows in the pattern seen from the right side. Choose diagram for your size. ---------------------------------------------------------- JUMPER: The jumper is worked in the round with circular needle as far as the armholes, then the front and back pieces are worked back and forth separately. The sleeves are worked in the round with double pointed needles. BODY: Cast on 138-146-158-170-178-190 stitches with circular needle size 9 and 2 strands Brushed Alpaca Silk or 1 strand Melody. Work as follows: Insert 1 marker at the beginning of the round, knit 25-27-30-31-33-36 stitches, A.1 (= 24-24-24-30-30-30 stitches), knit 25-27-30-31-33-36 stitches, insert 1 marker (= front piece), knit 64-68-74-78-82-88 stitches (= back piece). Continue pattern in this way. REMEMBER THE KNITTING TENSION! When the piece measures 8 cm, decrease 1 stitch on each side of each marker – read DECREASE TIP (= 4 stitches decreased). Decrease in this way every 14-12-8-7-7-5 cm a total of 2-3-4-5-5-7 times = 130-134-142-150-158-162 stitches. When the piece measures 34-35-36-37-38-39 cm, adjust so that the next round is round 6 or 8 of A.1, cast off stitches for armhole as follows: Cast off the first 3-3-4-4-5-5 stitches, knit and work A.1 as before until there are 3-3-4-4-5-5 stitches left before the marker, cast off the next 6-6-8-8-10-10 stitches, knit until there are 3-3-4-4-5-5 stitches left before the marker, cast off the last 3-3-4-4-5-5 stitches. Cut the strand. FRONT PIECE: The piece is now worked back and forth. Now divide the front piece for the neck as follows: LEFT SHOULDER: = 32-33-34-37-38-39 stitches. Now work from the side towards mid front from the right side as follows: 20-21-22-22-23-24 stitches stocking stitch and A.2 over the first 12-12-12-15-15-15 stitches of A.1 (adjust the cable so that there are 13-13-13-15-15-15 rows of stocking stitch between the cable in A.1 and the cable in A.2), turn the piece. Continue the pattern back and forth in this way until the piece measures 20-21-22-23-24-25 cm from where you cast off for the armhole (the piece has a total length of 54-56-58-60-62-64 cm). On the next row from the right side cast off the first 20-21-22-22-23-24 stitches for the shoulder = 12-12-12-15-15-15 stitches. Work shawl collar as follows: Continue with A.2 over the remaining stitches until the shawl collar measures 6 cm. Cast off. RIGHT SHOULDER: = 32-33-34-37-38-39 stitches. Now work from mid front towards the side from the right side as follows: A.3 over the 12-12-12-15-15-15 stitches of A.1 (adjust the cable so that there are 13-13-13-15-15-15 rows of stocking stitch between the cable in A.1 and cable in A.3) and 20-21-22-22-23-24 stitches stocking stitch, turn the piece. Continue the pattern back and forth in this way until the piece measures 20-21-22-23-24-25 cm from where you cast off for the armhole, adjust to match the left shoulder. On the next row from the wrong side, cast off the first 20-21-22-22-23-24 stitches for the shoulder = 12-12-12-15-15-15 stitches. Work shawl collar as follows: Continue with A.3 over the remaining stitches until the shawl collar measures 6 cm. Cast off. BACK PIECE: = 54-56-58-60-62-64 stitches. Work stocking stitch until the piece measures 18-19-20-21-22-23 cm from where you cast off for the armholes. On the next row from the right side, cast off the middle 14-14-14-16-16-16 stitches for the neck (= 20-21-22-22-23-24 stitches left on each shoulder). Now finish each shoulder separately. Work until the piece measures 20-21-22-23-24-25 cm from where you cast off for the armholes, adjust to match the front pieces, cast off. Work the other shoulder in the same way. SLEEVE: The sleeve is worked in the round with double pointed needles. Cast on 32-32-34-34-36-38 stitches with double pointed needles size 9 mm and 2 strands Brushed Alpaca Silk or 1 strand Melody. Insert 1 marker at the beginning of the round = mid under the sleeve. Knit. When the piece measures 8 cm increase 1 stitch on each side of the marker. Increase in this way every 10-8-7-6-6-6 cm a total of 4-5-5-6-6-6 times = 40-42-44-46-48-50 stitches. When sleeve measures 42-42-41-41-40-40 cm, divide the piece at the marker (= mid under the sleeve) and work back and forth from here. Cast off when the piece measures 45 cm (same length in all sizes because of the shoulder width). Work another sleeve. ASSEMBLY: Sew shoulder seams – make sure the seam is not tight. Sew the shawl collar together mid back with grafting stitches and sew it to the neckline at the back of the neck – the seam should turn in towards the wrong side. Sew in the sleeves i.e. sew the cast-off edge from sleeve to the armhole. The opening on the underside of sleeve should be sewn to the stitches that where cast off for armhole on the body. |
|||||||||||||||||||
Diagram explanations |
|||||||||||||||||||
|
|||||||||||||||||||

|
|||||||||||||||||||

|
|||||||||||||||||||

|
|||||||||||||||||||
|
Have you made this or any other of our designs? Tag your pictures in social media with #dropsdesign so we can see them! Do you need help with this pattern?You'll find tutorial videos, a Comments/Questions area and more by visiting the pattern on garnstudio.com. © 1982-2024 DROPS Design A/S. We reserve all rights. This document, including all its sub-sections, has copyrights. Read more about what you can do with our patterns at the bottom of each pattern on our site. |
|||||||||||||||||||


With over 40 years in knitting and crochet design, DROPS Design offers one of the most extensive collections of free patterns on the internet - translated to 17 languages. As of today we count 304 catalogues and 11422 patterns - 11422 of which are translated into English (UK/cm).
We work hard to bring you the best knitting and crochet have to offer, inspiration and advice as well as great quality yarns at incredible prices! Would you like to use our patterns for other than personal use? You can read what you are allowed to do in the Copyright text at the bottom of all our patterns. Happy crafting!
Comments / Questions (22)
I have done a tension test on size 8mm needles which I like. Can you advise what implication this would have to amount of wool required, please?
01.06.2021 - 08:48DROPS Design answered:
Dear Mrs Duke, if you get 10 sts x 14 rows stocking stitch with 2 strands Brushed Alpaca Silk or 1 strand Melody = 10 x10 cm, then yarn requirements should match - read more about tension here. Happy knitting!
01.06.2021 - 16:05Hi, Can I use Alpaca + Brushed Alpaca Silk to make this jumper, and if yes, I would like to make it in purple, can you give advice on an appropriate combination. tks Maxine
31.10.2020 - 11:30DROPS Design answered:
Dear Maxine, yes, you can use those two yarns. The resulting fabrick will be soft, but slightly less "fluffy" less "halo-effect". As always please allways knit a swatch, check your gauge and make the necessary modifications / recalculations if needed. As for colors, if you want a dark purple, then alpaca color 4400 would work well with the violet (10) colored Brushed AlpacaSilk , if you want a more heathery, more mixed color effect you can use the amethist (4434) or purple fog (9023) with violet (10) colored Brushed AlpacaSilk If you want more reddish puprle, then you might try the burgundy color of alpaca (6736) with the purple (09) color of Brushed Alpaca Silk. Happy Knitting!
31.10.2020 - 13:13J'ai eu beaucoup de plaisir à tricoter ce pull. En Brushed Alpaca Silk, pour la plus grande taille, 240g de laine ont été suffisants. Je peux me faire un deuxième pull avec les pelotes que j'avais achetées en suivant les données du modèle.
26.02.2020 - 14:27Liebes Drops Team, ich habe ein Problem mit dem Garnverbrauch. Beispiel Gr. M. Brushed Alpaca Silk: 400 g : 25 =16 x 140 m = 2240 m, : 2 (da doppelfädig) = 1120 m. Melody: 250 g : 50 = 5 x 140 m = 700 m. Was ist richtig? LG Gabriele
16.01.2020 - 18:50DROPS Design answered:
Liebe Gabriele, danke für den Hinweis, Problem liegte bei Melody, Sie brauche: 350-400-450-500-550-600 g Melody - deutsche Anleitung wird bald korrigiert. Viel Spaß beim stricken!
17.01.2020 - 14:06Danke + super Tipp mit dem Ansprühen:) Aber es wird doch überwiegend glatt re. gestrickt. Die ersten 4 Rd.en VT bis zum Verzopfen, RT sowieso glatt re. - Ich probiere es. Denn alternativ mit 1 Li-Rippe als Start könnte es evtl. zipfeln.^^ - Und das Modell auf dem Foto sieht so schön edel und leger aus:)
24.10.2019 - 17:35Hallo:) Ist es so verstehen, dass der Pulli einen Rollrand erhält, da nach dem Anschlag sofort glatt re. gestrickt wird? Mein Anschlag ist meistens Aufstricken auf einfacher Nadel. Empfehlen Sie einen besonderen Anschlag? - Top Kuschelmodell:) Das Garn habe ich schon und sitze im Strick-Startloch:)
24.10.2019 - 17:12DROPS Design answered:
Liebe Carmen-Gabriela, die Maschen können Sie wie in diesem Video anschlagen (nur bei der 1. Reihe stricken Sie glatt rechts + Diagram wie in der Anleitung beschrieben, Rand soll nicht rollen (mit Stecknadeln auf einer geeigneten Unterlage spannen, anfeuchten (z.B. mit einer Sprühflasche für Blumen) und trocknen lassen). Viel Spaß beim stricken!
24.10.2019 - 17:18Dear Team, I knitted the model London Fog out of Alpacka Silk and was really happy about it. Unluckily only until I did the handwash which is requested on the label. My washing maschine has a special wool handwash program and still the pullover shrank so much that it is impossible to wear it. As a big fan of your products I`m really disappointed.especially because I have a second one out of the same Alpaka silk Wool. How should I clean it? Kind regards Monika
25.11.2018 - 08:54DROPS Design answered:
Dear Monika, we are very sorry to hear that your sweater shrunk. We always advice that for yarn that is not superwash treated , should always be handwashed in cold 8or lukewarm at the most) water. Even the wool setting of some washing machines is too abrasive for those extra soft yarns loke the alpaca silk.
25.11.2018 - 11:21Dear Team, I knitted the model London Fog out of Alpacka Silk and was really happy about it. Unluckily only until I did the handwash which is requested on the label. My washing maschine has a special wool handwash program and still the pullover shrank so much that it is impossible to wear it. As a big fan of your products I`m really disappointed.especially because I have a second one out of the same Alpaka silk Wool. How should I clean it? Kind regards Monika
25.11.2018 - 08:53DROPS Design answered:
Dear Monika, we are so sorry, Brushed Alpaca Silk should be only handwashed - see label and care tab in the shadecard and general instructions about yarn care there. Maybe your DROPS store will have any tipp for you? Do not hesitate to contact them even per mail or telephone. Happy knitting!
26.11.2018 - 10:59Har lige strikket modellen i str. m - har KUN brugt 225 g, i opskriften står der 400 g
12.11.2018 - 10:17Bij het telpatroon staat bij het lege hokje maat ook bij het * dat recht aan de goede kant en averecht aan de verkeerde kant gebreid moet worden. Bij het* moet dat andersom zijn.
19.11.2017 - 14:45DROPS Design answered:
Hallo Henny, Het is aangepast. Dankjewel voor het doorgeven!
19.11.2017 - 20:41