DROPS Cotton Merino
DROPS Cotton Merino
50% Wool, 50% Cotton
from 3.55 £ /50g
Get the yarn to make this pattern from 3.55£.

The yarn cost is calculated from the pattern’s smallest size and the yarn’s cheapest product type. Looking for an even better price? You might find it on the DROPS Deals!

DROPS SS24

My Fairy Booties

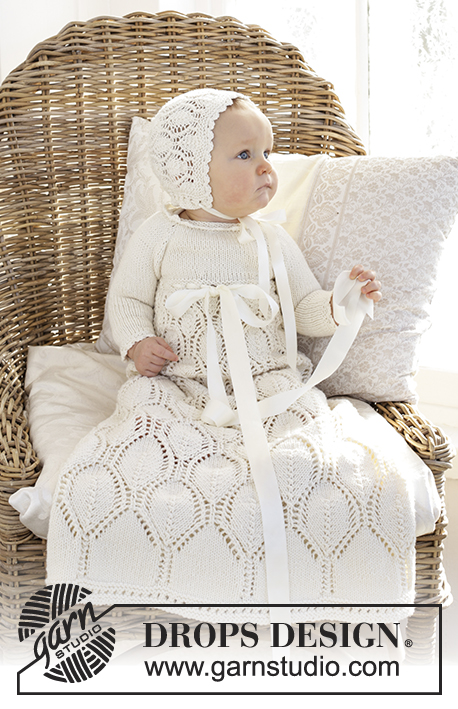
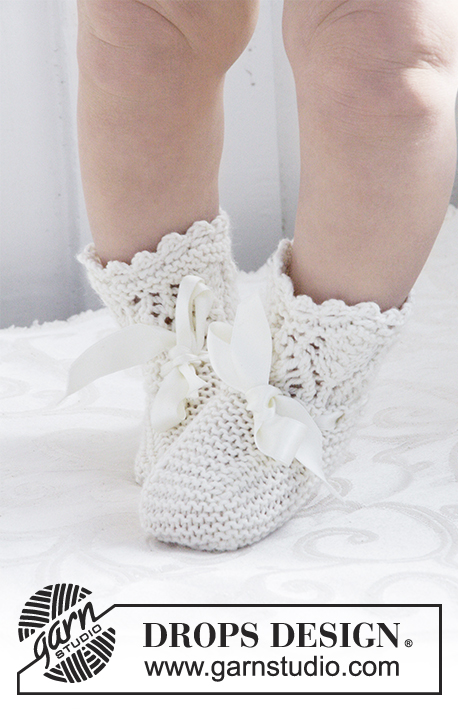
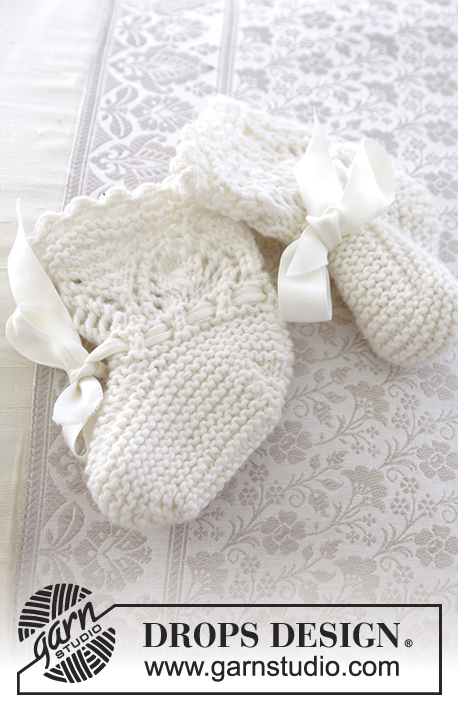
Knitted baby socks with lace pattern for Christening or special occasions in DROPS Cotton Merino. Sizes 15 -23.

DROPS Baby 29-2
DROPS Design: Pattern no cm-002-by
Yarn group B
----------------------------------------------------------
Sizes: 15/17 - 18/19 - 20/21 - 22/23
For foot length: 10-11-12-13 cm
Materials:
DROPS COTTON MERINO from Garnstudio (belongs to yarn group B)
50-50-50-100 g colour 01, off white

DROPS DOUBLE POINTED NEEDLES SIZE 3 MM – or the size needed to get 23 stitches and 34 rows lace pattern on 10 cm in width and 10 cm in height.
DROPS CROCHET HOOK SIZE 3 MM – for the picot edge.
ACCESSORIES: Approx. 1 metre silk ribbon (approx. 15 mm wide).
----------------------------------------------------------

-------------------------------------------------------

Alternative Yarn – See how to change yarns here
Yarn Groups A to F – Use the same pattern and change the yarn here
Yarn usage using an alternative yarn – Use our yarn converter here

-------------------------------------------------------

More like this:
Baby Baby Socks & Bootieslace
DROPS Cotton Merino
DROPS Cotton Merino
50% Wool, 50% Cotton
from 3.55 £ /50g
Get the yarn to make this pattern from 3.55£.

The yarn cost is calculated from the pattern’s smallest size and the yarn’s cheapest product type. Looking for an even better price? You might find it on the DROPS Deals!

Pattern instructions

NOTE: This pattern is written in British English. All measurements in charts are in cm. For conversion from cm to inches - click here. There are different terms for crocheting in British and American English. If this pattern includes crochet, click for "crochet terms" here. For this pattern in American English, please click here.
RIDGE/GARTER STITCH (worked in the round):
1 ridge = 2 rounds. Knit 1 round and purl 1 round.

RIDGE/GARTER STITCH (worked back and forth):
1 ridge = knit 2 rows.

PATTERN: 
See diagram A.1.
----------------------------------------------------------

SOCK: 
The piece is worked in the round with double pointed needles, top down.
Cast on 42 stitches for all sizes with double pointed needles size 3 mm and Cotton Merino. Work 2 RIDGES – see description above. Knit 1 round where you decrease 5 stitches evenly along the round in all sizes = 37 stitches. The next round is worked as follows: Work pattern according to diagram A.1A (= 2 stitches), A.1B (= 12 stitches) a total of 2 times in all sizes and finish with A.1C (= 11 stitches). Continue the pattern in this way. REMEMBER THE KNITTING TENSION! When A.1 has been completed 1-1-1-2 times in height knit 1 round where you decrease 5-5-1-1 stitches evenly along the round = 32-32-36-36 stitches. Purl 1 round and knit 1 round. The next round is worked as follows: * Knit 2 together, 1 yarn over *, repeat from *-* the whole round (= edge of holes for the silk ribbon). Knit 1 round and purl 1 round. Then knit 1 round where you decrease 2-0-2-0 stitches evenly along the round = 30-32-34-36 stitches. Cut the strand.

FOOT:
Place the first 11-12-12-13 stitches at the beginning of the round and the last 11-12-12-13 stitches at the end of the round on a thread = 8-8-10-10 stitches left on the needle (= mid top of foot). Work 10-10-12-14 ridges back and forth over these stitches (= 20-20-24-28 rows and approx. 4-4-5-6 cm of garter stitch). Cut the strand. The next round is worked as follows (from the right side): Knit the 11-12-12-13 stitches from the thread at the beginning of the round, knit up 1 stitch in each ridge along the side of the mid piece (= 10-10-12-14 stitches), knit the 8-8-10-10 stitches at the front of the foot, knit up 1 stitch in each ridge along the other side of the mid piece (= 10-10-12-14 stitches) and knit the 11-12-12-13 stitches from the thread at the end of the round = 50-52-58-64 m. Purl 1 round. Insert 1 marker on each side of the middle 8-8-10-10 stitches at the front. Continue working garter stitch in the round AT THE SAME TIME as you increase on the first round 1 stitch in each side, on the inside of the 2 markers so that there are 10-10-12-12 stitches on the mid piece = 52-54-60-66 stitches. When you have worked 3-3½-4-5 cm from the markers in front (finish after a round with purl), work as follows:
ROUND 1: Knit 3, slip 1 stitch as if to knit, knit 2 together, pass the slipped stitch over, knit 14-15-17-20 stitches, knit 3 together, knit 6-6-8-8, slip 1 stitch as if to knit, knit 2 together, pass the slipped stitch over, knit until there are 6 stitches left on the round, knit 3 together and finish with knit 3 (= 8 stitches decreased 44-46-52-58 stitches on the needle).
ROUND 2: Purl.
ROUND 3: Knit 2, slip 1 stitch as if to knit, knit 2 together, pass the slipped stitch over, knit 12-13-15-18 stitches, knit 3 together, knit 4-4-6-6, slip 1 stitch as if to knit, knit 2 together, pass the slipped stitch over, knit until there are 5 stitches left on the round, knit 3 together and finish with knit 2 (= 8 stitches decreased and 36-38-44-50 stitches on the round).
ROUND 4: Purl.
ROUND 5: Knit 1, slip 1 stitch as if to knit, knit 2 together, pass the slipped stitch over, knit 10-11-13-16 stitches, knit 3 together, knit 2-2-4-4, slip 1 stitch as if to knit, knit 2 together, pass the slipped stitch over, knit until there are 4 stitches left on the round, knit 3 together and finish with knit 1 (= 8 stitches decreased and 28-30-36-42 stitches on the round).
ROUND 6: Purl. 
Stop here for Sizes 15/17 + 18/19.

SIZES 20/21 + 22/23: 
ROUND 7: Slip 1 stitch as if to knit, knit 2 together, pass the slipped stitch over, knit 11-14 stitches, knit 3 together, knit 2-2, slip 1 stitch as if to knit, knit 2 together, pass the slipped stitch over, knit until there are 3 stitches left on the round, knit 3 together (= 8 stitches decreased and 28-34 stitches on the round).
ROUND 8: Purl.

ALL SIZES:
Work 1 ridge over all stitches.

ASSEMBLY:
Divide the stitches onto 2 needles with the same number on each needle (= mid under the foot). Lay the piece double and sew together lengthwise with grafting stitches – sew one stitch in each stitch. Work another sock in the same way.

PICOT EDGE:
Work a picot edge around the top of one of the socks. Start mid back and crochet with hook size 3 mm as follows: 1 double crochet in the first stitch, * 3 chain stitches, 1 treble crochet in the first chain stitch worked, skip 2 stitches on the sock, 1 double crochet in the next stitch*, repeat from *-* the whole round but finish with 1 slip stitch in the double crochet at the beginning of the round (instead of 1 double crochet in next stitch). Cut and fasten the strands. Work a similar edge around the other sock.

SILK RIBBON:
Cut the silk ribbon into two equal lengths. Start mid front on one of the socks and thread the ribbon up and down through the row of holes. Tie a bow mid front. Do the same on the other sock.

Diagram

symbols = knit
symbols = knit 2 together
symbols = slip 1 stitch as if to knit, knit 1, pass the slipped stitch over the knitted stitch
symbols = between 2 stitches make 1 yarn over
symbols = slip 1 stitch as if to knit, knit 2 together, pass the slipped stitch over the stitches knitted together
diagram

Each of our patterns has specific tutorial videos to help you.

Do you have a question? See a list of frequently asked questions (FAQ)

Knitting tension is what determines the final measurements of your work, and is usually measured per 10 x 10 cm. It is provided like so: number of stitches in width x number of rows in height - eg: 19 stitches x 26 rows = 10 x 10 cm.

The knitting tension is very individual; some people knit/crochet loosely while others work tightly. You adjust the knitting tension with the needle size, which is why the suggested needle size is only meant as a guide! You need to adjust this (up or down) to ensure that YOUR knitting tension matches the knitting tension provided in the pattern. If you work with a different knitting tension than provided you will have a different yarn consumption, and your work will have different measurements than what the pattern suggests.

The knitting tension also determines which yarns can replace each other. As long as you achieve the same knitting tension you can replace one yarn with another.

See DROPS lesson: How to measure your tension/gauge

See DROPS video: How to make a gauge tension swatch

The required amount of yarn is provided in grams, eg: 450 g. To calculate how many balls you’ll need you first need to know how many grams are in 1 ball (25g, 50g or 100g). This information is available if you click on the individual yarn quality on our pages. Divide the amount required with the amount of each ball. For example, if each ball is 50g (the most common amount), the calculation will be as follows: 450 / 50 = 9 balls.

The important thing when changing from one yarn to another is that the knitting/crochet tension remains the same. This is so that the measurements of the finished piece will be the same as on the sketch provided. It is easier to achieve the same knitting tension using yarns from the same yarn group. It is also possible to work with multiple strands of a thinner yarn to achieve the knitting tension of a thicker one. Please try our yarn converter. We recommend you to always work a test swatch.

Please NOTE: when changing yarn the garment might have a different look and feel to the garment in the photo, due to individual properties and qualities of each yarn.

See DROPS lesson: Can I use a different yarn than the one mentioned in the pattern?

All our yarns are categorised into yarn groups (from A to F) according to thickness and knitting tension – group A contains the thinnest yarns and group F the thickest. This makes it easier for you to find alternative yarns to our patterns, should you wish to switch yarn. All yarns within the same group have a similar knitting tension and can easily replace each other. However, different yarn qualities have different structures and properties which will give the finished work a unique look and feel.

Click here for an overview of the yarns in each yarn group

At the top of all our patterns you’ll find a link to our yarn calculator, which is a helpful tool should you wish to use a different yarn than suggested. By filling in the yarn quality you wish to replace, the amount (in your size) and number of strands, the calculator will present good alternative yarns with the same knitting tension. Additionally it will tell you how much you’ll require in the new qualities and whether you’ll need to work with multiple strands. Most skeins are 50g (some are 25g or 100g).

If the pattern is worked with multiple colours, every colour will have to be calculated separately. Similarly, if the pattern is worked with several strands of different yarns (for example 1 strand Alpaca and 1 strand Kid-Silk) you will have to find alternatives for each, individually.

Click here to see our yarn calculator

Since different yarns have different qualities and textures we have chosen to keep the original yarn in our patterns. However, you can easily find options among our available qualities by using our yarn calculator, or simply pick a yarn from the same yarn group.

It is possible that some retailers still have discontinued yarns in stock, or that someone has a few skeins at home that they would like to find patterns for.

The yarn calculator will provide both alternative yarn as well as required amount in the new quality.

If you think it's hard to decide what size to make, it can be a good idea to measure a garment you own already and like the size of. Then you can pick the size by comparing those measures with the ones available in the pattern's size chart.

You'll find the size chart at the bottom of the pattern.

See DROPS lesson: How to read size chart

The needle size provided in the pattern serves only as a guide, the important thing is to follow the knitting tension. And since knitting tension is very individual, you will have to adjust the needle size to ensure that YOUR tension is the same as in the pattern – maybe you’ll have to adjust 1, or even 2 needle sizes, up or down to achieve the correct tension. For this, we recommend that you work test swatches.

Should you work with a different knitting tension than the one provided, the measurements of the finished garment might deviate from the measurement sketch.

See DROPS lesson: How to measure your tension/gauge

See DROPS video: How to make a tension/gauge swatch

Working a garment top-down provides more flexibility and room for personal adjustment. For example it is easier to try the garment on while working, as well as making adjustments to length of yoke and shoulder caps.

The instructions are carefully explaining every step, in the correct order. Diagrams are adjusted to the knitting direction and are worked as usual.

The diagram depicts all rows/rounds, and every stitch seen from the right side. It is read from bottom to top, from right to left. 1 square = 1 stitch.

When working back and forth, every other row is worked from the right side and every other row is worked from the wrong side. When working from the wrong side, the diagram will have to be worked reversed: from left to right, knit stitches are purled, purl stitches are knit etc.

When working in the round every round is worked from the right side and the diagram are worked from right to left on all rounds.

See DROPS lesson: How to read knitting diagrams

The diagram depicts all rows/rounds, and every stitch seen from the right side. It is worked from bottom to top, from right to left.

When working back and forth every other row is worked from the right side: from right to left and every other row is worked from the wrong side: from left to right.

When working in the round, every row in the diagram are worked from the right side, from right to left.

When working a circular diagram you start in the middle and work your way outwards, counter clockwise, row by row.

The rows usually start with a given number of chain stitches (equivalent to the height of the following stitch), this will either be depicted in the diagram or explained in the pattern.

See DROPS lesson: How to read crochet diagrams

Instructions for working several diagrams after each other on the same row/round, will often be written like so: “work A.1, A.2, A.3 a total of 0-0-2-3-4 times". This means you work A.1 once, then A.2 is worked once, and A.3 is repeated (in width) the number of times provided for your size – in this case like so: S = 0 times, M = 0 times, L=2 times, XL= 3 times and XXL = 4 times.

The diagrams are worked as usual: begin with the first row in A.1, then work the first row in A.2 etc.

See DROPS lesson: How to read knitting diagrams

See DROPS lesson: How to read crochet diagrams

The total width of the garment (from wrist-to-wrist) will be larger in the larger sizes, despite the actual sleeves being shorter. The larger sizes have longer sleeve caps and wider shoulders, so there will be a good fit in all sizes.

The measurement sketch/schematic drawing provides information regarding the full length of the garment. If it’s a jumper or a jacket the length is measured from the highest point on the shoulder closest to the neckline, and straight down to the bottom of the garment. It is NOT measured from the tip of shoulder. Similarly, the length of yoke is measured from the highest point on the shoulder and down to where yoke is split into body and sleeves.

On a jacket measures are never taken along bands, unless specifically stated. Always measure inside band stitches when measuring the length.

See DROPS lesson: How to read a schematic drawing

Diagrams are often repeated on the round or in height. 1 repeat is the diagram the way it appears in the pattern. If it says to work 5 repeats of A.1 in the round, then you work A.1 a total of 5 times after/next to each other in the round. If it says to work 2 repeats of A.1 vertically/in height you work the entire diagram once, then begin again at the start and work the entire diagram one more time.

Chain stitches are slightly narrower than other stitches and to avoid working the cast-on edge too tight, we simply chain more stitches to begin with. The stitch count will be adjusted on the following row to fit the pattern and measurement sketch.

The rib edge is more elastic and will contract slightly compared to, for example, stocking stitch. By increasing before the rib edge, you avoid a visible difference in width between the rib edge and the rest of the body.

It’s very easy to cast off too tightly, and by making yarn overs while casting off (and simultaneously casting these off) you avoid a too tight cast off edge.

See DROPS video: How to bind off with yarn overs (yo)

To achieve an even increase (or decrease) you can increase on, for example: every 3rd and 4th row alternately, like so: work 2 rows and increase on the 3rd row, work 3 rows and increase on the 4th. Repeat this until the increase is complete.

See DROPS lesson: Increase or decrease 1 st on every 3rd and 4th row alternately

Should you prefer to work in the round instead of back and forth, you may of course adjust the pattern. You’ll need to add steeks mid-front (usually 5 stitches), and follow the instructions. When you would normally turn and work from the wrong side, simply work across the steek and continue in the round. At the end you’ll cut the piece open, pick up stitches to work bands, and cover the cut edges.

See DROPS video: How to knit steeks and cut open

Should you prefer to work back and forth instead of in the round, you may of course adjust the pattern so you work the pieces separately and then assemble them at the end. Divide the stitches for the body in 2, add 1 edge stitch in each side (for sewing) and work the front and back pieces separately.

See DROPS lesson: Can I adapt a pattern for circular needles into straight needles?

Pattern repeats can vary slightly in the different sizes, in order to get the correct proportions. If you’re not working the exact same size as the garment in the photo, yours might deviate slightly. This has been carefully developed and adjusted so that the complete impression of the garment is the same in all sizes.

Make sure to follow instructions and diagrams for your size!

If you have found a pattern you like which is available in women’s size it’s not very difficult to convert it to men’s size. The biggest difference will be the length of sleeves and body. Start working on the women size that you think would fit across the chest. The additional length will be worked right before you cast off for the armhole/sleeve cap. If the pattern is worked top-down you can add the length right after the armhole or before the first decrease on sleeve.

Regarding additional yarn amount, this will depend on how much length you add, but it is better with a skein too many than too few.

All yarns will have excess fibres (from production) that might come off as lint or shedding. Brushed yarns (ie hairier yarns) have more of these loose, excess fibres, causing more shedding.

Shedding also depends on what is worn under or over the garment, and whether this pulls at the yarn fibres. It’s therefore not possible to guarantee that there will be no shedding

Below are some tips on how to get the best result when working with hairier yarns:

1. When the garment is finished (before you wash it) shake it vigorously so the looser hairs come off. NOTE: do NOT use a lint roller, brush or any method that pulls at the yarn.

2. Place the garment in a plastic bag and put it in your freezer - the temperature will cause the fibres to become less attached to each other, and excess fibres will come off easier.

3. Leave in the freezer for a few hours before taking it out and shaking it again.

4. Wash the garment according to the instructions on the yarn label.

Pilling is a natural process that happens to even the most exclusive of fibers. It's a natural sign of wear and tear that is hard to avoid, and that is most visible in high friction areas of your garment like a sweater's arms and cuffs.

You can make your garment look as new by removing the pilling, using a fabric comb or a pill/lint remover.

Still can't find the answer you need? Then scroll down and leave your question so one of our experts can try to help you. This will be done normally within 5 to 10 working days.
In the meantime, you can read the questions and answers that others have left to this pattern or join the DROPS Workshop on Facebook to get help from fellow knitters/crocheters!

You might also like...

Post a comment to pattern DROPS Baby 29-2

We would love to hear what you have to say about this pattern!

If you want to leave a question, please make sure you select the correct category in the form below, to speed up the answering process. Required fields are marked *.

Comments / Questions (21)

country flag Helene wrote:

Jeg kan heller ikke få mønsteret til at passe. Hvad gør vi forkert

24.02.2021 - 09:44

country flag Christine Jørgensen wrote:

Hvorfor passer de 2 første mønster ikke ovenpå hinanden når jeg strikker det som mønstret viser

18.02.2020 - 17:54

DROPS Design answered:

Hej Christine, det gør de også om du strikker ifølge diagrammerne. Se her: Strik efter diagram

19.02.2020 - 10:28

country flag Sarianne wrote:

Hey! I dont understand this. Do I knit first A(2 stitches) then B 12 two times, then C 11 one time. But there is 36 stiches, how I knit that one (37)?

23.06.2019 - 08:05

DROPS Design answered:

Hello Sarianne. You work A on the first 2 sts, B on the next 24 sts, and then C on the last 11 sts. In total, you have worked on all of the 37 sts: 2 + 24 + 11 = 37. Happy knitting!

23.06.2019 - 12:03

country flag Sarianne wrote:

Hey! I try to knit these but i dont know how many stitches put per needle? I knit smallest size. Hope you answer fast!

15.05.2019 - 18:14

DROPS Design answered:

Dear Sarianne, you start with 42 sts, so you can divide it at 4 needles for example like this: 10 sts at 1 needle, 11 sts at second needle, 10 sts at third needle and 11 sts at fourth needle. Happy knitting!

15.05.2019 - 18:51

country flag Puigrenier wrote:

Merci beaucoup pour votre réponse . Je viens de comprendre le diagramme . Cordialement Anniep

02.03.2019 - 00:12

country flag Puigrenier A wrote:

Bonjour, Je ne comprends pas le diagramme du motif ajourée ? Au moment des points avec les jetées , je comprends qu’il faut faire 2 jetés côté à côté ??! Si oui moments faire ces 2 jetés car quand on tricote sur l’envers ces jetés ne tiennent pas . Merci de m’eclairer , car je n’y arrive pas . Merci beaucoup pour votre aide Bien cordialement Anniep

01.03.2019 - 00:30

DROPS Design answered:

Bonjour Anniep, on aura toujorus 1 maille entre chaque jeté, par ex dans A.2B, on tricote 2 m end, 1 jeté, 1 diminution, 1 jeté, 1 m end, 1 jeté, 1 diminution, 1 jeté, 2 m end, 1 double diminution. Bon tricot!

01.03.2019 - 10:00

country flag Ruth Dijkman wrote:

Als ik patroon B1 brei tot C kom ik op een halve steek samenbreien of eindig met een omslag. War moet ik dan breien?

24.02.2019 - 12:25

DROPS Design answered:

Dag Ruth,

Omdat je A.1b in de breedte herhaalt, en dus weer aan het begin van een patroonherhaling van A.1b begint, lopen de steken op de juiste wijze door. (m.a.w. als je een kopie maakt van A.1b en die naast A.1b plakt, loopt het patroon gewoon door.)Dus als je bij de steek bent waar je moet samenbreien, begin je weer aan het begin van a.1b.

26.02.2019 - 09:22

country flag Marianne Kirsten Nielsen wrote:

Jeg vil gerne vide om der er problemer med opskriften før jeg går igang med at lave dem?

14.02.2019 - 16:54

DROPS Design answered:

Hei Marianne. Det er ingen rettelser til denne oppskriften, hadde det vært det ville det stått rett over diagrammene. Du kunne da ha trykket deg inn og sett hva som hadde blitt rettet. Når det er sagt så blir disse rettelsene gjort fortløpende, slik at oppskriften som ligger online er den helt nyeste versjonen. Er det noe spesifikt du lurer på eller mener er feil så si gjerne ifra så skal vi ta en ekstra titt på det. God fornøyelse

18.02.2019 - 12:04

country flag Marit Myhre Sandal wrote:

Får ikke omg. 7 og videre til å stemme. B =12 skal strikkes 2 ggr. Det går jo ikke. Mønsteret går jo over i C=11.

01.10.2018 - 09:55

country flag Kaja wrote:

Üritasin neid armsaid papusid teha, aga mustri lugemisel tekis küll raskusi. kuidas lugeda neid A.1A ja A.1B ja A.1C. Tegin kõige väiksemaid.

28.09.2017 - 19:23

DROPS Design answered:

Tere Kaja! Keskmist mustrikordust (B) tuleb korrata 2 korda ja siis jätkata C osaga. Head kudumist!

12.01.2018 - 13:19