DROPS Alpaca Bouclé
DROPS Alpaca Bouclé
80% Alpaca, 15% Wool, 5% Polyamide
from 5.00 $ /50g
Get the yarn to make this pattern from 25.00$.

The yarn cost is calculated from the pattern’s smallest size and the yarn’s cheapest product type. Looking for an even better price? You might find it on the DROPS Deals!

DROPS SS24

Feel Free

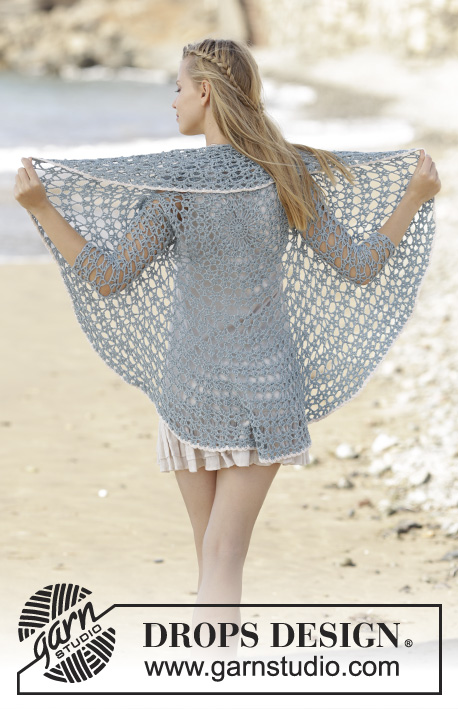
Knitted jumper with V-neck, shawl collar and ¾ sleeves in DROPS Alpaca Bouclé. Size: S - XXXL

DROPS 177-16
DROPS design: Pattern ab-073
Yarn group C or A + A
----------------------------------------------------------
Size: S - M - L - XL - XXL - XXXL
Materials:
DROPS ALPACA BOUCLÉ from Garnstudio (belongs to yarn group C)
250-300-300-350-350-400 g color 0100, off white

DROPS DOUBLE POINTED NEEDLES AND CIRCULAR NEEDLE (80 cm / 32") SIZE 5 mm/US 8 – or size needed to get 17 stitches and 22 rows in stockinette stitch = width 10 cm / 4" and 10 cm / 4" vertically.
DROPS DOUBLE POINTED NEEDLES and CIRCULAR NEEDLE (80 cm / 32") SIZE 4.5 mm/US 7 - for rib

-------------------------------------------------------

Alternative Yarn – See how to change yarns here
Yarn Groups A to F – Use the same pattern and change the yarn here
Yarn usage using an alternative yarn – Use our yarn converter here

-------------------------------------------------------

DROPS Alpaca Bouclé
DROPS Alpaca Bouclé
80% Alpaca, 15% Wool, 5% Polyamide
from 5.00 $ /50g
Get the yarn to make this pattern from 25.00$.

The yarn cost is calculated from the pattern’s smallest size and the yarn’s cheapest product type. Looking for an even better price? You might find it on the DROPS Deals!

Pattern instructions

NOTE: This pattern is written in American English. All measurements in charts are in cm. For conversion from inches to cm - click here. There are different terms for crocheting in American and British English. If this pattern includes crochet, click for "crochet terms" here. For this pattern in British English, please click here.
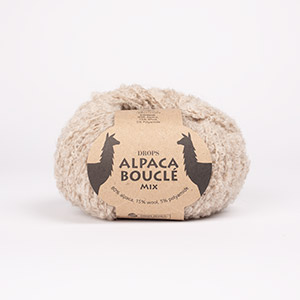
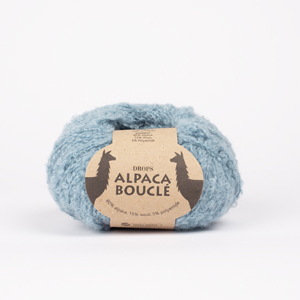
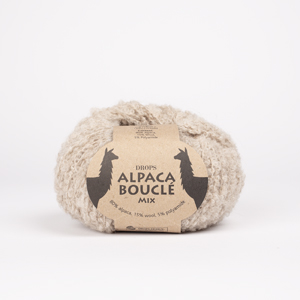
GARTER STITCH (back and forth):
1 ridge = knit 2 rows.

DECREASE TIP-1:
To calculate how to decrease evenly, use the total number of stitches on row (e.g. 216 stitches) and divide stitches by number of decreases to be done (e.g. 24) = 9. In this example knit approx. every 8th and 9th stitch together.

DECREASE TIP-2 (applies to V-neck):
Decrease for V-neck inside 10 stitches in garter stitch for shawl collar towards mid front + the increased stitches for shawl collar. All decreases are done from the right side.
Decrease as follows after 10 stitches in garter stitch + the increased stitches for shawl collar: Slip 1 stitch knitwise, knit 1, pass slipped stitch over stitch worked (= 1 stitch decreased).
Decrease as follows before 10 stitches in garter stitch + the increased stitches for shawl collar: Knit 2 together (= 1 stitch decreased).

INCREASE TIP-1 (applies to shawl collar):
Increase 1 stitch inside the outermost stitch in garter stitch in each side towards mid front by making 1 yarn-over. On next row knit yarn-over twisted to avoid holes.

INCREASE TIP-2 (applies to mid under sleeve):
Work until 1 stitch remain before marker, make 1 yarn-over, knit 2 (marker is in the middle of these 2 stitches), make 1 yarn-over (= 2 stitches increased). On next round knit yarn-over twisted to avoid holes.
----------------------------------------------------------

JUMPER:
Worked in the round on circular needle up to V-neck, then work front and back piece back and forth on circular needle until finished measurements. Work sleeves in the round on double pointed needles.

BODY:
Cast on 216-232-248-264-288-312 stitches on circular needle size 5 mm / US 8 with Alpaca Bouclé. Switch to circular needle size 4.5 mm / US 7 and knit 1 round. Then work rib in the round = knit 3/ purl 5. When piece measures 5 cm / 2", knit 1 round while at the same time decreasing 24-28-32-28-32-36 stitches evenly - READ DECREASE TIP-1 = 192-204-216-236-256-276 stitches. Insert 1 marker at beginning of round and 1 marker after 96-102-108-118-128-138 stitches (= in the sides). Switch to circular needle size 5 mm / US 8 and work in stockinette stitch. REMEMBER THE KNITTING GAUGE
When piece measures 25-27-27-29-29-29 cm / 9¾"-10½"-10½"-11½"-11½"-11½", work next round as follows: knit 43-46-49-54-59-64 stitches, purl the next 10 stitches (= mid front), knit the rest of round. Knit 1 round but instead of finishing the round in the side, continue to knit until the 10 stitches mid front. Now pick up 1 stitch behind each of the 10 stitches (pick up 1 stitch in each stitch) = 202-214-226-246-266-286 stitches on needle. Then work in stockinette stitch back and forth from mid front with 10 stitches in GARTER STITCH - see explanation above, in each side for shawl collar.
READ ALL OF THE FOLLOWING SECTION BEFORE CONTINUING!
V-NECK: When 5 rows have been worked back and forth, begin decrease for V-neck on next row from the right side - READ DECREASE TIP-2. Decrease for V-neck in each side towards mid front every 6th row 3-3-4-4-5-5 times in total, then on every 10th row 2 times in total in all sizes.
SHAWL COLLAR: AT THE SAME TIME when 10 ridges have been worked in each side increase for shawl collar every 8th row 5 times in total in each side - READ INCREASE TIP-1.
ARMHOLE: AT THE SAME TIME when piece measures 35-36-37-38-39-40 cm / 13¾"-14¼"-14½"-15"-15¼"-15¾", divide piece at the markers in each side and finish front and back piece separately.

BACK PIECE:
= 96-102-108-118-128-138 stitches. Continue back and forth in stockinette stitch and cast on 1 new stitch in each side (= edge stitch for seam) = 98-104-110-120-130-140 stitches on needle. When piece measures 50-52-54-56-58-60 cm / 19¾"-20½"-21¼"-22"-22¾"-23⅝", bind off the middle 18-18-20-20-22-22 stitches for neck and finish each shoulder separately. Continue in stockinette stitch and bind off 1 stitch on next row from the neck = 39-42-44-49-53-58 stitches remain on row. Continue until piece measures 52-54-56-58-60-62 cm / 20½"-21¼"-22"-22¾"-23⅝"-24⅜" and bind off - make sure to avoid a tight bind-off edge. Work the other shoulder the same way.

LEFT FRONT PIECE:
Continue back and forth in stockinette stitch and garter stitch AT THE SAME TIME decrease for V-neck and increase for shawl collar as before. Cast in addition on 1 new stitch towards the side (= edge stitch for seam). When piece measures 52-54-56-58-60-62 cm / 20½"-21¼"-22"-22¾"-23⅝"-24⅜", bind off the outermost 39-42-44-49-53-58 stitches on shoulder - make sure to avoid a tight bind-off edge = 15 stitches remain on needle in all sizes for shawl collar. Work in garter stitch back and forth over these stitches for 8-8-8-8-9-9 cm / 3"-3"-3"-3"-3½"-3½" from where shoulder stitches were bound off and slip stitches on 1 stitch holder.

RIGHT FRONT PIECE:
Continue the same way as on left front piece but with increases and decreases in the opposite side.

SLEEVE:
Cast on 40-40-40-40-48-48 stitches on double pointed needles size 5 mm / US 8 with Alpaca Bouclé. Switch to double pointed needles size 4.5 mm / US 7 and knit 1 round. Then work rib in the round = knit 3/ purl 5. When piece measures 5 cm / 2", knit 1 round while at the same time decreasing 4-2-0-0-6-4 stitches evenly = 36-38-40-40-42-44 stitches. Insert 1 marker at beginning of round (= mid under sleeve). Switch to double pointed needles size 5 mm / US 8 and work in stockinette stitch. When piece measures 7-8-8-8-7-6 cm / 2¾"-3"-3"-3"-2¾"-2½", increase 2 stitches mid under sleeve - READ INCREASE TIP-2. Increase 11-12-12-14-15-15 times in total in size S: On every 4th round, in size M + L: On every 3rd round and in size XL + XXL + XXXL: On every other round = 58-62-64-68-72-74 stitches. When piece measures 28-27-26-24-22-20 cm / 11"10½"-10¼"-9½"-8¾"-8", bind off all stitches - make sure to avoid a tight bind-off edge. Make another sleeve the same way.

ASSEMBLY:
Sew shoulder seams inside bind-off edge - make sure the seam is not tight.
Sew collar tog mid back with grafting/kitchener stitches and sew collar to neck line in the back of neck (the seam should be in towards the wrong side). Sew in sleeves inside 1 edge stitch in each side.

Diagram

All measurements in charts are in cm.

diagram measurements

Each of our patterns has specific tutorial videos to help you.

Do you have a question? See a list of frequently asked questions (FAQ)

Knitting tension is what determines the final measurements of your work, and is usually measured per 10 x 10 cm. It is provided like so: number of stitches in width x number of rows in height - eg: 19 stitches x 26 rows = 10 x 10 cm.

The knitting tension is very individual; some people knit/crochet loosely while others work tightly. You adjust the knitting tension with the needle size, which is why the suggested needle size only serve as a guide! You need to adjust this (up or down) to ensure that YOUR knitting tension matches the knitting tension provided in the pattern. If you work with a different knitting tension than provided you will have a different yarn consumption, and your work will have different measurements than what the pattern suggests.

The knitting tension also determines which yarns can replace each other. As long as you achieve the same knitting tension you can replace one yarn with another.

See DROPS lesson: How to measure your tension/gauge

See DROPS video: How to make a gauge tension swatch

The required amount of yarn is provided in grams, eg: 450 g. To calculate how many balls you’ll need you first need to know how many grams are in 1 ball (25g, 50g or 100g). This information is available if you click on the individual yarn quality on our pages. Divide the amount required with the amount of each ball. For example, if each ball is 50g (the most common amount), the calculation will be as follows: 450 / 50 = 9 balls.

The important thing when changing from one yarn to another is that the knitting/crochet tension remains the same. This is so that the measurements of the finished piece will be the same as on the sketch provided. It is easier to achieve the same knitting tension using yarns from the same yarn group. It is also possible to work with multiple strands of a thinner yarn to achieve the knitting tension of a thicker one. Please try our yarn converter. We recommend you to always work a test swatch.

Please NOTE: when changing yarn the garment might have a different look and feel to the garment in the photo, due to individual properties and qualities of each yarn.

See DROPS lesson: Can I use a different yarn than the one mentioned in the pattern?

All our yarns are categorised into yarn groups (from A to F) according to thickness and knitting tension – group A contains the thinnest yarns and group F the thickest. This makes it easier for you to find alternative yarns to our patterns, should you wish to switch yarn. All yarns within the same group have a similar knitting tension and can easily replace each other. However, different yarn qualities have different structures and properties which will give the finished work a unique look and feel.

Click here for an overview of the yarns in each yarn group

At the top of all our patterns you’ll find a link to our yarn converter, which is a helpful tool should you wish to use a different yarn than suggested. By filling in the yarn quality you wish to replace, the amount (in your size) and number of strands, the converter will present good alternative yarns with the same knitting tension. Additionally it will tell you how much you’ll require in the new qualities and whether you’ll need to work with multiple strands. Most skeins are 50g (some are 25g or 100g).

If the pattern is worked with multiple colours, every colour will have to be converted separately. Similarly, if the pattern is worked with several strands of different yarns (for example 1 strand Alpaca and 1 strand Kid-Silk) you will have to find alternatives for each, individually.

Click here to see our yarn converter

Since different yarns have different qualities and textures we have chosen to keep the original yarn in our patterns. However, you can easily find options among our available qualities by using our yarn converter, or simply pick a yarn from the same yarn group.

It is possible that some retailers still have discontinued yarns in stock, or that someone has a few skeins at home that they would like to find patterns for.

The yarn converter will provide both alternative yarn as well as required amount in the new quality.

If you think it's hard to decide what size to make, it can be a good idea to measure a garment you own already and like the size of. Then you can pick the size by comparing those measures with the ones available in the pattern's size chart.

You'll find the size chart at the bottom of the pattern.

See DROPS lesson: How to read size chart

The needle size provided in the pattern serves only as a guide, the important thing is to follow the knitting tension. And since knitting tension is very individual, you will have to adjust the needle size to ensure that YOUR tension is the same as in the pattern – maybe you’ll have to adjust 1, or even 2 needle sizes, up or down to achieve the correct tension. For this, we recommend that you work test swatches.

Should you work with a different knitting tension than the one provided, the measurements of the finished garment might deviate from the measurement sketch.

See DROPS lesson: How to measure your tension/gauge

See DROPS video: How to make a gauge tension swatch

Working a garment top-down provides more flexibility and room for personal adjustment. For example it is easier to try the garment on while working, as well as making adjustments to length of yoke and shoulder caps.

The instructions are carefully explaining every step, in the correct order. Diagrams are adjusted to the knitting direction and are worked as usual.

The diagram depicts all rows/rounds, and every stitch seen from the right side. It is read from bottom to top, from right to left. 1 square = 1 stitch.

When working back and forth, every other row is worked from the right side and every other row is worked from the wrong side. When working from the wrong side, the diagram will have to be worked reversed: from left to right, knit stitches are purled, purl stitches are knit etc.

When working in the round every round is worked from the right side and the diagram are worked from right to left on all rounds.

See DROPS lesson: How to read knitting diagrams

The diagram depicts all rows/rounds, and every stitch seen from the right side. It is worked from bottom to top, from right to left.

When working back and forth every other row is worked from the right side: from right to left and every other row is worked from the wrong side: from left to right.

When working in the round, every row in the diagram are worked from the right side, from right to left.

When working a circular diagram you start in the middle and work your way outwards, counter clockwise, row by row.

The rows usually start with a given number of chain stitches (equivalent to the height of the following stitch), this will either be depicted in the diagram or explained in the pattern.

See DROPS lesson: How to read crochet diagrams

Instructions for working several diagrams after each other on the same row/round, will often be written like so: “work A.1, A.2, A.3 a total of 0-0-2-3-4 times". This means you work A.1 once, then A.2 is worked once, and A.3 is repeated (in width) the number of times provided for your size – in this case like so: S = 0 times, M = 0 times, L=2 times, XL= 3 times and XXL = 4 times.

The diagrams are worked as usual: begin with the first row in A.1, then work the first row in A.2 etc.

See DROPS lesson: How to read knitting diagrams

See DROPS lesson: How to read crochet diagrams

The total width of the garment (from wrist-to-wrist) will be larger in the larger sizes, despite the actual sleeves being shorter. The larger sizes have longer sleeve caps and wider shoulders, so there will be a good fit in all sizes.

The measurement sketch/schematic drawing provides information regarding the full length of the garment. If it’s a jumper or a jacket the length is measured from the highest point on the shoulder (usually closest to the neckline), and straight down to the bottom of the garment. It is NOT measured from the tip of shoulder. Similarly, the length of yoke is measured from the highest point on the shoulder and down to where yoke is split into body and sleeves.

See DROPS lesson: How to read a schematic drawing

Diagrams are often repeated on the round or in height. 1 repeat is the diagram the way it appears in the pattern. If it says to work 5 repeats of A.1 in the round, then you work A.1 a total of 5 times after/next to each other in the round. If it says to work 2 repeats of A.1 vertically/in height you work the entire diagram once, then begin again at the start and work the entire diagram one more time.

Chain stitches are slightly narrower than other stitches and to avoid working the cast-on edge too tight, we simply chain more stitches to begin with. The stitch count will be adjusted on the following row to fit the pattern and measurement sketch.

The rib edge is more elastic and will contract slightly compared to, for example, stocking stitch. By increasing before the rib edge, you avoid a visible difference in width between the rib edge and the rest of the body.

It’s very easy to cast off too tightly, and by making yarn overs while casting off (and simultaneously casting these off) you avoid a too tight cast off edge.

See DROPS video: How to bind off with yarn overs (yo)

To achieve an even increase (or decrease) you can increase on, for example: every 3rd and 4th row alternately, like so: work 2 rows and increase on the 3rd row, work 3 rows and increase on the 4th. Repeat this until the increase is complete.

See DROPS lesson: Increase or decrease 1 st on every 3rd and 4th row alternately

Should you prefer to work in the round instead of back and forth, you may of course adjust the pattern. You’ll need to add steeks mid-front (usually 5 stitches), and follow the instructions. When you would normally turn and work from the wrong side, simply work across the steek and continue in the round. At the end you’ll cut the piece open, pick up stitches to work bands, and cover the cut edges.

See DROPS video: How to knit steeks and cut open

Should you prefer to work back and forth instead of in the round, you may of course adjust the pattern so you work the pieces separately and then assemble them at the end. Divide the stitches for the body in 2, add 1 edge stitch in each side (for sewing) and work the front and back pieces separately.

See DROPS lesson: Can I adapt a pattern for circular needles into straight needles?

Pattern repeats can vary slightly in the different sizes, in order to get the correct proportions. If you’re not working the exact same size as the garment in the photo, yours might deviate slightly. This has been carefully developed and adjusted so that the complete impression of the garment is the same in all sizes.

Make sure to follow instructions and diagrams for your size!

If you have found a pattern you like which is available in women’s size it’s not very difficult to convert it to men’s size. The biggest difference will be the length of sleeves and body. Start working on the women size that you think would fit across the chest. The additional length will be worked right before you cast off for the armhole/sleeve cap. If the pattern is worked top-down you can add the length right after the armhole or before the first decrease on sleeve.

Regarding additional yarn amount, this will depend on how much length you add, but it is better with a skein too many than too few.

All yarns will have excess fibres (from production) that might come off as lint or shedding. Brushed yarns (ie hairier yarns) have more of these loose, excess fibres, causing more shedding.

Shedding also depends on what is worn under or over the garment, and whether this pulls at the yarn fibres. It’s therefore not possible to guarantee that there will be no shedding

Below are some tips on how to get the best result when working with hairier yarns:

1. When the garment is finished (before you wash it) shake it vigorously so the looser hairs come off. NOTE: do NOT use a lint roller, brush or any method that pulls at the yarn.

2. Place the garment in a plastic bag and put it in your freezer - the temperature will cause the fibres to become less attached to each other, and excess fibres will come off easier.

3. Leave in the freezer for a few hours before taking it out and shaking it again.

4. Wash the garment according to the instructions on the yarn label.

Pilling is a natural process that happens to even the most exclusive of fibers. It's a natural sign of wear and tear that is hard to avoid, and that is most visible in high friction areas of your garment like a sweater's arms and cuffs.

You can make your garment look as new by removing the pilling, using a fabric comb or a pill/lint remover.

Still can't find the answer you need? Then scroll down and leave your question so one of our experts can try to help you. This will be done normally within 5 to 10 working days.
In the meantime, you can read the questions and answers that others have left to this pattern or join the DROPS Workshop on Facebook to get help from fellow knitters/crocheters!

You might also like...

Post a comment to pattern DROPS 177-16

We would love to hear what you have to say about this pattern!

If you want to leave a question, please make sure you select the correct category in the form below, to speed up the answering process. Required fields are marked *.

Comments / Questions (27)

country flag S.A.H. Van Der Burgt wrote:

Als ik het goed begrijp is de sjaalkraag op zijn breedst 15 steken breed?

30.01.2018 - 12:33

DROPS Design answered:

Hallo S.A.H. Dat klopt inderdaad! Eerst de 10 steken middenvoor en dan aan elke kant 5 steken Totaal dus 15 steken.

31.01.2018 - 16:27

country flag Nancy Hartfiel wrote:

I understand where to increase for the shawl collar but I don't understand at what point to begin doing it. Should I have been increasing at the beginning of the v-neck when I was decreasing or do I start it later?

19.01.2018 - 02:49

DROPS Design answered:

Dear Mrs Hartfiel, increase for shawl collar start when 10 ridges (= 20 rows) have been worked over the sts for collar. Increase then a total of 5 times every 8th row. Happy knitting!

19.01.2018 - 11:01

country flag Nancy Hartfiel wrote:

I don't understand when to start the increase for the shawl collar. I have knitted to the point where I divide the front from the back. should I have started it before this?

18.01.2018 - 02:13

DROPS Design answered:

Dear Mrs Hartfiel, you will increase for the shawl collar after the sts in garter st on right front piece and before the sts in garter st on left front piece (= before the stocking st section on right front piece and after the stocking st section on left front piece). Happy knitting!

18.01.2018 - 09:14

country flag Felicia wrote:

Salve quanti gomitoli occorrono per completare una taglia s?

25.11.2017 - 23:22

DROPS Design answered:

Buongiorno Felicia . Per la taglia S vengono indicati 250 g di Alpaca bouclè, pari a 5 gomitoli. Buon lavoro!

26.11.2017 - 08:40

country flag A De Groot Posset wrote:

Hallo, staat er een fout in het patroon? Ik begin met de sjaalkraag en moet dit soms met 2x 10 steken,want nu staat er 1keer 10 steken achter bij maken.

03.08.2017 - 12:27

DROPS Design answered:

Hoi A. de Groot, De sjaalkraag of v-hals is aan elke kant 10 steken breed, maar middenvoor overlappen deze 10 steken. Om deze overlap te maken neem je 1 steek op achter elk van de 10 steken die je in de vorige toer averecht hebt gebreid, vervolgens ga je verder met heen en weer breien en een sutkje verder begin je met de minderingen voor de hals midden voor en met het meerderen voor de sjaalkraag in de 10 steken ribbelsteek aan beide kanten. (zie beschrijving)

07.08.2017 - 10:54

Efi Tsalikoglou wrote:

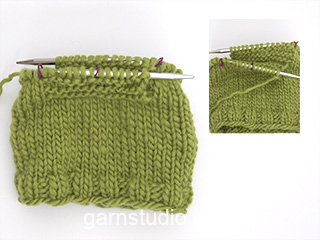
Hello and thank you for this beautiful pattern. Unfortunately I am having trouble with picking up stitches from behind for v neck. Can you please tell me how to do that? Thank you in advance!

17.07.2017 - 14:36

DROPS Design answered:

Dear Mrs Tsalikoglou, this video below shows how to pick up sts behind the 10 sts for collar. Happy knitting!

17.07.2017 - 15:42

country flag Linda wrote:

Ich bin an folgender Stelle der Anleitung und verstehe nicht wie ich die Maschen aus der Rückseite aufnehme und wie ich weiterstricke? "Nun aus der Rückseite der 10 Maschen je 1 Masche auffassen = 202-214-226-246-266-286 Maschen. Nun glatt rechts in Hin- und Rück-Reihen weiterstricken, mit beidseitig je 10 Maschen KRAUS RECHTS (siehe oben) für den Schalkragen. " Lieben Dank!

18.06.2017 - 21:17

DROPS Design answered:

Liebe Linde, dieses Video zeigt wie man die Maschen aus der Rückseite auffasst (bitte Maschenanzahl von Ihrer Anleitung folgen) - damit die Reihen jetzt ab der Mitte vom Vorderteil jetzt beginnen. Viel Spaß beim stricken!

19.06.2017 - 09:10

country flag Darja wrote:

Ich bin noch eine Anfängerin und frage mich, ob ich die Ärmel auch mit einer Rundstricknadel stricken könnte. Ist das nur eine Geschmackssache oder gibt es jeweils einen konkreten Grund beim Rundstricken wenn Sie bei manchen Modellen die Rundsticknadel und bei manchen das Nadelspiel empfehlen? Vielen Dank!

07.05.2017 - 19:33

DROPS Design answered:

Liebe Darja, wenn es zu wenig Maschen für Rundnadel, strickt man mit Nadelspiel, aber gerne können Sie auch "magic Loop" stricken, siehe Video. Viel Spaß beim stricken!

08.05.2017 - 11:02

country flag Paola wrote:

Grazie....Ammiro sempre la vostra squisita disponibilità... Complimenti x tutto

02.03.2017 - 16:56

country flag Paola wrote:

Scusate se capisco bene la scollatura inizia praticamente a circa 1 cm o due dopo i 27 cm (lavoro una taglia M. Non diventa troppo scollata se la maglia è lunga in tutto 54? Grazie

02.03.2017 - 15:46

DROPS Design answered:

Buonasera Paola. E’ corretto. Il capo è volutamente molto scollato, come può osservare dalla fotografia. Buon lavoro!

02.03.2017 - 16:05