Popular categories
Looking for a yarn?

100% Wool
from 2.30 £ /50g
Order DROPS Needles & Hooks
Clicking the ORDER button will redirect you to Wool Warehouse Direct Ltd website
The yarn cost is calculated from the pattern’s smallest size and the yarn’s cheapest product type. Looking for an even better price? You might find it on the DROPS Deals!
Keystone
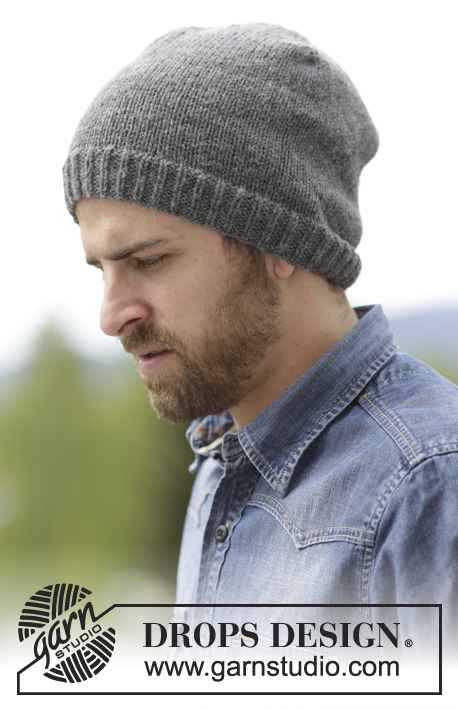
Knitted DROPS men’s jumper with raglan in Karisma. Size: S - XXXL.
DROPS design: Pattern no u-803
Yarn group B
----------------------------------------------------------
Size: S - M - L - XL - XXL - XXXL
Materials:
DROPS KARISMA from Garnstudio
500-550-600-650-700-750 g colour no 21, medium grey
50 g for all sizes in colour no 17, navy blue
DROPS DOUBLE POINTED NEEDLES AND CIRCULAR NEEDLE (60 and 80 cm) SIZE 4 mm - or size needed to get 21 sts x 28 rows in stocking st = 10 x 10 cm.
DROPS DOUBLE POINTED NEEDLES and CIRCULAR NEEDLE (80 cm) SIZE 3.5 mm - for rib.
----------------------------------------------------------
-------------------------------------------------------
Alternative Yarn – See how to change yarns here
Yarn Groups A to F – Use the same pattern and change the yarn here
Yarn usage using an alternative yarn – Use our yarn converter here
-------------------------------------------------------

100% Wool
from 2.30 £ /50g
Order DROPS Needles & Hooks
Clicking the ORDER button will redirect you to Wool Warehouse Direct Ltd website
The yarn cost is calculated from the pattern’s smallest size and the yarn’s cheapest product type. Looking for an even better price? You might find it on the DROPS Deals!
- English (UK/cm)
- Česky - not translated
- Dansk
- Deutsch
- Eesti keel
- English (US/in)
- Español
- Français
- Íslenska
- Italiano
- Magyar
- Nederlands
- Norsk
- Polski
- Português
- Suomi
- Svenska
- English (UK/cm), Bulgaria
- English (UK/cm), Croatia
- English (UK/cm), Greece
- English (UK/cm), Latvia
- English (UK/cm), Lithuania
- English (UK/cm), Romania
- English (UK/cm), Slovenia
- Česky, Slovakia - not translated
Pattern instructions
From RS:
Beg 3 sts before marker: K 2 tog, K 2 (marker is between these 2 sts), slip 1 st as if to K, K 1, psso.
KNITTING TIP:
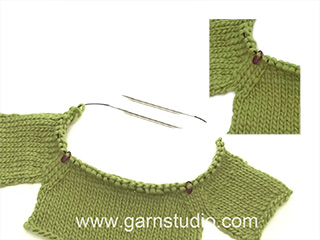
If knitting tension is incorrect in height and the knitting is too tight, the raglan dec will be too short and the armholes too small. This can be adjusted by working 1 extra round without dec evenly spaced between dec.
GARTER ST (worked in the round):
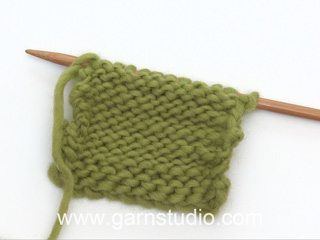
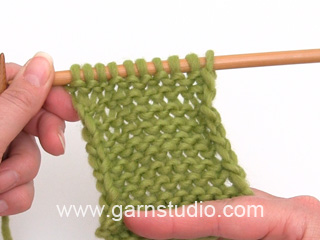
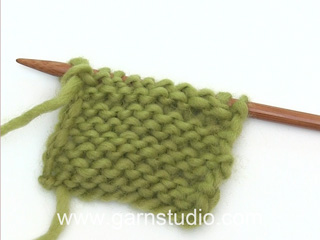
1 ridge = 2 rounds. * K 1 round and P 1 round *, repeat from *-*.
--------------------------------------------------------
BODY:
Worked in the round on circular needle from bottom up. Cast on 220-240-264-288-312-344 sts on circular needle size 3.5 mm with medium grey. Work rib = K 2/P 2 for 5 cm. Switch to circular needle size 4 mm and K next round – AT THE SAME TIME dec 36-40-44-48-52-56 sts evenly = 184-200-220-240-260-288 sts. Continue in stocking st. REMEMBER THE KNITTING TENSION Insert 1 marker in each side = 92-100-110-120-130-144 sts between markers. When piece measures 6 cm, inc 1 st on each side of both markers (= 4 inc). Inc every 10 cm a total of 4 times = 200-216-236-256-276-304 sts. When piece measures 40-40-41-41-41-41 cm, cast off 4-4-5-5-6-6 sts on each side of every marker (= 8-8-10-10-12-12 sts in each side) = 92-100-108-118-126-140 sts on front and back piece. Put piece aside and knit the sleeves.
SLEEVE:
Worked in the round on double pointed needles.
Cast on 60-60-64-68-72-72 sts on double pointed needles size 3.5 mm with medium grey. Work rib = K 2/P 2 for 4 cm. Switch to double pointed needles size 4 mm and K next round – AT THE SAME TIME dec 10-8-10-12-14-12 sts evenly = 50-52-54-56-58-60 sts. Insert 1 marker at beg of round = mid under sleeve. When piece measures 7-8-8-10-10-10 cm, inc 1 st on each side of marker. Inc every 3-2-2-1½-1½-1½ cm 13-16-17-18-19-20 times in total = 76-84-88-92-96-100 sts. When piece measures 46-45-44-43-42-42 cm (shorter measurements in the larger sizes because of wider shoulders), cast off 4-4-5-5-6-6 sts on each side of marker (= 8-8-10-10-12-12 sts cast off mid under sleeve) = 68-76-78-82-84-88 sts. Put piece aside and knit another sleeve.
YOKE:
READ ALL OF THE FOLLOWING SECTION BEFORE CONTINUING:
Slip sleeves on to same circular needle as body where armholes were cast off = 320-352-372-400-420-456 sts. Continue in stocking st, now beg dec for RAGLAN – see explanation above and READ KNITTING TIP. Insert 1 marker in all transitions between sleeves and body (= 4 markers). 1st marker = in transition between left sleeve and front piece.
Dec differently on body and on sleeves.
Dec as follows after 2nd and 4th marker and before 3rd and 1st marker (= dec on sleeves)
Dec every 4 rounds: 10-10-10-11-12-14 times and then every other round: 12-15-16-16-16-14 times.
Dec as follows after 1st and 3rd marker and before 2nd and 4th marker (= dec on front and back piece): Dec every 4 round: 8-8-6-4-3-0 times, every other round 16-19-24-30-34-39 times, then every round: 0-0-0-0-0-4 times.
After all dec for raglan 136-144-148-156-160-172 sts remain on round. Work 1 round while at the same time dec 36-36-36-40-40-44 sts evenly = 100-108-112-116-120-128 sts. Switch to navy blue and work 2 ridges in GARTER ST over all sts - see explanation above. Cast off with K.
ASSEMBLY:
Sew the openings under the sleeves tog.
Diagram

What can you do with our patterns? You can share DROPS patterns online, using the pattern original picture, materials, name and number. But you are NOT ALLOWED to reproduce the complete pattern digitally in any way. Yarn stores are welcome to use the DROPS pattern database to promote the sale of our assortment. You can print out our patterns, make as many copies as you’d like. The only thing we ask is that you don't make any changes / additions to the original printed document. And that the patterns according to the DROPS philosophy are given out to the consumers for free. Editorials that wish to publish our patterns in printed books or magazines can contact us for more information. The sale of garments based on DROPS patterns is permitted as long as they are sold as single items or per order. Further commercial use of the patterns is not permitted. It has to be clearly stated that the garment is made based on a design from DROPS DESIGN. The use of clothing labels of which DROPS DESIGN forms part is conditioned by the inclusion of the following text: “A DROPS DESIGN made by …..”. The use of DROPS photos for marketing purposes/sales is only permitted in connection with the use/sale of DROPS products. The photos may not be cut or edited and the logo should be clearly visible.
We reserve the right to withdraw the permission for use of our patterns at any time, notwithstanding the reason.
Each of our patterns has specific tutorial videos to help you.
These step-by-step tutorials might also help you:
Why is the knitting/crochet tension so important?
Knitting tension is what determines the final measurements of your work, and is usually measured per 10 x 10 cm. It is provided like so: number of stitches in width x number of rows in height - eg: 19 stitches x 26 rows = 10 x 10 cm.
The knitting tension is very individual; some people knit/crochet loosely while others work tightly. You adjust the knitting tension with the needle size, which is why the suggested needle size is only meant as a guide! You need to adjust this (up or down) to ensure that YOUR knitting tension matches the knitting tension provided in the pattern. If you work with a different knitting tension than provided you will have a different yarn consumption, and your work will have different measurements than what the pattern suggests.
The knitting tension also determines which yarns can replace each other. As long as you achieve the same knitting tension you can replace one yarn with another.
See DROPS lesson: How to measure your tension/gauge
See DROPS video: How to make a gauge tension swatch
How do I know how many balls of yarn I need?
The required amount of yarn is provided in grams, eg: 450 g. To calculate how many balls you’ll need you first need to know how many grams are in 1 ball (25g, 50g or 100g). This information is available if you click on the individual yarn quality on our pages. Divide the amount required with the amount of each ball. For example, if each ball is 50g (the most common amount), the calculation will be as follows: 450 / 50 = 9 balls.
Can I use a different yarn than what the pattern suggests?
The important thing when changing from one yarn to another is that the knitting/crochet tension remains the same. This is so that the measurements of the finished piece will be the same as on the sketch provided. It is easier to achieve the same knitting tension using yarns from the same yarn group. It is also possible to work with multiple strands of a thinner yarn to achieve the knitting tension of a thicker one. Please try our yarn converter. We recommend you to always work a test swatch.
Please NOTE: when changing yarn the garment might have a different look and feel to the garment in the photo, due to individual properties and qualities of each yarn.
See DROPS lesson: Can I use a different yarn than the one mentioned in the pattern?
What are the yarn groups?
All our yarns are categorised into yarn groups (from A to F) according to thickness and knitting tension – group A contains the thinnest yarns and group F the thickest. This makes it easier for you to find alternative yarns to our patterns, should you wish to switch yarn. All yarns within the same group have a similar knitting tension and can easily replace each other. However, different yarn qualities have different structures and properties which will give the finished work a unique look and feel.
How do I use the yarn calculator?
At the top of all our patterns you’ll find a link to our yarn calculator, which is a helpful tool should you wish to use a different yarn than suggested. By filling in the yarn quality you wish to replace, the amount (in your size) and number of strands, the calculator will present good alternative yarns with the same knitting tension. Additionally it will tell you how much you’ll require in the new qualities and whether you’ll need to work with multiple strands. Most skeins are 50g (some are 25g or 100g).
If the pattern is worked with multiple colours, every colour will have to be calculated separately. Similarly, if the pattern is worked with several strands of different yarns (for example 1 strand Alpaca and 1 strand Kid-Silk) you will have to find alternatives for each, individually.
Why do you show discontinued yarns in the patterns?
Since different yarns have different qualities and textures we have chosen to keep the original yarn in our patterns. However, you can easily find options among our available qualities by using our yarn calculator, or simply pick a yarn from the same yarn group.
It is possible that some retailers still have discontinued yarns in stock, or that someone has a few skeins at home that they would like to find patterns for.
The yarn calculator will provide both alternative yarn as well as required amount in the new quality.
What size should I knit?
If you think it's hard to decide what size to make, it can be a good idea to measure a garment you own already and like the size of. Then you can pick the size by comparing those measures with the ones available in the pattern's size chart.
You'll find the size chart at the bottom of the pattern.
See DROPS lesson: How to read size chart
Why do I get the wrong knitting tension with the suggested needle size?
The needle size provided in the pattern serves only as a guide, the important thing is to follow the knitting tension. And since knitting tension is very individual, you will have to adjust the needle size to ensure that YOUR tension is the same as in the pattern – maybe you’ll have to adjust 1, or even 2 needle sizes, up or down to achieve the correct tension. For this, we recommend that you work test swatches.
Should you work with a different knitting tension than the one provided, the measurements of the finished garment might deviate from the measurement sketch.
See DROPS lesson: How to measure your tension/gauge
See DROPS video: How to make a tension/gauge swatch
Why is the pattern worked top-down?
Working a garment top-down provides more flexibility and room for personal adjustment. For example it is easier to try the garment on while working, as well as making adjustments to length of yoke and shoulder caps.
The instructions are carefully explaining every step, in the correct order. Diagrams are adjusted to the knitting direction and are worked as usual.
How do I work according to a knitting diagram?
The diagram depicts all rows/rounds, and every stitch seen from the right side. It is read from bottom to top, from right to left. 1 square = 1 stitch.
When working back and forth, every other row is worked from the right side and every other row is worked from the wrong side. When working from the wrong side, the diagram will have to be worked reversed: from left to right, knit stitches are purled, purl stitches are knit etc.
When working in the round every round is worked from the right side and the diagram are worked from right to left on all rounds.
See DROPS lesson: How to read knitting diagrams
How do I work according to a crochet diagram?
The diagram depicts all rows/rounds, and every stitch seen from the right side. It is worked from bottom to top, from right to left.
When working back and forth every other row is worked from the right side: from right to left and every other row is worked from the wrong side: from left to right.
When working in the round, every row in the diagram are worked from the right side, from right to left.
When working a circular diagram you start in the middle and work your way outwards, counter clockwise, row by row.
The rows usually start with a given number of chain stitches (equivalent to the height of the following stitch), this will either be depicted in the diagram or explained in the pattern.
See DROPS lesson: How to read crochet diagrams
How do I work several diagrams simultaneously on the same row/round?
Instructions for working several diagrams after each other on the same row/round, will often be written like so: “work A.1, A.2, A.3 a total of 0-0-2-3-4 times". This means you work A.1 once, then A.2 is worked once, and A.3 is repeated (in width) the number of times provided for your size – in this case like so: S = 0 times, M = 0 times, L=2 times, XL= 3 times and XXL = 4 times.
The diagrams are worked as usual: begin with the first row in A.1, then work the first row in A.2 etc.
See DROPS lesson: How to read knitting diagrams
See DROPS lesson: How to read crochet diagrams
Why are the sleeves shorter in larger sizes?
The total width of the garment (from wrist-to-wrist) will be larger in the larger sizes, despite the actual sleeves being shorter. The larger sizes have longer sleeve caps and wider shoulders, so there will be a good fit in all sizes.
Where on the garment is the length measured?
The measurement sketch/schematic drawing provides information regarding the full length of the garment. If it’s a jumper or a jacket the length is measured from the highest point on the shoulder closest to the neckline, and straight down to the bottom of the garment. It is NOT measured from the tip of shoulder. Similarly, the length of yoke is measured from the highest point on the shoulder and down to where yoke is split into body and sleeves.
On a jacket measures are never taken along bands, unless specifically stated. Always measure inside band stitches when measuring the length.
See DROPS lesson: How to read a schematic drawing
What is a repeat?
Diagrams are often repeated on the round or in height. 1 repeat is the diagram the way it appears in the pattern. If it says to work 5 repeats of A.1 in the round, then you work A.1 a total of 5 times after/next to each other in the round. If it says to work 2 repeats of A.1 vertically/in height you work the entire diagram once, then begin again at the start and work the entire diagram one more time.
Why does the piece start with more chain stitches than it’s worked with?
Chain stitches are slightly narrower than other stitches and to avoid working the cast-on edge too tight, we simply chain more stitches to begin with. The stitch count will be adjusted on the following row to fit the pattern and measurement sketch.
Why increase before the rib edge when the piece is worked top-down?
The rib edge is more elastic and will contract slightly compared to, for example, stocking stitch. By increasing before the rib edge, you avoid a visible difference in width between the rib edge and the rest of the body.
Why increase in the cast-off edge?
It’s very easy to cast off too tightly, and by making yarn overs while casting off (and simultaneously casting these off) you avoid a too tight cast off edge.
See DROPS video: How to bind off with yarn overs (yo)
How do I increase/decrease on every 3rd and 4th row/round alternately?
To achieve an even increase (or decrease) you can increase on, for example: every 3rd and 4th row alternately, like so: work 2 rows and increase on the 3rd row, work 3 rows and increase on the 4th. Repeat this until the increase is complete.
See DROPS lesson: Increase or decrease 1 st on every 3rd and 4th row alternately
How can I work a jacket in the round instead of back and forth?
Should you prefer to work in the round instead of back and forth, you may of course adjust the pattern. You’ll need to add steeks mid-front (usually 5 stitches), and follow the instructions. When you would normally turn and work from the wrong side, simply work across the steek and continue in the round. At the end you’ll cut the piece open, pick up stitches to work bands, and cover the cut edges.
See DROPS video: How to knit steeks and cut open
Can I work a jumper back and forth instead of in the round?
Should you prefer to work back and forth instead of in the round, you may of course adjust the pattern so you work the pieces separately and then assemble them at the end. Divide the stitches for the body in 2, add 1 edge stitch in each side (for sewing) and work the front and back pieces separately.
See DROPS lesson: Can I adapt a pattern for circular needles into straight needles?
Why is the pattern slightly different than what I see in the photo?
Pattern repeats can vary slightly in the different sizes, in order to get the correct proportions. If you’re not working the exact same size as the garment in the photo, yours might deviate slightly. This has been carefully developed and adjusted so that the complete impression of the garment is the same in all sizes.
Make sure to follow instructions and diagrams for your size!
How do I make a women’s size garment into a men’s size one?
If you have found a pattern you like which is available in women’s size it’s not very difficult to convert it to men’s size. The biggest difference will be the length of sleeves and body. Start working on the women size that you think would fit across the chest. The additional length will be worked right before you cast off for the armhole/sleeve cap. If the pattern is worked top-down you can add the length right after the armhole or before the first decrease on sleeve.
Regarding additional yarn amount, this will depend on how much length you add, but it is better with a skein too many than too few.
How do I prevent a hairy garment from shedding?
All yarns will have excess fibres (from production) that might come off as lint or shedding. Brushed yarns (ie hairier yarns) have more of these loose, excess fibres, causing more shedding.
Shedding also depends on what is worn under or over the garment, and whether this pulls at the yarn fibres. It’s therefore not possible to guarantee that there will be no shedding
Below are some tips on how to get the best result when working with hairier yarns:
1. When the garment is finished (before you wash it) shake it vigorously so the looser hairs come off. NOTE: do NOT use a lint roller, brush or any method that pulls at the yarn.
2. Place the garment in a plastic bag and put it in your freezer - the temperature will cause the fibres to become less attached to each other, and excess fibres will come off easier.
3. Leave in the freezer for a few hours before taking it out and shaking it again.
4. Wash the garment according to the instructions on the yarn label.
Why does my garment pill?
Pilling is a natural process that happens to even the most exclusive of fibers. It's a natural sign of wear and tear that is hard to avoid, and that is most visible in high friction areas of your garment like a sweater's arms and cuffs.
You can make your garment look as new by removing the pilling, using a fabric comb or a pill/lint remover.
In the meantime, you can read the questions and answers that others have left to this pattern or join the DROPS Workshop on Facebook to get help from fellow knitters/crocheters!
You might also like...
Keystone |
|
 |
 |
Knitted DROPS men’s jumper with raglan in Karisma. Size: S - XXXL.
DROPS 174-3 |
|
|
RAGLAN: From RS: Beg 3 sts before marker: K 2 tog, K 2 (marker is between these 2 sts), slip 1 st as if to K, K 1, psso. KNITTING TIP: If knitting tension is incorrect in height and the knitting is too tight, the raglan dec will be too short and the armholes too small. This can be adjusted by working 1 extra round without dec evenly spaced between dec. GARTER ST (worked in the round): 1 ridge = 2 rounds. * K 1 round and P 1 round *, repeat from *-*. -------------------------------------------------------- BODY: Worked in the round on circular needle from bottom up. Cast on 220-240-264-288-312-344 sts on circular needle size 3.5 mm with medium grey. Work rib = K 2/P 2 for 5 cm. Switch to circular needle size 4 mm and K next round – AT THE SAME TIME dec 36-40-44-48-52-56 sts evenly = 184-200-220-240-260-288 sts. Continue in stocking st. REMEMBER THE KNITTING TENSION Insert 1 marker in each side = 92-100-110-120-130-144 sts between markers. When piece measures 6 cm, inc 1 st on each side of both markers (= 4 inc). Inc every 10 cm a total of 4 times = 200-216-236-256-276-304 sts. When piece measures 40-40-41-41-41-41 cm, cast off 4-4-5-5-6-6 sts on each side of every marker (= 8-8-10-10-12-12 sts in each side) = 92-100-108-118-126-140 sts on front and back piece. Put piece aside and knit the sleeves. SLEEVE: Worked in the round on double pointed needles. Cast on 60-60-64-68-72-72 sts on double pointed needles size 3.5 mm with medium grey. Work rib = K 2/P 2 for 4 cm. Switch to double pointed needles size 4 mm and K next round – AT THE SAME TIME dec 10-8-10-12-14-12 sts evenly = 50-52-54-56-58-60 sts. Insert 1 marker at beg of round = mid under sleeve. When piece measures 7-8-8-10-10-10 cm, inc 1 st on each side of marker. Inc every 3-2-2-1½-1½-1½ cm 13-16-17-18-19-20 times in total = 76-84-88-92-96-100 sts. When piece measures 46-45-44-43-42-42 cm (shorter measurements in the larger sizes because of wider shoulders), cast off 4-4-5-5-6-6 sts on each side of marker (= 8-8-10-10-12-12 sts cast off mid under sleeve) = 68-76-78-82-84-88 sts. Put piece aside and knit another sleeve. YOKE: READ ALL OF THE FOLLOWING SECTION BEFORE CONTINUING: Slip sleeves on to same circular needle as body where armholes were cast off = 320-352-372-400-420-456 sts. Continue in stocking st, now beg dec for RAGLAN – see explanation above and READ KNITTING TIP. Insert 1 marker in all transitions between sleeves and body (= 4 markers). 1st marker = in transition between left sleeve and front piece. Dec differently on body and on sleeves. Dec as follows after 2nd and 4th marker and before 3rd and 1st marker (= dec on sleeves) Dec every 4 rounds: 10-10-10-11-12-14 times and then every other round: 12-15-16-16-16-14 times. Dec as follows after 1st and 3rd marker and before 2nd and 4th marker (= dec on front and back piece): Dec every 4 round: 8-8-6-4-3-0 times, every other round 16-19-24-30-34-39 times, then every round: 0-0-0-0-0-4 times. After all dec for raglan 136-144-148-156-160-172 sts remain on round. Work 1 round while at the same time dec 36-36-36-40-40-44 sts evenly = 100-108-112-116-120-128 sts. Switch to navy blue and work 2 ridges in GARTER ST over all sts - see explanation above. Cast off with K. ASSEMBLY: Sew the openings under the sleeves tog. |
|

|
|
|
Have you made this or any other of our designs? Tag your pictures in social media with #dropsdesign so we can see them! Do you need help with this pattern?You'll find tutorial videos, a Comments/Questions area and more by visiting the pattern on garnstudio.com. © 1982-2024 DROPS Design A/S. We reserve all rights. This document, including all its sub-sections, has copyrights. Read more about what you can do with our patterns at the bottom of each pattern on our site. |
|
With over 40 years in knitting and crochet design, DROPS Design offers one of the most extensive collections of free patterns on the internet - translated to 17 languages. As of today we count 304 catalogues and 11422 patterns - 11422 of which are translated into English (UK/cm).
We work hard to bring you the best knitting and crochet have to offer, inspiration and advice as well as great quality yarns at incredible prices! Would you like to use our patterns for other than personal use? You can read what you are allowed to do in the Copyright text at the bottom of all our patterns. Happy crafting!











Comments / Questions (110)
Hvordan skal jeg forstås at der tages forskelligt ind på for/ bag stykke og ærmer.? Kan se, at det er hver anden omg for; for/ bag stk og hver 4 omg på ærmer.. MEN hvordan strikkes raglanindtagningerne på ærmerne ? Hvis jeg følger anvisningen for raglanindtag kan det ikke undgåes at der samtidig også bliver indtag på for/ bag stk. Og det samme gør sig gældende på for/bag stk indtagningerne.
23.11.2020 - 10:31DROPS Design answered:
Hei Eva. Når det felles samtidig, altså både til for/bakstykket og ermene felles det 8 masker pr omgang. Når det felles kun til for/bakstykket felles det 4 masker pr omgang. Slik felles det: Start 3 masker før merketråden: 2 rett sammen, 2 rett (merket sitter midt mellom disse 2 maskene), ta 1 maske løs av pinnen, 1 m rett, løft den løse masken over. mvh DROPS design
24.11.2020 - 14:28Che significa diminuire prima o dopo il segnapunti? Nella spiegazione iniziale dice che il segnapunti è in mezzo alla diminuzione
10.11.2020 - 13:37DROPS Design answered:
Buonasera Michele, deve seguire le istruzioni indicate diminuendo prima o dopo i segnapunti indicati. Per la lavorazione delle diminuzioni fare riferimento al suggerimento all'inizio del modello, seguendo le istruzioni per le diminuzioni prima o dopo il segnapunti. Buon lavoro!
10.11.2020 - 22:27Hei! Aloitetanko hihat, eli etu- ja takakpl jää odottamaan hihoja tosiaan jo 40 cm jälkeen. Eikö pusero jää melko lyhyeksi? Eli onko kainalo-alalaita mitta vain 40cm? Neuvosta kiittäen Ulla
05.11.2020 - 15:36DROPS Design answered:
Hei, halutessasi voi jatkaa neulomista, kunnes työ on halutun pituinen. Ohjeen puseron koko pituus on koossa S 66 cm.
11.11.2020 - 18:07Bonjour, Où dois-je placer mes marqueurs du dos et devant ? Merci
05.11.2020 - 15:27DROPS Design answered:
Bonjour Florence, au début du pull, quand on tricote le DOS& DEVANT, on place un marqueur au début du tour et un autre marqueur après 92-100-110-120-130-144 mailles = autrement dit après la moitié des mailles. Bon tricot!
05.11.2020 - 17:22Guten Tag, Ich verstehe nicht ganz, wie die Abnahmen in Reihen funktionieren, in denen sowohl an den Ärmeln wie auch am Körper abgenommen wird: Wie kann ich gleichzeitig vor und nach einem Markierer abnehmen, wenn der Markierer doch in der Mitte sitzen soll? Die Beschreibung beschreibt leider nur, dass die Abnahme 3 M VOR dem Markierer beginnen soll. Vielen Dank für Ihre Hilfe!
04.11.2020 - 07:50DROPS Design answered:
Liebe Christina, die Abnahmen werden unterschiedlich beim Rumpfteil und bei den Ärmeln, aber immer entweder/oder vor der Markierung und nach der Markierung: am Ende vom Teil beginnen Sie 3 M vor der Markierung und stricken Sie 2 M re zusammen, 1 Masche re, Markierung, 1 Maschen re, (Anfang nächster Teil) 1 M abheben, 1 M re, die abgehobene M überziehen. Es wird aber je nach der Grösse entweder 4 M (Rumpfteil oder Ärmel) oder 8 Maschen (Rumpfteil + Ärmel) abgenommen. Viel Spaß beim stricken!
04.11.2020 - 09:46Bonsoir, je ne comprends pas comment se fait le raglan. Si je tricote ensemble deux mailles avant le marqueur 1 et 3 et je glisse une maille endroit avant de la tricoter ensemble pour le marqueur 2 et quatre cela fait 4 diminutions par tour. Or je suis censée avoir une diminution de 8 mailles. Il me manque donc des diminutions mais je ne vois pas comment ?
19.10.2020 - 20:20DROPS Design answered:
Bonjour Mme Vermot, les diminutions se font à un rythme différent sur le dos/le devant et sur les manches, en fonction de la taille, vous diminuerez ainsi 8 mailles par tour (= dos/devant + manches tous les 4 tours au début), et/ou 4 mailles seulement (= par ex sur les manches seulement quand on diminue tous les 2 tours alors que les diminutions dos/devant tous les 4 tours ne sont pas terminées). Bon tricot!
20.10.2020 - 10:21Jag har gjort tröjan med raglanminskning både före och efter varje markering, men förstår nu att jag nog gjort fel då det blir ju rak intagning och inte sned mot halsen. Ska jag minska endast före den ena markeringen och efter den andra markeringen på hela raglanintagningen? När jag ser på bilden ser det i sådant fall inte ut att bli lika bred och snygg intagning. Tacksam för hjälp. Mvh Anne-Marie
27.09.2020 - 10:07DROPS Design answered:
Hei Anne-Mari. Ved raglan avfellingen skal du starte 3 masker før merketråden. Strikk da slik: 2 rett masker sammen, 2 rett masker (merket sitter midt mellom disse 2 maskene), ta 1 maske løst av pinnen, strikk 1 maske rett, løft den løse masken over den masken du nettop strikket. Når du feller slik vil avfellingen før raglan og etter raglan vende mot merketråden. Og du vil alltid ha samme antall masker ved raglan linjene. God Fornøyelse!
28.09.2020 - 17:03Är osäker på raglanintagningarna, ska jag mellan intagningarna vart 4:e varv bara sticka slätstickning? Har inte gjort raglan tidigare och tycker det skulle se konstigt ut med slätstickning mellan intagningarna. Tacksam för hjälp och förklaring.
10.09.2020 - 09:23DROPS Design answered:
Hej Anne-Marie. Ja det stämmer, du stickar bara slätstickning som tidigare mellan intagningarna. Mvh DROPS Design
10.09.2020 - 10:22Die Raglanabnahme Ärmel und Körper sind unterschiedlich muss ich eine doppelt Abnahme machen also 8 Maschen, dann sitzt mein Marker nicht mehr in der Mitte.
06.09.2020 - 13:56DROPS Design answered:
Liebe Renate, für die Raglanabnahmen werden Sie je nach der Grösse entweder 4 Maschen (nur bei den Ärmeln/Rumpfteil) oder 8 Maschen (= Ärmel + Rumpfteil) pro Abnahmerunde abnehmen. Viel Spaß beim stricken!
07.09.2020 - 09:13Hola me encanto este patrón pero no puedo hacer el cálculo para los puntos no me resulta , voy a usar un hilado de la marca Yarn Art pacific chunky 20%lana y 80%acrilico grosor 2 fino agujas 4.5 el tamaño que tengo que tejer es para XL , el cuello mide 60cm el contorno 63cm y el largo total es de 65cm , les agradecería mucho si me pudieran ayudar . Muchas Gracias
30.08.2020 - 20:43DROPS Design answered:
Hola Aniuska, lo sentimos pero no hacemos patrones personalizados. Además, al no conocer la lana que vas a usar no podemos darte indicaciones. Puedes hacer la muestra indicada en el patrón (ver el cuadrado de 10x10 cm cuántas filas y puntos requiere) y después hacer a partir de ello los cálculos necesarios.
31.08.2020 - 23:21