Popular categories
Looking for a yarn?
The yarn cost is calculated from the pattern’s smallest size and the yarn’s cheapest product type. Looking for an even better price? You might find it on the DROPS Deals!
Open Air
Knitted DROPS shawl with stripes, worked top down in ”Air”.
DROPS design: Pattern no ai-037
Yarn group C or A + A
----------------------------------------------------------
Measurements: approx. 85 cm / 33½'' measured mid back, and approx. 180 cm / 71'' along the edge at the top.
Materials:
DROPS AIR from Garnstudio
150 g color no 03, pearl gray
100 g color no 04, medium gray
50 g color no 01, off white
DROPS CIRCULAR NEEDLE (80 cm / 32'') size 7 mm / US 10.75 - or size needed to get 14 sts x 17 rows in stockinette st = 4'' x 4'' (10 x 10 cm).
-------------------------------------------------------
Alternative Yarn – See how to change yarns here
Yarn Groups A to F – Use the same pattern and change the yarn here
Yarn usage using an alternative yarn – Use our yarn converter here
-------------------------------------------------------
The yarn cost is calculated from the pattern’s smallest size and the yarn’s cheapest product type. Looking for an even better price? You might find it on the DROPS Deals!
- English (US/in)
- Česky
- Dansk
- Deutsch
- Eesti keel
- English (UK/cm)
- Español
- Français
- Íslenska
- Italiano
- Magyar
- Nederlands
- Norsk
- Polski
- Português
- Suomi
- Svenska
- English (UK/cm), Bulgaria
- English (UK/cm), Croatia
- English (UK/cm), Greece
- English (UK/cm), Latvia
- English (UK/cm), Lithuania
- English (UK/cm), Romania
- English (UK/cm), Slovenia
- Česky, Slovakia
Pattern instructions
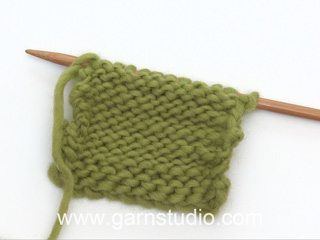
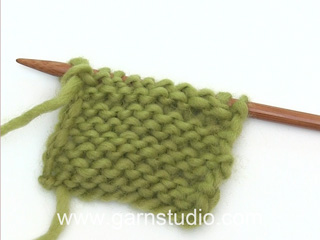
K all rows. 1 ridge = K2 rows.
----------------------------------------------------------
SHAWL:
Worked back and forth on circular needle to make room for all the sts. Cast on 4 sts with pearl gray on circular needle size 7 mm / US 10.75.
ROW 1 (= RS): Work 1 edge st in GARTER ST - see explanation above, 1 YO, K 2, 1 YO and 1 edge st in garter st = 6 sts.
ROW 2 (= WS): K 1 edge st, P all sts until 1 st remains and work 1 edge st in garter st.
ROW 3: Work 1 edge st in garter st, 1 YO, K 1, 1 YO, K 2 and insert a marker in the middle of these sts, 1 YO, K 1, 1 YO and 1 edge st in garter st = 10 sts and 4 sts inc.
ROW 4: Work 1 edge st in garter st, P all sts until 1 st remains and work 1 edge st in garter st.
ROW 5: Work 1 edge st in garter st, 1 YO, work until 1 st before marker, 1 YO and K 2 (= marker is in the middle of these sts), 1 YO, K until 1 st remains, 1 YO and 1 edge st in garter st = 14 sts and 4 sts inc.
ROW 6: Work 1 edge st in garter st, P all sts until 1 st remains and work 1 edge st in garter st.
ROW 7: Work 1 edge st in garter st, 1 YO, K 1, 1 YO, work until 2 sts before marker, 1 YO, K 1, 1 YO and K 2 (= marker is in the middle of these sts), 1 YO, K 1, 1 YO and K until 2 sts remain, 1 YO, K 1, 1 YO and 1 edge st in garter st = 22 sts and 8 sts inc.
ROW 8: Work 1 edge st in garter st, P all sts until 1 st remains and work 1 edge st in garter st.
ROW 9: As 7th round = 30 sts and 8 sts inc. REMEMBER THE KNITTING GAUGE
ROW 10: Work 1 edge st in garter st, P all sts until 1 st remains and work 1 edge st in garter st.
Repeat rows 5-10 until piece measures approx. 36 cm / 14 1/4'' in knitting direction = last row is from WS. Switch to off white, work and inc as before for 4 rows. Switch to medium gray, work and inc until piece measures approx. 50 cm / 19 3/4'' in knitting direction = last row is from RS.
EDGE AND BIND OFF:
To avoid the edge from rolling, work and bind off as follows:
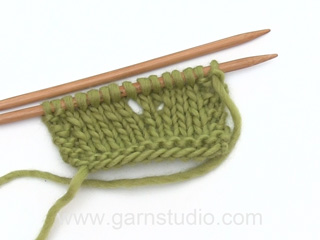
ROW 1 (= WS): K 1, * 1 YO, slip 1 st as if to K, K 1 *, repeat from *-* the rest of row and finish with K 1.
ROW 2 (= RS): K 2 and * pass the first over the last st worked, work YO and slipped st K tog and pass the second st over the last st worked, K 1 *, repeat from *-* the rest of row and bind off last st.
This pattern has been corrected. Click here to see the correction/s.
Correction:... ROW 10: Work 1 edge st in garter st, P all sts until 1 st remains and work 1 edge st in garter st. Repeat rows 5-10 until piece measures approx. 36 cm in knitting direction = last row is from WS...
What can you do with our patterns? You can share DROPS patterns online, using the pattern original picture, materials, name and number. But you are NOT ALLOWED to reproduce the complete pattern digitally in any way. Yarn stores are welcome to use the DROPS pattern database to promote the sale of our assortment. You can print out our patterns, make as many copies as you’d like. The only thing we ask is that you don't make any changes / additions to the original printed document. And that the patterns according to the DROPS philosophy are given out to the consumers for free. Editorials that wish to publish our patterns in printed books or magazines can contact us for more information. The sale of garments based on DROPS patterns is permitted as long as they are sold as single items or per order. Further commercial use of the patterns is not permitted. It has to be clearly stated that the garment is made based on a design from DROPS DESIGN. The use of clothing labels of which DROPS DESIGN forms part is conditioned by the inclusion of the following text: “A DROPS DESIGN made by …..”. The use of DROPS photos for marketing purposes/sales is only permitted in connection with the use/sale of DROPS products. The photos may not be cut or edited and the logo should be clearly visible.
We reserve the right to withdraw the permission for use of our patterns at any time, notwithstanding the reason.
Each of our patterns has specific tutorial videos to help you.
These step-by-step tutorials might also help you:
Why is the knitting/crochet tension so important?
Knitting tension is what determines the final measurements of your work, and is usually measured per 10 x 10 cm. It is provided like so: number of stitches in width x number of rows in height - eg: 19 stitches x 26 rows = 10 x 10 cm.
The knitting tension is very individual; some people knit/crochet loosely while others work tightly. You adjust the knitting tension with the needle size, which is why the suggested needle size only serve as a guide! You need to adjust this (up or down) to ensure that YOUR knitting tension matches the knitting tension provided in the pattern. If you work with a different knitting tension than provided you will have a different yarn consumption, and your work will have different measurements than what the pattern suggests.
The knitting tension also determines which yarns can replace each other. As long as you achieve the same knitting tension you can replace one yarn with another.
See DROPS lesson: How to measure your tension/gauge
See DROPS video: How to make a gauge tension swatch
How do I know how many balls of yarn I need?
The required amount of yarn is provided in grams, eg: 450 g. To calculate how many balls you’ll need you first need to know how many grams are in 1 ball (25g, 50g or 100g). This information is available if you click on the individual yarn quality on our pages. Divide the amount required with the amount of each ball. For example, if each ball is 50g (the most common amount), the calculation will be as follows: 450 / 50 = 9 balls.
Can I use a different yarn than what the pattern suggests?
The important thing when changing from one yarn to another is that the knitting/crochet tension remains the same. This is so that the measurements of the finished piece will be the same as on the sketch provided. It is easier to achieve the same knitting tension using yarns from the same yarn group. It is also possible to work with multiple strands of a thinner yarn to achieve the knitting tension of a thicker one. Please try our yarn converter. We recommend you to always work a test swatch.
Please NOTE: when changing yarn the garment might have a different look and feel to the garment in the photo, due to individual properties and qualities of each yarn.
See DROPS lesson: Can I use a different yarn than the one mentioned in the pattern?
What are the yarn groups?
All our yarns are categorised into yarn groups (from A to F) according to thickness and knitting tension – group A contains the thinnest yarns and group F the thickest. This makes it easier for you to find alternative yarns to our patterns, should you wish to switch yarn. All yarns within the same group have a similar knitting tension and can easily replace each other. However, different yarn qualities have different structures and properties which will give the finished work a unique look and feel.
How do I use the yarn converter?
At the top of all our patterns you’ll find a link to our yarn converter, which is a helpful tool should you wish to use a different yarn than suggested. By filling in the yarn quality you wish to replace, the amount (in your size) and number of strands, the converter will present good alternative yarns with the same knitting tension. Additionally it will tell you how much you’ll require in the new qualities and whether you’ll need to work with multiple strands. Most skeins are 50g (some are 25g or 100g).
If the pattern is worked with multiple colours, every colour will have to be converted separately. Similarly, if the pattern is worked with several strands of different yarns (for example 1 strand Alpaca and 1 strand Kid-Silk) you will have to find alternatives for each, individually.
Why do you show discontinued yarns in the patterns?
Since different yarns have different qualities and textures we have chosen to keep the original yarn in our patterns. However, you can easily find options among our available qualities by using our yarn converter, or simply pick a yarn from the same yarn group.
It is possible that some retailers still have discontinued yarns in stock, or that someone has a few skeins at home that they would like to find patterns for.
The yarn converter will provide both alternative yarn as well as required amount in the new quality.
What size should I knit?
If you think it's hard to decide what size to make, it can be a good idea to measure a garment you own already and like the size of. Then you can pick the size by comparing those measures with the ones available in the pattern's size chart.
You'll find the size chart at the bottom of the pattern.
See DROPS lesson: How to read size chart
Why do I get the wrong knitting tension with the suggested needle size?
The needle size provided in the pattern serves only as a guide, the important thing is to follow the knitting tension. And since knitting tension is very individual, you will have to adjust the needle size to ensure that YOUR tension is the same as in the pattern – maybe you’ll have to adjust 1, or even 2 needle sizes, up or down to achieve the correct tension. For this, we recommend that you work test swatches.
Should you work with a different knitting tension than the one provided, the measurements of the finished garment might deviate from the measurement sketch.
See DROPS lesson: How to measure your tension/gauge
See DROPS video: How to make a gauge tension swatch
Why is the pattern worked top-down?
Working a garment top-down provides more flexibility and room for personal adjustment. For example it is easier to try the garment on while working, as well as making adjustments to length of yoke and shoulder caps.
The instructions are carefully explaining every step, in the correct order. Diagrams are adjusted to the knitting direction and are worked as usual.
How do I work according to a knitting diagram?
The diagram depicts all rows/rounds, and every stitch seen from the right side. It is read from bottom to top, from right to left. 1 square = 1 stitch.
When working back and forth, every other row is worked from the right side and every other row is worked from the wrong side. When working from the wrong side, the diagram will have to be worked reversed: from left to right, knit stitches are purled, purl stitches are knit etc.
When working in the round every round is worked from the right side and the diagram are worked from right to left on all rounds.
See DROPS lesson: How to read knitting diagrams
How do I work according to a crochet diagram?
The diagram depicts all rows/rounds, and every stitch seen from the right side. It is worked from bottom to top, from right to left.
When working back and forth every other row is worked from the right side: from right to left and every other row is worked from the wrong side: from left to right.
When working in the round, every row in the diagram are worked from the right side, from right to left.
When working a circular diagram you start in the middle and work your way outwards, counter clockwise, row by row.
The rows usually start with a given number of chain stitches (equivalent to the height of the following stitch), this will either be depicted in the diagram or explained in the pattern.
See DROPS lesson: How to read crochet diagrams
How do I work several diagrams simultaneously on the same row/round?
Instructions for working several diagrams after each other on the same row/round, will often be written like so: “work A.1, A.2, A.3 a total of 0-0-2-3-4 times". This means you work A.1 once, then A.2 is worked once, and A.3 is repeated (in width) the number of times provided for your size – in this case like so: S = 0 times, M = 0 times, L=2 times, XL= 3 times and XXL = 4 times.
The diagrams are worked as usual: begin with the first row in A.1, then work the first row in A.2 etc.
See DROPS lesson: How to read knitting diagrams
See DROPS lesson: How to read crochet diagrams
Why are the sleeves shorter in larger sizes?
The total width of the garment (from wrist-to-wrist) will be larger in the larger sizes, despite the actual sleeves being shorter. The larger sizes have longer sleeve caps and wider shoulders, so there will be a good fit in all sizes.
Where on the garment is the length measured?
The measurement sketch/schematic drawing provides information regarding the full length of the garment. If it’s a jumper or a jacket the length is measured from the highest point on the shoulder (usually closest to the neckline), and straight down to the bottom of the garment. It is NOT measured from the tip of shoulder. Similarly, the length of yoke is measured from the highest point on the shoulder and down to where yoke is split into body and sleeves.
See DROPS lesson: How to read a schematic drawing
What is a repeat?
Diagrams are often repeated on the round or in height. 1 repeat is the diagram the way it appears in the pattern. If it says to work 5 repeats of A.1 in the round, then you work A.1 a total of 5 times after/next to each other in the round. If it says to work 2 repeats of A.1 vertically/in height you work the entire diagram once, then begin again at the start and work the entire diagram one more time.
Why does the piece start with more chain stitches than it’s worked with?
Chain stitches are slightly narrower than other stitches and to avoid working the cast-on edge too tight, we simply chain more stitches to begin with. The stitch count will be adjusted on the following row to fit the pattern and measurement sketch.
Why increase before the rib edge when the piece is worked top-down?
The rib edge is more elastic and will contract slightly compared to, for example, stocking stitch. By increasing before the rib edge, you avoid a visible difference in width between the rib edge and the rest of the body.
Why increase in the cast-off edge?
It’s very easy to cast off too tightly, and by making yarn overs while casting off (and simultaneously casting these off) you avoid a too tight cast off edge.
See DROPS video: How to bind off with yarn overs (yo)
How do I increase/decrease on every 3rd and 4th row/round alternately?
To achieve an even increase (or decrease) you can increase on, for example: every 3rd and 4th row alternately, like so: work 2 rows and increase on the 3rd row, work 3 rows and increase on the 4th. Repeat this until the increase is complete.
See DROPS lesson: Increase or decrease 1 st on every 3rd and 4th row alternately
How can I work a jacket in the round instead of back and forth?
Should you prefer to work in the round instead of back and forth, you may of course adjust the pattern. You’ll need to add steeks mid-front (usually 5 stitches), and follow the instructions. When you would normally turn and work from the wrong side, simply work across the steek and continue in the round. At the end you’ll cut the piece open, pick up stitches to work bands, and cover the cut edges.
See DROPS video: How to knit steeks and cut open
Can I work a jumper back and forth instead of in the round?
Should you prefer to work back and forth instead of in the round, you may of course adjust the pattern so you work the pieces separately and then assemble them at the end. Divide the stitches for the body in 2, add 1 edge stitch in each side (for sewing) and work the front and back pieces separately.
See DROPS lesson: Can I adapt a pattern for circular needles into straight needles?
Why is the pattern slightly different than what I see in the photo?
Pattern repeats can vary slightly in the different sizes, in order to get the correct proportions. If you’re not working the exact same size as the garment in the photo, yours might deviate slightly. This has been carefully developed and adjusted so that the complete impression of the garment is the same in all sizes.
Make sure to follow instructions and diagrams for your size!
How do I make a women’s size garment into a men’s size one?
If you have found a pattern you like which is available in women’s size it’s not very difficult to convert it to men’s size. The biggest difference will be the length of sleeves and body. Start working on the women size that you think would fit across the chest. The additional length will be worked right before you cast off for the armhole/sleeve cap. If the pattern is worked top-down you can add the length right after the armhole or before the first decrease on sleeve.
Regarding additional yarn amount, this will depend on how much length you add, but it is better with a skein too many than too few.
How do I prevent a hairy garment from shedding?
All yarns will have excess fibres (from production) that might come off as lint or shedding. Brushed yarns (ie hairier yarns) have more of these loose, excess fibres, causing more shedding.
Shedding also depends on what is worn under or over the garment, and whether this pulls at the yarn fibres. It’s therefore not possible to guarantee that there will be no shedding
Below are some tips on how to get the best result when working with hairier yarns:
1. When the garment is finished (before you wash it) shake it vigorously so the looser hairs come off. NOTE: do NOT use a lint roller, brush or any method that pulls at the yarn.
2. Place the garment in a plastic bag and put it in your freezer - the temperature will cause the fibres to become less attached to each other, and excess fibres will come off easier.
3. Leave in the freezer for a few hours before taking it out and shaking it again.
4. Wash the garment according to the instructions on the yarn label.
Why does my garment pill?
Pilling is a natural process that happens to even the most exclusive of fibers. It's a natural sign of wear and tear that is hard to avoid, and that is most visible in high friction areas of your garment like a sweater's arms and cuffs.
You can make your garment look as new by removing the pilling, using a fabric comb or a pill/lint remover.
In the meantime, you can read the questions and answers that others have left to this pattern or join the DROPS Workshop on Facebook to get help from fellow knitters/crocheters!
You might also like...
Open Air |
|
|
|
|
Knitted DROPS shawl with stripes, worked top down in ”Air”.
DROPS 173-16 |
|
|
GARTER ST (back and forth): K all rows. 1 ridge = K2 rows. ---------------------------------------------------------- SHAWL: Worked back and forth on circular needle to make room for all the sts. Cast on 4 sts with pearl gray on circular needle size 7 mm / US 10.75. ROW 1 (= RS): Work 1 edge st in GARTER ST - see explanation above, 1 YO, K 2, 1 YO and 1 edge st in garter st = 6 sts. ROW 2 (= WS): K 1 edge st, P all sts until 1 st remains and work 1 edge st in garter st. ROW 3: Work 1 edge st in garter st, 1 YO, K 1, 1 YO, K 2 and insert a marker in the middle of these sts, 1 YO, K 1, 1 YO and 1 edge st in garter st = 10 sts and 4 sts inc. ROW 4: Work 1 edge st in garter st, P all sts until 1 st remains and work 1 edge st in garter st. ROW 5: Work 1 edge st in garter st, 1 YO, work until 1 st before marker, 1 YO and K 2 (= marker is in the middle of these sts), 1 YO, K until 1 st remains, 1 YO and 1 edge st in garter st = 14 sts and 4 sts inc. ROW 6: Work 1 edge st in garter st, P all sts until 1 st remains and work 1 edge st in garter st. ROW 7: Work 1 edge st in garter st, 1 YO, K 1, 1 YO, work until 2 sts before marker, 1 YO, K 1, 1 YO and K 2 (= marker is in the middle of these sts), 1 YO, K 1, 1 YO and K until 2 sts remain, 1 YO, K 1, 1 YO and 1 edge st in garter st = 22 sts and 8 sts inc. ROW 8: Work 1 edge st in garter st, P all sts until 1 st remains and work 1 edge st in garter st. ROW 9: As 7th round = 30 sts and 8 sts inc. REMEMBER THE KNITTING GAUGE ROW 10: Work 1 edge st in garter st, P all sts until 1 st remains and work 1 edge st in garter st. Repeat rows 5-10 until piece measures approx. 36 cm / 14 1/4'' in knitting direction = last row is from WS. Switch to off white, work and inc as before for 4 rows. Switch to medium gray, work and inc until piece measures approx. 50 cm / 19 3/4'' in knitting direction = last row is from RS. EDGE AND BIND OFF: To avoid the edge from rolling, work and bind off as follows: ROW 1 (= WS): K 1, * 1 YO, slip 1 st as if to K, K 1 *, repeat from *-* the rest of row and finish with K 1. ROW 2 (= RS): K 2 and * pass the first over the last st worked, work YO and slipped st K tog and pass the second st over the last st worked, K 1 *, repeat from *-* the rest of row and bind off last st. |
|
|
Have you made this or any other of our designs? Tag your pictures in social media with #dropsdesign so we can see them! Do you need help with this pattern?You'll find tutorial videos, a Comments/Questions area and more by visiting the pattern on garnstudio.com. © 1982-2024 DROPS Design A/S. We reserve all rights. This document, including all its sub-sections, has copyrights. Read more about what you can do with our patterns at the bottom of each pattern on our site. |
With over 40 years in knitting and crochet design, DROPS Design offers one of the most extensive collections of free patterns on the internet - translated to 17 languages. As of today we count 304 catalogs and 11422 patterns - 11417 of which are translated into English (US/in).
We work hard to bring you the best knitting and crochet have to offer, inspiration and advice as well as great quality yarns at incredible prices! Would you like to use our patterns for other than personal use? You can read what you are allowed to do in the Copyright text at the bottom of all our patterns. Happy crafting!








Comments / Questions (42)
Buongiorno, permetto che sono principiante. Ho appena iniziato questo progetto ma già al ferro 5 ho un problema. Il ferro ha 10 maglie e i gettati da fare sono 5 ( 3 prima del segnapunti e 2 dopo) , quindi alla fine della lavorazione del ferro le maglie sono 15. La spiegazione ne indica invece 14 . Inoltre nella spiegazione viene indicato il segnapunti 2 volte, ma in verità ne é stato messo uno solo.
14.10.2020 - 23:01DROPS Design answered:
Buonasera Clara, la spiegazione del ferro 5 è corretta: ci sono 14 maglie e 4 aumenti con gettati. Inoltre il segnapunti è posizionato al centro delle 2 maglie diritto. Buon lavoro!
15.10.2020 - 00:04Comment peut on avoir un total de 85 cm dans le sens du tricot (comme annoncé dans la rubrique dimensions en début d ouvrage) alors que il faut tricoter jusqu' à ce que l'ouvrage mesure 50 cm; merci pour votre réponse. Cordialement
16.08.2020 - 16:40DROPS Design answered:
Bonjour Mme Lebeau, les 85 cm sont mesurés au milieu dos, au niveau des augmentations de part et d'autre de la maille centrale, les 50 cm sont mesurés au milieu d'une section en jersey de part et d'autre de la maille centrale, à partir du rang de montage jusqu'aux mailles sur l'aiguille = dans le sens du tricot/le long des mailles. Bon tricot!
17.08.2020 - 08:45When I start knitting the pattern, am I starting from the neck or the tail of the shawl?
18.06.2019 - 19:53DROPS Design answered:
Dear Ms. Eileen Chaulk, this shawl you start from neck. Happy knitting!
19.06.2019 - 05:50Hej.\r\nJeg er kommet godt i gang med dette sjal, men bliver i tvivl om de 36 cm skal måles fra maskerne i midten og ud til sidste maske på pinden eller det er fra første til sidste maske på pinden. Jeg er nybegynder og er ved at lære at læse en opskrift. 😊
25.05.2019 - 16:07Jeg kan simpelthen ikke gennemskue, hvornår den mørke kant strikkes? Syntes ikke det fremgår, af opskriften, og kan ikke finde en video, på dette sjal... Vh Birthe
24.05.2019 - 10:42DROPS Design answered:
Hei Birthe. Den mørke kanten er det siste du strikker før avfellingen. Avfellingskanten går langs begge kortsidene, og midten av arbeidet ditt (der du øker på hver side av merket) er spissen på sjalet. Du strikker med perlegrå til arb måler ca 36 cm i strikkeretning = siste p er fra vrangen. Skift til natur, strikk og øk som før i 4 p. Skift til mellomgrå (dette er den mørke gråfargen), strikk og øk til arb måler ca 50 cm i strikkeretning = siste p er fra rettsiden. God fornøyelse
24.05.2019 - 11:17Hej. Jeg skal til at strikke model Drops sjal “Air” ai-037. Jeg bliver i tvivl om jeg skal have et garn nøgle af mellemgrå og natur på hver side af sjalet for at jeg ikke får for mange hæftninger i siden ? Eller er der en anden måde det skal gøres på Hilsen Ulla
22.05.2019 - 14:40DROPS Design answered:
Hei Ulla. Du bytter farge kun 2 ganger, og dette gjøres fra retten begge ganger. Du vil altså få 1 tråd perlegrå, 2 tråder natur (starten og slutten av denne stripen) og 1 tråd mellomgrå å feste i siden av sjalet. I tillegg til de 2 endetrådene fra opplegg og avfelling. Sjalet strikkes i 1 stykke der midten av arbeidet = spissen på sjalet. Avfellingskanten er de 2 kortsidene. God fornøyelse
23.05.2019 - 15:06Jeg er frustreret over, at de sidste 2 pinde skal laves som de skal for at sjalet ikke skal rulle for det er lige præcis det der sker når der er lukket af og det er jo ikke det nemmeste garn at pille op igen. Mon det vil hjælpe hvis jeg hækler en kant på eller har i andre forslag?
11.02.2019 - 11:18DROPS Design answered:
Hej Pia, du kan prøve at dampe kanten let. Sørg for at starte forsigtigt og læg et fugtigt klæde imellem. God fornøjelse!
12.02.2019 - 10:14Jeg er frustreret over, at de sidste 2 pinde skal laves som de skal for at sjalet ikke skal rulle for det er lige præcis det der sker når der er lukket af og det er jo ikke det nemmeste garn at pille op igen.
11.02.2019 - 08:50Dziękuję za odpowiedź. Jak w takim razie na chustę potrzeba 150 g koloru perłowo szarego, skoro na podaną długość wystarcza jeden? Dopytuję tak, bo zakupiłam tyle, ile podano w instrukcji, chustę robię na prezent, nie jestem bardzo doświadczoną dziewiarką :) Czy chustę należy zblokować po wypraniu?
07.02.2019 - 19:53DROPS Design answered:
Witaj Barbaro! Problem może być z próbką. Jeżeli zostaje ci włóczka, a ty masz jeszcze włóczkę, to może przerabiasz zbyt ścisło. Przerabiaj dalej pozostałą włóczką w taki sam sposób, aż szal będzie miał takie wymiary jak potrzebujesz, ale pamiętaj, że dopóki masz go na drutach, nie znasz do końca jego wymiarów. Ja w tym momencie przełożyłabym wszystkie oczka na długą nitkę, wyjmując drut i zobaczyła jakie są rzeczywiste wymiary szala. Powodzenia!
08.02.2019 - 08:18Witam. Mam pytanie odnośnie długości chusty. w opisie ogólnym ma wymiary ok 85/180 cm. A w opisie wykonania jest napisane, aby robić, aż długość osiągnie ok 50 cm. Dlaczego? Czy po zdjęciu z drutów chusta się naciągnie? Robię aktualnie tą chustę z zaproponowanej włóczki Drops Air i dochodząc do momentu pierwszej zmiany koloru, gdy robótka ma 36 cm, wydaje mi się ona bardzo mała i zużyłam zaledwie jeden motek. Bardzo proszę o wytłumaczenie. Pozdrawiam Basia
07.02.2019 - 11:50DROPS Design answered:
Witaj Basiu! Jak pierwszy raz wykonywałam taką chustę myślałam podobnie. W szalu dodajesz oczka na środku i na bokach, w czasie robótki otrzymuje ona kształt strzałki. Brzeg na górze (od strony szyi) wyprostuje się, a 50 cm rozszerzy się również do wymaganych ok. 85 cm. Powodzenia!
07.02.2019 - 17:49