DROPS Alpaca Bouclé
DROPS Alpaca Bouclé
80% Alpaca, 15% Wool, 5% Polyamide
from 19.00 RON /50g
Get the yarn to make this pattern from 209.00RON.

The yarn cost is calculated from the pattern’s smallest size and the yarn’s cheapest product type. Looking for an even better price? You might find it on the DROPS Deals!

DROPS SS24

Outlander

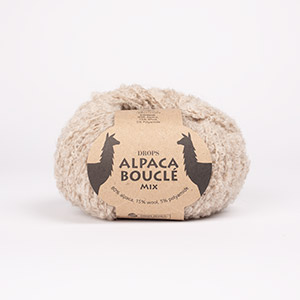
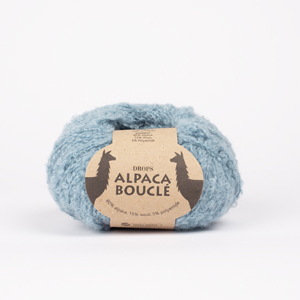
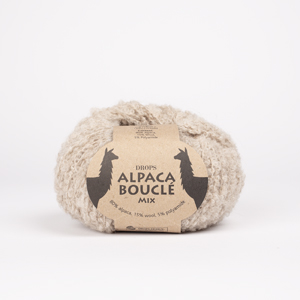
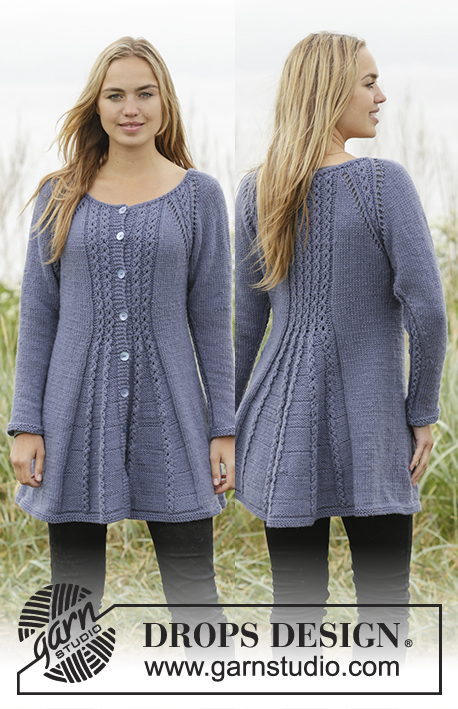
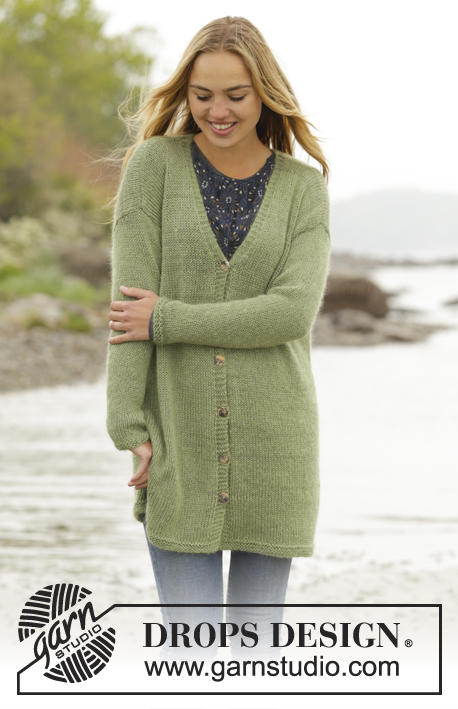
Knitted DROPS long jumper with vents in the sides in ”Alpaca Bouclé”. Size: S - XXXL.

DROPS 171-36
DROPS design: Pattern no ab-067
Yarn group C or A + A
----------------------------------------------------------
Size: S - M - L - XL - XXL - XXXL
Materials:
DROPS ALPACA BOUCLÉ from Garnstudio
550-600-650-700-800-850 g colour no 0517, grey

DROPS CIRCULAR NEEDLE (60 or 80 cm) SIZE 5 mm - or size needed to get 17 sts x 22 rows in stocking st = 10 x 10 cm.
DROPS CIRCULAR NEEDLE (40 + 60 or 80 cm) SIZE 4 mm - for edges in garter st.

-------------------------------------------------------

Alternative Yarn – See how to change yarns here
Yarn Groups A to F – Use the same pattern and change the yarn here
Yarn usage using an alternative yarn – Use our yarn converter here

-------------------------------------------------------

DROPS Alpaca Bouclé
DROPS Alpaca Bouclé
80% Alpaca, 15% Wool, 5% Polyamide
from 19.00 RON /50g
Get the yarn to make this pattern from 209.00RON.

The yarn cost is calculated from the pattern’s smallest size and the yarn’s cheapest product type. Looking for an even better price? You might find it on the DROPS Deals!

Pattern instructions

GARTER ST (back and forth):
K all rows. 1 ridge = 2 rows K.

MEASURING TIP:
Because of the size of the garment all measurements must be done by holding the piece up otherwise the garment will be too long when worn.

DECREASE TIP:
Dec inside 5 edge sts in garter st in the sides on front and back piece. All dec are done from RS.
Dec as follows after 5 edge sts: Slip 1 st as if to K, K 1, psso (= 1 st dec).
Dec as follows before 5 edge sts: Beg 2 sts before edge sts and K 2 tog (= 1 st dec).

INCREASE TIP:
Inc 1 st inside 3 edge sts in garter st by making 1 YO. On next row work YO twisted to avoid holes - work inc sts in stocking st.
----------------------------------------------------------

JUMPER:
Piece is worked back and forth on circular needle in parts and sewn tog when finished.

BACK PIECE:
Cast on 110-116-124-132-140-150 sts on circular needle size 5 mm with Alpaca Bouclé. Switch to circular needle size 4 mm and work 2 ridges in GARTER ST - see explanation above. Switch back to circular needle size 5 mm and work in stocking st with 5 edge sts in garter st in each side. REMEMBER THE KNITTING TENSION When piece measures 30 cm - READ MEASURING TIP, dec 1 st in each side - READ DECREASE TIP (= 2 sts dec). Repeat dec when piece measures 50 cm = 106-112-120-128-136-146 sts. When piece measures 65-67-69-71-73-74 cm, work 1 ridge back and forth over the outermost 7-8-10-12-13-15 sts in each side (work the other sts as before). Then cast off 4-5-7-9-10-12 sts at beg of next 2 rows for armholes = 98-102-106-110-116-122 sts. Continue in stocking st with 3 edge sts in garter st in each side towards armholes. When piece measures 82-85-88-91-94-96 cm - remember MEASURING TIP, slip sts on a stitch holder for diagonal shoulder at beg of every row from armhole (in each side) as follows: Slip 11-12-13-13-14-15 sts 2-2-3-2-2-3 times and then 13-13-0-14-15-0 sts 1 time on stitch holder. AT THE SAME TIME when piece measures 83-86-89-92-95-97 cm, cast off the middle 26-26-26-28-28-30 sts for neck and finish each shoulder separately. Continue to slip sts on stitch holder for diagonal shoulder. Cast in addition off 1 st on next row from neck. All sts have been cast off/slipped on stitch holder and piece measures approx. 85-88-91-94-97-99 cm (measured from shoulder and down). Cut the yarn and repeat on the other shoulder.
Slip sts from stitch holder on one shoulder back on circular needle size 4 mm. K 1 row from WS - NOTE. To avoid holes in transitions where sts were slipped on stitch holder pick up loop between 2 sts and K twisted tog with next st on needle. Then cast off with K from RS - make sure to avoid a tight cast-off edge. Repeat on the other shoulder.

FRONT PIECE:
Cast on and work as on back piece until piece measures 79-81-84-86-89-91 cm. Now slip the middle 14-14-14-16-16-18 sts on a stitch holder for neck and finish each shoulder
separately. Continue to cast off for neck at beg of every row from neck as follows: Cast off 2 sts 2 times and 1 st 3 times.
AT THE SAME TIME when piece measures 82-85-88-91-94-96 cm, slip sts on a stitch holder for diagonal shoulder the same way as on back piece. When all sts have been cast off/slipped on stitch holder, piece measures approx. 85-88-91-94-97-99 cm (measured from the top of shoulder). Slip sts on one shoulder back on circular needle size 4 mm and K from WS as on back piece before casting off with K from RS. Repeat on the other shoulder.

SLEEVE:
Worked back and forth on circular needle.
Cast on 34-36-38-40-40-42 sts on circular needle size 5 mm with Alpaca Bouclé. Switch to circular needle size 4 mm and work 2 ridges. Switch back to circular needle size 5 mm and work in stocking st with 3 edge sts in garter st in each side. When piece measures 7-7-7-7-7-9 cm, inc 1 st in each side - READ INCREASE TIP (= 2 sts inc). Inc like this every 4-4-3½-3-2½-2 cm 9-9-10-11-12-13 times in total = 52-54-58-62-64-68 sts. When piece measures 43-42-41-39-38-36 cm, insert 1 marker in each side. Then work in stocking st back and forth over all sts for 2-3-4-5-6-7 cm from markers (piece measures approx. 45-45-45-44-44-43 cm). Cast off 5 sts at beg of the next 2 rows in each side, then cast off the remaining sts (make sure to avoid a tight cast-off edge). Knit another sleeve.

ASSEMBLY:
Sew shoulder seams inside cast-off edge.
Sew side seams – sew edge to edge in outer loops of edge sts but stop when approx. 25 cm remain at the bottom in each side (= vent). Sew sleeve seams tog edge to edge in front loop of outermost sts from markers at the top of sleeve and down. Place sleeve in under edge in garter st along armhole in one side of piece and sew neatly along armhole and in the bottom of armhole - NOTE: Markers on sleeve should fit side seam on body. Sew in the other sleeve the same way.

NECK EDGE:
Pick up from RS approx. 70 to 88 sts around the neck (incl sts on stitch holder at the front) on short circular needle size 4 mm. P 1 round, K 1 round and P 1 round, then cast off with K.

Diagram

diagram measurements

Each of our patterns has specific tutorial videos to help you.

Do you have a question? See a list of frequently asked questions (FAQ)

Knitting tension is what determines the final measurements of your work, and is usually measured per 10 x 10 cm. It is provided like so: number of stitches in width x number of rows in height - eg: 19 stitches x 26 rows = 10 x 10 cm.

The knitting tension is very individual; some people knit/crochet loosely while others work tightly. You adjust the knitting tension with the needle size, which is why the suggested needle size is only meant as a guide! You need to adjust this (up or down) to ensure that YOUR knitting tension matches the knitting tension provided in the pattern. If you work with a different knitting tension than provided you will have a different yarn consumption, and your work will have different measurements than what the pattern suggests.

The knitting tension also determines which yarns can replace each other. As long as you achieve the same knitting tension you can replace one yarn with another.

See DROPS lesson: How to measure your tension/gauge

See DROPS video: How to make a gauge tension swatch

The required amount of yarn is provided in grams, eg: 450 g. To calculate how many balls you’ll need you first need to know how many grams are in 1 ball (25g, 50g or 100g). This information is available if you click on the individual yarn quality on our pages. Divide the amount required with the amount of each ball. For example, if each ball is 50g (the most common amount), the calculation will be as follows: 450 / 50 = 9 balls.

The important thing when changing from one yarn to another is that the knitting/crochet tension remains the same. This is so that the measurements of the finished piece will be the same as on the sketch provided. It is easier to achieve the same knitting tension using yarns from the same yarn group. It is also possible to work with multiple strands of a thinner yarn to achieve the knitting tension of a thicker one. Please try our yarn converter. We recommend you to always work a test swatch.

Please NOTE: when changing yarn the garment might have a different look and feel to the garment in the photo, due to individual properties and qualities of each yarn.

See DROPS lesson: Can I use a different yarn than the one mentioned in the pattern?

All our yarns are categorised into yarn groups (from A to F) according to thickness and knitting tension – group A contains the thinnest yarns and group F the thickest. This makes it easier for you to find alternative yarns to our patterns, should you wish to switch yarn. All yarns within the same group have a similar knitting tension and can easily replace each other. However, different yarn qualities have different structures and properties which will give the finished work a unique look and feel.

Click here for an overview of the yarns in each yarn group

At the top of all our patterns you’ll find a link to our yarn calculator, which is a helpful tool should you wish to use a different yarn than suggested. By filling in the yarn quality you wish to replace, the amount (in your size) and number of strands, the calculator will present good alternative yarns with the same knitting tension. Additionally it will tell you how much you’ll require in the new qualities and whether you’ll need to work with multiple strands. Most skeins are 50g (some are 25g or 100g).

If the pattern is worked with multiple colours, every colour will have to be calculated separately. Similarly, if the pattern is worked with several strands of different yarns (for example 1 strand Alpaca and 1 strand Kid-Silk) you will have to find alternatives for each, individually.

Click here to see our yarn calculator

Since different yarns have different qualities and textures we have chosen to keep the original yarn in our patterns. However, you can easily find options among our available qualities by using our yarn calculator, or simply pick a yarn from the same yarn group.

It is possible that some retailers still have discontinued yarns in stock, or that someone has a few skeins at home that they would like to find patterns for.

The yarn calculator will provide both alternative yarn as well as required amount in the new quality.

If you think it's hard to decide what size to make, it can be a good idea to measure a garment you own already and like the size of. Then you can pick the size by comparing those measures with the ones available in the pattern's size chart.

You'll find the size chart at the bottom of the pattern.

See DROPS lesson: How to read size chart

The needle size provided in the pattern serves only as a guide, the important thing is to follow the knitting tension. And since knitting tension is very individual, you will have to adjust the needle size to ensure that YOUR tension is the same as in the pattern – maybe you’ll have to adjust 1, or even 2 needle sizes, up or down to achieve the correct tension. For this, we recommend that you work test swatches.

Should you work with a different knitting tension than the one provided, the measurements of the finished garment might deviate from the measurement sketch.

See DROPS lesson: How to measure your tension/gauge

See DROPS video: How to make a tension/gauge swatch

Working a garment top-down provides more flexibility and room for personal adjustment. For example it is easier to try the garment on while working, as well as making adjustments to length of yoke and shoulder caps.

The instructions are carefully explaining every step, in the correct order. Diagrams are adjusted to the knitting direction and are worked as usual.

The diagram depicts all rows/rounds, and every stitch seen from the right side. It is read from bottom to top, from right to left. 1 square = 1 stitch.

When working back and forth, every other row is worked from the right side and every other row is worked from the wrong side. When working from the wrong side, the diagram will have to be worked reversed: from left to right, knit stitches are purled, purl stitches are knit etc.

When working in the round every round is worked from the right side and the diagram are worked from right to left on all rounds.

See DROPS lesson: How to read knitting diagrams

The diagram depicts all rows/rounds, and every stitch seen from the right side. It is worked from bottom to top, from right to left.

When working back and forth every other row is worked from the right side: from right to left and every other row is worked from the wrong side: from left to right.

When working in the round, every row in the diagram are worked from the right side, from right to left.

When working a circular diagram you start in the middle and work your way outwards, counter clockwise, row by row.

The rows usually start with a given number of chain stitches (equivalent to the height of the following stitch), this will either be depicted in the diagram or explained in the pattern.

See DROPS lesson: How to read crochet diagrams

Instructions for working several diagrams after each other on the same row/round, will often be written like so: “work A.1, A.2, A.3 a total of 0-0-2-3-4 times". This means you work A.1 once, then A.2 is worked once, and A.3 is repeated (in width) the number of times provided for your size – in this case like so: S = 0 times, M = 0 times, L=2 times, XL= 3 times and XXL = 4 times.

The diagrams are worked as usual: begin with the first row in A.1, then work the first row in A.2 etc.

See DROPS lesson: How to read knitting diagrams

See DROPS lesson: How to read crochet diagrams

The total width of the garment (from wrist-to-wrist) will be larger in the larger sizes, despite the actual sleeves being shorter. The larger sizes have longer sleeve caps and wider shoulders, so there will be a good fit in all sizes.

The measurement sketch/schematic drawing provides information regarding the full length of the garment. If it’s a jumper or a jacket the length is measured from the highest point on the shoulder closest to the neckline, and straight down to the bottom of the garment. It is NOT measured from the tip of shoulder. Similarly, the length of yoke is measured from the highest point on the shoulder and down to where yoke is split into body and sleeves.

On a jacket measures are never taken along bands, unless specifically stated. Always measure inside band stitches when measuring the length.

See DROPS lesson: How to read a schematic drawing

Diagrams are often repeated on the round or in height. 1 repeat is the diagram the way it appears in the pattern. If it says to work 5 repeats of A.1 in the round, then you work A.1 a total of 5 times after/next to each other in the round. If it says to work 2 repeats of A.1 vertically/in height you work the entire diagram once, then begin again at the start and work the entire diagram one more time.

Chain stitches are slightly narrower than other stitches and to avoid working the cast-on edge too tight, we simply chain more stitches to begin with. The stitch count will be adjusted on the following row to fit the pattern and measurement sketch.

The rib edge is more elastic and will contract slightly compared to, for example, stocking stitch. By increasing before the rib edge, you avoid a visible difference in width between the rib edge and the rest of the body.

It’s very easy to cast off too tightly, and by making yarn overs while casting off (and simultaneously casting these off) you avoid a too tight cast off edge.

See DROPS video: How to bind off with yarn overs (yo)

To achieve an even increase (or decrease) you can increase on, for example: every 3rd and 4th row alternately, like so: work 2 rows and increase on the 3rd row, work 3 rows and increase on the 4th. Repeat this until the increase is complete.

See DROPS lesson: Increase or decrease 1 st on every 3rd and 4th row alternately

Should you prefer to work in the round instead of back and forth, you may of course adjust the pattern. You’ll need to add steeks mid-front (usually 5 stitches), and follow the instructions. When you would normally turn and work from the wrong side, simply work across the steek and continue in the round. At the end you’ll cut the piece open, pick up stitches to work bands, and cover the cut edges.

See DROPS video: How to knit steeks and cut open

Should you prefer to work back and forth instead of in the round, you may of course adjust the pattern so you work the pieces separately and then assemble them at the end. Divide the stitches for the body in 2, add 1 edge stitch in each side (for sewing) and work the front and back pieces separately.

See DROPS lesson: Can I adapt a pattern for circular needles into straight needles?

Pattern repeats can vary slightly in the different sizes, in order to get the correct proportions. If you’re not working the exact same size as the garment in the photo, yours might deviate slightly. This has been carefully developed and adjusted so that the complete impression of the garment is the same in all sizes.

Make sure to follow instructions and diagrams for your size!

If you have found a pattern you like which is available in women’s size it’s not very difficult to convert it to men’s size. The biggest difference will be the length of sleeves and body. Start working on the women size that you think would fit across the chest. The additional length will be worked right before you cast off for the armhole/sleeve cap. If the pattern is worked top-down you can add the length right after the armhole or before the first decrease on sleeve.

Regarding additional yarn amount, this will depend on how much length you add, but it is better with a skein too many than too few.

All yarns will have excess fibres (from production) that might come off as lint or shedding. Brushed yarns (ie hairier yarns) have more of these loose, excess fibres, causing more shedding.

Shedding also depends on what is worn under or over the garment, and whether this pulls at the yarn fibres. It’s therefore not possible to guarantee that there will be no shedding

Below are some tips on how to get the best result when working with hairier yarns:

1. When the garment is finished (before you wash it) shake it vigorously so the looser hairs come off. NOTE: do NOT use a lint roller, brush or any method that pulls at the yarn.

2. Place the garment in a plastic bag and put it in your freezer - the temperature will cause the fibres to become less attached to each other, and excess fibres will come off easier.

3. Leave in the freezer for a few hours before taking it out and shaking it again.

4. Wash the garment according to the instructions on the yarn label.

Pilling is a natural process that happens to even the most exclusive of fibers. It's a natural sign of wear and tear that is hard to avoid, and that is most visible in high friction areas of your garment like a sweater's arms and cuffs.

You can make your garment look as new by removing the pilling, using a fabric comb or a pill/lint remover.

Still can't find the answer you need? Then scroll down and leave your question so one of our experts can try to help you. This will be done normally within 5 to 10 working days.
In the meantime, you can read the questions and answers that others have left to this pattern or join the DROPS Workshop on Facebook to get help from fellow knitters/crocheters!

You might also like...

Post a comment to pattern DROPS 171-36

We would love to hear what you have to say about this pattern!

If you want to leave a question, please make sure you select the correct category in the form below, to speed up the answering process. Required fields are marked *.

Comments / Questions (27)

country flag FILIO CHARITOU wrote:

Can I knitt in the round the body (after 25 cm) to avoid sewing) ? Τhe same for the sleeves.

09.02.2023 - 06:42

DROPS Design answered:

Dear Mrs Charitou, yes probably, just remember to adapt the cast off for armholes. Happy knitting!

09.02.2023 - 10:03

country flag Karin wrote:

Ik wil de Outlander gebreide DROPS lange trui met splitten aan de zijkanten van ”Alpaca Bouclé”. Maat: XXXL maken. Maar ik zie nergens hoe ik het aantal bolletjes wol kan berekenen.

23.11.2022 - 17:24

DROPS Design answered:

Dag Karin

De hoeveelheid wol staat in grammen aangegeven bij de materialen. De reeks getallen refereren aan de maten, dus het eerste getal staat voor maat S, het tweede getal voor maat M, enzovoort. 1 bol Alpaca Bouclé weegt 50 gram.

23.11.2022 - 19:40

country flag Carrie Leona Duncan wrote:

Ok... so I knitted the 1st and 2nd rows. Then continued as pattern goes for about bit. My problem is it\'s rolling up at the bottom. Does this go away when I block it or have I done something wrong?

07.01.2022 - 09:42

DROPS Design answered:

Dear Mrs Duncan, yes will will have to block at the end of knitting, before wearing, so that edge do not roll anymore. Happy knitting!

07.01.2022 - 15:58

country flag Kirsi Väistö wrote:

Hei, haluaisin neuloa outlander villapaidan, mikä muu lanka siihen sopisi ja mikä olisi langan määrä? Sopiiko esim. drops nepal ja miten paljon sitä menisi, vastaako menekki alpaca bouclea?

28.12.2021 - 16:22

DROPS Design answered:

Hei, voit käyttää jonkun lankaryhmään C kuuluvista langoistamme, tai lankaryhmään A kuuluvan langan kaksinkertaisena. DROPS Nepal-lanka sopii tähän ohjeeseen. Nepal-kerässä on vain 75 metriä lankaa, kun taas Alpaca-Bouclé -kerässä on 140 metriä, eli tarvitset tuplasti enemmän lankakeriä.

07.03.2022 - 17:22

country flag Kerstin wrote:

Hallo, was hat das mit "mit je 5 M kraus re beidseitig" auf sich? Es werden doch alle Reihen kraus rechts gestrickt, da gibt es doch keinen Unterschied, oder? Vielen Dank!

23.04.2021 - 23:55

DROPS Design answered:

Liebe Kerstin, nach den 2 Krausrippen (untere Kante) stricken Sie glatt rechts mit 5 Maschen kraus rechts beidseitig, dh bei den Hinreihen stricken Sie alle Maschen rechts, bei den Rückreihen stricken Sie, 5 M re, links bis 5 M übrig sind, 5 M re. Viel Spaß beim stricken!

26.04.2021 - 07:27

country flag Natasja wrote:

Ik begrijp het gedeelte niet van schouder.. en dat je het op een hulpdraad moet doen. Kan iemand het mij gemakkelijker uitleggen. Groetjes

12.05.2020 - 12:19

DROPS Design answered:

Dag Natasja,

Je breit gewoon verder heen en weer en aan de kant waar het armsgat zit zet je telkens steken op een hulpdraad. Je zet 2-2-3-2-2-3 keer 11-12-13-13-14-15 steken op een hulpdraad en dan 1 keer 13-13-0-14-15-0 steken.

22.05.2020 - 10:24

country flag Rosy wrote:

Bonjour, j’ai envie de tricoter ce modèle pour ma fille. En taille M. Mais ma fille est petite: 1m,56. Que me conseillez vous pour la longueur ? Le raccourcir ? Comment ? Merci d’avance pour votre réponse

04.12.2019 - 09:25

DROPS Design answered:

Bonjour Rosy, comparez les différentes mesures du schéma à un pull analogue dont elle aime la forme (et la longueur), pour trouver la taille (et ajuster la longueur si besoin). Bon tricot!

04.12.2019 - 10:02

country flag Mary Van Riel wrote:

Is het mogelijk om dit gewoon op normale naalden te breien. Hoe doe ik dat dan. Ik vind het model super, maar ik kan niet overweg met een rondbrei naald.\\r\\n\\r\\nIk zie het antwoord wel tegemoet, alvast bedankt \\r\\n\\r\\nGroet, Mary van Riel

14.10.2018 - 23:36

country flag Barbara Smith wrote:

What is the gauge for this pattern?

26.08.2018 - 02:04

DROPS Design answered:

Hi Barbara, The guages are written at the top of the patterns, to the right of the photo. So in this pattern, the guide is to use a circular needle size 4 mm, with a guage of 19 stitches x 25 rows of stocking stitch on10 x 10 cm. Happy knitting!

26.08.2018 - 07:38

country flag Nancy wrote:

Ik snap het patroon niet goed wat de ribbelrand betreft. Vanaf het begin brei je de 5 buitenste steken in ribbel. Klopt het dat je dit het hele pand blijft doen? Als ik de tekening bekijk lijkt het dat dat alleen de eerste 25 cm de bedoeling is, maar ik kan daar in het patroon niets van terug vinden.

16.02.2018 - 20:26

DROPS Design answered:

Hoi Nancy, Het klopt inderdaad dat de 5 ribbelsteken doorgaan over het hele pand. Op de eerste 25 cm komt een split, maar de ribbelsteken gaan wel gewoon door.

18.02.2018 - 14:17