
Popular categories
Looking for a yarn?


|
|
Midnight Roads |
|
 |
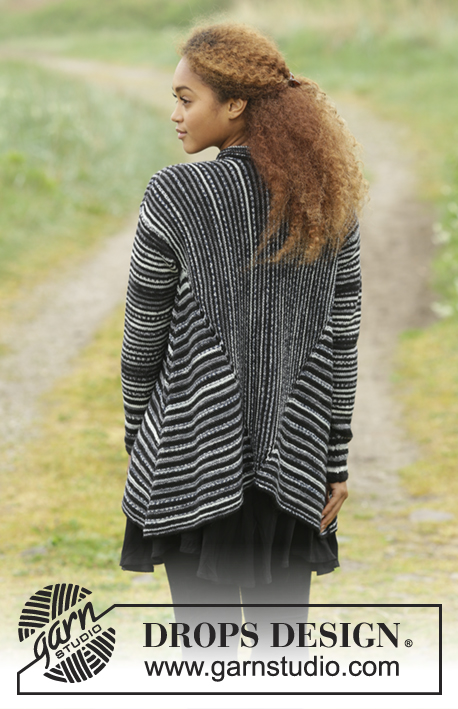 |
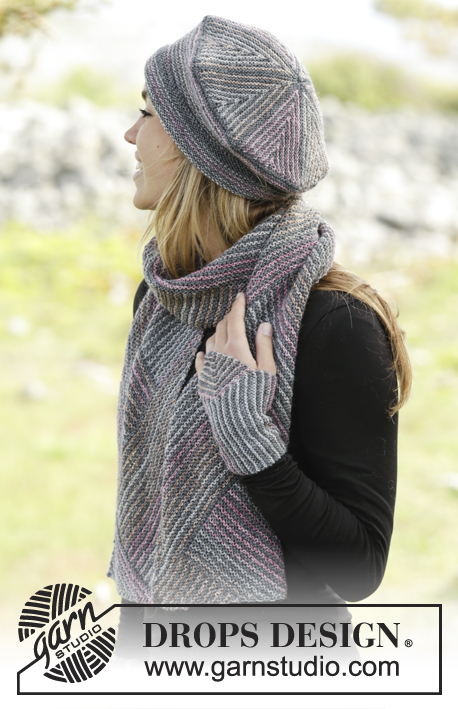
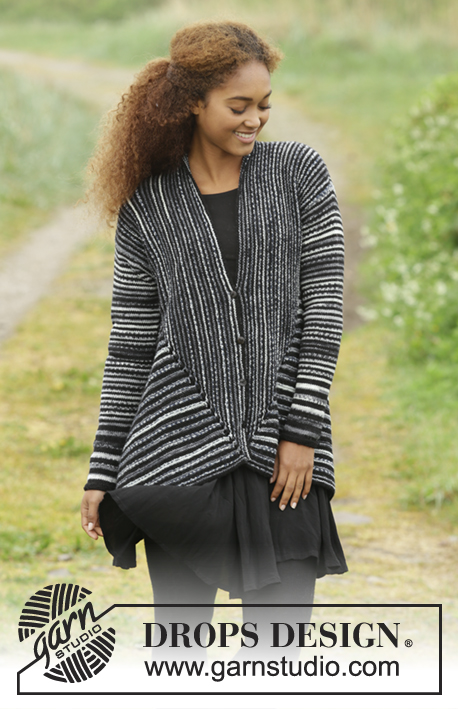
Knitted DROPS jacket in garter st with shawl collar, worked sideways in ”Fabel”. Size: S - XXXL.
DROPS 173-14 |
|
|
GARTER ST (back and forth on circular needle): K all rows. 1 ridge = 2 rows K. GARTER ST (worked in the round): 1 ridge = 2 rounds. * K 1 round and P 1 round *, repeat from *-*. STRIPES BODY: ROW 1: K with salt and pepper ROW 2: K with salt and pepper ROW 3: K with black ROW 4: K with black STRIPES SLEEVE: Work as follows for 14 cm: 4 rounds with black 4 rounds with salt and pepper Then work as follows until finished measurements: 2 rounds black 2 rounds salt and pepper ---------------------------------------------------------- RIGHT FRONT PIECE: Worked back and forth on circular needle from the side and towards mid front. Arrows on chart show the knitting direction. Cast on 46-49-51-55-57-59 sts on circular needle size 4 mm with salt and pepper. K 1 row from WS over all sts. Insert 1 marker in the 7th-7th-7th-9th-9th-9th st (seen from RS). Then work as follows: ROW 1 (from RS with salt and pepper): K 1, 1 YO, K 5-5-5-7-7-7, 1 YO, K 1 (= st with marker), 1 YO, K 1, 1 YO, K 38-41-43-45-47-49. Turn = 50-53-55-59-61-63 sts on needle. ROW 2 (from WS with salt and pepper): K all sts. Always K YOs from WS to make holes. ROW 3 (from RS with salt and pepper): K the first 8-8-8-10-10-10 (until st with marker), turn. ROW 4 (from WS with salt and pepper): Tighten yarn and K 8-8-8-10-10-10. ROW 5 (from RS with black): K 1, 1 YO, K 7-7-7-9-9-9, 1 YO, K 1 (= st with marker), 1 YO, K 1, 1 YO, K 40-43-45-47-49-51. Turn = 54-57-59-63-65-67 sts on needle. ROW 6 (from WS with black): K all sts. ROW 7 (from RS with black): K the first 10-10-10-12-12-12 (until st with marker), turn. ROW 8 (from WS with black): Tighten yarn and K 10-10-10-12-12-12. Work these 8 rows (= pattern, work 8 rows before marker and 4 rows after marker) 15-17-19-20-23-25 times in total, there are now 166-185-203-215-241-259 sts on needle. REMEMBER THE KNITTING TENSION On next row from RS (worked as 1st row in pattern), cast on 15-15-17-17-19-19 new sts at the end of row (= collar) = 185-204-224-236-264-282 sts. Continue pattern 5-5-5-5-5-6 more times (the 8 rows in pattern have been worked 20-22-24-25-28-31 times in total), on every row worked as 1st or 5th row work 2 sts in last st - there are now 230-249-269-281-309-337 sts on needle. Slip the last 144-155-167-173-189-205 sts on a stitch holder, now only work over the first 86-94-102-108-120-132 sts on needle (= bottom edge). Work in garter st back and forth over these sts for 8-5-2-1-1-1 cm with STRIPES BODY – see explanation above, finish after 2 rows black. Cast off. Pick up 16-10-4-2-2-2 sts towards mid front (along short side on the 8-5-2-1-1-1 cm worked in bottom edge), and slip the 144-155-167-173-189-205 sts from stitch holder back on needle = 160-165-171-175-191-207 sts. Work in garter st back and forth over all sts for 1 cm with STRIPES BODY. On next row from RS dec for buttonholes as follows: K 16-18-18-18-10-10, * K 2 tog, 1 YO, K 16 *, repeat from *-* 3-3-3-3-4-4 times, K 2 tog, 1 YO, work the rest of row = 4-4-4-4-5-5 button holes. Work 1 cm over all sts, finish after 2 rows black. Cast off. LEFT FRONT PIECE: Cast on 46-49-51-55-57-59 sts on circular needle size 4 mm with salt and pepper. K 1 row from WS over all sts. Insert 1 marker in the 40th-43rd-45th-47th-49th-51st st (seen from RS). Then work as follows: ROW 1 (from RS with salt and pepper): K 38-41-43-45-47-49, 1 YO, K 1, 1 YO, K 1 (= st with marker), 1 YO, K 5-5-5-7-7-7, 1 YO, K 1 = 50-53-55-59-61-63 sts on needle. ROW 2 (from WS with salt and pepper): K the first 8-8-8-10-10-10 (until st with marker), turn. ROW 3 (from RS with salt and pepper):Tighten yarn and K 8-8-8-10-10-10. ROW 4 (from WS with salt and pepper): K all sts. Always K YOs from WS to make holes. ROW 5 (from RS with black): K 40-43-45-47-49-51, 1 YO, K 1, 1 YO, K 1 (= st with marker), 1 YO, K 7-7-7-9-9-9, 1 YO, K 1. Turn = 54-57-59-63-65-67 sts on needle. ROW 6 (from WS with black): K the first 10-10-10-12-12-12 (until st with marker), turn. ROW 7 (from RS with black):Tighten yarn and K 10-10-10-12-12-12. ROW 8 (from WS with black): K all sts. Work these 8 rows (= pattern, work 8 rows over sts before marker and 4 rows over sts after marker) 15-17-19-20-23-25 times in total, there are now 166-185-203-215-241-259 sts on needle, on last row (= from WS) cast on 14-14-16-16-18-18 new sts at the end of row (= collar, i.e. 1 stitch less is cast on for collar on left front piece to get the right amount of stitches) = 180-199-219-231-259-277 sts. Continue pattern 5-5-5-5-5-6 more times (the 8 rows in pattern have been worked 20-22-24-25-28-31 times in total), at the end of every row worked as 4th or 8th row work 2 sts in last st on row - there are now 230-249-269-281-309-337 sts on needle. Slip the first 144-155-167-173-189-205 sts on a stitch holder, now only work over the last 86-94-102-108-120-132 sts on needle (= bottom edge). Work in garter st back and forth over these sts for 8-5-2-1-1-1 cm with STRIPES BODY – see explanation above, finish after 2 rows black. Cast off. Slip the 144-155-167-173-189-205 sts from stitch holder back on needle, and pick up 16-10-4-2-2-2 sts towards mid front (along short side on the 8-5-2-1-1-1 cm worked in bottom edge) = 160-165-171-175-191-207 sts. Work in garter st back and forth over all sts for 2 cm with STRIPES BODY, finish after 2 rows black (do not dec for buttonholes). Cast off. LEFT BACK PIECE: Worked back and forth on circular needle from the side and towards mid back. Cast on 46-49-51-55-57-59 sts on circular needle size 4 mm with salt and pepper. K 1 row from WS over all sts. Insert 1 marker in the 7th-7th-7th-9th-9th-9th st (seen from RS). Then work as follows: ROW 1 (from RS with salt and pepper): K 1, 1 YO, K 5-5-5-7-7-7, 1 YO, K 1 (= st with marker), 1 YO, K 1, 1 YO, K 38-41-43-45-47-49. Turn = 50-53-55-59-61-63 sts on needle. ROW 2 (from WS with salt and pepper): K all sts. Always K YOs from WS to make holes. ROW 3 (from RS with salt and pepper): K the first 8-8-8-10-10-10 (until st with marker), turn. ROW 4 (from WS with salt and pepper): Tighten yarn and K 8-8-8-10-10-10. ROW 5 (from RS with black): K 1, 1 YO, K 7-7-7-9-9-9, 1 YO, K 1 (= st with marker), 1 YO, K 1, 1 YO, K 40-43-45-47-49-51. Turn = 54-57-59-63-65-67 sts on needle. ROW 6 (from WS with black): K all sts. ROW 7 (from RS with black): K the first 10-10-10-12-12-12 (until st with marker), turn. ROW 8 (from WS with black): Tighten yarn and K 10-10-10-12-12-12. Work these 8 rows (= pattern, work 8 rows before marker and 4 rows after marker) 15-17-19-20-23-25 times in total, there are now 166-185-203-215-241-259 sts on needle. Work 1st row in pattern = 170-189-207-219-245-263 sts on needle. At beg of next row (= 2nd row in pattern) cast off the first 4 sts on row (= neck), then K the rest of row = 166-185-203-215-241-259 sts. Continue pattern 5-5-5-5-5-6 more times (the 8 rows in pattern have been worked 20-22-24-25-28-31 times in total) - there are now 202-221-239-251-277-303 sts on needle. Slip the last 116-127-137-143-157-171 sts on a stitch holder, now only work over the first 86-94-102-108-120-132 sts on row (= bottom edge), work in garter st back and forth over these sts for 8-5-2-1-1-1 cm with STRIPES BODY – see explanation above, finish after 2 rows black. Cast off. Cast off sts from the stitch holder. RIGHT BACK PIECE: Cast on 46-49-51-55-57-59 sts on circular needle size 4 mm with salt and pepper. K 1 row from WS over all sts. Insert 1 marker in the 40th-43rd-45th-47th-49th-51st st (seen from RS). Then work as follows: ROW 1 (from RS with salt and pepper): K 38-41-43-45-47-49, 1 YO, K 1, 1 YO, K 1 (= st with marker), 1 YO, K 5-5-5-7-7-7, 1 YO, K 1 = 50-53-55-59-61-63 sts on needle. ROW 2 (from WS with salt and pepper): K the first 8-8-8-10-10-10 (until st with marker), turn. ROW 3 (from RS with salt and pepper):Tighten yarn and K 8-8-8-10-10-10. ROW 4 (from WS with salt and pepper): K all sts. Always K YOs from WS to make holes. ROW 5 (from RS with black): K 40-43-45-47-49-51, 1 YO, K 1, 1 YO, K 1 (= st with marker), 1 YO, K 7-7-7-9-9-9, 1 YO, K 1. Turn = 54-57-59-63-65-67 sts on needle. ROW 6 (from WS with black): K the first 10-10-10-12-12-12 (until st with marker), turn. ROW 7 (from RS with black):Tighten yarn and K 10-10-10-12-12-12. ROW 8 (from WS with black): K all sts. Work these 8 rows (= pattern, work 8 rows before marker and 4 rows after marker) 15-17-19-20-23-25 times in total, there are now 166-185-203-215-241-259 sts on needle. At beg of next 1st row in pattern cast off the first 4 sts on row (= neck), then K the rest of row with inc as before = 166-185-203-215-241-259 sts. Continue pattern 5-5-5-5-5-6 more times (the 8 rows in pattern have been worked 20-22-24-25-28-31 times in total) - there are now 202-221-239-251-277-303 sts on needle. Cast off the first 116-127-137-143-157-171 sts, now only work over the last 86-94-102-108-120-132 sts on row (= bottom edge), work in garter st back and forth over these sts for 8-5-2-1-1-1 cm with STRIPES BODY – see explanation above, finish after 2 rows black. Cast off. SLEEVE: Worked in the round on double pointed needles. Cast on 40-42-44-46-48-50 sts on double pointed needles size 4 mm with black. Work 3 ridges in GARTER ST - see explanation above. Insert 1 marker at beg of round = mid under sleeve. Then work in stocking st and STRIPES SLEEVE. When piece measures 8-8-8-12-12-10 cm, inc 1 st on each side of marker under sleeve. Inc every 2-2-2-1½-1½-1½ cm 19-21-22-23-24-25 times in total = 78-84-88-92-96-100 sts. When piece measures 51-50-49-48-46-44 cm, continue piece back and forth on needle. Continue to work until sleeve measures 54-53-52-52-50-48 cm. Cast off. ASSEMBLY: Sew back piece tog mid back. Sew the shoulder seams. Sew in sleeves, sew the top 3-3-3-4-4-4 cm of sleeve to the 7-7-7-9-9-9 sts (= where the marker is) on cast on edge to front and back piece. Sew side seams in outer loops of edge sts. Sew the collar tog mid back and sew it to the back piece. Sew the buttons on to left front piece. |
|

|
|
|
Have you made this or any other of our designs? Tag your pictures in social media with #dropsdesign so we can see them! Do you need help with this pattern?You'll find tutorial videos, a Comments/Questions area and more by visiting the pattern on garnstudio.com. © 1982-2024 DROPS Design A/S. We reserve all rights. This document, including all its sub-sections, has copyrights. Read more about what you can do with our patterns at the bottom of each pattern on our site. |
|


With over 40 years in knitting and crochet design, DROPS Design offers one of the most extensive collections of free patterns on the internet - translated to 17 languages. As of today we count 304 catalogues and 11422 patterns - 11422 of which are translated into English (UK/cm).
We work hard to bring you the best knitting and crochet have to offer, inspiration and advice as well as great quality yarns at incredible prices! Would you like to use our patterns for other than personal use? You can read what you are allowed to do in the Copyright text at the bottom of all our patterns. Happy crafting!
Comments / Questions (73)
Forstår ikke opskrift. Ville ønske at efter de første 8 omgange, ville fortælle om de næste 8, så man havde en ide om mønster. Der kommer 4 nye masker på hver 4 pind.. kan ikke se det med de 8 masker før man kan se de 4 efter mærke. Hvad med de nye masker. Samt der mangler billeder, så man bedre kan se siderne
04.03.2024 - 08:17Hvordan skal kraven monteres. Den kommer jo til at vende med vrangen udad, hvis den bare sys sammen midt bag og sys på rygstykkerne. Jeg kan ikke se det på billederne.
07.02.2024 - 18:08DROPS Design answered:
Hei Benedicte. Du kan montere / sy sammen med usynlig maskesting. mvh DROPS Design
16.02.2024 - 09:25Hej. Jeg er meget i tvivl om hvordan jeg fortsætter. Jeg har strikket de første 8 pinde. Hvordan fortsætter man? Ved godt jeg skal strikke de 8p igen, men hvordan? Strikker man som der står så hullerne/omslag bliver forskudte eller skal man tælle ud fra mærketråd så omslagene kommer til at være samme sted. Det vil sige hvordan strikker jeg pind 1 anden gang? Hilsen Karina.
09.03.2022 - 10:16DROPS Design answered:
Hej Karina, du skal have omslagene på samme sted, dvs du strikker 1r, 1omslag, 9-9-9-11-11-11 r, 1 omslag, 1 ret (mærketråd) osv... God fornøjelse!
14.03.2022 - 15:28Kunne man ikke lave et diagram. Det er mange gange lettere at gennemskue når man ser det grafisk. Opskriften virker noget rodet.
18.01.2022 - 20:46Jeg vil gerne stille det samme spørgsmål som Lillian stiller. Du skriver at vi bare skal gentage de 8 pinde til størrelsen passer. Vil det sige at hullerne bliver forskudte. Da I nævner før og efter m med mærketråd kan jeg ikke få det til at passe. Så hullerne skal måske ligge over hinanden? Det er en meget misvisende opskrift. Har strikket i 40 år.
18.01.2022 - 17:56Hej Er det rigtig at ærmerne at strikkes i glatstrik
29.12.2021 - 08:09DROPS Design answered:
Hej Judith, ja ærmerne strikke i glatstrik :)
03.01.2022 - 15:51Hej igen Tak for ingenting tænker jeg - jeg beder jo ikke om at omskrive en opskrift - men ved i hvad..... jeg har en mega god person på en strikkeside - som jeg ikke kender - som kan mere end i kan - for hun har lavet en hel side med tallene som jeg efterlyser - så ikke meget hjælp når man ydermere "køber" garn og opskrift og så ikke kan få hjælp til opskriften
08.10.2021 - 19:01Er helt nystartet - måske en for stor mundfuld - men når jeg har lavet første omgang mønster - er der jo en masse tal/masker der skal passe - men jeg kan simpelthen ikke regne ud - hvor mange masker der skal stå de forskellige steder i de 19 gange jeg skal lave mønstret - altså p 1 skal der strikkes 5 masker osv. og når 2 omgang mønster skal i gang - hvad skal der så stå i stedet for 5 m. Skal alle antal masker være + 8 alle omgange igennem - kan simpelthen ikke regne det ud - Jette
30.09.2021 - 20:06DROPS Design answered:
Hej Jette, det er en af de mere avancerede modeller, så er du "nybegynder" skal du nok prøve et par andre først. Vi har desværre ikke mulighed for at skrive den om. Vi kan svare på et helt konkret spørgsmål og da må vi vide størrelse, hvor du er i opskriften, hvor mange masker du skal have og hvor mange du har. Held og lykke!
06.10.2021 - 14:19Jeg kan ikke se rettelser ? Er i gang med det sidste på højre del foran . Når jeg har lavet det sidste knaphul skal kraven så bare strikkes ret frem og tilbage uden udtagninger ? Eller skal der fortsættes med det ?
30.08.2021 - 06:50DROPS Design answered:
Hei Babette. Rettelsen er allerede rettet inn i selve oppskriften på nett. Har du katalogen er ikke rettelsen der, man kan da klikke på den røde linken og lese hva rettelse er. Etter siste knappehull strikk 1 cm over alle maskene og avslutt etter 2 pinne med sort. Fell av. mvh DROPS design
30.08.2021 - 14:10Jeg har også haft problemer med mønstret, da det ikke fremgår at man skal fortsætte med at tage ud på begge sider af mærketråden fortløbende, på for og bagstykke. Samtidig med farveskift mønsteret. Havde strikket to forstykker da jeg opdagede at det var forkert jeg havde gjort, da jeg troede at sidestykkerne var separate. Og er nu startet forfra, nu ser det ud til at jeg har løst problemet. Er en erfaren strikker. Mvh Susanna
10.04.2021 - 08:43