
Popular categories
Looking for a yarn?


|
|||||||
Early Morning |
|||||||
|
|
|||||||
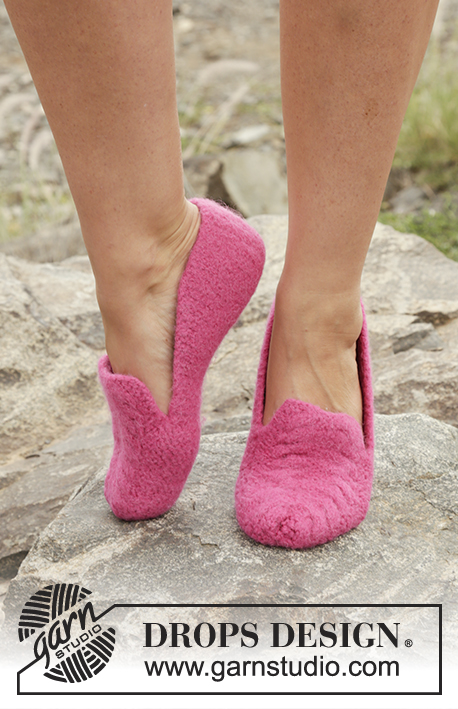
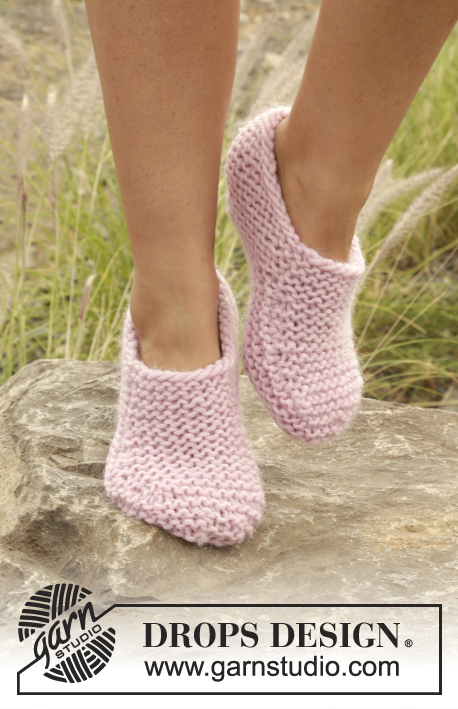
Felted DROPS slippers with stripes in ”Snow”. Size 35 - 44
DROPS Extra 0-1229 |
|||||||
|
GARTER ST (back and forth): K all rows. 1 ridge = 2 rows K. ---------------------------------------------------------- SLIPPER: The slipper is worked back and forth in one and sewn tog mid front and mid back, beg at the top of instep. READ THE ENTIRE PATTERN BEFORE WORKING THE SLIPPER! Cast on 11-11-13-13 sts on needle size 6 mm with powder pink. Work in GARTER ST - see explanation above - AT THE SAME TIME cast on new sts at the end of every row from RS as follows: 3 sts 2 times and 1 st 3 times = 20-20-22-22 sts - work inc sts in garter st. REMEMBER THE KNITTING TENSION When inc are done (piece measures approx. 4 cm), cast off the first 6 sts on next row from RS = 14-14-16-16 sts. At the end of next row from WS, cast on 17-21-21-25 new sts = 31-35-37-41 sts on needle. Switch to amethyst, then work in stocking st. Work 2 rows amethyst, then switch to powder pink and work as follows: Work 2 rows with powder pink, then work 2 short rows from RS as follows: Work in stocking st over the first 19-23-23-27 sts, turn and work back. Work 2 rows over all sts with amethyst, then work 2 rows with powder pink and 2 short rows with powder pink over the first 19-23-23-27 sts as before. Continue with amethyst. When piece measures 13-14-14-15 cm (measured from beg of work in knitting direction) insert a marker = mid under foot. When the same length has been worked as before marker with amethyst continue as follows, beg from RS: Work 2 rows with powder pink, work 2 short rows over the first 19-23-23-27 sts as before. Work 2 rows over all sts with amethyst, then work 2 rows with powder pink and 2 short rows over the first 19-23-23-27 sts with powder pink. Work 2 rows over all sts with amethyst. Switch to powder pink, then work in garter st. Cast off the first 17-21-21-25 sts at beg of next row from RS, at end of next row from WS cast on 6 new sts = 20-20-22-22 sts. Cast off at beg of every row from WS as follows: Cast off 1 sts 3 times and 3 st 2 times = 11-11-13-13 sts. Cast off. ASSEMBLY: See measurement chart. Fold the slipper mid under foot and sew tog mid front on toe and up to first cast-on and last cast-off edge. Sew tog mid back. Knit another slipper the same way. FELTING: Place the slippers in the washing machine with a detergent without enzymes and optical bleach. Wash at 40 degrees with normal spin but no pre-wash. Put on the slippers and shape it to the correct size while it is still wet. At subsequent wash, wash the slippers at regular wool programme. AFTER FELTING: If the piece is not felted enough and is too big: Wash the piece one more time in the washing machine while it is still wet add a terry towel that measures approx. 50 x 70 cm - NOTE: Do not use a short program. If the piece has been felted too much and is too small: While the piece is still wet stretch it to the correct measurements, if the piece is dry, make sure to soak it first. Remember: All subsequent washes are as a normal wool garment. |
|||||||
Diagram explanations |
|||||||
|
|||||||

|
|||||||
|
Have you made this or any other of our designs? Tag your pictures in social media with #dropsdesign so we can see them! Do you need help with this pattern?You'll find tutorial videos, a Comments/Questions area and more by visiting the pattern on garnstudio.com. © 1982-2024 DROPS Design A/S. We reserve all rights. This document, including all its sub-sections, has copyrights. Read more about what you can do with our patterns at the bottom of each pattern on our site. |
|||||||


With over 40 years in knitting and crochet design, DROPS Design offers one of the most extensive collections of free patterns on the internet - translated to 17 languages. As of today we count 304 catalogues and 11422 patterns - 11422 of which are translated into English (UK/cm).
We work hard to bring you the best knitting and crochet have to offer, inspiration and advice as well as great quality yarns at incredible prices! Would you like to use our patterns for other than personal use? You can read what you are allowed to do in the Copyright text at the bottom of all our patterns. Happy crafting!
Comments / Questions (13)
Question sur le feutrage : programme à 40° essorage normal. Quel programme laine ou autre et essorage normal combien de tour 600 900 1200 ? J'ai fait programme laine 40° ça n'a pas feutré puis programme coton 40° essorage 900 et vraiment trop feutré le chausson est maintenant trop serré. Merci de m'indiquer avec plus de précision et la durée aussi du programme pour feutrer habituellement. Merci
13.03.2022 - 14:39DROPS Design answered:
Bonjour Mme Riviere, toutes les machines sont différentes, l'idéal est que vous fassiez un essai au préalable sur un échantillon - à titre d'informations, sur la mienne, je garde un essorage à 600 t (le "basique" de mon lave-linge). Il faut feutrer en programme normal, pas laine, car le programme laine ne sera pas suffisant (c'est en général un programme doux). Retrouvez d'autres infos sur le feutrage ici. Bon tricot!
14.03.2022 - 11:14Buongiorno, leggo che per questo modello sono consigliati i ferri n°6, ma sul sito del rivenditore del filato Eskimo sono indicati i ferri n°9! a quale informazione devo fare affidamento?
30.03.2020 - 19:30DROPS Design answered:
Buongiorno Alice, questo è un modello che dev'essere infeltrito, quindi lavorato in modo più stretto anche prima dell'infeltrimento. Provi a lavorare con il 6mm indicato nel modello e controlli che il suo campione corrisponda a quello indicato: in caso negativo usi il numero di ferri che le permette di ottenere il campione indicato nel modello. Buon lavoro!
31.03.2020 - 09:09Tøflerne er ikke krøbet eller filtet efter vask på 40 grader. Har ikke brugt sæbe, centrifugering på 1200 omdrejninger. Hvad kan jeg så prøve.
09.10.2018 - 15:43DROPS Design answered:
Hei Jannie. Det var leit å høre, hvilken farge og partinummer er garnet? Du kan prøve igjen, denne gangen med litt grønnsåpe og høyere sentrifugering hvis det er mulig. God fornøyelse.
16.10.2018 - 13:05Britta Bousba wrote:
Skal man absolut filtrere arbejdet? Kan man ikke bare lave dem uden at filtrere? Britta
27.07.2018 - 17:06DROPS Design answered:
Hej Britta, Hvis du ikke filter dem så vil de blive for store. Men vi har mange tøfler i DROPS Eskimo som ikke skal filtes. God fornøjelse!
30.08.2018 - 14:45Bonjour merci c'est niquel j'ai réussi à le faire. Par contre jai une autre question général, quand j'ai cousu comme indiqué le bout reste pointu , comment faire pour qu'il soit arrondi vers le talon ? Car ça me fait un talon pointu
16.01.2018 - 17:24DROPS Design answered:
Bonjour Bibou, vous pourrez les mettre en forme après feutrage, dès sortie de la machine, et tant qu'ils sont encore humides. Bon tricot!
17.01.2018 - 08:20Merci à vous je viens de recommencer et de m'apercevoir que c'était bien ça mais je me suis juste trompé j'avais rajouté les mailles en début et non en fin de rang envers . Merci de prendre le temps de me répondre . Une fois que je serai arrivé au marqueur il faudra que je le place où exactement ? Il n y a pas de maille en particulier juste au milieu ?
12.01.2018 - 15:23DROPS Design answered:
Bonjour Bibou, vous pouvez le placer entre les mailles du dernier rang, ce marqueur sert à bien repérer le milieu de l'ouvrage. Bon tricot!
15.01.2018 - 10:59C'est pourtant ce que j'ai fait ça donne la bonne forme mais la pointe se trouve tout en haut et pas vers le bas .Ça me paraît bizarre c'est moi qui doit mal comprendre et malgré les vidéos et explications je ne comprends pas comment les monter à la fin d'un rang . Merci
12.01.2018 - 14:26DROPS Design answered:
Bonjour Bibou, cette vidéo montre comment monter les mailles en fin de rang. Dans la vidéo, elles sont montées à la fin du rang sur l'envers, pour les chaussons, montez les premières mailles du début du chausson en fin de rang sur l'endroit. Pour toute aide complémentaire individuelle, n'hésitez pas à contacter votre magasin ou à vous enregistrer sur le forum DROPS. Bon tricot!
12.01.2018 - 14:46En gros je fais mon rang endroit que je tricote ensuite je rajoute des mailles et après je tricote le rang envers . C'est bien ça ?
11.01.2018 - 21:12DROPS Design answered:
Bonjour Bibou, Vous montez 11-13 m et *tricotez 1 rang sur l'endroit en montant 3 m à la fin de ce rang. Tournez, tricotez 1 rang sur l'envers sur toutes les mailles*. Répétez de *-* encore 1 fois. *Tournez. S ur l'endroit, tricotez toutes les mailles et montez 1 m à la fin du rang, tournez, sur l'envers, tricotez 1 rang sur toutes les mailles*, répétez 3 fois au total de *-*. = vos augmentations seront à gauche, vu sur l'endroit. Bon tricot!
12.01.2018 - 08:56Est ce normal que quand je tricote , le côté se trouve vers le haut et non le bas comme sur le diagramme ? Je fais comme indiqué les augmentations sur le côté droit et la pointe du côté se trouve au dessus et non en bas
11.01.2018 - 21:07DROPS Design answered:
Bonjour Bibou, votre ouvrage doit ressembler à celui du schéma, les augmentations se font toutes du même côté: en fin de rang sur l'endroit (sur l'envers, vous tricotez les mailles sans augmenter) jusqu'à ce que vous ayez 20-22 m.
12.01.2018 - 08:53Bonjour, désolé si je vous pose pleins de questions à chaque fois, quand vous dites augmenter sur chaque rang à l'endroit . Est ce l'endroit de l'ouvrage? Ou chaque rang endroit ? Mais vu que c'est du point mousse j'augmente sur tous les rangs peut importe le sens de l'ouvrage ?
10.01.2018 - 19:36DROPS Design answered:
Bonjour Bibou, on va augmenter à la fin de chaque rang sur l'endroit, soit à gauche quand on regarde l'ouvrage sur l'endroit. Les augmentations vont être d'un côté seulement. Puis on va rabattre des mailles en début de rang sur l'endroit (= à droite, vu sur l'endroit) et monter des mailles en fin de rang sur l'envers (= à droite, vu sur l'endroit). Le schéma en bas de page vous aidera sans doute à bien visualiser. Bon tricot!
11.01.2018 - 08:38