
Popular categories
Looking for a yarn?


|
|||||||||||||
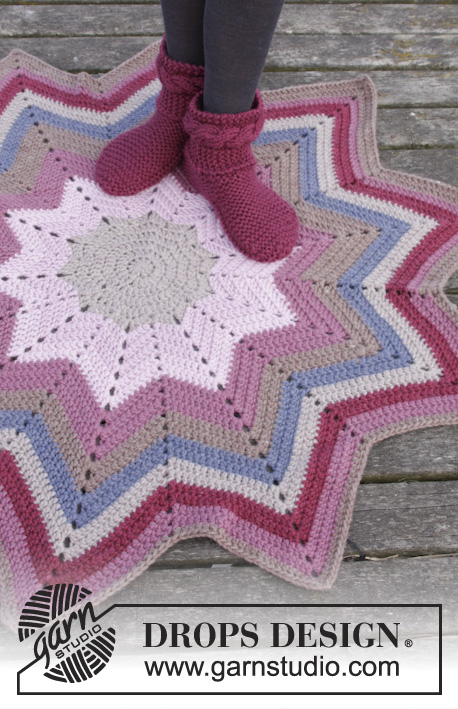
Pole Star |
|||||||||||||
 |
 |
||||||||||||
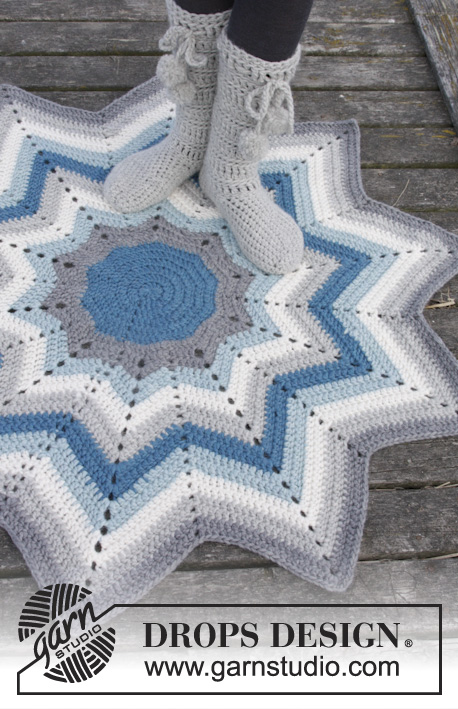
Crochet DROPS carpet with stripes and zig-zag pattern in "Snow".
DROPS 163-12 |
|||||||||||||
|
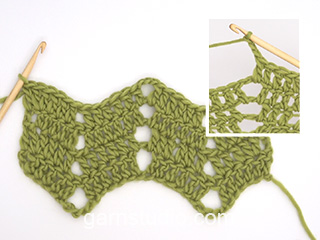
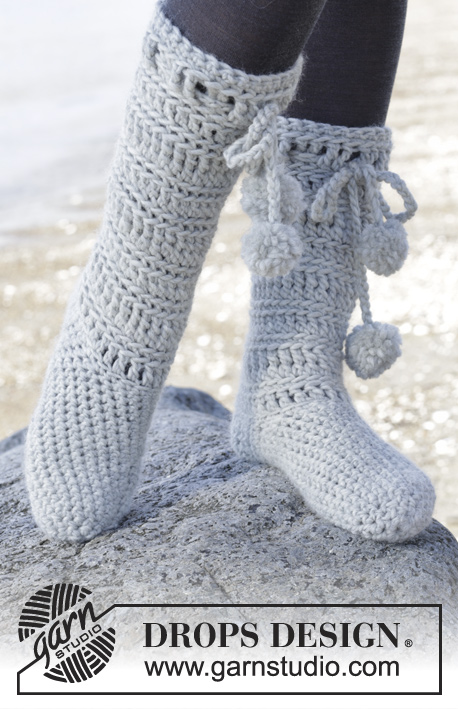
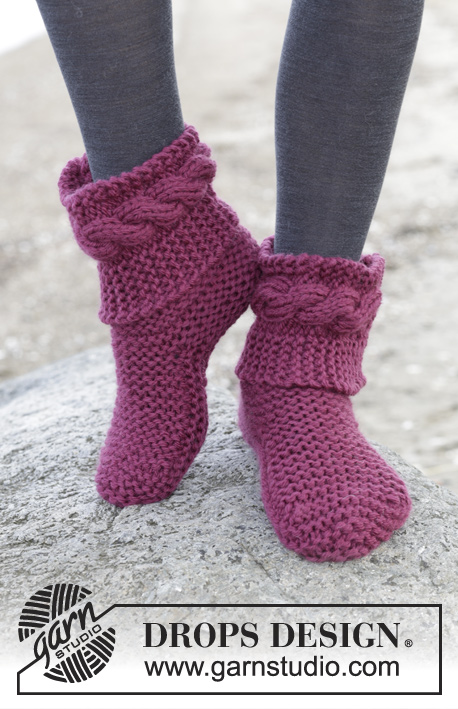
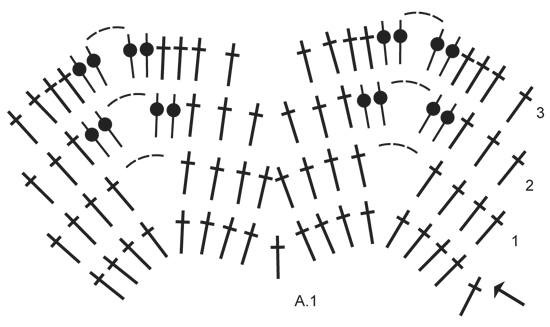
MAGIC CIRCLE: When piece is worked in the round, start with this technique to avoid hole in the middle (instead of ch-ring): Hold the yarn end and wind the yarn one time around the index finger to make a loop. Hold the loop with left thumb and middle finger, place the yarn over left index finger. Insert hook through the loop, make a YO and pull yarn through loop, work 3 ch, then work 11 tr around the loop. Pull the yarn end to tighten loop. Fasten the yarn end on the back side. CROCHET INFO: Replace first tr at beg of every tr round with 3 ch. Finish round with 1 sl st in 3rd ch at beg of round. PATTERN: See diagram A.1. STRIPES: Piece is worked in stripes - READ COLOUR CHANGE. 2 ROUNDS medium grey 2 ROUNDS sapphire 2 ROUNDS off white 2 ROUNDS light grey 2 ROUNDS turquoise 2 ROUNDS sapphire 2 ROUNDS off white 2 ROUNDS light grey 2 ROUNDS medium grey COLOUR CHANGE: To get a nice colour change when working, work last tr on round as follows: Make a YO, insert hook in last st, get the yarn and pull it through st, make a YO and pull it through the first 2 sts on hook, then make a YO with the new colour and pull it through the 2 sts on hook. ---------------------------------------------------------- CARPET: Worked in the round in turquoise before working stripes and zig-zag. CIRCLE: Work a MAGIC CIRCLE - see explanation above, with 12 tr - READ CROCHET INFO, on hook size 7 mm with turquoise. Continue to work as follows: ROUND 1: Work 2 tr in every tr = 24 tr. ROUND 2: Work * 2 tr in first tr, 1 tr in next tr *, repeat from *-* the entire round = 36 tr. REMEMBER THE CROCHET TENSION! ROUND 3: Work * 2 tr in first tr, 1 tr in each of the next 2 tr *, repeat from *-* the entire round = 48 tr. ROUND 4: Work * 2 tr in first tr, 1 tr in each of the next 3 tr *, repeat from *-* the entire round = 60 tr. ROUND 5: Work * 2 tr in first tr, 1 tr in each of the next 4 tr *, repeat from *-* the entire round = 72 tr. Switch to medium grey - READ COLOUR CHANGE! ROUND 6: Work * 2 tr in first tr, 1 tr in each of the next 3 tr *, repeat from *-* the entire round = 90 tr. ZIG-ZAG: Then work STRIPES - see explanation above - while AT THE SAME TIME working zig-zag as follows: Work A.1 5 times in total on round (= 10 tips). When A.1 has been worked 1 time vertically, repeat 3rd round in A.1. Continue until stripes are done. Piece measures approx. 112 cm in diameter (from edge of tips). Fasten off. ---------------------------------------------------------- Slippers: See DROPS 163-13 or "Related patterns" in pattern on website. ---------------------------------------------------------- |
|||||||||||||
Diagram explanations |
|||||||||||||
|
|||||||||||||
|
|||||||||||||
|
Have you made this or any other of our designs? Tag your pictures in social media with #dropsdesign so we can see them! Do you need help with this pattern?You'll find tutorial videos, a Comments/Questions area and more by visiting the pattern on garnstudio.com. © 1982-2024 DROPS Design A/S. We reserve all rights. This document, including all its sub-sections, has copyrights. Read more about what you can do with our patterns at the bottom of each pattern on our site. |
|||||||||||||


With over 40 years in knitting and crochet design, DROPS Design offers one of the most extensive collections of free patterns on the internet - translated to 17 languages. As of today we count 304 catalogues and 11422 patterns - 11422 of which are translated into English (UK/cm).
We work hard to bring you the best knitting and crochet have to offer, inspiration and advice as well as great quality yarns at incredible prices! Would you like to use our patterns for other than personal use? You can read what you are allowed to do in the Copyright text at the bottom of all our patterns. Happy crafting!
Comments / Questions (25)
I am having trouble understanding the diagram, can it be explained in writing please?
07.04.2024 - 03:25DROPS Design answered:
Dear Karen, we are do not have a written out pattern partly, because our site and patters are available in many languages, but also, because we believe that with diagrams you can see the "big picture", in other words, not only the very next stitch but also that how rows and stitches relate to each other en large. HERE we have a tutorial on how to read crochet diagrams, and you can always ask for help (either over the phone or in person) in the store where you bought your DROPS yarn from. Happy Crafting!
07.04.2024 - 13:46Ich komme mit der Anleitung nicht zurecht. Im Video werden 2 Stäbchen in das untere gehäkelt in der Häkelschrift nicht. Was ist denn nun korrekt?
18.11.2022 - 12:55DROPS Design answered:
Liebe Krissi, es gibt unerschiedliche Zackenmuster, hier folgen Sie das Diagram, so haben Sie das selbe Muster wie im Foto. Viel Spaß beim häkeln!
18.11.2022 - 15:37Undskyld men er der ikke fejl i opskriften? Er det ikke efter 5 omgang, at der skal laves farveskift til mellemgrå. Hvis man tæller på billedet er der 6 omgange med blå, men følger man opskriften er der 7. Tænker at det er fordi, at man ikke har talt den første omgang, de 12 stgm med, det burde være "første omgang"?
30.11.2021 - 08:03DROPS Design answered:
Hei Maria. Takk for din kommentar, oppskriften er oversendt design avd slik at de kan ta en dobbeltsjekk og evnt komme med en rettelse. mvh DROPS Design
30.11.2021 - 11:35Ich glaube mit der Anleitung stimmt etwas nicht. Ich denke man muss nicht die Reihe 3 wiederholen sondern sinngemäß fortsetzen. Also in der 4. Reihe 5Maschen zwischen der abnahme und Zunahme in der 5. Reihe 6 Maschen dazwischen. Sonst kann es nicht funktionieren das der Teppich gerade bleibt. Wenn man das Bild anschaut kann man auch mehr als 4 Maschen zwischen der Abnahme und Zunahme zählen.
05.02.2021 - 23:00Forstår ikke verken videoen eller oppskrifta, fra økingen til der mønsteret begynner. Jeg får flere spisser en det som skal være, hva gjør jeg galt?
29.07.2020 - 06:01DROPS Design answered:
Hej Jane, sæt gerne et mærke efter hver gang du har hæklet de 18 st i diagrammet, da er det lettere at se hor lm skal være. God fornøjelse!
30.07.2020 - 15:41Goedenavond. Lees ik het goed dat je na de eerste keer A1 je hebt gehaakt, je daarna steeds rij 3 herhaald?
13.03.2020 - 20:05DROPS Design answered:
Dag Solange,
Ja, dat klopt helemaal!
22.03.2020 - 12:44Det tok litt tid men jeg skjønte det til slutt. Den første raden i diagrammet er egentlig det som hekles først, staver i ring. Så vi begynner med andre raden i diagrammet og sikk sakk mønster. Håper det hjelper andre til å forstå oppskrifta. Hilsen
03.04.2019 - 10:18Buonasera, vorrei sapere se è possibile usare questo modello per realizzare una copertina da neonato (filato tipo B). In caso affermativo, cosa consigliate? Grazie mille
30.08.2018 - 21:21DROPS Design answered:
Buongiorno Elisa, questo tappeto è lavorato con il filato Eskimo che appartiene al gruppo filati E. Una coperta con queste caratteristiche non è adatta a un neonato perchè risulterebbe troppo pesante. In ogni caso provi il nostro convertitore di filati per vedere quale filato potrebbe usare. In alternativa a questo link può trovare moltissimi modelli di coperte per neonati. Buon lavoro!
31.08.2018 - 07:59In navolging op de opmerking van Kim loop ik ook vast bij het begin van de zigzag. Als ik kijk bij het instructie filmpje zie ik een heel ander telpatroon eronder leggen die wel klopt. Ik denk dat jullie eens goed moeten kijken naar jullie telpatroon wat hierbij staat want die klopt niet.
22.07.2018 - 19:43Hallo, Wat een leuk kleed! Ik loop helaas vast bij het begin van de zigzag; de laatste rij in de geschreven uitleg geeft aan *2 stk in eerste stk, 1 stk in elk van de volgende 3 stk*. In het diagram zie ik echter *2 stk in eerste stk, 1 stk in elk van de volgende 7 stk* (elke tweede dubbele stk lijkt er maar 1 te zijn in het diagram; de dieper getekende stk). Kunt u mij uitleggen wat ik verkeerd doe? Met vriendelijke groet, Kim
07.06.2018 - 06:56DROPS Design answered:
Dag Kim, In het telpatroon staat bij de eerste toer van stokjes een pijl. Dit is toer 6 van het geschreven patroon. Deze is er in getekent zodat je kunt zien hoe je start met het telpatroon, Je begint gewoon bij toer 1 van het telpatroon.
08.06.2018 - 11:04