
Popular categories
Looking for a yarn?


|
||||||||||||||||||||||||||||
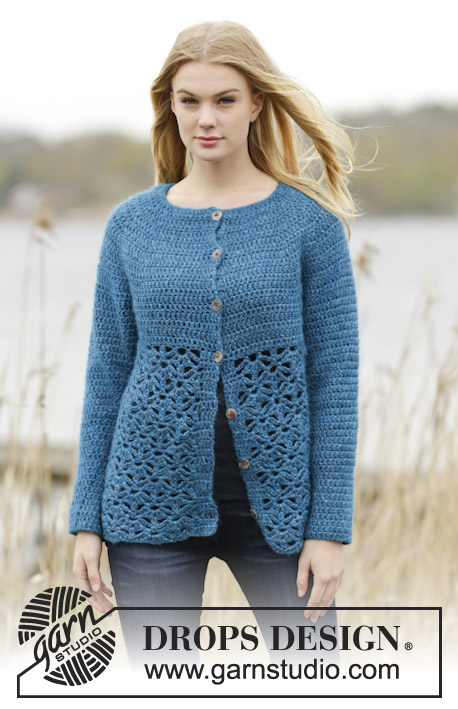
Lakeside |
||||||||||||||||||||||||||||
|
|
||||||||||||||||||||||||||||
Crochet DROPS jumper with double crochet, lace pattern and round yoke, worked top down in ”Air”.
DROPS 164-31 |
||||||||||||||||||||||||||||
|
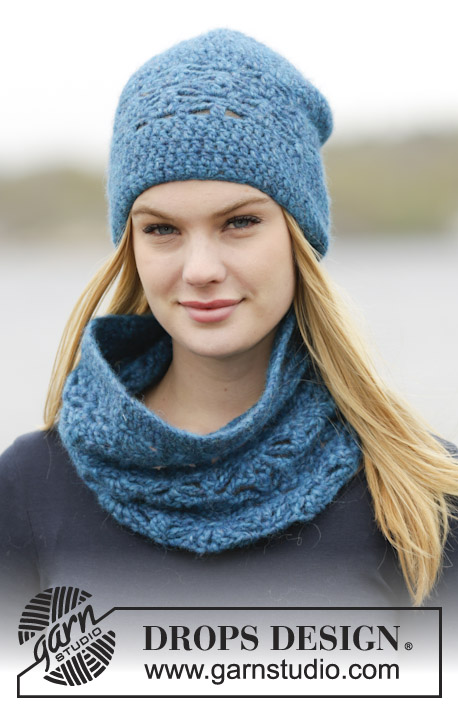
CROCHET INFO: Replace first sc at beg of every sc round with 1 ch. Finish every round with 1 sl st in ch from beg of round. Replace first dc at beg of every dc round with 3 ch. Finish round with 1 sl st in 3rd ch at beg of round. PATTERN: See diagrams A.1 and A.2. CROCHET 2 DC TOG (in dc): Work 1 dc in next dc but wait with last pull through, work 1 dc more in same dc, but on last pull through, pull through all sts on hook. CROCHET 2 DC TOG (around ch): Work 1 dc around the middle ch in dc-group but wait with last pull through, work 1 dc more around same ch, but on last pull through, pull through all sts on hook. DC-GROUP: Work a dc-group around ch-space as follows: Work * 1 dc, 1 ch *, repeat from *-* 2 more times around same ch-space, 1 dc around same ch-space. INCREASE TIP: Inc 1 dc by working 2 dc in 1 sc/dc. DECREASE TIP: Dec 1 dc at beg and end of round as follows: Work 1 dc (= 3 ch), * work 1 dc but wait with last pull through (= 2 sts on hook), then work next dc but on last pull through, pull yarn through all sts on hook *, repeat from *-* when 3 dc remain on round = 1 st dec on each side of marker. ---------------------------------------------------------- JUMPER: The piece is worked top down. Worked in the round, round beg mid back. YOKE: Work 66-69-75-82-84-90 loose ch on hook size 6 mm / J/10 with Air and form a ring with 1 sl st. Work first round as follows: ROUND 1: Work 1 ch - READ CROCHET INFO, work 1 sc in each of the first 1-4-2-1-3-1 ch, * skip ch 1, work 1 sc in each of the next 7 ch *, repeat from *-* 7-7-8-9-9-10 more times = 58-61-66-72-74-79 sc. ROUND 2: Work 1 dc in every sc while AT THE SAME TIME inc 6-8-8-9-12-23 dc evenly - READ INCREASE TIP = 64-69-74-81-86-102 dc. Now insert 8 markers in the piece for raglan inc without working sts. Insert 4 marker in each side from beg of round so that it is reversed from mid front: Insert a marker after 10-10-10-11-12-15 dc, insert next marker after 2 dc, then insert next marker after 8-10-12-14-14-17 dc, and finish with last marker after 2 dc. There are now 20-21-22-23-26-30 dc between the 2 middle markers towards front piece on jumper. Now continue with 1 dc in every dc, AT THE SAME TIME inc 1 dc on right side of each of the 8 markers. Then inc alternately on right and left side of every marker. Repeat inc every round 9-9-11-12-13-16 more times, and every other round 2-3-2-2-2-0 times = 160-173-186-201-214-238 dc on round. Piece measures approx. 20-23-23-24-26-27 cm / 8"-9"-9"-9½"-10 1/4"-10½". REMEMBER THE CROCHET GAUGE! On next round work as follows: Work 21-23-25-28-30-34 dc (= half back piece), 8 ch (under sleeve), skip 38-40-42-45-47-50 dc from previous row (= sleeve), 42-47-52-55-60-70 dc (= front piece), 8 ch (under sleeve), skip 38-40-42-45-47-50 dc from previous row (= sleeve) and 21-23-25-27-30-34 dc (= half back piece). Insert a marker, now measure piece from here! BODY: There are now 100-109-118-127-136-154 sts for body. NOW MEASURE THE PIECE FROM HERE. Work 1 round with 1 dc in every dc/ch. Then work PATTERN - see explanation above, as follows: NOTE: Work from 1st round in A.1-A.2. ROUND 1: Work 3 ch (= A.1) - remember crochet info. Then work A.2 as follows: * Work 2 dc TOG (in dc) - see explanation above, ch 5, skip 2 dc, 1 sc in next dc, ch 3, skip 2 dc, 1 sc in next dc, ch 5, skip 2 dc *, repeat from *-* 10-11-12-13-14-16 more times. Finish with 1 sl st in 3rd ch on round (= A.1). ROUND 2: Work ch 1, * work 1 sc in the 2 dc worked tog, ch 3, skip 1 ch-space, work 1 dc-GROUP - see explanation above, around next ch-space, ch 3, skip 1 ch-space *, repeat from *-* 10-11-12-13-14-16 more times. Finish with 1 sl st in 1st ch on round. ROUND 3: Work ch 1, * ch 2, 1 sc around next ch-space, ch 5, work 2 dc TOG (around ch-space) - see explanation above, ch 5, 1 sc around next ch after dc-group, 1 ch *, repeat from *-* 10-11-12-13-14-16 more times. Finish with 1 sl st in 1st ch on round. ROUND 4: Work ch 3, work (1 ch, 1 dc, ch 1, 1 dc) around first ch-space, ch 3, skip 1 ch-space, 1 sc in the 2 dc worked tog, ch 3, skip 1 ch-space, * (1 dc, ch 1, 1 dc, ch 1, 1 dc, ch 1, 1 dc) around next ch-space, ch 3, skip 1 ch-space, 1 sc in the 2 dc worked tog, ch 3, skip 1 ch-space *, repeat from *-* 9-10-11-12-13-15 more times, (1 dc, ch 1, 1 dc) around last ch-space. Finish with 1 sl st in 3rd ch on round. ROUND 5: Work ch 3, * work 2 dc TOG (around ch), ch 5, work 1 sc around ch-space after dc-group, ch 3, 1 sc around next ch-space, 5 ch *, repeat from *-* 10-11-12-13-14-16 more times. Finish with 1 sl st in 3rd ch on round. Continue like this and repeat A.X (= 2nd-5th round) until piece measures approx. 32 cm / 12½'' in all sizes - adjust to finish after 2nd or 4th round in A.1-A.2. Piece measures 56-60-60-62-64-66 cm / 22"-23½"-23½"-24½"-25 1/4"-26" in total. SLEEVE: Sleeve is worked in the round, top down. NOW MEASURE THE PIECE FROM HERE. Insert a marker in the middle of the 8 ch worked under sleeve. Let marker follow in piece until finished measurements. Fasten yarn with 1 sl st in the 5th ch of the 8 ch worked in armhole on body. Work 3 ch (= 1 dc) continue with 1 dc in each of the next ch 3, 1 dc in each of the dc for sleeve and then 1 dc in the remaining 4 ch under sleeve = 46-48-50-53-55-58 dc - remember CROCHET INFO! Continue with 1 dc in every dc AT THE SAME TIME when piece measures approx. 4 cm / 1½'' beg dec - READ DECREASE TIP. Repeat dec every 3rd-2nd-2nd-2nd-2nd-1st round 8-9-10-10-11-12 more times = 28-28-28-31-31-32 dc remain. When sleeve measures 46-44-44-43-42-40 cm / 18"-17 1/4"-17 1/4"-17"-16½"-15 3/4", sleeve is finished. Work the other sleeve the same way. ---------------------------------------------------------- Hat and neck warmer: See DROPS 164-32 or "Related patterns" in pattern on website. ---------------------------------------------------------- |
||||||||||||||||||||||||||||
Diagram explanations |
||||||||||||||||||||||||||||
|
||||||||||||||||||||||||||||

|
||||||||||||||||||||||||||||

|
||||||||||||||||||||||||||||
|
Have you made this or any other of our designs? Tag your pictures in social media with #dropsdesign so we can see them! Do you need help with this pattern?You'll find tutorial videos, a Comments/Questions area and more by visiting the pattern on garnstudio.com. © 1982-2024 DROPS Design A/S. We reserve all rights. This document, including all its sub-sections, has copyrights. Read more about what you can do with our patterns at the bottom of each pattern on our site. |
||||||||||||||||||||||||||||


With over 40 years in knitting and crochet design, DROPS Design offers one of the most extensive collections of free patterns on the internet - translated to 17 languages. As of today we count 304 catalogs and 11422 patterns - 11417 of which are translated into English (US/in).
We work hard to bring you the best knitting and crochet have to offer, inspiration and advice as well as great quality yarns at incredible prices! Would you like to use our patterns for other than personal use? You can read what you are allowed to do in the Copyright text at the bottom of all our patterns. Happy crafting!
Comments / Questions (41)
Herrlich, und jetzt ist das Kommentarfeld auch noch lächerlich kurz, dass man bloooß keine vollständige Frage stellen kann. Na wenn Ihnen 20 Kommentare lieber sind... Sie schrieben als Antwort auf die gleiche Frage oben "Es soll bedeuten, dass Sie die Zunahmen in JEDER Rd noch weitere 12 x wie beim 1. Mal machen, dann machen Sie die Zunahmen in JEDER 2.Rd noch 2 x wie beim 1. Mal. D.h. es liegt nun jeweils 1 Rd ohne Zunahmen dazwischen.", allerdings bringt mich das kein Stück weiter.
24.09.2017 - 15:10Es tut mir Leid, aber ich finde die Anleitung extrem schlecht geschrieben. Ich bin wirklich kein Anfänger, aber ich verstehe die Zunahmen an der Passe beim besten Willen nicht, weder auf Englisch noch auf Deutsch (und den anderen Fragen zufolge bin ich da offenbar nicht die Einzige), und an den Rest der Anleitung will ich gar nicht erst denken. Ich möchte das Teil am liebsten schon nach 3 Runden in de Ecke feuern bzw. aufribbeln und was anderes häkeln.
24.09.2017 - 15:05DROPS Design answered:
Liebe Frau Knaxgurke, dieses Video zeigt, wie man rechts und links von der Markierung bei der Rundpasse zunimmt (bitte beachten, im Video gibt es 6 Markierungen, in dieser Anleitung sollen Sie 8 Markierung einsetzen). Viel Spaß beim häkeln!
25.09.2017 - 10:31Kan denne hækles i alle garngruppe C garner? Jeg tænkte på om det ville være muligt at lave den i Brushed Alpaca Silk i stedet for Air?
04.01.2017 - 13:58DROPS Design answered:
Hej Sarah. Ja, det kan du sagtens. Men husk at hekle en pröve först saa din heklefasthed er korrekt:)
09.01.2017 - 15:16Ciao, c'è un errore nello schema A2, in particolare nella legenda del gruppo di maglie alte del 2' giro riporta: 1 ma, 1 cat, ripetere per 3 volte totale, 2 ma. Ma nella spiegazione dello schema invece riporta: 1 ma, 1 cat, ripetere 3 volte totale, 1 ma; che ha più senso per il 3' giro per fare ()
19.12.2016 - 20:49DROPS Design answered:
Buonasera Alessandra. Abbiamo corretto il testo nel diagramma. La ringraziamo per la segnalazione. Buon lavoro!
19.12.2016 - 22:25Hello! Beautiful pattern here! I was wondering if you by chance could tell the measurements of each size, please? I appreciate it so much! If they are not available it's fine and I understand. I love your patterns so much there are so many beautiful patterns!
19.06.2016 - 01:35DROPS Design answered:
Dear Donna, you an find a measurement chart (in cm) scrolling down the page: compare them with a garment you have and you'll find the right size. Happy crocheting!
19.06.2016 - 11:48Hello! Beautiful pattern here! I was wondering if you by chance could tell the measurements of each size, please? I appreciate it so much! If they are not available it's fine and I understand. I love your patterns so much there are so many beautiful patterns!
19.06.2016 - 01:10DROPS Design answered:
Dear Donna, you an find a measurement chart (in cm) scrolling down the page: compare them with a garment you have and you'll find the right size. Happy crocheting!
19.06.2016 - 11:48Hello! Beautiful pattern here! I was wondering if you by chance could tell the measurements of each size, please? I appreciate it so much! If they are not available it's fine and I understand. I love your patterns so much there are so many beautiful patterns!
19.06.2016 - 00:08DROPS Design answered:
Dear Donna, you an find a measurement chart (in cm) scrolling down the page: compare them with a garment you have and you'll find the right size. Happy crocheting!
19.06.2016 - 11:48Bonjour, je viens de réaliser ce modèle et mes "coutures" au dos et aux manches partent en biais ( je vois sur votre photo que vous avez le même problème à la manche ) , y a-t-il un moyen de faire autrement ? Merci de votre réponse
11.02.2016 - 11:32DROPS Design answered:
Chère Madame Hongens, votre question a été transmise à nos stylistes. Merci d'avance pour votre patience.
02.03.2016 - 10:33Merci pour votre rapidité et vos explications.
09.02.2016 - 09:46Bonjour j'ai un problème pour les augmentations,si je les fais sur les 8 marqueurs je me retrouve avec plus de mailles j'aimerai de l'aide S V P merci.
08.02.2016 - 09:54DROPS Design answered:
Bonjour Patricia, on augmente 8 m (= 1 m à chaque marqueur) 12 fois au total (1ère taille), soit 64 + (8x10 fois tous les tours + 8x2 fois tous les 2 tours = 96 augm) = 160 B. Bon crochet!
08.02.2016 - 13:51