
Popular categories
Looking for a yarn?


|
||||||||||||||||||||||||||||||||||
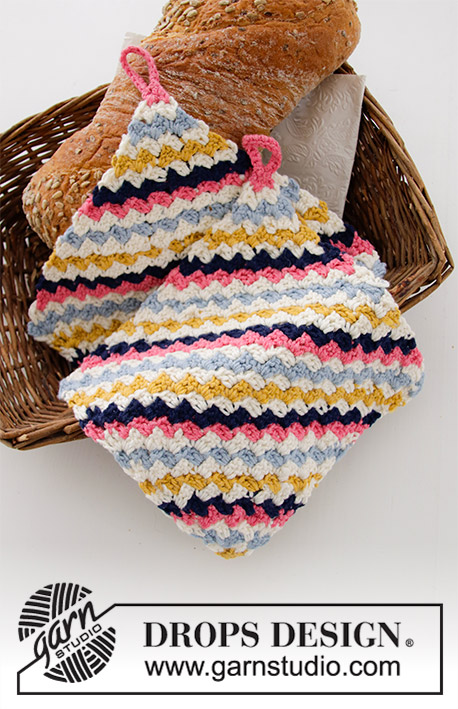
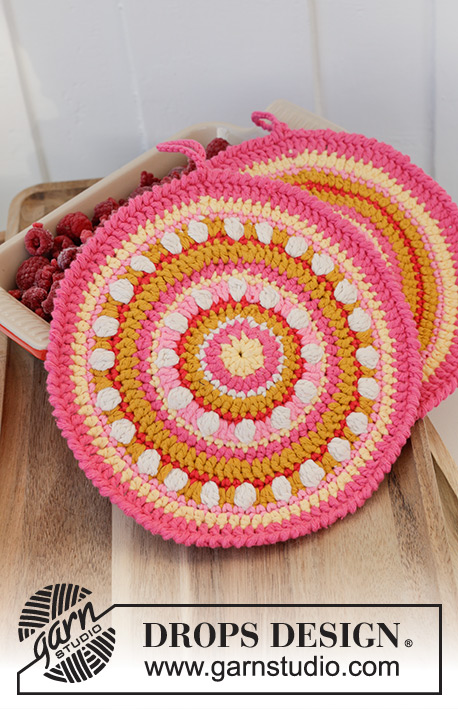
Colourful Spring |
||||||||||||||||||||||||||||||||||
 |
 |
|||||||||||||||||||||||||||||||||
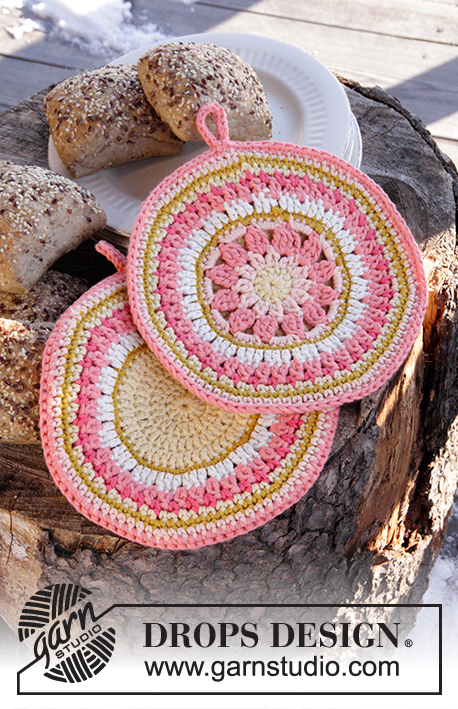
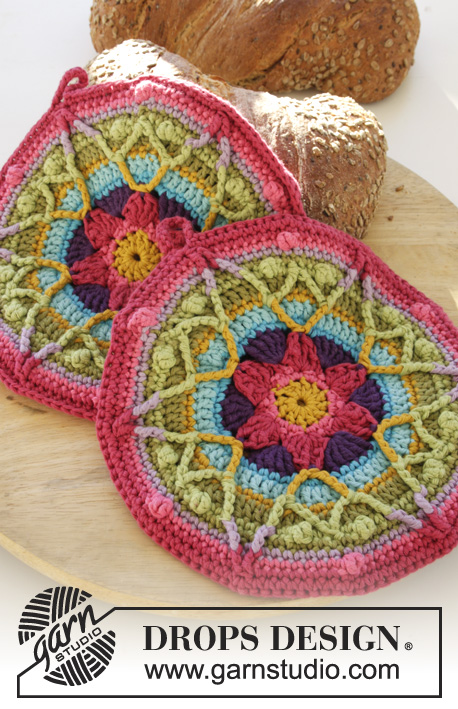
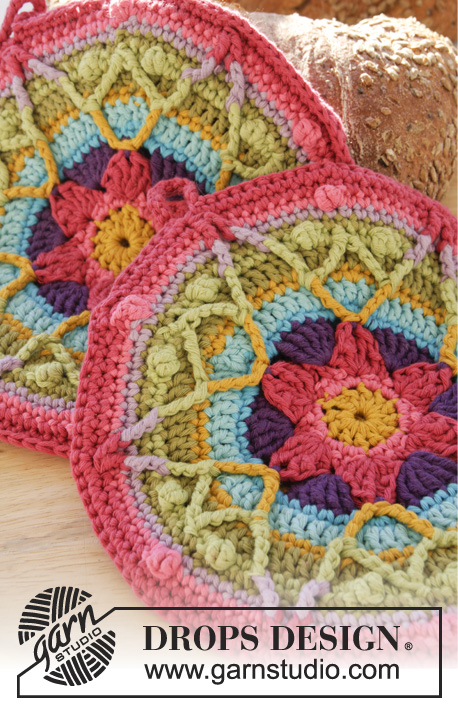
DROPS Easter: Crochet DROPS pot holders with star in ”Paris”.
DROPS Extra 0-1103 |
||||||||||||||||||||||||||||||||||
|
NOTE: Beg by reading from POT HOLDERS further down in pattern. PATTERN: See diagram A.1 (1st-5th round) and A.2 (6th-13th round). Diagrams show entire 1st and 2nd round, diagrams show 1 of 3 repetitions. TTR: Make 4 YOs on hook, move hook under st to be worked around, pull through first st, make YO around hook again, and pull through the first 2 sts, * make YO around hook again, and pull through the next 2 sts *, repeat from *-* 3 more times. BOBBLE: Work 1 sc in next st, work 2 tr tog into 1 tr as follows: 1 tr in same st but wait with last YO and pull through, work 1 tr in same st but pull last YO through all 3 sts on hook = 1 sc and 1 tr. CROCHET 2 TR TOG: 2 tr tog into 1 tr as follows: Work 1 tr but wait with last YO and pull through, work 1 tr in next st but pull last YO through all 3 sts on hook. TIP: Work 2 ttr and 1 sc into 1 st as follows: Work 1 ttr around same ttr as previous ttr was worked around but wait with last pull through, work 1 ttr around next ttr from 7th round but wait with last pull through, work 1 sc in next dc on round, now pull last YO through all 4 sts on hook. STRIPE COLORS: ROUND 1: Mustard ROUND 2: Shocking pink ROUND 3: Heather ROUND 4: Dark purple ROUND 5: Dark turquoise ROUND 6: Light turquoise ROUND 7: Mustard ROUND 8: Army ROUND 9: Pistachio ROUND 10: Army ROUND 11: Light purple ROUND 12: Shocking pink ROUND 13: Heather CROCHET INFO: Beg every dc round with 3 ch (these ch are not counted in no of dc), finish with 1 sl st in 3rd ch at beg of round. Beg every sc round with 1 ch (this ch is not counted in no of sc), finish with 1 sl st in first sc at beg of round. COLOR CHANGE: To get a nice transition between the color changes, work last sl st on round with the new color as follows: Insert hook in 1st/3rd ch from beg of round, get the new yarn, make a YO with the new color and pull it through st on hook (cut the yarn from previous row and pull it through st). STRAP: 1 ch, * 1 sc in front part of 1st sc from hook, 1 ch *, repeat from *-* until strap measures 6 cm / 2 3/8''. LINES AND DOT (applies if only working according to diagram): At every dot in diagram work around the st the line leads to. ROUND 7: Work TTR - see explanation above - around sc at start from 4th round. ROUND 9: Work ttr around ttr from 7th round. ROUND 11: Work 1 dtr around ttr from 9th round. ROUND 13: Work 1 tr around each of the 2 dtr from 11th round - READ CROCHET 2 TR TOG above. LINES AND CIRCLE (applies if only working according to diagram): At every circle in diagram work around the st the line leads to. Circle on 9th ROUND: 2 ttr (1 around each st with dot from 7th round), and work 1 sc into 1 st as follows: Work 1 ttr around st with dot but wait with last pull through, work 1 ttr around next st with dot but wait with last pull through, work 1 sc in next dc on round, now pull last YO through all 4 sts on hook. ---------------------------------------------------------- POT HOLDERS: Work 2 pot holders that consist of 2 pot holders each which are assemble tog. 1 POT HOLDER: Work 6 ch on hook size 4.5 mm/US 7 with mustard and form a ring with 1 sl st in 1st ch. READ STRIPE COLORS AND CROCHET INFO. Work PATTERN according to diagram – see explanation above, or according to pattern as follows: ROUND 1: Work 12 dc in ch-ring. ROUND 2: Work 1 sc in first dc, 2 sc in each of the next 11 dc, 1 sc in first dc from beg of previous round = 24 sc. ROUND 3: In space between the next 2 sc work 1 dc + 2 tr, 1 ch + 2 tr + 1 dc, skip 1 sc, 1 sc in space between the next 2 sc, * skip 1 sc, in space between the next 2 sc work 1 dc + 2 tr, 1 ch + 2 tr + 1 dc, skip 1 sc, 1 sc in space between the next 2 sc *, repeat from *-* 4 more times = 6 dc-groups. ROUND 4: 1 sc in first ch, ch 1, in space between dc and sc work 5 tr, ch 1, * 1 sc in next ch, ch 1, in space between dc and sc work 5 tr, 1 ch *, repeat from *-* 4 more times = 6 tr-groups, 12 ch and 6 sc. ROUND 5: Work 1 sc in first sc, 2 sc in next ch, 1 sc in each of the next 5 tr, 2 sc in next ch, * 2 sc in next sc, 2 sc in next ch, 1 sc in each of the next 5 tr, 2 sc in next ch *, repeat from *-* 4 more times, 1 sc in first sc from beg of round = 66 sc. ROUND 6: Work 1 dc in every sc the entire round = 66 dc. REMEMBER THE CROCHET GAUGE! ROUND 7: Work 1 sc in each of the first 3 dc, 1 ttr around first sc from 4th round, * work 1 sc in each of the next 5 dc, 1 ttr around next sc from 4th round, 1 sc in each of the next 2 dc, 2 sc in next dc, 1 sc in each of the next 3 dc, 1 ttr around same sc as previous ttr was worked around, 1 sc in each of the next 5 dc, 1 ttr around next sc from 4th round, 1 sc in each of the next 2 sc, 2 sc in next sc, 1 sc in each of the next 3 dc, 1 ttr around same sc as previous ttr was worked around *, repeat from *-* 1 more time, work 1 sc in each of the next 5 dc, 1 ttr around next sc from 4th round, 1 sc in each of the next 2 dc, 2 sc in next dc, 1 sc in each of the next 3 dc, 1 ttr around same sc as previous ttr was worked around, 1 sc in each of the next 5 dc, 1 ttr around same sc as first ttr was worked around, 1 sc in each of the next 2 sc, 2 sc in next sc = 12 ttr and 72 sc. ROUND 8: Work 1 dc in every sc/ttr the entire round = 84 dc. ROUND 9: Work 1 sc in first dc, 1 BOBBLE – see explanation above, 1 sc in each of the next 2 dc, 1 ttr around first ttr from 7th round, skip 1 dc, 1 sc in each of the next 3 dc, 1 ttr around next ttr from 4th round, * skip 1 dc, 1 sc in next dc, 1 bobble, 1 sc in each of the next 2 dc, work 1 TIP - see explanation above, 1 sc in next sc, 1 bobble, 1 sc in each of the next 2 sc, 1 ttr around same ttr as previous ttr was worked around, skip 1 dc, 1 sc in each of the next 3 dc, 1 ttr around next ttr from 7th round *, repeat from *-* 4 more times, work 1 ttr around next ttr from 7th round, 1 sc in next dc, 1 bobble, 1 dc in each of the next 2 dc, work 1 tip = 24 ttr, 72 sc and 12 bobbles. ROUND 10: Work 1 sc in every sc/ttr the entire round = 96 sc. ROUND 11: Work 1 sc in each of the first 7 sc, 1 dtr around first ttr from 9th round, 1 sc in next sc, 1 dtr around next ttr from 9th round, * 1 sc in each of the next 15 sc, work 1 dtr around first ttr after tip from 9th round, 1 sc in next sc, 1 dtr around next ttr from 9th round *, repeat from *-* 4 more times, 1 sc in each of the next 8 sc = 12 dtr and 96 sc. ROUND 12: Work 1 sc in each of the first 17 sc/dtr, 1 bobble, * 1 sc in each of the next 17 sc/dtr, 1 bobble *, repeat from *-* 4 more times = 102 sc and 6 bobbles. ROUND 13: Work 1 sc in each of the first 8 sc, 1 tr around each of the first 2 dtr from 11th round that are (the 2 tr) worked tog into 1 tr - READ CROCHET 2 TR TOG, * 1 sc in each of the next 18 sc/tr, 1 tr around each of the next 2 dtr from 11th round that are worked tog into 1 tr *, repeat from *-* 4 more times, 1 sc in each of the next 10 sc/tr. Work another 1 pot holder the same way for 1 pot holder. ASSEMBLY: Place the 2 pot holder tog, WS against WS and work them tog through both layers with heather as follows: REMEMBER CROCHET INFO! Work 1 sc in each of the first 8 sc, work STRAP – see explanation above, skip 1 sc, 1 sc in each of the next 17 sc, 2 sc in next tr, * 1 sc in each of the next 18 sts, 2 sc in next tr *, repeat from *-* 4 more times, 1 sc in each of the next 10 sc. Piece measures approx. 24 cm / 9 1/2'' in diameter. Fasten off. Work another 2 pot holders. |
||||||||||||||||||||||||||||||||||
Diagram explanations |
||||||||||||||||||||||||||||||||||
|
||||||||||||||||||||||||||||||||||

|
||||||||||||||||||||||||||||||||||
|
Have you made this or any other of our designs? Tag your pictures in social media with #dropsdesign so we can see them! Do you need help with this pattern?You'll find tutorial videos, a Comments/Questions area and more by visiting the pattern on garnstudio.com. © 1982-2024 DROPS Design A/S. We reserve all rights. This document, including all its sub-sections, has copyrights. Read more about what you can do with our patterns at the bottom of each pattern on our site. |
||||||||||||||||||||||||||||||||||


With over 40 years in knitting and crochet design, DROPS Design offers one of the most extensive collections of free patterns on the internet - translated to 17 languages. As of today we count 304 catalogs and 11422 patterns - 11417 of which are translated into English (US/in).
We work hard to bring you the best knitting and crochet have to offer, inspiration and advice as well as great quality yarns at incredible prices! Would you like to use our patterns for other than personal use? You can read what you are allowed to do in the Copyright text at the bottom of all our patterns. Happy crafting!
Comments / Questions (7)
Toer 3 eindig ik met een vaste, vervolgens moet ik toer 4 beginnen met een vaste in de eerste -L. Maar hoe kom ik daar? Moet ik toer 4 beginnen met 4 L ?
24.11.2018 - 21:24DROPS Design answered:
Dag Wilma,
Goede vraag (staat inderdaad niet goed aangegeven). Om aan het begin van de toer te komen na de laatste steek van toer 3 kun je het beste halve vaste haken langs de zijkant van het groepje stokjes.
28.11.2018 - 13:14Dobrý den, hlásím hotové obě chňapky, jsou nádherné. Jen víc utahuju, vyšly mi o 2cm v průměru menší. Děkuji za skvělý návod. Monika
31.07.2015 - 11:15DROPS Design answered:
Milá Moniko, díky za zprávu - návrhářská sekce byla pochvalou potěšena :-) A vy se na oplátku můžete těšit na další (věřím, že báječné) nápady, modely i návody. Hodně zdaru! Hana
01.08.2015 - 18:44Har det kommit någon rättelse till denna? Is there any errata for this pattern yet?
25.07.2015 - 09:43Hej Efter at have pillet op 3 gange, har jeg fundet en fejl i omgang 9. Der skal også springes en fm over under SPIDS. Ellers passer det ikke.
09.07.2015 - 19:55Helemaal gelijk. Toch het patroon niet goed gelezen.mijn fout was dat ik elke vaste maar 1 vaste deed ipv 2. Dank voor de reactie
01.06.2015 - 15:24Met dit patroon kom ik na de stokjes ronde op maar 60 stokjes uit ipv 66 die het patroon aangeeft. na 3 keer opnieuw beginnen geef ik het maar op. jammer
31.05.2015 - 13:56DROPS Design answered:
Hoi Rita. Dat is jammer. Ik heb toer 5 nagekeken en uitgerekend, en als je die correct haakt zou je op 66 steken uitkomen: haak 1 v in eerste v, 2 v in volgende l, 1 v in elke van de volgende 5 dstk, 2 v in volgende l, * 2 v in volgende v, 2 v in volgende l, 1 v in elke van de volgende 5 dstk, 2 v in volgende l *, herhaal van *-* nog 4 keer, 1 v in eerste v van het begin van de toer = 66 v = 1+2+5+2 (=10), *2+2+5+2* (aantal st tussen de sterretjes), herhaal in TOTAAL 5 keer (= 55), eindig met 1 v in de eerste v = 66
01.06.2015 - 13:56Hej! Varför går det inte att skriva ut diagrammet till Colorful Spring By Drops Design Extra 0-1103, när hela övriga mönstret fungerar perfekt. Vill så gärna virka dessa grytlappar men har inte tillgång till data alltid. Gäller alltså bara själva diagrammet. Hälsning Anna-Greth
09.04.2015 - 11:17DROPS Design answered:
Hei Anne-Greth. Du skulle kunne printe diagram ud uden problemer.
22.04.2015 - 15:58