DROPS Baby Merino
DROPS Baby Merino
100% Wool
from 3.50 £ /50g
Get the yarn to make this pattern from 24.50£.

The yarn cost is calculated from the pattern’s smallest size and the yarn’s cheapest product type. Looking for an even better price? You might find it on the DROPS Deals!

DROPS SS24

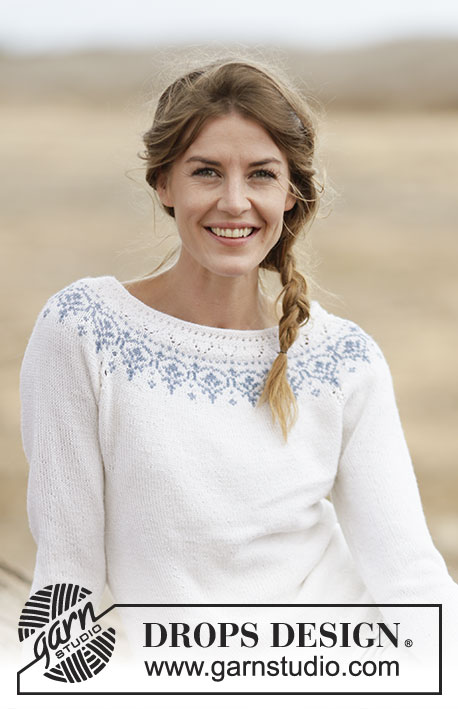
Nordic Summer Cardigan

Knitted DROPS jacket with raglan and round yoke in ”BabyMerino”. Size: S - XXXL.

DROPS 161-32
DROPS design: Pattern no bm-016
Yarn group A
----------------------------------------------------------
Size: S - M - L - XL - XXL - XXXL
Materials:
DROPS BABY MERINO from Garnstudio
300-350-350-400-450-500 g colour no 01, white
50 g for all sizes in colour no 25, lavender

DROPS DOUBLE POINTED NEEDLES and CIRCULAR NEEDLE (80 cm) SIZE 3 mm - or size needed to get 24 sts x 32 rows in stocking st = 10 x 10 cm.
DROPS DOUBLE POINTED NEEDLES and CIRCULAR NEEDLE (80 cm) SIZE 2.5 mm - for edge.
DROPS MOTHER-OF-PEARL BUTTON: ARCHED (white), NO 521: 8 pieces in all sizes

-------------------------------------------------------

Alternative Yarn – See how to change yarns here
Yarn Groups A to F – Use the same pattern and change the yarn here
Yarn usage using an alternative yarn – Use our yarn converter here

-------------------------------------------------------

DROPS Baby Merino
DROPS Baby Merino
100% Wool
from 3.50 £ /50g
Get the yarn to make this pattern from 24.50£.

The yarn cost is calculated from the pattern’s smallest size and the yarn’s cheapest product type. Looking for an even better price? You might find it on the DROPS Deals!

Pattern instructions

NOTE: This pattern is written in British English. All measurements in charts are in cm. For conversion from cm to inches - click here. There are different terms for crocheting in British and American English. If this pattern includes crochet, click for "crochet terms" here. For this pattern in American English, please click here.
GARTER ST (back and forth on needle):
K all rows. 1 ridge = 2 rows K.

PATTERN:
See diagrams A.1 to A.5. The diagrams show all rows in pattern seen from RS.

BUTTONHOLES:
Cast off for buttonholes on right band. 1 buttonhole = cast off third and fourth st from edge and cast on 2 new sts on next row over these sts. Cast off for buttonholes when piece measures:
SIZE S: 2, 10, 17, 25, 32, 40, 47 and 55 cm.
SIZE M: 2, 10, 18, 26, 34, 42, 50 and 57 cm.
SIZE L: 2, 10, 18, 26, 34, 42, 50 and 59 cm.
SIZE XL: 2, 10, 19, 27, 36, 44, 53 and 61 cm.
SIZE XXL: 2, 11, 20, 29, 38, 47, 55 and 63 cm.
SIZE XXXL: 2, 11, 20, 29, 38, 47, 56 and 65 cm.

WAIST:
Dec for waist at the 4 markers. All dec are done from RS!
Dec as follows when 2 sts remain before 1st and 3rd marker: Slip 1 st as if to K, K 1, psso.
Dec as follows after 2nd and 4th marker: K 2 tog.

INCREASE TIP:
Inc for waist at the 4 markers. All inc are done from RS.
Inc as follows: Make 1 YO before 1st and 3rd marker and after 2nd and 4th marker. On next row P YO twisted to avoid holes.

RAGLAN:
Dec for raglan on each side of A.3 in every transition between sleeves and body. All dec are done from RS!
Dec as follows after A.3: Slip 1 st as if to K, K 1, psso.
Dec as follows 2 sts before A.3: K 2 tog.
----------------------------------------------------------

BODY:
Worked back and forth on circular needle from mid front.
Cast on 211-231-251-275-299-327 sts (incl 5 band sts in each side towards mid front) on circular needle size 2.5 mm with white. Work first row as follows from RS: 5 band sts in GARTER ST - see explanation above, work pattern according to diagram A.1 until 6 sts remain, finish with 1st st in A.1 and 5 band sts in GARTER ST. Continue the pattern like this - NOTE: ON 7th row in diagram K last st before band (seen from RS). Remember BUTTONHOLES on band - see explanation above. When A.1 has been worked 1 time vertically, switch to circular needle size 3 mm. Then work in stocking st with 5 band sts in garter st in each side towards mid front. REMEMBER THE KNITTING TENSION
When piece measures 8-8-8-8-10-10 cm, insert 4 markers in piece as follows: Insert 1st marker after the first 31-32-34-35-35-36 sts, 2nd marker after the next 48-56-62-72-84-96 sts, 3rd marker after the next 53-55-59-61-61-63 sts and 4th marker after the next 48-56-62-72-84-96 sts (31-32-34-35-35-36 sts remain on needle after last marker).
On next row from RS, dec for WAIST at the 4 markers – see explanation above (= 4 sts dec). Repeat dec every 4th row (i.e. every other row from RS) 7-7-7-7-6-6 times in total = 183-203-223-247-275-303 sts. When piece measures 22 cm in all sizes, inc before 1st and 3rd marker and after 2nd and 4th marker – READ INCREASE TIP (= 4 sts inc). Repeat inc every 4th-4th-6th-6th-8th-8th row 7-7-7-7-6-6 times in total = 211-231-251-275-299-327 sts. Continue to work until piece measures 38-39-39-40-41-43 cm. Work next row as follows from WS: Work 50-55-60-65-71-78 sts (= left front piece), cast off 10-10-10-12-12-12 sts for armhole, work 91-101-111-121-133-147 sts in stocking st (= back piece), cast off 10-10-10-12-12-12 sts for armhole and work the last 50-55-60-65-71-78 sts (= right front piece). Put piece aside and knit the sleeves.

SLEEVE:
Worked in the round on double pointed needles.
Cast on 56-56-58-60-62-64 sts on double pointed needles size 2.5 mm with white. Work pattern according to diagram A.2. When A.2 has been worked 1 time vertically, switch to double pointed needles size 3 mm. Insert 1 marker at beg of round (= mid under sleeve) and work in stocking st. When piece measures 8 cm, inc 2 sts mid under sleeve. Repeat inc every 9th-7th-7th-6th-6th-5th round 12-14-14-16-16-17 times in total = 80-84-86-92-94-98 sts. When piece measures 41-40-39-38-38-38 cm (NOTE: shorter measurements in the larger sizes because of longer sleeve cap and wider shoulders), cast off the middle 10-10-10-12-12-12 sts under sleeve (i.e. cast off 5-5-5-6-6-6 sts on each side of marker) = 70-74-76-80-82-86 sts remain on needle. Put piece aside and knit another sleeve.

YOKE:
Slip sleeves on to same circular needle as body as follows: Beg from RS with white and work sts from right front piece, then work sts from first sleeve AT THE SAME TIME insert 1 marker in first st and 1 marker in last st on sleeve, work sts from back piece, work sts from the other sleeve AT THE SAME TIME insert 1 marker in first st and 1 marker in last st on sleeve and finally work sts from left front piece = 331-359-383-411-439-475 sts on needle and 4 markers in piece.
Then work in stocking st back and forth AT THE SAME TIME work A.3 in every transition between body and sleeves (arrow in diagram should match against st with marker). AT THE SAME TIME on next row from RS dec for RAGLAN on each side of A.3 in every transition between body and sleeves – see explanation above (= 8 sts dec). Repeat dec for raglan every 4th row (i.e. every other row from RS) 6-7-8-8-9-9 times in total = 283-303-319-347-367-403 sts. After last dec, P 1 row from WS (continue bands in garter st) AT THE SAME TIME dec 20-26-28-32-36-40 sts evenly (do not dec over bands) = 263-277-291-315-331-363 sts on needle. Work next row as follows from RS: 5 band sts as before, work pattern according to diagram A.4 until 6 sts remain on row (NOTE: choose diagram for correct size), finish with 1 st in stocking st and 5 band sts in garter st as before. Continue the pattern like this AT THE SAME TIME dec as shown in diagram - NOTE: work the last st in stocking st before band (seen from RS) as 1st st in A.4 but without dec, so that A.4 beg and ends the same way in each side towards mid front. When A.4 has been worked 1 time vertically, there are 191-201-211-239-251-275 sts on needle. P 1 row from WS with white (continue bands in garter st) while AT THE SAME TIME dec 4-6-8-28-30-44 sts evenly (do not dec over bands) = 187-195-203-211-221-231 sts. Work next row as follows from RS: 5 band sts as before, work pattern according to diagram A.5 until 6 sts remain on row (NOTE: choose diagram for correct size), finish with 1 st in stocking st and 5 band sts in garter st as before. When A.5 has been worked 1 time vertically, work an elevation in the back of neck as follows: Beg from RS with white and K until 20-20-22-22-24-26 sts remain on row. Turn, K back until 20-20-22-22-24-26 sts remain in the other side. Turn, K until 36-36-40-40-44-48 sts remain. Turn, K back until 36-36-40-40-44-48 sts remain in the other side. Turn, K until 52-52-58-58-64-70 sts remain. Turn, K back until 52-52-58-58-64-70 sts remain in the other side. Turn, K until 68-68-76-76-82-92 sts remain. Turn, K back until 68-68-76-76-82-92 sts remain in the other side. Turn piece and K the rest of the row.

NECK EDGE:
Switch to circular needle size 2.5 mm, beg from WS and work pattern according to diagram A.1 (beg on 2nd row in A.1). On next row from RS, dec 30-28-36-34-44-44 sts evenly = 157-167-167-177-177-187 sts. When A.1 has been worked 1 time vertically, loosely cast off with K from RS. Jacket measures approx. 56-58-60-62-64-66 cm from shoulder and down.

ASSEMBLY:
Sew the openings under the sleeves. Sew on buttons.

Diagram

symbols = K from RS, P from WS with white
symbols = P from RS, K from WS with white
symbols = K from RS, P from WS with lavender
symbols = 1 YO with white
symbols = K 2 tog with white
symbols = slip 1 st as if to K, K 2 tog with white, psso
diagram
diagram
diagram
diagram

Each of our patterns has specific tutorial videos to help you.

Do you have a question? See a list of frequently asked questions (FAQ)

Knitting tension is what determines the final measurements of your work, and is usually measured per 10 x 10 cm. It is provided like so: number of stitches in width x number of rows in height - eg: 19 stitches x 26 rows = 10 x 10 cm.

The knitting tension is very individual; some people knit/crochet loosely while others work tightly. You adjust the knitting tension with the needle size, which is why the suggested needle size is only meant as a guide! You need to adjust this (up or down) to ensure that YOUR knitting tension matches the knitting tension provided in the pattern. If you work with a different knitting tension than provided you will have a different yarn consumption, and your work will have different measurements than what the pattern suggests.

The knitting tension also determines which yarns can replace each other. As long as you achieve the same knitting tension you can replace one yarn with another.

See DROPS lesson: How to measure your tension/gauge

See DROPS video: How to make a gauge tension swatch

The required amount of yarn is provided in grams, eg: 450 g. To calculate how many balls you’ll need you first need to know how many grams are in 1 ball (25g, 50g or 100g). This information is available if you click on the individual yarn quality on our pages. Divide the amount required with the amount of each ball. For example, if each ball is 50g (the most common amount), the calculation will be as follows: 450 / 50 = 9 balls.

The important thing when changing from one yarn to another is that the knitting/crochet tension remains the same. This is so that the measurements of the finished piece will be the same as on the sketch provided. It is easier to achieve the same knitting tension using yarns from the same yarn group. It is also possible to work with multiple strands of a thinner yarn to achieve the knitting tension of a thicker one. Please try our yarn converter. We recommend you to always work a test swatch.

Please NOTE: when changing yarn the garment might have a different look and feel to the garment in the photo, due to individual properties and qualities of each yarn.

See DROPS lesson: Can I use a different yarn than the one mentioned in the pattern?

All our yarns are categorised into yarn groups (from A to F) according to thickness and knitting tension – group A contains the thinnest yarns and group F the thickest. This makes it easier for you to find alternative yarns to our patterns, should you wish to switch yarn. All yarns within the same group have a similar knitting tension and can easily replace each other. However, different yarn qualities have different structures and properties which will give the finished work a unique look and feel.

Click here for an overview of the yarns in each yarn group

At the top of all our patterns you’ll find a link to our yarn calculator, which is a helpful tool should you wish to use a different yarn than suggested. By filling in the yarn quality you wish to replace, the amount (in your size) and number of strands, the calculator will present good alternative yarns with the same knitting tension. Additionally it will tell you how much you’ll require in the new qualities and whether you’ll need to work with multiple strands. Most skeins are 50g (some are 25g or 100g).

If the pattern is worked with multiple colours, every colour will have to be calculated separately. Similarly, if the pattern is worked with several strands of different yarns (for example 1 strand Alpaca and 1 strand Kid-Silk) you will have to find alternatives for each, individually.

Click here to see our yarn calculator

Since different yarns have different qualities and textures we have chosen to keep the original yarn in our patterns. However, you can easily find options among our available qualities by using our yarn calculator, or simply pick a yarn from the same yarn group.

It is possible that some retailers still have discontinued yarns in stock, or that someone has a few skeins at home that they would like to find patterns for.

The yarn calculator will provide both alternative yarn as well as required amount in the new quality.

If you think it's hard to decide what size to make, it can be a good idea to measure a garment you own already and like the size of. Then you can pick the size by comparing those measures with the ones available in the pattern's size chart.

You'll find the size chart at the bottom of the pattern.

See DROPS lesson: How to read size chart

The needle size provided in the pattern serves only as a guide, the important thing is to follow the knitting tension. And since knitting tension is very individual, you will have to adjust the needle size to ensure that YOUR tension is the same as in the pattern – maybe you’ll have to adjust 1, or even 2 needle sizes, up or down to achieve the correct tension. For this, we recommend that you work test swatches.

Should you work with a different knitting tension than the one provided, the measurements of the finished garment might deviate from the measurement sketch.

See DROPS lesson: How to measure your tension/gauge

See DROPS video: How to make a tension/gauge swatch

Working a garment top-down provides more flexibility and room for personal adjustment. For example it is easier to try the garment on while working, as well as making adjustments to length of yoke and shoulder caps.

The instructions are carefully explaining every step, in the correct order. Diagrams are adjusted to the knitting direction and are worked as usual.

The diagram depicts all rows/rounds, and every stitch seen from the right side. It is read from bottom to top, from right to left. 1 square = 1 stitch.

When working back and forth, every other row is worked from the right side and every other row is worked from the wrong side. When working from the wrong side, the diagram will have to be worked reversed: from left to right, knit stitches are purled, purl stitches are knit etc.

When working in the round every round is worked from the right side and the diagram are worked from right to left on all rounds.

See DROPS lesson: How to read knitting diagrams

The diagram depicts all rows/rounds, and every stitch seen from the right side. It is worked from bottom to top, from right to left.

When working back and forth every other row is worked from the right side: from right to left and every other row is worked from the wrong side: from left to right.

When working in the round, every row in the diagram are worked from the right side, from right to left.

When working a circular diagram you start in the middle and work your way outwards, counter clockwise, row by row.

The rows usually start with a given number of chain stitches (equivalent to the height of the following stitch), this will either be depicted in the diagram or explained in the pattern.

See DROPS lesson: How to read crochet diagrams

Instructions for working several diagrams after each other on the same row/round, will often be written like so: “work A.1, A.2, A.3 a total of 0-0-2-3-4 times". This means you work A.1 once, then A.2 is worked once, and A.3 is repeated (in width) the number of times provided for your size – in this case like so: S = 0 times, M = 0 times, L=2 times, XL= 3 times and XXL = 4 times.

The diagrams are worked as usual: begin with the first row in A.1, then work the first row in A.2 etc.

See DROPS lesson: How to read knitting diagrams

See DROPS lesson: How to read crochet diagrams

The total width of the garment (from wrist-to-wrist) will be larger in the larger sizes, despite the actual sleeves being shorter. The larger sizes have longer sleeve caps and wider shoulders, so there will be a good fit in all sizes.

The measurement sketch/schematic drawing provides information regarding the full length of the garment. If it’s a jumper or a jacket the length is measured from the highest point on the shoulder closest to the neckline, and straight down to the bottom of the garment. It is NOT measured from the tip of shoulder. Similarly, the length of yoke is measured from the highest point on the shoulder and down to where yoke is split into body and sleeves.

On a jacket measures are never taken along bands, unless specifically stated. Always measure inside band stitches when measuring the length.

See DROPS lesson: How to read a schematic drawing

Diagrams are often repeated on the round or in height. 1 repeat is the diagram the way it appears in the pattern. If it says to work 5 repeats of A.1 in the round, then you work A.1 a total of 5 times after/next to each other in the round. If it says to work 2 repeats of A.1 vertically/in height you work the entire diagram once, then begin again at the start and work the entire diagram one more time.

Chain stitches are slightly narrower than other stitches and to avoid working the cast-on edge too tight, we simply chain more stitches to begin with. The stitch count will be adjusted on the following row to fit the pattern and measurement sketch.

The rib edge is more elastic and will contract slightly compared to, for example, stocking stitch. By increasing before the rib edge, you avoid a visible difference in width between the rib edge and the rest of the body.

It’s very easy to cast off too tightly, and by making yarn overs while casting off (and simultaneously casting these off) you avoid a too tight cast off edge.

See DROPS video: How to bind off with yarn overs (yo)

To achieve an even increase (or decrease) you can increase on, for example: every 3rd and 4th row alternately, like so: work 2 rows and increase on the 3rd row, work 3 rows and increase on the 4th. Repeat this until the increase is complete.

See DROPS lesson: Increase or decrease 1 st on every 3rd and 4th row alternately

Should you prefer to work in the round instead of back and forth, you may of course adjust the pattern. You’ll need to add steeks mid-front (usually 5 stitches), and follow the instructions. When you would normally turn and work from the wrong side, simply work across the steek and continue in the round. At the end you’ll cut the piece open, pick up stitches to work bands, and cover the cut edges.

See DROPS video: How to knit steeks and cut open

Should you prefer to work back and forth instead of in the round, you may of course adjust the pattern so you work the pieces separately and then assemble them at the end. Divide the stitches for the body in 2, add 1 edge stitch in each side (for sewing) and work the front and back pieces separately.

See DROPS lesson: Can I adapt a pattern for circular needles into straight needles?

Pattern repeats can vary slightly in the different sizes, in order to get the correct proportions. If you’re not working the exact same size as the garment in the photo, yours might deviate slightly. This has been carefully developed and adjusted so that the complete impression of the garment is the same in all sizes.

Make sure to follow instructions and diagrams for your size!

If you have found a pattern you like which is available in women’s size it’s not very difficult to convert it to men’s size. The biggest difference will be the length of sleeves and body. Start working on the women size that you think would fit across the chest. The additional length will be worked right before you cast off for the armhole/sleeve cap. If the pattern is worked top-down you can add the length right after the armhole or before the first decrease on sleeve.

Regarding additional yarn amount, this will depend on how much length you add, but it is better with a skein too many than too few.

All yarns will have excess fibres (from production) that might come off as lint or shedding. Brushed yarns (ie hairier yarns) have more of these loose, excess fibres, causing more shedding.

Shedding also depends on what is worn under or over the garment, and whether this pulls at the yarn fibres. It’s therefore not possible to guarantee that there will be no shedding

Below are some tips on how to get the best result when working with hairier yarns:

1. When the garment is finished (before you wash it) shake it vigorously so the looser hairs come off. NOTE: do NOT use a lint roller, brush or any method that pulls at the yarn.

2. Place the garment in a plastic bag and put it in your freezer - the temperature will cause the fibres to become less attached to each other, and excess fibres will come off easier.

3. Leave in the freezer for a few hours before taking it out and shaking it again.

4. Wash the garment according to the instructions on the yarn label.

Pilling is a natural process that happens to even the most exclusive of fibers. It's a natural sign of wear and tear that is hard to avoid, and that is most visible in high friction areas of your garment like a sweater's arms and cuffs.

You can make your garment look as new by removing the pilling, using a fabric comb or a pill/lint remover.

Still can't find the answer you need? Then scroll down and leave your question so one of our experts can try to help you. This will be done normally within 5 to 10 working days.
In the meantime, you can read the questions and answers that others have left to this pattern or join the DROPS Workshop on Facebook to get help from fellow knitters/crocheters!

You might also like...

Post a comment to pattern DROPS 161-32

We would love to hear what you have to say about this pattern!

If you want to leave a question, please make sure you select the correct category in the form below, to speed up the answering process. Required fields are marked *.

Comments / Questions (27)

country flag Nadette wrote:

Bonjour, Je viens de terminer ce modèle : le résultat est vraiment joli. Seul bémol : j'ai suivi scrupuleusement les explications pour la taille M comme je le fais pour les modèles Drops en utilisant la laine Baby Mérino et des aiguilles 2.5 et 3 mais le cardigan correspond plutôt à une taille S...

28.02.2021 - 21:14

DROPS Design answered:

Bonjour Nadette, en fonction de la forme du modèle, certains seront plus près du corps que d'autres, pensez toujours à bien vérifier les mesures du schéma avec celles d'un vêtement similaire dont vous aimez la forme pour bien avoir les bonnes mesures finales souhaitées. Et n'hésitez pas à partager vos photos pour la galerie DROPS fan - plus d'infos ici. Bonne continuation!

01.03.2021 - 10:17

country flag Ursula Gajewski wrote:

Liebes Drops-Team: In der Passe - "GLEICHZEITIG 20-26-28-32-36-40 M gleichmäßig verteilt abnehmen (nicht bei den Blenden-M abnehmen) " - soll man diese Maschen in der Passe in einer Reihe oder über mehrere Reihen verteilt abnehmen??? Vielen Dank für eine Antwort!!!

12.03.2020 - 18:30

DROPS Design answered:

Liebe Frau Gajewski, diese Maschen werden in einer Reihe abgenommen - hier lesen Sie, wie man regelmäßig verteilt abnimmt. Viel Spaß beim stricken!

13.03.2020 - 08:34

country flag AAnette Tougaard wrote:

Jeg kan ikke lige finde ud af mønsteret. For der er lige midt i forklaringen beskrevet en forkant, og jeg skal pludselig strikke frem og tilbage. Det passer jo ikke til den lukkede trøje.

07.02.2020 - 07:49

DROPS Design answered:

Hej Anette, Jo denne trøje er skrevet som en jakke, hvis du vil strikke blusen så skal du følge DROPS 161-33 God fornøjelse!

10.02.2020 - 16:53

country flag Olga wrote:

Witam serdecznie.Czy schemat A3 ma byc przerobiony tylko jeden raz ,czy wiecej razy ?

24.11.2019 - 19:00

DROPS Design answered:

Witaj Olgo! Schemat A.3 jest przerabiany 4 razy w rzędzie (w miejscach podkrojów reglanów). Jest on powtarzany na wysokość, aż reglan zostanie zakończony, np. w rozmiarze S będzie on powtórzony 2 razy na wysokość, a w ostatnim rozmiarze 3 razy na wysokość. Pozdrawiamy i miłej pracy!

24.11.2019 - 23:12

country flag Angela Humeniuk wrote:

When working A3, are you to leave the yo as a hole or do you work the back of the stitch to close the gap?

12.10.2019 - 00:41

DROPS Design answered:

Dear Angela, according the pattern, you knit the yarnovers (so there is a hole in their places. But it is up to you. The hole are decortive (I used them, when i knitted this pattern), but if you prefer, you can close it too. Happy Knitting!

12.10.2019 - 01:16

country flag Charlotte Thomsen wrote:

Ifølge opskriften skal man efter mønster A5 er strikket lave vendestrik. I opskriften står beskrevet at man skal strikke ret på såvel ret og vrang siden - kan det virkelig passe? Dvs. det er ikke glatstrikning men retstrikning og kun på ryggen/nakken

18.09.2019 - 17:48

DROPS Design answered:

Hej Charlotte, ja det stemmer, vi har strikket forhøjningen i retstrik, men det er smag og behag så du er naturligvis velkommen til at strikke den i glatstrik :)

19.09.2019 - 09:55

country flag Israa Samir wrote:

Hello I wonder if your team can offer a ready made clothes meaning can i choose a design and size and you can make it for me and send it to me

12.09.2019 - 17:12

DROPS Design answered:

Hello! Garnstudio DROPS Design only wholesales yarn. You can find a list of retailers on our stores page. Hope it helps!

25.09.2019 - 12:02

country flag Birgit Haug wrote:

Ich habe dieses wunderschöne Jäckchen gestrickt,aber die Maschenzahl und die Angaben für den Halsausschnitt stimmen nicht. erst als ich 40! Maschen zusätzlich abgenommen habe und ein verkürztes Muster strickte, hat es funktioniert.

31.07.2019 - 13:12

DROPS Design answered:

Liebe Frau Haug, die Jacke hat eine relativ weiten Halsausschnitt, die Maße des Halsausschnitts sehen Sie ja in der Maßskizze. Welche Größe haben Sie denn gestrickt? Ein Fehler ist in der Anleitung erst einmal nicht zu erkennen...

01.08.2019 - 09:09

country flag Lillian Solberg wrote:

Hvordan vil det bli om jeg ikke strikker jakken frem og tilbake, men heller strikker rundt og klipper opp etterpå?

10.05.2018 - 11:26

DROPS Design answered:

Hei Lillian, Du kan gjerne strikke rundt og klippe opp etterpå. Du må bare justere oppskriften slik at du strikke båndene til slutt, God fornøyelse!

11.05.2018 - 07:57

country flag Alena wrote:

Dobrý den, nemohu se dopočítat opakování vzoru A1 u velikosti M. Zde je psáno 231 ok.Vzor A1 se skládá z 8 ok. Takže mi to vychází na 227 včetně 5 ok légy na každou stranu. Opakuji 27 x vzor A1, pak 1 oko ze vzoru A1 + 5 + 5 ok légy = 227. Je to tak správně? Jak je prosím rozmístění značek pro tuto velikost? A zbývající rozpis ok?

05.03.2018 - 09:37