
Popular categories
Looking for a yarn?


|
|||||||||||||||||||
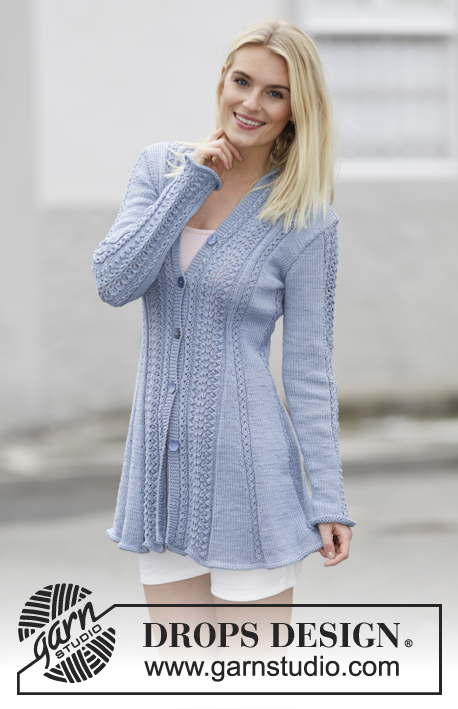
Blue Bird Song |
|||||||||||||||||||
 |
 |
||||||||||||||||||
Knitted DROPS jacket with lace pattern and shawl collar in ”Muskat” or "Belle". Size: S - XXXL.
DROPS 161-1 |
|||||||||||||||||||
|
GARTER ST (worked in the round): 1 ridge = 2 rounds. * K 1 round and P 1 round *, repeat from *-*. GARTER ST (back and forth): K all rows. 1 ridge = K2 rows. SHORT ROWS IN BAND: Work short rows over sts in band to avoid it contracting vertically. Work as follows from RS on every 20th row: K 5 (= right band), turn and work back. Work 1 row over all sts as before. Turn and K 5 (= left band), turn and work back. Turn and work 1 row over all sts as before. PATTERN: See diagrams A.1-A.4. The diagrams show all rows in pattern seen from RS. INCREASE TIP: All inc are done from RS. Inc by making 1 YO between 2 sts. On next row P YO twisted to avoid holes. Work inc sts in stockinette st. KNITTING TIP: K 4 twisted tog as follows: K 4, pass next to last st worked over the last so that this st is around the last st, repeat until all 3 sts have been passed over (= 3 sts dec). K 4 tog as follows: K 4, pass them back on left needle, pass the next to last st over the last so that this st is around the last st, repeat until all 3 sts have been passed over (= 3 sts dec), pass the last st worked back on right needle. NO OF STS: When no of sts is given in pattern, it is taken from first row in A.2 (no of sts change in A.2 on the different rows). BUTTONHOLES: Dec for buttonholes on right band. 1 buttonhole = K tog second and third st from edge and make 1 YO. Dec for buttonholes when piece measures: SIZE S: 21, 30, 39, 48 and 57 cm / 8 1/4", 11 3/4", 15 1/4", 19", 22½'' SIZE M: 22, 31, 40, 49 and 58 cm / 8 3/4", 12 1/4", 15 3/4", 19 1/4", 22 3/4" SIZE L: 22, 32, 41, 50 and 59 cm / 8 3/4", 12½", 16", 19 3/4", 23 1/4" SIZE XL: 22, 32, 42, 51 and 60 cm / 8 3/4", 12½", 16½", 20", 23½" SIZE XXL: 17, 26, 35, 44, 53 and 62 cm / 6 3/4", 10 1/4", 13 3/4", 17 1/4", 21", 24½". SIZE XXXL: 19, 28, 37, 46, 55 and 64 cm / 7½", 11", 14½", 18", 21½", 25 1/4". ---------------------------------------------------------- BODY: Worked back and forth on circular needle. Cast on 300-320-336-364-376-404 sts (includes 5 band sts in each side of piece) on circular needle size 3.5 mm / US 4 with Muskat or Belle. Work 1 ridge in GARTER ST - see explanation above AT THE SAME TIME on last row inc 20 sts evenly = 320-340-356-384-396-424 sts. Switch to circular needle size 4 mm / US 6. Work 2 row in stockinette st with 5 sts in garter st each side of work. Then work as follows from RS: 5 band sts in garter st, A.2 (= 6 sts), A.1 (= 17 sts), A.2 0-0-0-1-1-2 times, 19-21-23-21-22-22 sts in stockinette st, A.2, 28-31-33-36-38-39 sts in stockinette st, A.2, 28-31-33-36-38-39 sts in stockinette st, A.2, 19-21-23-21-22-22 sts in stockinette st, A.2 0-0-0-1-1-2 times, A.3 (= 17 sts), A.2, A.1, A.2 0-0-0-1-1-2 times, 19-21-23-21-22-22 sts in stockinette st, A.2, 28-31-33-36-38-39 sts in stockinette st, A.2, 28-31-33-36-38-39 sts in stockinette st, A.2, 19-21-23-21-22-22 sts in stockinette st, A.2 0-0-0-1-1-2 times, A.3, A.2, finish with 5 band sts in garter st. Work band sts in garter st until finished measurements. Repeat A.1-A.3 vertically until finished measurements. Continue pattern like this. Remember BUTTONHOLES - see explanation above. On every 20th row (i.e. 5 repetitions of A.1) work SHORT ROWS IN BAND – see explanation above. REMEMBER THE KNITTING GAUGE When piece measures 8 cm / 3 1/8'', dec as follows from RS: 5 band sts in garter st, A.2, A.1, A.2 0-0-0-1-1-2 times, K 2 twisted tog, 15-17-19-17-18-18 sts in stockinette st, K 2 tog, A.2, K 2 twisted tog, 24-27-29-32-34-35 sts in stockinette st, K 2 tog, A.2, K 2 twisted tog, 24-27-29-32-34-35 sts in stockinette st, K 2 tog, A.2, K 2 twisted tog, 15-17-19-17-18-18 sts in stockinette st, K 2 tog, A.2 0-0-0-1-1-2 times, A.3, A.2, A.1, A.2 0-0-0-1-1-2 times, K 2 twisted tog, 15-17-19-17-18-18 sts in stockinette st, K 2 tog, A.2, K 2 twisted tog, 24-27-29-32-34-35 sts in stockinette st, K 2 tog, A.2, K 2 twisted tog, 24-27-29-32-34-35 sts in stockinette st, K 2 tog, A.2, K 2 twisted tog, 15-17-19-17-18-18 sts in stockinette st, K 2 tog, A.2 0-0-0-1-1-2 times, A.3, A.2, finish with 5 band sts in garter st (= 16 sts dec). Repeat dec every 4 cm / 1½'' 7 more times = 192-212-228-256-268-296 sts - READ NO OF STS. ONLY SIZE M-L: Then dec as follows on next row from RS in size M-L: 5 band sts in garter st, A.2, A.1, K 2 twisted tog, 1-3 sts in stockinette st, K 2 tog, A.2, 15-17 sts in stockinette st, A.2, 15-17 sts in stockinette st, A.2, K 2 twisted tog, 1-3 sts in stockinette st, K 2 tog, A.3, A.2, A.1, K 2 twisted tog, 1-3 sts in stockinette st, K 2 tog, A.2, 15-17 sts in stockinette st, A.2, 15-17 sts in stockinette st, A.2, K 2 twisted tog, 1-3 sts in stockinette st, K 2 tog, A.3, A.2, finish with 5 band sts in garter st (= 8 sts dec) = 204-220 sts. ALL SIZES: Work next row from RS as follows: 5 band sts in garter st, A.2, A.1, A.2 0-0-0-1-1-2 times, 3-3-5-5-6-6 sts in stockinette st, A.2, 11-14-16-19-21-22 sts in stockinette st, insert 1st marker, 1 sts in stockinette st, A.2, 1 sts in stockinette st, insert 2nd marker, 11-14-16-19-21-22 sts in stockinette st, A.2, 3-3-5-5-6-6 sts in stockinette st, A.2 0-0-0-1-1-2 times, A.3, A.2, A.1, A.2 0-0-0-1-1-2 times, 3-3-5-5-6-6 sts in stockinette st, A.2, 11-14-16-19-21-22 sts in stockinette st, insert 3rd marker, 1 sts in stockinette st, A.2, 1 sts in stockinette st, insert 4th marker, 11-14-16-19-21-22 sts in stockinette st, A.2, 3-3-5-5-6-6 sts in stockinette st, A.2 0-0-0-1-1-2 times, A.3, A.2, finish with 5 band sts in garter st. Move the markers upwards when working. When piece measures 41 cm / 16'', inc 1 st before 1st and 3rd marker and after 2nd and 4th marker (= 4 sts inc) - READ INCREASE TIP. Work inc sts in stockinette st. Repeat inc every 3-3-3-5-2½-2½ cm / 1 1/8"-1 1/8"-1 1/8"-2"-7/8"-7/8" 5-5-5-3-7-7 more times = 216-228-244-272-300-328 sts. When piece measures 58-59-60-61-62-63 cm / 22¾''-23¼''-23 5/8''-24''-24 3/8''-24¾'', divide the piece as follows: Slip the first and last 58-61-65-72-79-86 sts on a stitch holder for front piece, cut the yarn, then work only over the middle 100-106-114-128-142-156 sts (= back piece). BACK PIECE: Now bind off for armholes at beg of every row in each side of piece as follows: bind off 3-3-3-5-6-8 sts 1 time, then 2 sts 2-3-4-4-5-5 times and 1 st 3-4-4-4-5-7 times = 80-80-84-94-100-106 sts. When piece measures 74-76-78-80-82-84 cm / 29 1/8''-30''-30¾''-31½''-32¼''-33'', bind off the middle 24-24-26-26-28-28 sts for neck and finish each shoulder separately = 28-28-29-34-36-39 sts. On next row from neck, K the first 2 tog = 27-27-28-33-35-38 sts. Continue and work A.2 and in stockinette st, work the remaining sts of A.1 and A.3 in stockinette st and P over P sts. When piece measures 75-77-79-81-83-85 cm / 29½''-30 3/8''-31''-32''-32¾''-33½'', work 1 ridge in garter st over all sts, then bind off. Work the other shoulder the same way. RIGHT FRONT PIECE: = 58-61-65-72-79-86 sts. Now bind off for armhole at beg of every row from the side as follows: bind off 3-3-3-5-6-8 sts 1 time, then 2 sts 2-3-4-4-5-5 times and 1 st 3-4-4-4-5-7 times = 48-48-50-55-58-61 sts. Continue to work in garter st, A.1, A.2 and in stockinette st as before. When piece measures 75-77-79-81-83-85 cm / 29½''-30 3/8''-31''-32''-32¾''-33½'', work 1 ridge over all sts, then bind off the first 27-27-28-33-35-38 sts for shoulder on next row from WS = 21-21-22-22-23-23 sts remain for shawl collar. Then work shawl collar in garter st over the remaining sts, beg mid front (1st row = RS) as follows: * Work 2 rows back and forth over the first 13-13-14-14-15-15 sts, work 2 rows back and forth over all sts *, repeat from *-* until collar measures 8-8-9-9-10-10 cm / 3 1/8''-3 1/8''-3½''-3½''-4''-4'' at the shortest. Bind off. LEFT FRONT PIECE: Work as right but reversed. Bind off for shoulder from RS. Shawl collar beg from WS. Do not dec for buttonholes. SLEEVE: Worked in the round on double pointed needles. Cast on 51-53-55-57-59-61 sts on double pointed needles size 3.5 mm / US 4 with Muskat or Belle. Work 1 ridge in GARTER ST - see explanation above. Switch to double pointed needles size 4 mm / US 6. Work 2 rounds in stockinette st. Then work as follows: 12-13-14-15-16-17 sts in stockinette st, A.2, A.4 (= 15 sts), A.2, 12-13-14-15-16-17 sts in stockinette st, insert 1 marker at beg of round. Continue pattern like this. When piece measures 8-8-8-12-8-7 cm / 3"-3"-3"-4 3/4"-3"-2 3/4", inc 1 st on each side of marker, repeat inc every 3½-3-2½-2-2-2 cm / 1 1/4"-1 1/8"-7/8"-3/4"-3/4"-3/4" 11-12-14-15-16-17 more times = 75-79-85-89-93-97 sts. Work inc sts in stockinette st. When piece measures 49-49-48-46-44-43 cm / 19 1/4"-19 1/4"-19"-18"-17 1/4"-17" (shorter measurements in the larger sizes because of longer sleeve cap and wider shoulders), bind off for sleeve cap at beg of every row in each side: bind off 4 sts 1 time, 2 sts 3 times and 1 st 6 times, then bind off 2 sts in each side until piece measures 56-57-57-56-55-55 cm / 22"-22½"-22½"-22"-21½"-21½", then bind off 3 sts 1 time in each side. Bind off the remaining sts, piece measures 57-58-58-57-56-56 cm / 22½"-22 3/4"-22 3/4"-22½"-22"-22". Make another sleeve. ASSEMBLY: Sew the shoulder seams. Sew in sleeves. Sew the collar tog mid back and sew it to the neckline. Sew the buttons on to the left band. |
|||||||||||||||||||
Diagram explanations |
|||||||||||||||||||
|
|||||||||||||||||||

|
|||||||||||||||||||

|
|||||||||||||||||||
|
Have you made this or any other of our designs? Tag your pictures in social media with #dropsdesign so we can see them! Do you need help with this pattern?You'll find tutorial videos, a Comments/Questions area and more by visiting the pattern on garnstudio.com. © 1982-2024 DROPS Design A/S. We reserve all rights. This document, including all its sub-sections, has copyrights. Read more about what you can do with our patterns at the bottom of each pattern on our site. |
|||||||||||||||||||


With over 40 years in knitting and crochet design, DROPS Design offers one of the most extensive collections of free patterns on the internet - translated to 17 languages. As of today we count 304 catalogs and 11422 patterns - 11417 of which are translated into English (US/in).
We work hard to bring you the best knitting and crochet have to offer, inspiration and advice as well as great quality yarns at incredible prices! Would you like to use our patterns for other than personal use? You can read what you are allowed to do in the Copyright text at the bottom of all our patterns. Happy crafting!
Comments / Questions (110)
Als ik de steken optel van maat M na de 1e keer meerderen kom ik uit op 340. Maar.... als ik het patroon ga volgen met de A 2 etc.. kom ik uit op 364 steken... ik heb er dus tekort ??? Ik kom iedere keer niet uit... hoe kan dit?
11.10.2022 - 11:10DROPS Design answered:
Dag Monique,
Alle steken optellend kom ik in totaal op 340 steken. Heb je er rekening mee gehouden dat A.2 in maat M een aantal keren 0 keer gebreid wordt. Het staat wel aangegeven in de beschrijving, maar voor maat M brei je A.2 dan dus 0 keer.
20.11.2022 - 17:59Tror stadig der er fejl i jeres STRIKKETIPS der hvor man skal tage fire ret sammen og fire DR-ret sammen, iflg jeres video bliver det gjort omvendt af hvad der står i opskriften. Forvirret strikker af denne model 161-1 Hanne
18.02.2021 - 13:52DROPS Design answered:
Hej Hanne, man kan gøre det på flere forskellige måder, i vores video viser vi en måde at gøre det på. Du bestemmer selv om du vil følge og gøre det som beskrevet i opskriften :)
18.02.2021 - 15:00I would like to knit Blue Bird Song by Drops Desin # 161-1 or pattern no r 667. I have a llot of Cascade 220 yarn. It is 100% Peruvian Highland Wool, 100 g. 3.5 oz, the guage is 19-20 stitches = 4" using # 7-8- needles. How do you convert the guage for this pattern. which call for a US 6 needle to get 21 sts x 28 rows =4x4" ?
15.08.2020 - 00:32DROPS Design answered:
Dear Mrs Bussing, we unfortunately do not know this yarn and are not able to convert every pattern to every individual request - you are welcome to contact the store where you bought the yarn or any knitting forum for more individual assistance. Happy knitting!
17.08.2020 - 08:08Hallo ich habe die erste Reihe vom Muster gestrickt komme aber mit der maschenzahl nicht hin ,ich Stricke gr M A 2. 6 maschen A 1. 17 dann maschen dann kommen 0-0-0-1-1-2-×19-21-....muss ich diese 19 maschen stricken ? Das verstehe ich nicht ganz es wäre sehr lieb wenn sie mir helfen könnten .lg martina
29.05.2020 - 16:29DROPS Design answered:
Liebe Frau Gahr, in M stricken Sie so: 5 Blenden-M, A.2 (= 6 M), A.1 (= 17 M), 21 M glatt re, A.2, 31 M glatt re, A.2, 31 M glatt re, A.2, 21 M glatt re, A.3 (= 17 M), A.2, A.1, 21 M glatt re, A.2, 31 M glatt re, A.2, 31 M glatt re, A.2, 21 M glatt re, A.3, A.2, 5 Blenden-M kraus re = 5+6+17+21+ 6+31+6+31+6+ 21+17+ 6+ 17+ 21+ 6+31+6+31+6+21+17+6+5= 340 M. Viel Spaß beim stricken!
29.05.2020 - 16:56Ik ben al naar eigen inzicht verder gegaan. Dus laat maar
01.05.2019 - 17:04Hoe kan ik bij de mouwen die rondgebreid worden op nld zonder knop aan elk begin van nld minderen voor mouwkop. Moet alles op 1 nld en heen en terug gebreid worden vanaf dat moment? SVP rap antwoord want ik ben op dat punt.
30.04.2019 - 12:40Hoe kan ik bij de mouwen die rondgebreid worden op nld zonder knop aan elk begin van nld minderen voor mouwkop. Moet alles op 1 nld en heen en terug gebreid worden vanaf dat moment? SVP rap antwoord want ik ben op dat punt.
30.04.2019 - 12:39Bonjour Sur la vidéo expliquant le diagramme A4 vous montrez qu'il faut faire de chaque côté des jetés 4m ens. à l'endroit alors que sur le diagramme vous expliquez qu'à droite des jetés il faut faire 4m ens. à l'endroit et à gauche 4m ens. torse à l'endroit. Où est l'erreur? Faut il tricoter comme sur la vidéo ou comme sur le diagramme. Idem pour les diagrammes A1 et A3 puisqu'ils sont similaires au A4 ( rang des jetés ) ? Merci de votre aide.
04.03.2019 - 11:16DROPS Design answered:
Bonjour Brigitte, nous allons vérifier les diagrammes et la vidéo, merci. Bon tricot! - Edit 08/03: tricotez comme indiqué dans les diagrammes, la vidéo va être refaite, merci!
04.03.2019 - 12:08Aloitin neulomaan L-kokoa ja kymmenen sentin jälkeen onneksi huomasin, että vaikka silmukkaluku täsmää ohjeeseen, niin alareunani pituus on 91 cm ohjeessa olevan 78 cm sijaan. Tiheys oli minulla 19x28 silmukkaa ei-kuvioidussa kohdassa. Tulisiko minun nyt tehdä jopa s-koolla, mutta lisätä (kenties) pituutta L-koon mukaan, vai mitä teen, jotta en neuvoisi itselleni telttaa?
14.02.2019 - 10:16DROPS Design answered:
Hei, sinun kannattaa vaihtaa työhön pienemmät puikot. Ennen kuin aloitat neulomisen, sinun tulee aina neuloa koetilkku ja tarkistaa, että neuletiheytesi on sama kuin ohjeessa. Tärkeintä tämän mallin kannalta on, että neuletiheys täsmää leveydeltään.
15.01.2020 - 19:16Größe XL (44-46) in DROPS Muskat: wenn ich nach eurer Maschenprobe 384 M in der 2.Reihe habe, sind es 183,5 cm. Sollen aber nach Bild nur 168 cm (???) sein ? Und das nur in Nachrechnung, nicht durch mein Stricken. Wo liegt mein Fehler oder sind es am unteren Ende zuviele Maschen? Obwohl die Musterfolge für die Größe stimmt... LG Gaby
30.01.2019 - 08:17DROPS Design answered:
Liebe Frau Strahlendorf, die Maschenprobe wird glatt rechts gestrickt, die verschiedenen Muster werden diese Ratio ändern, wenn Ihre Maschenprobe glatt rechts stimmt, bekommen Sie die Massen wie in der Maßskizze. Viel Spaß beim stricken!
30.01.2019 - 09:30