
Popular categories
Looking for a yarn?


|
||||||||||||||||||||||
Timeless |
||||||||||||||||||||||
 |
 |
|||||||||||||||||||||
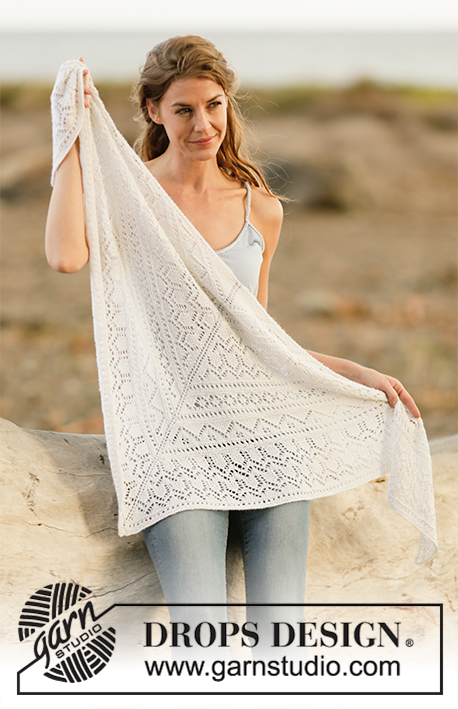
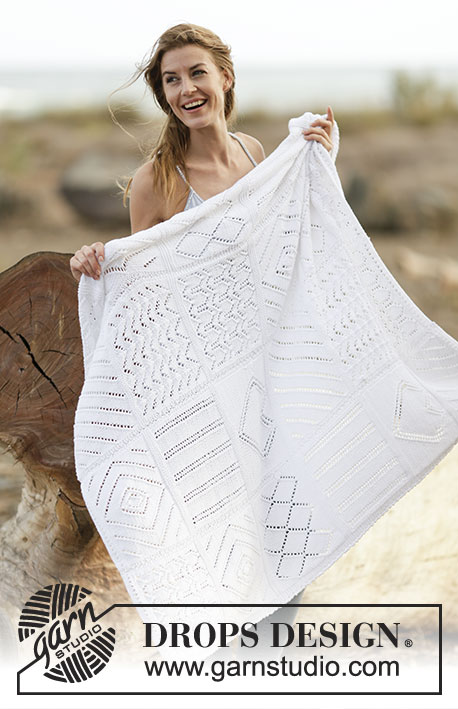
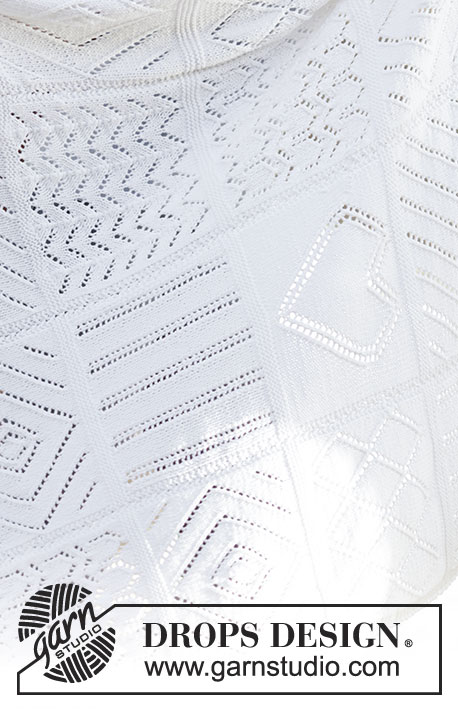
Knitted DROPS blanket with lace patterns in ”Cotton Light”.
DROPS 159-34 |
||||||||||||||||||||||
|
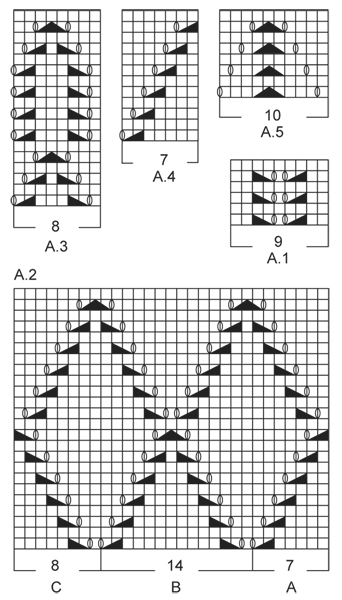
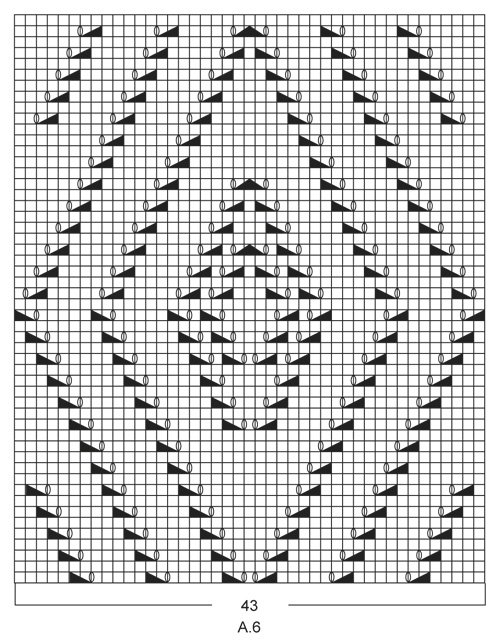
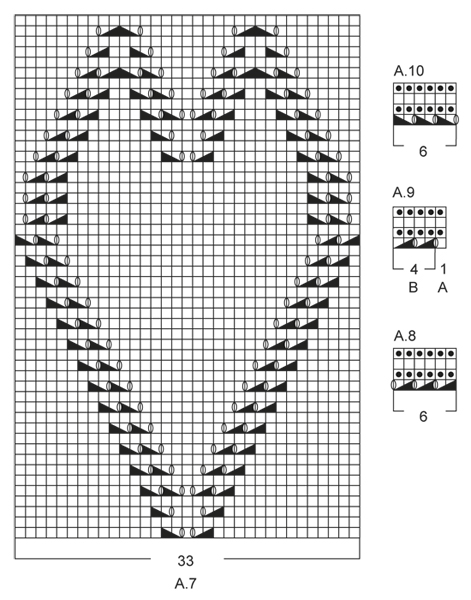
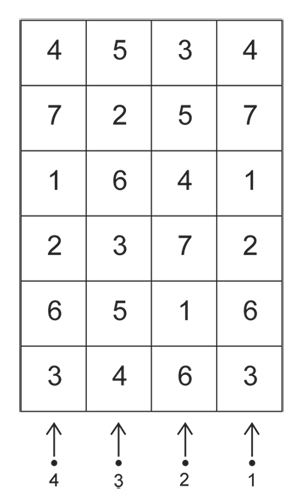
GARTER ST (back and forth): K all rows. 1 ridge = K2 rows. PATTERN: See diagrams A.1 - A.10. Diagrams show pattern seen from RS, first row = RS. NOTE: Diagram A.4: Diagram does not fit vertically when repeated, but eyelet rows will continue to displace as before, AT THE SAME TIME beg a new eyelet row every 15th row. SQUARE ORDER: Strip 1: Square 3, 6, 2, 1, 7 and 4. Strip 2: Square 6, 1, 7, 4, 5 and 3. Strip 3: Square 4, 5, 3, 6, 2 and 5. Strip 4: Square 3, 6, 2, 1, 7 and 4. SQUARE PATTERN: There are 7 different square patterns, they are worked as follows: Square 1: = 43 sts. Work 2 row in stockinette st. Work next row from RS as follows: Work the last 8 sts in A.1, A.1 over the next 27 sts (= 3 times), work the first 8 sts in A.1. Work A.1 9 times in total vertically. Square 2: = 43 sts. Work 4 row in stockinette st. Work next row from RS as follows: A.2A (= 7 sts), A.2B over the next 28 sts (= 2 times), finish with A.2C (= 8 sts). Work A.2 2 times in total vertically. Work 4 row in stockinette st. Square 3: = 43 sts. Work 2 row in stockinette st. Work next row from RS as follows: 1 st in stockinette st, A.3 over the next 40 sts (= 5 times), 2 sts in stockinette st. Work A.3 3 times in total vertically. Square 4: = 43 sts. Work 2 row in stockinette st. Work next row from RS as follows: Work the last 5 sts in A.4, A.4 over the next 35 sts (= 5 times), work the first 3 sts in A.4. Repeat A.4 until piece measures approx. 21.5 cm / 8½'' (adjust so that next row is from RS). Square 5: = 43 sts. Work next row from RS as follows: 1 st in stockinette st, A.5 over the next 40 sts (= 4 times), 2 sts in stockinette st. Repeat A.5 7 times in total vertically. Square 6: = 43 sts. Work 2 row in stockinette st. Work next row from RS as follows: A.6 (= 43 sts). Work A.6 1 time vertically. Work 2 row in stockinette st. Square 7: = 43 sts. Work 4 rows in stockinette st. Work next row from RS as follows: 5 sts in stockinette st, A.7 (= 33 sts) and 5 sts in stockinette st. Work A.7 1 time vertically. Work 2 rows in stockinette st. ---------------------------------------------------------- BLANKET: Piece is worked back and forth on needle in 4 strips and sewn tog when finished. Each strip consists of 6 squares, squares are worked in 7 different textures - read SQUARE ORDER above. STRIP 1: Cast on 51 sts on needle size 4.5 mm / US 7 with Cotton Light. Work and edge on 8 rows as follows (1st row = RS): Work 2 ridges in GARTER ST - see explanation above. Work diagram A.8 (= 6 sts), A.9A (= 1 st), A.9B over the next 44 sts. Then work as follows: A.8 (= 6 sts), SQUARE PATTERN – read explanation above (= 43 sts), 2 sts in garter st. Finish 1st-5th square in strip with 4 ridges. REMEMBER THE KNITTING GAUGE After last square in strip has been worked, work 2 ridges. Then work an edge on 4 rows as follows: A.8 (= 6 sts), A.9A (= 1 st), A.9B over the next 44 sts. Bind off. STRIP 2 and 3: Cast on 47 sts on needle size 4.5 mm / US 7 with Cotton Light. Work and edge on 8 rows as follows (1st row = RS): Work 2 ridges. Work diagram A.9A (= 1 st), A.9B over the next 46 sts. Then work as follows: 2 sts in garter st, square pattern (= 43 sts) and 2 sts in garter st. Finish 1st-5th square in strip with 4 ridges. After last square in strip has been worked, work 2 ridges. Then work an edge on 4 rows as follows: A.9A (= 1 st), A.9B over the next 46 sts. Bind off. STRIP 4: Cast on 51 sts on needle size 4.5 mm / US 7 with Cotton Light. Work and edge on 8 rows as follows (1st row = RS): Work 2 ridges. Work diagram A.9A (= 1 st), A.9B over the next 44 sts, A.10 (= 6 sts). Then work as follows: 2 sts in garter st, square pattern (= 43 sts) and A.10 (= 6 sts). Finish 1st-5th square in strip with 4 ridges. After last square in strip has been worked, work 2 ridges. Then work an edge as follows: A.9A (= 1 st), A.9B over the next 44 sts, A.10 (= 6 sts). Bind off. ASSEMBLY: Sew tog strips in outer loops of edge sts. |
||||||||||||||||||||||
Diagram explanations |
||||||||||||||||||||||
|
||||||||||||||||||||||
|
||||||||||||||||||||||
|
||||||||||||||||||||||
|
||||||||||||||||||||||
|
||||||||||||||||||||||
|
Have you made this or any other of our designs? Tag your pictures in social media with #dropsdesign so we can see them! Do you need help with this pattern?You'll find tutorial videos, a Comments/Questions area and more by visiting the pattern on garnstudio.com. © 1982-2024 DROPS Design A/S. We reserve all rights. This document, including all its sub-sections, has copyrights. Read more about what you can do with our patterns at the bottom of each pattern on our site. |
||||||||||||||||||||||


With over 40 years in knitting and crochet design, DROPS Design offers one of the most extensive collections of free patterns on the internet - translated to 17 languages. As of today we count 304 catalogs and 11422 patterns - 11417 of which are translated into English (US/in).
We work hard to bring you the best knitting and crochet have to offer, inspiration and advice as well as great quality yarns at incredible prices! Would you like to use our patterns for other than personal use? You can read what you are allowed to do in the Copyright text at the bottom of all our patterns. Happy crafting!
Comments / Questions (41)
Buongiorno! Ho una domanda sul bordo della striscia 1: si comincia con il digramma A8, cioè devo iniziare il bordo con un gettato? L'altra perplessità riguarda la fine di tutti i bordi che siano da fare col digramma A9B o A10: si finisce con un gettato? Non rimane un buco o comunque è troppo lasco? Grazie!
05.03.2017 - 16:47DROPS Design answered:
Buongiorno Dina. I diagrammi vanno letti dal basso verso l'alto e da destra verso sinistra sui ferri di andata e da sinistra verso destra sui ferri di ritorno. In questo modo i gettati non si trovano né all'inizio né alla fine dei ferri. Buon lavoro!
05.03.2017 - 18:24Hej forstår ikke helt rude 4, kan det passe at der skal strikkes de 3 første masker i den sidste del af pinden, så strikkes der jo over 8 masker i mønstret, som jo kun dækker over 7 masker,
22.08.2016 - 17:27DROPS Design answered:
Hej Birgitte. Du strikker de förste 5 m af firkanten iflg de sidste 5 m af diagram A.4. Herefter gentager du hele A.4 (= 7 m) over de naeste 35 m (dvs, 5 hele gentagelser)
23.08.2016 - 14:27Synd att man inte kan läsa alla kommentarer, frågor och svar på svenska!
15.08.2016 - 09:10Ich habe diese Decke für ein großes Doppelbett gestrickt. Da mir die Vorlage zu wenig war, habe ich mir noch 4 andere einfache Muster dazu gesucht. Sie ist super schön geworden. Vielen Dank für die tolle Inspiration.
25.04.2016 - 17:46Bij blok 1 moet je aan de goede kant eerst 8 laatste steken in A1 breien en aan het eind de eerste 8, dat kan dus niet, toch
12.04.2016 - 13:00DROPS Design answered:
Hoi Joke. Jawel, je breit gewoon 8 st ipv 9 van A.1 (dwz, je hebt 1 r st aan het eind minder).
12.04.2016 - 14:57Hej! Undrar om kantmaska, en rät, är inräknad i maskantalet? Eller börjar man tex A8 med två tillsammans? Hälsning Ellenor
06.04.2016 - 12:49DROPS Design answered:
Hej Ellenor, Om vi inte skriver att det är en kantm, så börjar du direkt m A8 när du kommer till det. Lycka till!
07.04.2016 - 10:40Väntar på grannen, vill gärna sticka den här filten, men tycker mönstret är lite svårbegripligt, och jag brukar inte ha svårt för mönster, men jag återkommer
06.04.2016 - 09:22Bonjour, La bande 3 comporte 2 fois le carré n°5. Est-ce une erreur ou pas? De plus, je pense qu'il y a une erreur dans le diagramme A7, les lignes 45 et 49 n'ont que 31 mailles tricotées alors que le diagramme comporte 33 mailles. Merci pour votre aide.
05.04.2016 - 09:26DROPS Design answered:
Bonjour Carole, le carré 5 se tricote bien 2 fois dans la 3ème bande - après le rang 45, vous devez toujours avoir 45 m, la pointe de chaque coeur se tricote ainsi: 1 jeté, gliss 1 m, 1 m end, passez la m glissée par-dessus la m tricotée (= 1 surjet simple), 1 jeté, 1 surjet simple, 2 m ens à l'end, 1 jeté, 2 m ens à l'end, 1 jeté = 4 diminutions compensées par 4 jetés. Bon tricot!
05.04.2016 - 10:13Jeg strever veldig med hjertemønster A7. Øverst er sammenføyningene slik at man reduserer over 4 masker i stedet for 3 som på de andre diagrammene. (1 m løs og 2 r sammen) Hvordan skal dette strikkes io denne ruten?
25.10.2015 - 10:32DROPS Design answered:
Hej Edna, jo øverst strikker du først den ene trekant og så den anden, det vil sige: 1 kast, ta 1 m løs av p so.... og så 2 rett sm, 1 kast. God fornøjelse!
30.10.2015 - 12:31Zuerst einmal habt ihr diese Anleitung super kompliziert geschrieben. Das ginge meiner Meinung nach viel einfacher. Mein erstes Problem ist schon in Reihe 5 beim ersten Streifen aufgetreten. Warum unterbrecht ihr das Lochmuster im Übergang zwischen A.8 und A.9A? Also das gibt für mich nicht viel sinn. Und wie sieht das Eck genau aus. Auf dem Foto sieht man da leider gar nichts.
28.07.2015 - 10:54DROPS Design answered:
Das Lochmuster wird nicht unterbrochen, die beiden es erscheint immer eine M re und 1 Umschlag (die einzelne re gestrickte M erscheint ja so wie 2 re zusammengestrickte M). Welche Ecke meinen Sie genau?
28.07.2015 - 12:59