
Popular categories
Looking for a yarn?


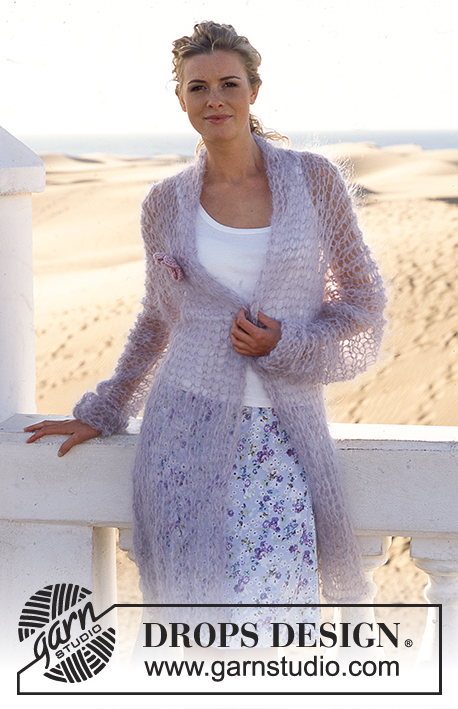
Morning Whisper
DROPS Cardigan in Vienna or Melody with Brooch in Snow
CARDIGAN:
Sizes: S - M - L - XL – XXL
Finished measurements:
Bust: 92-100-108-120-128 cm
[36.25" - 39-⅜" - 42.5" - 47.25" - 50-⅜"]
Hem: 100-108-116-128-136 cm
[39-⅜" - 42.5" - 45-⅝" - 50-⅜" - 53.5"]
The sleeve length on the diagram may seem a little small, but the sleeve lengthens approx. 10-15 cm when the cardigan is worn.
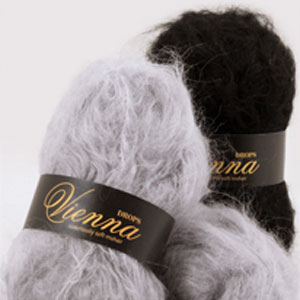
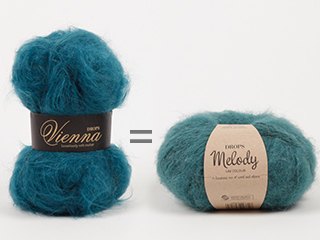
Materials: DROPS VIENNA from Garnstudio
200-200-250-250-300 gr nr 20, light grey
Or use:
DROPS MELODY from Garnstudio
150-150-200-200-150 gr nr 03, pearl grey
DROPS 20 mm [US 36] needles, or size needed to obtain correct gauge.
-------------------------------------------------------
Alternative Yarn – See how to change yarns here
Yarn Groups A to F – Use the same pattern and change the yarn here
Yarn usage using an alternative yarn – Use our yarn converter here
-------------------------------------------------------
- English (US/in)
- Česky - not translated
- Dansk
- Deutsch
- Eesti keel - not translated
- English (UK/cm)
- Español
- Français
- Íslenska - not translated
- Italiano - not translated
- Magyar
- Nederlands
- Norsk
- Polski
- Português
- Suomi
- Svenska
- English (UK/cm), Bulgaria
- English (UK/cm), Croatia
- English (UK/cm), Greece
- English (UK/cm), Latvia
- English (UK/cm), Lithuania
- English (UK/cm), Romania
- English (UK/cm), Slovenia
- Česky, Slovakia - not translated
Pattern instructions
Gauge: 5 sts x 6 rows in stockinette st = 10 x 10 cm.
Measuring tips: Measure the piece when lying flat, otherwise it will be too short when worn.
Cardigan: The body and sleeve are knit in one piece, starting at the lower edge of Body and casting on sts for sleeve, then the shoulder seams are joined in Kitchener st (see Fig. 1 on page 24 of Drops No. 89).
Back: Cast on 25-27-29-32-34 sts around 2 needles (so that the cast-on edge will be elastic), pull out one needle and knit 2 rows garter st, then continue in stockinette st.
When the piece measures 20 cm dec 1 st at each side = 23-25-27-30-32 sts.
When the piece measures 56-58-60-62-64 cm start increasing for the sleeves. Loosely cast on new sts at each side every other row (that is, at the end of every row): 2 sts 2 times, 4 sts 2 times and then 6-6-6-5-5 sts 1 time = 59-61-63-64-66 sts. Continue in stockinette st, keeping 1 st in garter st at each side (cuff edge).
When the piece measures 79-82-85-88-91 cm bind off the center 3-3-3-4-4 sts for the neck. On the next row dec 1 st at each neck edge = 27-28-29-29-30 sts remain on each shoulder + sleeve. Put sts on a st holder.
When you dec 1 st at the other side of the neck, begin at neck edge, start by picking up 1 st in the 1st bound off st and K tog with the 1st st. This will prevent the neck from stretching out.
Right front: Cast on 16-17-18-19-20 sts (incl. 3 edge st at the center front) around 2 needles. Pull out one needle and knit 2 rows garter st. Then knit stockinette st, keeping 1 st at center front edge in garter st. When the piece measures 40 cm dec 1 st at the side = 15-16-17-18-19 sts.
When the piece measures 56-58-60-62-64 cm cast on new sts at the side for sleeve as on back = 33-34-35-35-36 sts.
Continue in stockinette st, keeping 1 st in garter st at center front edge and at cuff edge.
When the piece measures 82-85-88-91-94 cm put the 27-28-29-29-30 sts on shoulder + sleeves on a st holder and the remaining 6 sts on a second st holder.
Left front: Cast on and knit the same as the right, reversing shaping.
Assembly: Join shoulder-sleeve seams with Kitchener st - see Fig.1.
Neckband: Put the 6 sts from st holder on one side back on needles and knit stockinette st until edge measures approx. 5-6 cm from shoulder, put sts back on st holder. Repeat on the other side of neck and then join neckband at center back with Kitchener st. Sew neckband to back neck. Sew sleeve and side seams in one, making sure that the seam is not too tight.
Belt: If you wish a belt knit as follows: Cast on 5 sts around 2 needles. Pull out one needle and knit garter st. When belt measures approx. 100-130 cm bind off all sts loosely.
BROOCH:
Materials: DROPS SNOW from Garnstudio
small amount of nr 30, pink
DROPS 6 mm [US J] crochet hook, or size needed to obtain correct gauge.
Accessories: a small safety pin
Blossom:
Ch 4 and join into a ring with 1 sl st.
1st row: 1 sc in ring, * ch 3, 1 sc in ring *, repeat from * - * a total of 2 times and finish with ch 3 and 1 sl st in first sc at start of row = 3 ch-loops.
2nd row: ch 1, crochet as follows in each ch-loop:
sl 1, 5 dc, sl 1.
Turn the work, crochet the next row from other side (back).
3rd row: ch 1, 1 sc around each sc from previous row, * ch 3, 1 sc in the lower edge of the 3 dc from 2nd row (in the center of the petal’s lower edge), ch 3, 1 sc around the next sc from 1st row *, repeat * - * until there are 5 ch-loops, finish with ch 3 and 1 sl st in first ch at start of row = 6 ch-loops.
Turn the work, crochet the next row from the other side (front).
4th row: ch 1, crochet as follows in each ch-loop:
sl 1, 3 dc, sl 1.
Cut yarn and fasten. Sew a safety pin on back side of blossom.
Use brooch as decoration, or to close the cardigan.
Diagram
All measurements in charts are in cm.

What can you do with our patterns? You can share DROPS patterns online, using the pattern original picture, materials, name and number. But you are NOT ALLOWED to reproduce the complete pattern digitally in any way. Yarn stores are welcome to use the DROPS pattern database to promote the sale of our assortment. You can print out our patterns, make as many copies as you’d like. The only thing we ask is that you don't make any changes / additions to the original printed document. And that the patterns according to the DROPS philosophy are given out to the consumers for free. Editorials that wish to publish our patterns in printed books or magazines can contact us for more information. The sale of garments based on DROPS patterns is permitted as long as they are sold as single items or per order. Further commercial use of the patterns is not permitted. It has to be clearly stated that the garment is made based on a design from DROPS DESIGN. The use of clothing labels of which DROPS DESIGN forms part is conditioned by the inclusion of the following text: “A DROPS DESIGN made by …..”. The use of DROPS photos for marketing purposes/sales is only permitted in connection with the use/sale of DROPS products. The photos may not be cut or edited and the logo should be clearly visible.
We reserve the right to withdraw the permission for use of our patterns at any time, notwithstanding the reason.
Each of our patterns has specific tutorial videos to help you.


These step-by-step tutorials might also help you:


Why is the knitting/crochet tension so important?
Knitting tension is what determines the final measurements of your work, and is usually measured per 10 x 10 cm. It is provided like so: number of stitches in width x number of rows in height - eg: 19 stitches x 26 rows = 10 x 10 cm.
The knitting tension is very individual; some people knit/crochet loosely while others work tightly. You adjust the knitting tension with the needle size, which is why the suggested needle size only serve as a guide! You need to adjust this (up or down) to ensure that YOUR knitting tension matches the knitting tension provided in the pattern. If you work with a different knitting tension than provided you will have a different yarn consumption, and your work will have different measurements than what the pattern suggests.
The knitting tension also determines which yarns can replace each other. As long as you achieve the same knitting tension you can replace one yarn with another.
See DROPS lesson: How to measure your tension/gauge
See DROPS video: How to make a gauge tension swatch
How do I know how many balls of yarn I need?
The required amount of yarn is provided in grams, eg: 450 g. To calculate how many balls you’ll need you first need to know how many grams are in 1 ball (25g, 50g or 100g). This information is available if you click on the individual yarn quality on our pages. Divide the amount required with the amount of each ball. For example, if each ball is 50g (the most common amount), the calculation will be as follows: 450 / 50 = 9 balls.
Can I use a different yarn than what the pattern suggests?
The important thing when changing from one yarn to another is that the knitting/crochet tension remains the same. This is so that the measurements of the finished piece will be the same as on the sketch provided. It is easier to achieve the same knitting tension using yarns from the same yarn group. It is also possible to work with multiple strands of a thinner yarn to achieve the knitting tension of a thicker one. Please try our yarn converter. We recommend you to always work a test swatch.
Please NOTE: when changing yarn the garment might have a different look and feel to the garment in the photo, due to individual properties and qualities of each yarn.
See DROPS lesson: Can I use a different yarn than the one mentioned in the pattern?
What are the yarn groups?
All our yarns are categorised into yarn groups (from A to F) according to thickness and knitting tension – group A contains the thinnest yarns and group F the thickest. This makes it easier for you to find alternative yarns to our patterns, should you wish to switch yarn. All yarns within the same group have a similar knitting tension and can easily replace each other. However, different yarn qualities have different structures and properties which will give the finished work a unique look and feel.
How do I use the yarn converter?
At the top of all our patterns you’ll find a link to our yarn converter, which is a helpful tool should you wish to use a different yarn than suggested. By filling in the yarn quality you wish to replace, the amount (in your size) and number of strands, the converter will present good alternative yarns with the same knitting tension. Additionally it will tell you how much you’ll require in the new qualities and whether you’ll need to work with multiple strands. Most skeins are 50g (some are 25g or 100g).
If the pattern is worked with multiple colours, every colour will have to be converted separately. Similarly, if the pattern is worked with several strands of different yarns (for example 1 strand Alpaca and 1 strand Kid-Silk) you will have to find alternatives for each, individually.
Why do you show discontinued yarns in the patterns?
Since different yarns have different qualities and textures we have chosen to keep the original yarn in our patterns. However, you can easily find options among our available qualities by using our yarn converter, or simply pick a yarn from the same yarn group.
It is possible that some retailers still have discontinued yarns in stock, or that someone has a few skeins at home that they would like to find patterns for.
The yarn converter will provide both alternative yarn as well as required amount in the new quality.
What size should I knit?
If you think it's hard to decide what size to make, it can be a good idea to measure a garment you own already and like the size of. Then you can pick the size by comparing those measures with the ones available in the pattern's size chart.
You'll find the size chart at the bottom of the pattern.
See DROPS lesson: How to read size chart
Why do I get the wrong knitting tension with the suggested needle size?
The needle size provided in the pattern serves only as a guide, the important thing is to follow the knitting tension. And since knitting tension is very individual, you will have to adjust the needle size to ensure that YOUR tension is the same as in the pattern – maybe you’ll have to adjust 1, or even 2 needle sizes, up or down to achieve the correct tension. For this, we recommend that you work test swatches.
Should you work with a different knitting tension than the one provided, the measurements of the finished garment might deviate from the measurement sketch.
See DROPS lesson: How to measure your tension/gauge
See DROPS video: How to make a gauge tension swatch
Why is the pattern worked top-down?
Working a garment top-down provides more flexibility and room for personal adjustment. For example it is easier to try the garment on while working, as well as making adjustments to length of yoke and shoulder caps.
The instructions are carefully explaining every step, in the correct order. Diagrams are adjusted to the knitting direction and are worked as usual.
How do I work according to a knitting diagram?
The diagram depicts all rows/rounds, and every stitch seen from the right side. It is read from bottom to top, from right to left. 1 square = 1 stitch.
When working back and forth, every other row is worked from the right side and every other row is worked from the wrong side. When working from the wrong side, the diagram will have to be worked reversed: from left to right, knit stitches are purled, purl stitches are knit etc.
When working in the round every round is worked from the right side and the diagram are worked from right to left on all rounds.
See DROPS lesson: How to read knitting diagrams
How do I work according to a crochet diagram?
The diagram depicts all rows/rounds, and every stitch seen from the right side. It is worked from bottom to top, from right to left.
When working back and forth every other row is worked from the right side: from right to left and every other row is worked from the wrong side: from left to right.
When working in the round, every row in the diagram are worked from the right side, from right to left.
When working a circular diagram you start in the middle and work your way outwards, counter clockwise, row by row.
The rows usually start with a given number of chain stitches (equivalent to the height of the following stitch), this will either be depicted in the diagram or explained in the pattern.
See DROPS lesson: How to read crochet diagrams
How do I work several diagrams simultaneously on the same row/round?
Instructions for working several diagrams after each other on the same row/round, will often be written like so: “work A.1, A.2, A.3 a total of 0-0-2-3-4 times". This means you work A.1 once, then A.2 is worked once, and A.3 is repeated (in width) the number of times provided for your size – in this case like so: S = 0 times, M = 0 times, L=2 times, XL= 3 times and XXL = 4 times.
The diagrams are worked as usual: begin with the first row in A.1, then work the first row in A.2 etc.
See DROPS lesson: How to read knitting diagrams
See DROPS lesson: How to read crochet diagrams
Why are the sleeves shorter in larger sizes?
The total width of the garment (from wrist-to-wrist) will be larger in the larger sizes, despite the actual sleeves being shorter. The larger sizes have longer sleeve caps and wider shoulders, so there will be a good fit in all sizes.
Where on the garment is the length measured?
The measurement sketch/schematic drawing provides information regarding the full length of the garment. If it’s a jumper or a jacket the length is measured from the highest point on the shoulder (usually closest to the neckline), and straight down to the bottom of the garment. It is NOT measured from the tip of shoulder. Similarly, the length of yoke is measured from the highest point on the shoulder and down to where yoke is split into body and sleeves.
See DROPS lesson: How to read a schematic drawing
What is a repeat?
Diagrams are often repeated on the round or in height. 1 repeat is the diagram the way it appears in the pattern. If it says to work 5 repeats of A.1 in the round, then you work A.1 a total of 5 times after/next to each other in the round. If it says to work 2 repeats of A.1 vertically/in height you work the entire diagram once, then begin again at the start and work the entire diagram one more time.
Why does the piece start with more chain stitches than it’s worked with?
Chain stitches are slightly narrower than other stitches and to avoid working the cast-on edge too tight, we simply chain more stitches to begin with. The stitch count will be adjusted on the following row to fit the pattern and measurement sketch.
Why increase before the rib edge when the piece is worked top-down?
The rib edge is more elastic and will contract slightly compared to, for example, stocking stitch. By increasing before the rib edge, you avoid a visible difference in width between the rib edge and the rest of the body.
Why increase in the cast-off edge?
It’s very easy to cast off too tightly, and by making yarn overs while casting off (and simultaneously casting these off) you avoid a too tight cast off edge.
See DROPS video: How to bind off with yarn overs (yo)
How do I increase/decrease on every 3rd and 4th row/round alternately?
To achieve an even increase (or decrease) you can increase on, for example: every 3rd and 4th row alternately, like so: work 2 rows and increase on the 3rd row, work 3 rows and increase on the 4th. Repeat this until the increase is complete.
See DROPS lesson: Increase or decrease 1 st on every 3rd and 4th row alternately
How can I work a jacket in the round instead of back and forth?
Should you prefer to work in the round instead of back and forth, you may of course adjust the pattern. You’ll need to add steeks mid-front (usually 5 stitches), and follow the instructions. When you would normally turn and work from the wrong side, simply work across the steek and continue in the round. At the end you’ll cut the piece open, pick up stitches to work bands, and cover the cut edges.
See DROPS video: How to knit steeks and cut open
Can I work a jumper back and forth instead of in the round?
Should you prefer to work back and forth instead of in the round, you may of course adjust the pattern so you work the pieces separately and then assemble them at the end. Divide the stitches for the body in 2, add 1 edge stitch in each side (for sewing) and work the front and back pieces separately.
See DROPS lesson: Can I adapt a pattern for circular needles into straight needles?
Why is the pattern slightly different than what I see in the photo?
Pattern repeats can vary slightly in the different sizes, in order to get the correct proportions. If you’re not working the exact same size as the garment in the photo, yours might deviate slightly. This has been carefully developed and adjusted so that the complete impression of the garment is the same in all sizes.
Make sure to follow instructions and diagrams for your size!
How do I make a women’s size garment into a men’s size one?
If you have found a pattern you like which is available in women’s size it’s not very difficult to convert it to men’s size. The biggest difference will be the length of sleeves and body. Start working on the women size that you think would fit across the chest. The additional length will be worked right before you cast off for the armhole/sleeve cap. If the pattern is worked top-down you can add the length right after the armhole or before the first decrease on sleeve.
Regarding additional yarn amount, this will depend on how much length you add, but it is better with a skein too many than too few.
How do I prevent a hairy garment from shedding?
All yarns will have excess fibres (from production) that might come off as lint or shedding. Brushed yarns (ie hairier yarns) have more of these loose, excess fibres, causing more shedding.
Shedding also depends on what is worn under or over the garment, and whether this pulls at the yarn fibres. It’s therefore not possible to guarantee that there will be no shedding
Below are some tips on how to get the best result when working with hairier yarns:
1. When the garment is finished (before you wash it) shake it vigorously so the looser hairs come off. NOTE: do NOT use a lint roller, brush or any method that pulls at the yarn.
2. Place the garment in a plastic bag and put it in your freezer - the temperature will cause the fibres to become less attached to each other, and excess fibres will come off easier.
3. Leave in the freezer for a few hours before taking it out and shaking it again.
4. Wash the garment according to the instructions on the yarn label.
Why does my garment pill?
Pilling is a natural process that happens to even the most exclusive of fibers. It's a natural sign of wear and tear that is hard to avoid, and that is most visible in high friction areas of your garment like a sweater's arms and cuffs.
You can make your garment look as new by removing the pilling, using a fabric comb or a pill/lint remover.
In the meantime, you can read the questions and answers that others have left to this pattern or join the DROPS Workshop on Facebook to get help from fellow knitters/crocheters!
You might also like...


|
|
Morning Whisper |
|
|
|
|
DROPS Cardigan in Vienna or Melody with Brooch in Snow
DROPS 89-12 |
|
|
CARDIGAN: Gauge: 5 sts x 6 rows in stockinette st = 10 x 10 cm. Measuring tips: Measure the piece when lying flat, otherwise it will be too short when worn. Cardigan: The body and sleeve are knit in one piece, starting at the lower edge of Body and casting on sts for sleeve, then the shoulder seams are joined in Kitchener st (see Fig. 1 on page 24 of Drops No. 89). Back: Cast on 25-27-29-32-34 sts around 2 needles (so that the cast-on edge will be elastic), pull out one needle and knit 2 rows garter st, then continue in stockinette st. When the piece measures 20 cm dec 1 st at each side = 23-25-27-30-32 sts. When the piece measures 56-58-60-62-64 cm start increasing for the sleeves. Loosely cast on new sts at each side every other row (that is, at the end of every row): 2 sts 2 times, 4 sts 2 times and then 6-6-6-5-5 sts 1 time = 59-61-63-64-66 sts. Continue in stockinette st, keeping 1 st in garter st at each side (cuff edge). When the piece measures 79-82-85-88-91 cm bind off the center 3-3-3-4-4 sts for the neck. On the next row dec 1 st at each neck edge = 27-28-29-29-30 sts remain on each shoulder + sleeve. Put sts on a st holder. When you dec 1 st at the other side of the neck, begin at neck edge, start by picking up 1 st in the 1st bound off st and K tog with the 1st st. This will prevent the neck from stretching out. Right front: Cast on 16-17-18-19-20 sts (incl. 3 edge st at the center front) around 2 needles. Pull out one needle and knit 2 rows garter st. Then knit stockinette st, keeping 1 st at center front edge in garter st. When the piece measures 40 cm dec 1 st at the side = 15-16-17-18-19 sts. When the piece measures 56-58-60-62-64 cm cast on new sts at the side for sleeve as on back = 33-34-35-35-36 sts. Continue in stockinette st, keeping 1 st in garter st at center front edge and at cuff edge. When the piece measures 82-85-88-91-94 cm put the 27-28-29-29-30 sts on shoulder + sleeves on a st holder and the remaining 6 sts on a second st holder. Left front: Cast on and knit the same as the right, reversing shaping. Assembly: Join shoulder-sleeve seams with Kitchener st - see Fig.1. Neckband: Put the 6 sts from st holder on one side back on needles and knit stockinette st until edge measures approx. 5-6 cm from shoulder, put sts back on st holder. Repeat on the other side of neck and then join neckband at center back with Kitchener st. Sew neckband to back neck. Sew sleeve and side seams in one, making sure that the seam is not too tight. Belt: If you wish a belt knit as follows: Cast on 5 sts around 2 needles. Pull out one needle and knit garter st. When belt measures approx. 100-130 cm bind off all sts loosely. BROOCH: Materials: DROPS SNOW from Garnstudio small amount of nr 30, pink DROPS 6 mm [US J] crochet hook, or size needed to obtain correct gauge. Accessories: a small safety pin Blossom: Ch 4 and join into a ring with 1 sl st. 1st row: 1 sc in ring, * ch 3, 1 sc in ring *, repeat from * - * a total of 2 times and finish with ch 3 and 1 sl st in first sc at start of row = 3 ch-loops. 2nd row: ch 1, crochet as follows in each ch-loop: sl 1, 5 dc, sl 1. Turn the work, crochet the next row from other side (back). 3rd row: ch 1, 1 sc around each sc from previous row, * ch 3, 1 sc in the lower edge of the 3 dc from 2nd row (in the center of the petal’s lower edge), ch 3, 1 sc around the next sc from 1st row *, repeat * - * until there are 5 ch-loops, finish with ch 3 and 1 sl st in first ch at start of row = 6 ch-loops. Turn the work, crochet the next row from the other side (front). 4th row: ch 1, crochet as follows in each ch-loop: sl 1, 3 dc, sl 1. Cut yarn and fasten. Sew a safety pin on back side of blossom. Use brooch as decoration, or to close the cardigan. |
|
|
|
|
|
Have you made this or any other of our designs? Tag your pictures in social media with #dropsdesign so we can see them! Do you need help with this pattern?You'll find tutorial videos, a Comments/Questions area and more by visiting the pattern on garnstudio.com. © 1982-2024 DROPS Design A/S. We reserve all rights. This document, including all its sub-sections, has copyrights. Read more about what you can do with our patterns at the bottom of each pattern on our site. |


With over 40 years in knitting and crochet design, DROPS Design offers one of the most extensive collections of free patterns on the internet - translated to 17 languages. As of today we count 304 catalogs and 11422 patterns - 11417 of which are translated into English (US/in).
We work hard to bring you the best knitting and crochet have to offer, inspiration and advice as well as great quality yarns at incredible prices! Would you like to use our patterns for other than personal use? You can read what you are allowed to do in the Copyright text at the bottom of all our patterns. Happy crafting!
Comments / Questions (9)
Hej! Det finns stickor av olika tillverkare och då kan t.ex. nr 20 vara olika tjocka i mm. Jag undrar vad är grovleken är i mm för DROPS St nr 20, som används i mönster Morning Whisper? Det kan väl ändå inte vara 2 cm (20 mm)? Det är ju isåfall JÄTTEtjocka stickor. 🤔 Mvh Anneli
19.10.2022 - 18:18DROPS Design answered:
Hej Anneli, jo det er 20 mm eller den pind du skal bruge for at få 5 masker på 10 cm :)
25.10.2022 - 11:31Thank you
07.06.2022 - 16:40Please help I don't understand how much wool to use for this pattern
06.06.2022 - 19:41DROPS Design answered:
Dear Mrs Cupido, you will find the amount of yarn in grams under header, ie in Size S for example you need 150 g DROPS Melody /50 g a ball = 3 balls (DROPS Vienna is discontinued - use our yarn converter for more alternatives). Happy knitting!
07.06.2022 - 10:19I would like to knit your pattern 89-12 but as yet have been unable to purchase the 20mm needles required so would like to know where I can buy them
23.11.2020 - 14:00DROPS Design answered:
Hi Janet! In our offer there is DROPS Basic line in which you will find fixed circular needles no 20 (birch). You will find a list of active DROPS stores in your country HERE. Happy knitting!
23.11.2020 - 17:51Beim Vorderteil verstehe ich leider folgende Sätze nicht: "(inkl 3 Blendenm gegen die Mitte). Die zweite Nadel herausziehen und 1 Krausrippe stricken. Danach glatt, mit 1 M. in Krausrippe gegen die Mitte, stricken. " Habe ich drei Blendmaschen in der Mitte oder nur eine? Danke im Voraus!
01.04.2020 - 22:05DROPS Design answered:
Liebe Jennifer, es sind 3 Blendemaschen (gegen die Mitte) und die Randmasche (gegen die Mitte) wird krausrechts gestrickt, dh beim rechten Vorderteil stricken Sie bei den Hinreihen alle Maschen rechts und bei den Rückreihen stricken Sie links bis die letzte Masche die rechts gestrickt wird (spiegelverkehr beim linken Vorderteil), dh die krausrechts gestricke Masche ist die erste der Blendemaschen. Viel Spaß beim stricken!
02.04.2020 - 08:04Es ist gar nicht so einfach an eine 20 mm dicke Stricknadel zu kommen. Wie lang sollte denn das Seil einer Rundstricknadel zum Stricken dieser Jacke sein? Danke. :)
30.01.2020 - 10:33DROPS Design answered:
Liebe Jennifer, Sie können 60 oder 80 cm Seil benutzen - ein 80 cm ist vielleicht vielseitiger, denn es kann auch mit magic loop (für ein anderes Projekt) benutzt werden. Viel Spaß beim stricken!
30.01.2020 - 10:39Klopt het aantal gram garen wel wat er bij staat. Dat houdt in dat ik maar 4 bollen melody nodig heb. Lijkt me zo weinig.
26.06.2017 - 09:20DROPS Design answered:
Hoi Josephien, Ja, dat zou moeten kloppen. Doordat het een zeer open breisel is, heb je weinig garen nodig.
26.06.2017 - 17:34Bonjour, Je ne comprends pas comment le dos, le devant et les manches peuvent être tricotés en une seule pièce avec une paire d'aiguilles droites. Pouvez-vous m'éclairer ?
05.09.2015 - 15:45DROPS Design answered:
Bonjour Mme Robineau, dans le cas présent, ce modèle est tricoté en différentes parties assemblées entre elles à la fin, mais sans rabattre les mailles de l'épaule+manche pour pouvoir faire un montage en grafting et éviter les coutures disgrâcieuses. Bon tricot!
07.09.2015 - 09:47Je l'ai tricoté en PUDDEL, il est magnifique!
09.06.2014 - 11:27