
Popular categories
Looking for a yarn?


|
|||||||
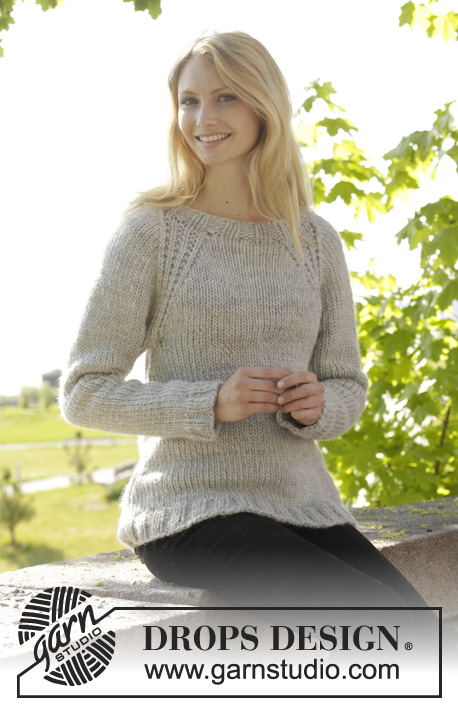
Virginia Cardigan |
|||||||
|
|
|||||||
Knitted DROPS jacket with rib and raglan, worked top down in ”Snow”. Size: S - XXXL.
DROPS 157-28 |
|||||||
|
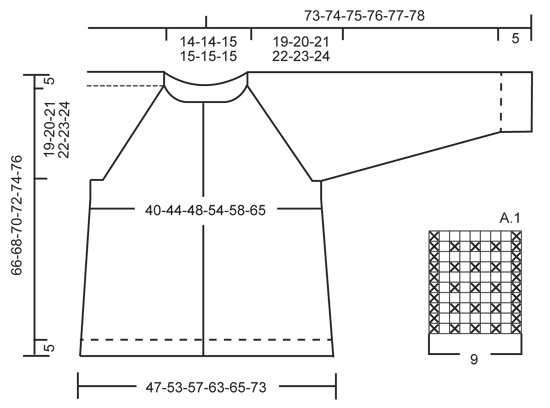
GARTER ST (back and forth on needle): K all rows. 1 ridge = K2 rows. PATTERN: See diagram A.1. The diagram shows all rows in pattern seen from RS. RAGLAN: Inc on each side of every A.1 by making 1 YO (= 8 inc on row). On next row work YOs twisted (i.e. work in the back loop of st instead of front) to avoid holes. INCREASE TIP (applies to body): Work until 1 st remains before marker, 1 YO, K 2, 1 YO = 2 sts inc. Repeat in the other side. On next row K YOs twisted (i.e. work in the back loop of st instead of front) to avoid holes. DECREASE TIP (applies to sleeves): Dec before marker and 1 st as follows: K 2 tog. Dec after marker and 1 st as follows: Slip 1 st as if to K, K 1, psso. BUTTONHOLES: Dec for buttonholes on right band. 1 buttonhole = K 2 tog and make 1 YO. Dec for buttonholes when piece measures (measured from edge at the bottom of body): SIZE S: 5, 14, 23, 32, 41, 50 and 59 cm / 2",5½",9",12½",16",19 3/4",23 1/4" SIZE M: 5, 15, 25, 34, 43, 52 and 61 cm / 2",6",9 3/4",13½",17",20½",24" SIZE L: 5, 15, 25, 35, 45, 54 and 63 cm / 2",6",9 3/4",13 3/4",17 3/4",21 1/4",24 3/4" SIZE XL: 5, 15, 25, 35, 45, 55 and 65 cm / 2",6",9 3/4",13 3/4",17 3/4",21½",25½" SIZE XXL: 5, 14, 23, 32, 41, 50, 59 and 67 cm / 2",5½",9",12½",16",19 3/4",23 1/4",26½" SIZE XXXL: 5, 15, 24, 33, 42, 51, 60 and 69 cm / 2",6",9½",13",16½",20",23½",27" ---------------------------------------------------------- JACKET: Worked back and forth, top down. Work sleeves in the round on double pointed needles. YOKE: Cast on 54-54-58-58-58-58 sts on circular needle size 8 mm / US 11. Continue to work rib as follows: P 2, * K 2, P 2 *, repeat from *-*. When rib has been worked for 3 cm / 1'', work 1 row in stockinette st from RS while AT THE SAME TIME inc 8-8-7-7-8-8 sts evenly = 62-62-65-65-66-66 sts. Now work pattern as follows: 5-5-6-6-6-6 sts in stockinette st (= front piece), A.1, 3 sts in stockinette st (= sleeve), A.1, 10-10-11-11-12-12 sts in stockinette st (= back piece), A.1, 3 sts in stockinette st (= sleeve ), A.1, 5-5-6-6-6-6 sts in stockinette st (= front piece). There is now 1 repetition A.1 in each raglan. REMEMBER THE GAUGE! Continue with pattern like this, AT THE SAME TIME on next row from RS beg inc for RAGLAN – see explanation above! Inc differently on body and sleeves: BODY: Repeat inc every row 0-2-5-8-10-12 times, every other row 4-4-3-4-4-8 times and every 4th row 5-5-5-4-4-2 times. SLEEVE: Repeat inc every row 6-6-7-7-10-11 times, every other row 3-4-4-5-4-4 times and every 4th row 4 times in all sizes. When all inc are done and piece measures 24-25-26-27-28-29 cm / 9½''-9 3/4''-10 1/4''-10 5/8''-11''-11 3/8'', there are 150-162-177-193-210-230 sts in total on needle. Then continue in stockinette st as follows: Work the first 18-20-23-26-28-32 sts, slip the next 39-41-43-45-49-51 sts on a stitch holder for sleeve, cast on 8 new sts under sleeve, insert a marker in the middle of these sts, work the next 36-40-45-51-56-64 sts, slip the next 39-41-43-45-49-51 sts on a stitch holder for sleeve, cast on 8 new sts under sleeve, insert a marker in the middle of these sts, work the remaining 18-20-23-26-28-32 sts. Work the new sts under each sleeve in stockinette st. BODY: There are now 88-96-106-118-128-144 sts for body. Continue in stockinette st. When piece measures 4 cm / 1½'' from the new sts under sleeve, beg inc on each side of markers - READ INCREASE TIP! Repeat inc every 8-6½-7-7-9-9 cm / 3"-2½"-2 3/4"-2 3/4"-3½"-3½" 3-4-4-4-3-3 more times = 104-116-126-138-144-160 sts. When piece measures 61-63-65-67-69-71 cm / 24''-24¾''-25½''-26 3/8''-27 1/8''-28'' in total, inc 2-2-4-4-2-2 sts = 106-118-130-142-146-162 sts. Now work rib as follows: P 2, * K 2, P 2 *, repeat from *-*. Continue like this until rib has been worked for 5 cm / 2''. Bind off with K over K and P over P. SLEEVE: Slip sts back on double pointed needles. Work in stockinette st and cast on 8 new sts at the end of row = 47-49-51-53-57-59 sts. Insert a marker in the middle of the new sts under the sleeve. NOW MEASURE THE PIECE FROM HERE. Then work in stockinette st in the round – AT THE SAME TIME dec 1 st on each side of marker – READ DECREASE TIP. Repeat dec every other round 2 more times in all sizes = 41-43-45-47-51-53 sts. Then dec every 4-3½-4-3½-3-3 cm / 1½"-1 1/4"-1½"-1 1/4"-1"-1" 9-10-9-10-12-11 times = 23-23-27-27-27-31 sts. When sleeve measures 42-42-41-41-41-41 cm / 16½"-16½"-16"-16"-16"-16", inc 1 st in all sizes = 24-24-28-28-28-32 sts. Continue with rib as follows: K 1, * P 2, K 2 *, repeat from *-* until 1 st remains, K 1. Continue like this until rib has been worked for 5 cm / 2''. Bind off with K over K and P over P. RIGHT BAND: Pick up sts for band as follows from RS: Beg at the bottom on right front piece and pick up 86-90-90-94-98-102 sts evenly inside 1 st in stockinette st. Then work rib, beg from WS as follows: 2 sts in GARTER ST – see explanation above -, * K 2, P 2 *, repeat from *-* until 4 sts remain, P 2, 2 sts in garter st. Continue like this back and forth, AT THE SAME TIME on 1st row from RS dec for BUTTONHOLES – see explanation above! LEFT BAND: Pick up sts and work band the same way as right band but reversed. I.e. pick up sts from neck edge st the top (= from RS). Do not dec for buttonholes. ASSEMBLY: Sew the holes under the sleeves. Sew the buttons on to the left band. |
|||||||
Diagram explanations |
|||||||
|
|||||||
|
|||||||
|
Have you made this or any other of our designs? Tag your pictures in social media with #dropsdesign so we can see them! Do you need help with this pattern?You'll find tutorial videos, a Comments/Questions area and more by visiting the pattern on garnstudio.com. © 1982-2024 DROPS Design A/S. We reserve all rights. This document, including all its sub-sections, has copyrights. Read more about what you can do with our patterns at the bottom of each pattern on our site. |
|||||||


With over 40 years in knitting and crochet design, DROPS Design offers one of the most extensive collections of free patterns on the internet - translated to 17 languages. As of today we count 304 catalogs and 11422 patterns - 11417 of which are translated into English (US/in).
We work hard to bring you the best knitting and crochet have to offer, inspiration and advice as well as great quality yarns at incredible prices! Would you like to use our patterns for other than personal use? You can read what you are allowed to do in the Copyright text at the bottom of all our patterns. Happy crafting!
Comments / Questions (54)
Tusinde tak, det hjalp. Jeg er naesten faerdig med trojen. Birthe
14.12.2014 - 20:18Kan heller ikke forstaa udtagninger foer maerket. Der er ikke nogen angivelse hvor maerkerne skal saettes til raglan udtagninger. Har brug for hjaelp. Tak Birthe
04.12.2014 - 14:33DROPS Design answered:
Hej Birthe, det står øverst i opskriften hvordan du tager ud til raglan, se her: RAGLAN: Der tages ud på hver side af hver A.1 ved at slå om (= 8 udtagninger på p). På næste p strikkes omslagen drejet (dvs der strikkes i bagerste del af m i stedet for forreste del) så der ikke bliver hul.
05.12.2014 - 08:51Hei. Jeg har nå økt ferdig, men har kun kommet til 17cm! Jeg har riktig strikkefasthet. Er det meningen at jeg da skal fortsette å strikke til jeg har nådd 24cm og skal sette av maskene til armene!?!
01.12.2014 - 10:24DROPS Design answered:
Hej Iris, de sidste 4 udtagninger sker på hver 4.p og først efter det når du 24 cm hvis du overholder strikkefastheden. God fornøjelse!
05.12.2014 - 09:24Vania wrote:
Thank you very much for your answer! Are all increases made from right side or both sides when needed?
20.11.2014 - 15:03DROPS Design answered:
Dear Vania, you are correct, inc for raglan can be done either from RS (every other row eg) or/and from WS (when inc every row). Happy knitting!
20.11.2014 - 16:45Vania wrote:
Can't undearstand how increases are made for Raglan. Can you please give me an example of how to start the first row with increases? Thanks in advance
19.11.2014 - 20:24DROPS Design answered:
Dear Vania, inc for raglan are not made all at the same time, ie you will sometimes inc only on sleeves, sometimes only on body and sometimes on all pieces. You will inc before/after A.1 with a YO inside the piece that need to be inc. eg to inc on right front piece, inc before A.1, to inc on sleeves inc after A.1 at beg of sleeve and before A.1 at end of sleeve, etc.. Happy knitting!
20.11.2014 - 09:23I udtagningstips står der, at man skal tage to masker ud før mærket. Hvilket mærke? Det står der ikke noget om i opskriften
11.09.2014 - 21:05Det økes forskjellig på bol og ermer slik: BOL: Gjenta økningen på hver p 0-2-5-8-10-12 ganger, på hver 2.p 4-4-3-4-4-8 ganger og på hver 4.p 5-5-5-4-4-2 ganger. ERME: Gjenta økningen på hver p 6-6-7-7-10-11 ganger, på hver 2.p 3-4-4-5-4-4 ganger og på hver 4.p 4 ganger i alle str. Dette forstår jeg ikke hvordan jeg skal gjøre. Noen som kan forklare? Er dette i tillegg til raglan økingen?
30.08.2014 - 11:34DROPS Design answered:
Dette er raglan økningen! Du øger altså m på/mod forstykket ifølge "BOL" forklaringen og du øger m på/mod ærmerne ifølge "ERME" forklaringen.
03.09.2014 - 12:25Zahra wrote:
Mérci madam désolé Je ne comprends pas que vous commenciez-ups Pouvez-vous m'expliquer en détail
06.08.2014 - 20:58DROPS Design answered:
Bonjour Zahra, pour réaliser ce modèle, il faut avoir un échantillon de 11 m x 15 rangs en jersey = 10 x 10 cm. Si vous n'avez pas cet échantillon, vous pouvez utiliser notre moteur de recherches pour trouver un modèle analogue pour votre échantillon. Pensez à demander de l'aide à votre magasin et/ou au forum DROPS si nécessaire. Bon tricot!
07.08.2014 - 10:12Zahra wrote:
Puis-je travailler cette veste au aiguilles de 5mm ou Puis-je travailler cette veste au crochet 6mm
06.08.2014 - 11:37DROPS Design answered:
Bonjour Zahra, ce modèle est écrit sur la base d'un échantillon de 11 m x 15 rangs jersey = 10 x 10 cm, vous pouvez recalculer sur la base de votre échantillon, ou bien, pour une autre tension, pensez à consulter le moteur de recherches (tricot ou crochet). Bon tricot!
06.08.2014 - 11:45Fint med raglan men passformen vid armhålorna verkar vara alldeles för vid!
13.07.2014 - 18:37