
Popular categories
Looking for a yarn?


|
|
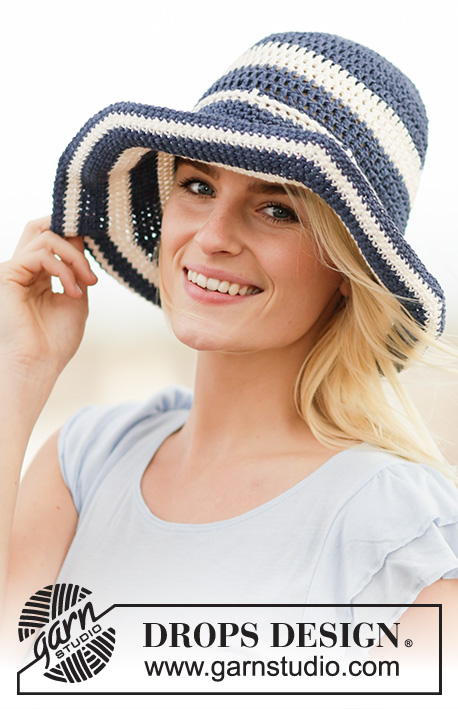
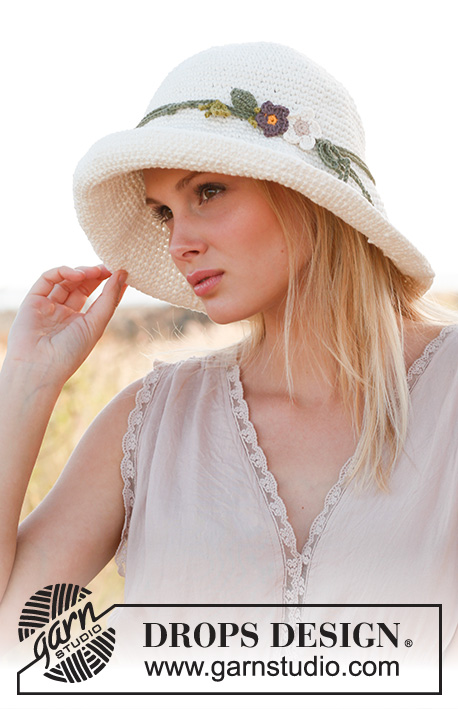
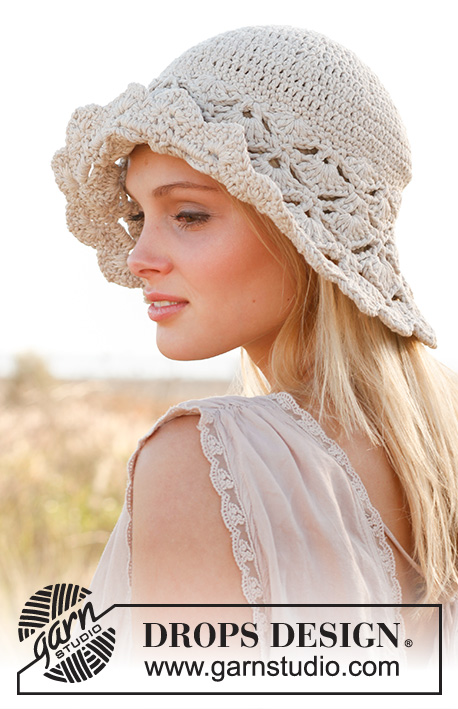
Summer Fun |
|
|
|
|
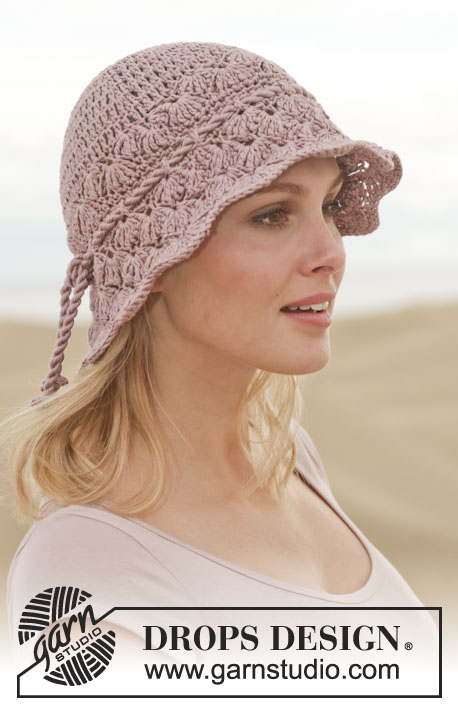
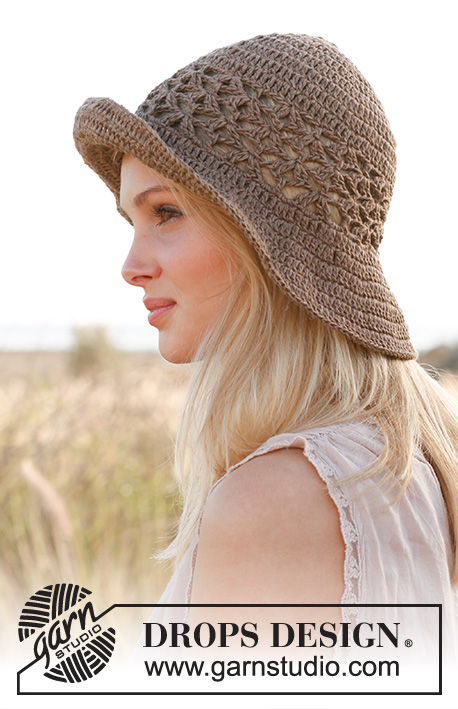
Crochet DROPS hat in "Bomull-Lin" or "Paris".
DROPS 153-37 |
|
|
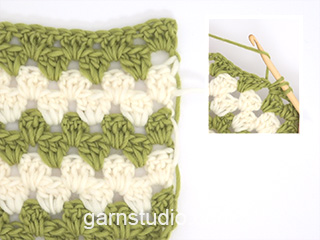
CROCHET INFO: At beg of every sc round, replace 1st sc with 1 ch and finish every round with 1 sl st in first ch from beg of round. Replace 1st dc at beg of dc round with ch 3, finish every round with 1 sl st in third ch from beg of round. DECREASE TIP: Dec 1 sc by working 2 sc tog as follows: * Insert hook in next sc, get yarn *, repeat from *-* one more time, make 1 YO and pull yarn through all 3 sts on hook. ---------------------------------------------------------- HAT: The piece is worked top down. Work 4 ch on hook size 4 mm / G/6 with Bomull-Lin or Paris and form a ring with 1 sl st in first ch. ROUND 1: READ CROCHET INFO! Work 5 sc in ch-ring. ROUND 2: Work 2 sc in every sc the entire round = 10 sc. ROUND 3: * 1 sc in first sc, 2 sc in next sc *, repeat from *-* the entire round = 15 sc. ROUND 4: * 1 sc in each of the first 2 sc, 2 sc in next sc *, repeat from *-* the entire round = 20 sc. ROUND 5: * 1 sc in each of the first 3 sc, 2 sc in next sc *, repeat from *-* the entire round = 25 sc. ROUND 6: * 1 sc in each of the first 4 sc, 2 sc in next sc *, repeat from *-* the entire round = 30 sc. ROUND 7: * 1 sc in each of the first 5 sc, 2 sc in next sc *, repeat from *-* the entire round = 35 sc. ROUND 8: * 1 sc in each of the first 6 sc, 2 sc in next sc *, repeat from *-* the entire round = 40 sc. ROUND 9: * 1 sc in each of the first 7 sc, 2 sc in next sc *, repeat from *-* the entire round = 45 sc. ROUND 10: * 1 sc in each of the first 8 sc, 2 sc in next sc *, repeat from *-* the entire round = 50 sc. ROUND 11: * 1 sc in each of the first 9 sc, 2 sc in next sc *, repeat from *-* the entire round = 55 sc. ROUND 12: * 1 sc in each of the first 10 sc, 2 sc in next sc *, repeat from *-* the entire round = 60 sc. ROUND 13: * 1 sc in each of the first 11 sc, 2 sc in next sc *, repeat from *-* the entire round = 65 sc. ROUND 14: * 1 sc in each of the first 12 sc, 2 sc in next sc *, repeat from *-* the entire round = 70 sc. ROUND 15: * 1 sc in each of the first 13 sc, 2 sc in next sc *, repeat from *-* the entire round = 75 sc. ROUND 16: * 1 sc in each of the first 14 sc, 2 sc in next sc *, repeat from *-* the entire round = 80 sc. ROUND 17: In size L/XL work: * 1 sc in each of the first 19 sc, 2 sc in next sc *, repeat from *-* the entire round = 84 sc. In size S/M inc 1 st on round = 81 sc. There are now 81-84 sc on round. Work 1 sc in every sc until piece measures 11-12 cm / 4½"-4 3/4" from the middle. Then continue as follows: ROUND 1: Work 3 dc in first sc, * skip 2 sc and work 3 dc in next sc *, repeat from *-* the entire round and finish by skipping 2 sc = 27-28 dc-groups. ROUND 2-9: Work ch 3, skip first dc-group from previous round, * 3 dc in space between the next 2 dc-groups *, repeat from *-* the entire round and finish with 2 dc in last space and 1 sl st in 3rd ch from beg of round. ROUND 10: Work ch 1, then 1 sc in every dc the entire round but DEC 1 sc in size S/M - READ DECREASE TIP ABOVE = 80-84 sc and finish with 1 sl st in 1st ch from beg of round. ROUND 11: Work * 1 dc in each of the next 3-3 sc, then 2 dc in next sc *, repeat from *-* the entire round = 100-105 dc. ROUND 12: * 1 dc in each of the next 4-4 dc, 2 dc in next dc *, repeat from *-* the entire round = 120-126 dc. ROUND 13: * 1 dc in each of the next 5-5 dc, 2 dc in next dc *, repeat from *-* the entire round = 140-147 dc. ROUND 14: Work 1 dc in every dc the entire round. ROUND 15: ch 1, then 1 sc in every dc the entire round. Fasten off. |
|
|
Have you made this or any other of our designs? Tag your pictures in social media with #dropsdesign so we can see them! Do you need help with this pattern?You'll find tutorial videos, a Comments/Questions area and more by visiting the pattern on garnstudio.com. © 1982-2024 DROPS Design A/S. We reserve all rights. This document, including all its sub-sections, has copyrights. Read more about what you can do with our patterns at the bottom of each pattern on our site. |


With over 40 years in knitting and crochet design, DROPS Design offers one of the most extensive collections of free patterns on the internet - translated to 17 languages. As of today we count 304 catalogs and 11422 patterns - 11417 of which are translated into English (US/in).
We work hard to bring you the best knitting and crochet have to offer, inspiration and advice as well as great quality yarns at incredible prices! Would you like to use our patterns for other than personal use? You can read what you are allowed to do in the Copyright text at the bottom of all our patterns. Happy crafting!
Comments / Questions (41)
In pattern it says 1dc I each of next 5-5dc Does the dash mean of 5 of 5 or 5 dc in 5th dc
24.09.2017 - 20:16DROPS Design answered:
Dear Nansi, the dash separates the numbers for the two different sizes. In this case you should crochet 1 treble into each of the next five stitches --in both sizes. I hope this helps. Happy Crochet!
25.09.2017 - 00:23Con i vostri ulteriori suggerimenti, ho finito il mio cappello! Sono soddisfatta del mio lavoro ( il mio primo ad uncinetto) ma non pienamente soddisfatta della riuscita del modello forse anche dovuta ad un filato non idoneo. Ora mi accingo a cominciare un altro cappello con il filo da voi suggerito, ma avrò sicuramente bisogno di altro aiuto. Grazie!! A presto su un altro modello!!
22.04.2017 - 14:41Non capisco i giri 2-9 di m.a. Se faccio le 3 cat. e salto il 1° gruppo di m.a. del giro precedente, le 3 cat. diventano orizzontali rispetto al lavoro. Potreste aiutarmi? E quanti gruppi di maglie devo trovarmi alla fine del 9° giro? sempre 27-28 come all'inizio?
14.04.2017 - 23:48DROPS Design answered:
Buongiorno Antonella. Le catenelle torneranno nella posizione corretta quando chiuderà il giro con 1 m.b nella terza catenella. Alla fine del nono giro avrà 27-28 gruppi di maglie. Buon lavoro!
15.04.2017 - 08:51Premetto che sono una neofita di uncinetto. Leggo nelle informazioni per il lavoro che ogni giro deve essere chiuso con una m. bss. Ma questa la devo comprendere nelle 10, 15 , 20 ecc maglie di ogni giro? Grazie
29.03.2017 - 18:14DROPS Design answered:
Buonasera Antonella. I giri vengono chiusi con 1 m.bss nella prima catenella, ma questa m.bss non viene contata nel numero delle m sul giro. Buon lavoro!
29.03.2017 - 19:29Me encanta y las explicaciones claras y fáciles.
03.10.2016 - 18:27FRANCESCA wrote:
Buongiorno, sevolessi fare la parte bassa meno lavorata, posso continuare a punto basso, ma con quali aumenti? Grazie e complimenti!
19.08.2016 - 01:54DROPS Design answered:
Buongiorno Francesca. Nella parte che andrebbe a modificare, non ci sono aumenti di m. Potrebbe provare a continuare a lavorare con 1 m.b in ogni m.b senza aumentare. Dopo qualche giro verifichi che la misura del cappello vada bene. In caso contrario potrebbe aumentare continuando come indicato per gli aumenti nella prima parte. Buon lavoro!
19.08.2016 - 16:14Round 10 of the brim says to do a ch 1 in the beginning of row and finish with a sl in 1st ch from beg of round. Round 11 says Work * 1 dc in each of the next 3-3 sc then 2 dc in the next sc *, repeat from *-*. Do I need to slip stitch to the first DC and then do ch 3? If I do the ch 3 in the sl, the count will be wrong.
28.05.2016 - 19:51DROPS Design answered:
Dear Mrs Vasquez, at the beg of dc-rounds (Round 1, 11, 12, 13, 14), replace 1st dc with 3 ch and finish round with 1 sl st in the 1st dc (= 3rd ch at beg of round). Happy crocheting!
30.05.2016 - 09:21Bonjour, comment mettre en forme le chapeau une fois terminé ? Je l'ai mouillé puis fait sécher sur une forme, mais la bordure reste trop souple. Merci d'avance.
09.11.2015 - 14:25DROPS Design answered:
Bonjour Pascale, vous pouvez amidonner légèrement si vous voulez une bordure un peu plus rigide. Bon crochet!
09.11.2015 - 15:55Hadar wrote:
Hello, I am very new to crocheting and i didn't understand the "crochet info". does it mean that in the first row, for example, i make a chain stitch instead of a double crochet and then make 4 double crochet stitches? and when do i do the second instruction? thank you:)
25.08.2015 - 23:30DROPS Design answered:
Dear Mrs Hadar, Crochet info explains how to start rounds, ie replace 1st dc (UK-Eng) with a ch and 1st tr with 3 ch - see also videos below. Happy crocheting!
26.08.2015 - 10:26Hallo, ich häkle den Sommerhut Summer fun mit Drops Paris Garn. Nun verstehe ich nicht, was gemeint ist mit 1 Stb in jedes der nächsten 4-4 Stb. Können Sie mir auf die Sprünge helfen ? Vielen Dank und liebe Grüsse, Jacqueline
15.08.2015 - 12:38DROPS Design answered:
Die nächsten 4 Stb beziehen sich auf die Vorreihe. In jedes dieser 4 Stb, die als nächstes kommen, häkeln Sie 1 Stb, also häkeln Sie einfach 4 Stb. (4-4 bezieht sich auf die unterschiedlichen Größen, die erste Zahl gilt für die kleinere Größe, die zweite Zahl für die größere Größe, hier ist es für beide Größen gleich).
16.08.2015 - 17:31