
Popular categories
Looking for a yarn?


|
||||||||||
DROPS 73-3 |
||||||||||
 |
 |
|||||||||
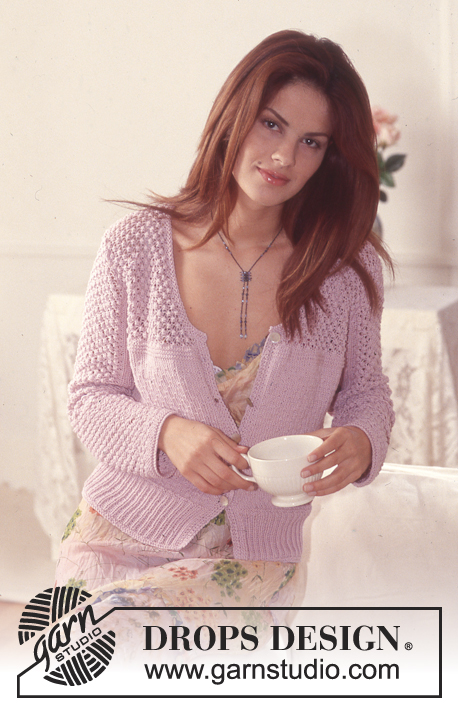
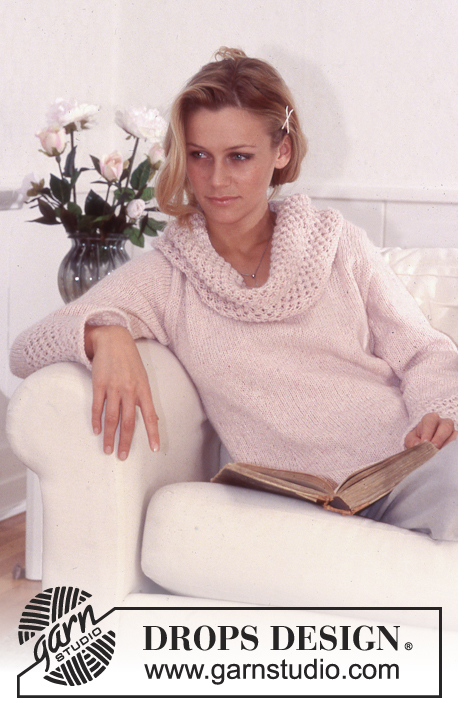
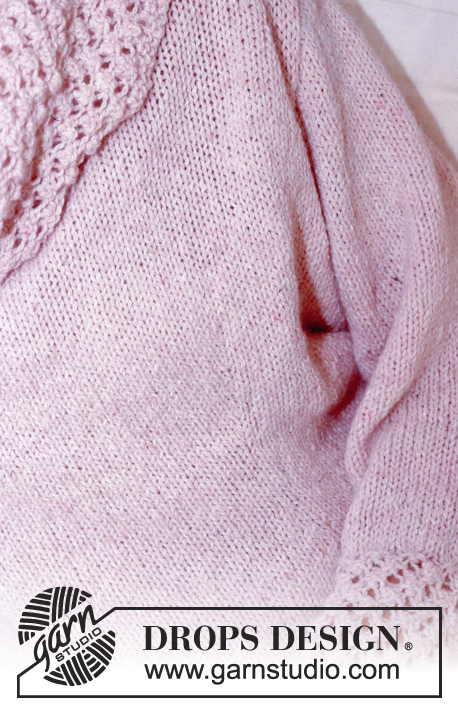
Pullover in DROPS Angora Tweed or DROPS Soft Tweed
DROPS 73-3 |
||||||||||
|
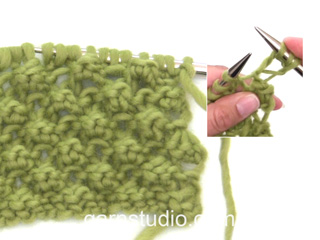
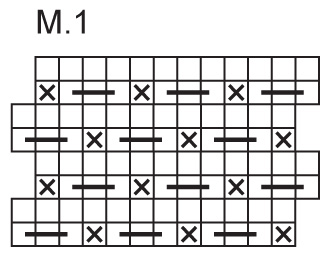
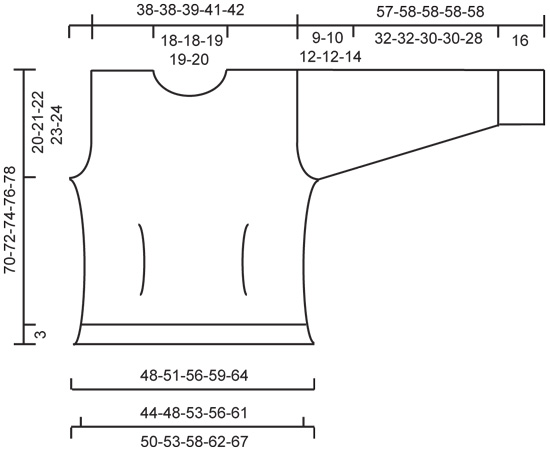
Gauge: 18 sts x 24 rows = 10 x 10 cm in stockinette st. Rib: * K 2, P 1 *, repeat from * - *. Garter st, when knitting flat: Knit all sts, all rows. Blackberry Stitch: See chart. The pattern is seen from the wrong side. Knitting tips-1 (for dart on Body): All decs are made on right side rows. After 1st marker: K 2 tog. Before 2nd marker: Slip 1 as if to knit, K 1, psso. Knitting tips-2 (for armholes): All decs are made on right side rows. Dec 1 st inside 5 stockinette st sts as follows: After 5 sts: Slip 1 as if to knit, K 1, psso. Before 5 sts: K 2 tog. --------------------------------------------------------------------- Front: Cast on 92-98-107-113-122 sts and knit rib for 3 cm. Put a marker 25-28-31-33-36 sts in from each side and change to stockinette st. When the piece measures 20-21-22-23-24 cm dec 1 st after 1st marker and 1 st before 2nd marker (right side row) - see knitting tips-1 – dec every 4 rows a total of 5 times = 82-88-97-103-112 sts. When the piece measures 32-34-36-38-40 cm inc 1 st after 1st marker and 1 st before 2nd marker (right side) - inc by pulling up sts from the previous row. Inc every 6 rows a total of 3 times = 88-94-103-109-118 sts. When the piece measures 50-51-52-53-54 cm bind off 4-5-6-7-8 sts at each side for armhole. Then dec 1 st inside 5 sts at each side every other row 6-8-10-11-13 times - see knitting tips-2. At the same time when the piece measures 55-57-58-60-61 cm bind off the center 6-6-7-7-8 sts for the neck. Then bind off at each neck edge every other row: 2 sts 2 times and 1 st 9-9-10-10-10 times = 18-18-18-19-20 sts remain on each shoulder. Bind off when the piece measures 70-72-74-76-78 cm. Back: Cast on and knit the same as the front. Bind off for armhole at each side as on front and continued until the piece measures 68-70-72-74-76 cm. Now bind off the center 30-30-33-33-34 sts for the neck. On the next row dec 1 st at each neck edge = 18-18-18-19-20 sts remain on each shoulder. Bind off when the piece measures 70-72-74-76-78 cm. Sleeve: Cast on 50-50-54-54-58 sts. Knit 2 rows garter st, continue with blackberry stitch - see chart. When the piece measures 16 cm change to stockinette st. At the same time inc 1 st at each side every 3.5-3-2.5-2-2 cm a total of 9-11-11-13-13 times = 68-72-76-80-84 sts. When sleeve measures 48-48-46-46-44 cm bind off for sleeve cap at each side every other row: 3 sts 1 time, 2 sts 4 times, 1 st 2-2-5-4-8 times, then bind off 2 sts at each side until the piece measures 56-57-57-57-57 cm, then bind off 3 sts 1 time. The piece measures 57-58-58-58-58 cm, bind off the remaining sts. Assembly: Sew right shoulder. Collar: Pick up approx. 96-104 sts (divisible by 4) around the neck. Knit 2 rows garter st, then knit 1 row increasing 1 st in every other st = 144-156 sts. Change to blackberry stitch – be sure that the pattern is knit so that it will be on the outside when the collar folds. When the collar measures approx. 20 cm knit 2 rows garter st and bind off with double strands of yarn. Sew left shoulder and up along collar edge. Sew in sleeves. Sew sleeve and side seams using edge sts as a seam allowance. English translations for diagram = knit (as seen from the wrong side) = knit 3 sts in 1 st as follows: K 1 in front of st, K 1 in back of st, K 1 in front of st. = P 3 tog, pull yarn tight. If this is too difficult, make as follows: P 2, pass 2nd st on right needle over the first, P 1 and pass 2nd st over first st. |
||||||||||
Diagram explanations |
||||||||||
|
||||||||||
|
||||||||||
|
||||||||||
|
Have you made this or any other of our designs? Tag your pictures in social media with #dropsdesign so we can see them! Do you need help with this pattern?You'll find tutorial videos, a Comments/Questions area and more by visiting the pattern on garnstudio.com. © 1982-2024 DROPS Design A/S. We reserve all rights. This document, including all its sub-sections, has copyrights. Read more about what you can do with our patterns at the bottom of each pattern on our site. |
||||||||||


With over 40 years in knitting and crochet design, DROPS Design offers one of the most extensive collections of free patterns on the internet - translated to 17 languages. As of today we count 304 catalogues and 11422 patterns - 11422 of which are translated into English (UK/cm).
We work hard to bring you the best knitting and crochet have to offer, inspiration and advice as well as great quality yarns at incredible prices! Would you like to use our patterns for other than personal use? You can read what you are allowed to do in the Copyright text at the bottom of all our patterns. Happy crafting!
Comments / Questions (11)
Meine gewählte Wolle entspricht der Nadelgrösse 3. Laut meiner Maschenprobe: entspricht Anschlag 136 Maschen Grösse M Wie verhält es sich mit der Massskizze, den Abnehmen, Zunahmen, ganze Anleitung? Herzlichen Dank im Voraus Freundliche Grüsse Irma
07.11.2022 - 20:54DROPS Design answered:
Liebe Irma, leider können wir nicht jede Anleitung nach jeder Anfrage bzw Maschenprobe umrechnen; gerne können Sie sich an Ihrem Wollladen wenden. Wir danke Ihnen im voraus für Ihr Verständnis. Viel Spaß beim stricken!
08.11.2022 - 09:01Bonjour je voudrais savoir pour faire les diminutions des emmanchures c’est 6*1 maille à 5mailles du bord mais tout les combien de rangs ?
24.10.2022 - 19:43DROPS Design answered:
Bonjour Valérie, on doit diminuer tous les 2 rangs - c'est maintenant indiqué dans les explications, merci pour votre retour. Bon tricot!
25.10.2022 - 09:01Har nettopp strikket genser DROPS 73-3 i DROPS Soft Tweed og hadde 2 problemer. Mitt spørsmål er for langt til å få plass i dette feltet, kan dere gi meg en mail adr eg kan sende til?
07.06.2022 - 17:57DROPS Design answered:
Hej Turid, skriv gerne 1 spørgsmål ad gangen. Skriv hvilken størrelse du strikke og hvor i opskriften du får problemer. Så svarer vi så godt vi kan :)
08.06.2022 - 14:57I cannot understand how much wool is needed for size xxl
06.02.2021 - 10:45DROPS Design answered:
Hi Jenny, DROPS Angora Tweed is an discountinued yarn, we do not sell it any more. How to replace this yarn by another you will find thanks to our yarn converter HERE. Happy knitting!
06.02.2021 - 19:13Back- after binding off the arm holes, do I dec1 inside 5 stitches like the front?
03.11.2020 - 03:08DROPS Design answered:
Dear Mrs Meyer, correct, you have to cast off and decrease for armholes as you did on front piece. Happy knitting!
03.11.2020 - 09:03Ik verdraag geen angora of wol wel alpaca,fijne merino of alpaca met zijde.groetjes
22.08.2019 - 21:23DROPS Design answered:
Dag Jeanne,
Als je wel wol wilt gebruiken dan kun je voor onze merinosoorten kiezen. We hebben 3 varianten: Cotton Merino, Merino Extra fine en Baby Merino. De eerste bevat naast Merino ook katoen, de andere 2 zijn van 100% Merinowol gemaakt.
31.08.2019 - 14:50Guinevere wrote:
Hi! As Angora tweed is discontinued, I used your own yarn converter and decided to use either Merino Extra Fine or Puna. I am confused by the third box referring to the number of threads. What should I choose? Please tell me which of the two yarns you think is more appropriate for this particular project. If there is a more suitable one than these two, please let me know.
19.04.2018 - 11:10DROPS Design answered:
Dear Guinevere, Angora Tweed was a yarn group B and this pattern was worked with 1 strand Angora Tweed so that you can replace it with 1 thread any other yarn group B - see the best alternatives in our yarn converter selecting first weight. Happy knitting!
19.04.2018 - 11:38HEATHER wrote:
I see that this jumper has darts knitted intoit. Is it a close fitting jumper?
26.07.2014 - 10:46DROPS Design answered:
Dear Heather, you will find at the bottom of the pattern a measurement chart with all measures in cm taken flat from side to side. Compare to a similar garment you like the shape to find out the matching size. Happy knitting!
28.07.2014 - 09:13J'aimerais savoir si vous pouvez m'envoyer le diagramme du pull 73 3 CAR JE LE TROUVE ILLISIBLE MERCI
29.03.2014 - 22:04DROPS Design answered:
Bonjour Mme Pautrot, un nouveau diagramme plus grand est désormais disponible. N'hésitez pas à consulter la vidéo si nécessaire. Bon tricot!
31.03.2014 - 10:36Waarom ga je midden in het voorpand op 33 st vanuit de zijkant minderen? is niets van te zien op de foto
03.11.2013 - 08:36DROPS Design answered:
Hoi Nan. Je mindert voor de vorm/taille in het model te krijgen. Dat is inderdaad moeilijk te zien op de foto, maar het is correct en je kan gerust gaan breien. Veel plezier meerder
04.11.2013 - 19:57