
Popular categories
Looking for a yarn?


|
|
Comfort Rib |
|
|
|
|
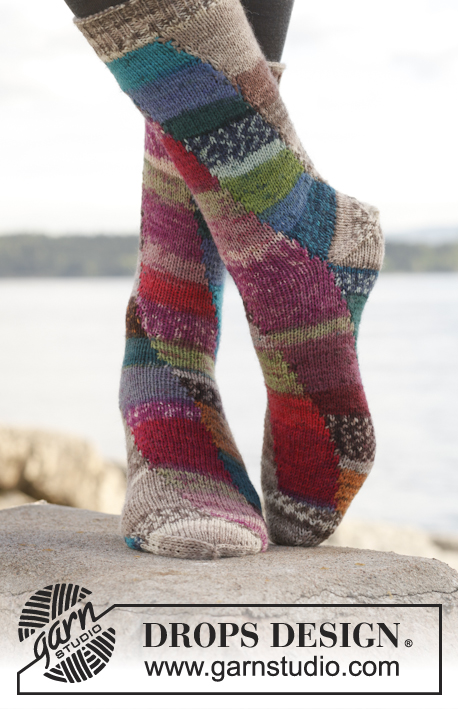
Crochet DROPS socks in "Alaska". Size 35 - 43
DROPS 149-21 |
|
|
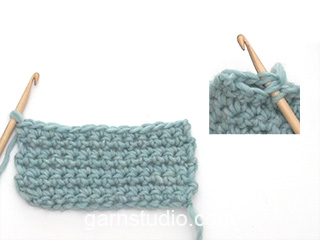
WORK IN THE ROUND IN A CIRCLE: After last dc on the round, continue to next round with 1 dc in next dc (= 1st dc from previous round). NOTE: Insert a marker at the beg of round between last dc on round and 1st dc on next round, move the marker upwards when working. CROCHET INFO: Replace first dc at beg of every dc round with 1 ch. Finish every round with 1 sl st in ch from beg of round. Replace first dc at beg of every dc row with 1 ch. Finish every row with 1 sl st in ch from beg of previous row. DECREASE TIP: Work 1 dc but wait with last pull through (= 2 sts on hook), then work next dc but on last pull through, pull thread through all sts on hook = 1 dc dec. ---------------------------------------------------------- SOCK: Piece is worked in the round from toe and back to instep, then work back and forth from mid back on heel. Then work leg sideways and crochet onto sock. Crochet 4 ch on hook size 3.5 mm with Alaska and form 1 ring with 1 sl st in 1st ch. ROUND 1: Work 6-6-5 dc in ch-ring - READ WORK IN THE ROUND IN A CIRCLE. ROUND 2: Work 2 dc in every dc = 12-12-10 dc. ROUND 3 (and then every other round): Work 1 dc in every dc. ROUND 4: * 1 dc in first dc, 2 dc in next dc *, repeat from *-* 6-6-5 times in total = 18-18-15 dc. ROUND 6: * 1 dc in each of the first 2 dc, 2 dc in next dc *, repeat from *-* 6-6-5 times in total = 24-24-20 dc. ROUND 8: * 1 dc in each of the first 3 dc, 2 dc in next dc *, repeat from *-* 6-6-5 times in total = 30-30-25 dc. ROUND 10: * 1 dc in each of the first 4 dc, 2 dc in next dc *, repeat from *-* 6-6-5 times in total = 36-36-30 dc. Inc are now done in size 35/37. ROUND 12: * 1 dc in each of the first 5 dc, 2 dc in next dc *, repeat from *-* 6-5 times in total = 42-35 dc. Inc are now done in size 38/40. ROUND 14: * 1 dc in each of the first 6 dc, 2 dc in next dc *, repeat from *-* 5 times in total = 40 dc. ROUND 16: * 1 dc in each of the first 7 dc, 2 dc in next dc *, repeat from *-* 5 times in total = 45 dc. Inc are now done in size 41/43. ALL SIZES: = 36-42-45 dc on round. Work in the round with 1 dc in every dc until piece measures 14-16-18 cm. Then work dc back and forth over the first 24-30-32 dc (i.e. do not work over the last 12-12-13 dc on round) - read CROCHET INFO! When sock measures 20-22-25 cm (i.e. approx. 6-6-7 cm from where it is divided), insert 1 marker in the middle of piece (= 12-15-16 dc on each side of marker). On next row dec 1 dc on each side of marker, i.e. beg 2 sts before marker and work the next 4 dc tog 2 by 2 – READ DECREASE TIP (= 2 dc dec). Work 1 row without dec. Repeat dec on next row (= 2 dc dec) = 20-26-28 sts remain on row. Work 1 row without dec, sock now measures approx. 22-24-27 cm from toe to heel. Put piece aside. LEG: Work leg as follows: Work 33 loose ch with Alaska on hook size 3.5 mm. Work 1 dc in 2nd ch from hook, then work 1 dc in every ch the entire row = 32 dc. Work back and forth with dc only in back loop of sts until piece measures 16-16-18 cm, adjust so that one long side fits the opening of sock. Place leg and sock opening towards each other and work tog from WS with a row of sl sts through both layers. NOTE – opening on sock should be mid back of sock. ASSEMBLY: Turn the sock inside out, place it double and work tog the back from WS with a row of sl sts through both layers. Fasten off. |
|
|
Have you made this or any other of our designs? Tag your pictures in social media with #dropsdesign so we can see them! Do you need help with this pattern?You'll find tutorial videos, a Comments/Questions area and more by visiting the pattern on garnstudio.com. © 1982-2024 DROPS Design A/S. We reserve all rights. This document, including all its sub-sections, has copyrights. Read more about what you can do with our patterns at the bottom of each pattern on our site. |


With over 40 years in knitting and crochet design, DROPS Design offers one of the most extensive collections of free patterns on the internet - translated to 17 languages. As of today we count 304 catalogues and 11422 patterns - 11422 of which are translated into English (UK/cm).
We work hard to bring you the best knitting and crochet have to offer, inspiration and advice as well as great quality yarns at incredible prices! Would you like to use our patterns for other than personal use? You can read what you are allowed to do in the Copyright text at the bottom of all our patterns. Happy crafting!
Comments / Questions (62)
I am trying to start this, what does these numbers mean 6-6-5???? Also Read work in the round circle???? What does that mean? THANK YOU "Work 6-6-5 sc in ch-ring - READ WORK IN THE ROUND IN A CIRCLE."
15.01.2021 - 18:02DROPS Design answered:
Dear Mrs Camara, these socks are given in 3 sizes, these 3 numbers refer to each size, for exemple in first and 2nd size you will start with 6 sc in the chain-ring, but in the larger size you will work only 5 sc in the chain-ring. Happy crocheting!
18.01.2021 - 07:53When starting the pattern, working in the round using DC stitches, is it correct that it skips rounds 5, 7, 9, etc. ? It goes from round 1, 2, 3, 4, but then misses round 5. Also, what does "Inc" an abbreviation of?
17.12.2020 - 21:26DROPS Design answered:
Dear Vicky, round 3 and then every other round will be worked the same way, with 1 dc in every dc. "Inc" is the abreviation of increase. and "dec" is for decrease. Happy crocheting!
18.12.2020 - 07:14Het is mij niet duidelijk hoe je de pijp bevestig aan de sok. Heeft iemand tips? Moet je pijp helemaal in de rondte eromheen? Want dan is 18cm tekort.
15.11.2020 - 15:33Ik wil de sok maat 41/43 maken dus tot tour 16. Na tour 12 heb ik 42 vaste. Bij tour 14 moet ik 40 vast hebben. Er staat: TOER 14: * 1 v in elke van de eerste 6 v, 2 v in volgende v *, herhaal van *-* 5 keer in totaal = 40 v. Hoe kan ik van 42 vaste naar 40 vaste gaan?
10.11.2020 - 19:21Bonjour! Je voulais savoir si vous pensez que c'est possible de faire ce modèle avec 100gr de laine 60% acrylique, 20% nylon et 20% merino? J'ai un restant chez moi et je voulais faire quelque chose avec! Merci beaucoup! J'adore votre site! :)
07.11.2020 - 18:19DROPS Design answered:
Bonjour Alexandra, je ne connais pas votre fil, il est donc difficile de vous répondre, vous trouverez toutefois quelques éléments de réponse à propos des alternatives ici - n'hésitez pas à contacter le magasin où vous avez acheté votre laine pour toute assistance personnalisée. Bon crochet!
09.11.2020 - 10:06Can y have the pattern in frénch? Thank you
30.08.2020 - 15:58DROPS Design answered:
Bonjour Mme Leroux, tous nos modèles sont disponibles en français, cliquez sur le menu déroulant sous la photo pour changer la langue. Bon crochet!
31.08.2020 - 10:28Kunt u mij helpen met de gehaakte sokken ik ben linkshandig en ik zoek een ju tube fimpje
08.05.2020 - 13:37DROPS Design answered:
Dag Jacquelien,
De tip voor linkshandigen is om de filmpjes met een spiegel te bekijken.
13.05.2020 - 10:04Jeg synes det virker lidt spøjst, at i Glider af på spørgsmålene/ kommentarerne omkring bredden på skaftet! Der er ingen kvinder med en fod i en str 38/40 der kun er 16 cm rundt om underbenet. Hvis sokken og skaftet skal passe sammen, så skal skaftet være Mindst 22 cm, som jeg ser det. Opskrifterne skal vel også Kunne fungere i real Life?
14.03.2020 - 19:54Har jag förstått rätt att jag ska ersätta första fm med en luftmaska, och sedan i slutet av varvet avsluta med en sm i denna? När jag virkar så får jag en skarv tvärsöver hela sockan. Ska det vara så?
11.02.2020 - 10:45DROPS Design answered:
Hei Rebecka. I denne oppskriften står det: VIRKA RUNT I CIRKEL: Efter den sista fm på v, fortsätt till nästa v med 1 fm i nästa fm (= 1:a fm från föregående v) Altså første fm skal ikke erstattes med en luftmaske. God Fornøyelse!
11.02.2020 - 19:03Vær så snill å gå over denne oppskriften en gang til, den stemmer ikke. Skaftet blir ikke stort nok og når ikke rundt.
04.12.2019 - 17:16