
Popular categories
Looking for a yarn?


|
|
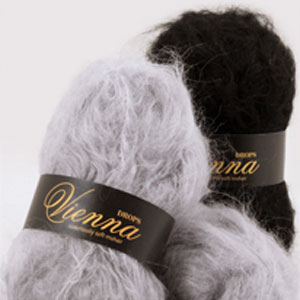
Frost Flower |
|
|
|
|
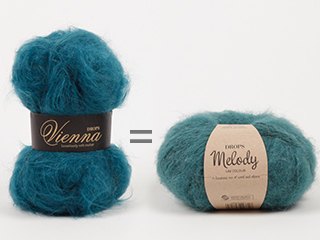
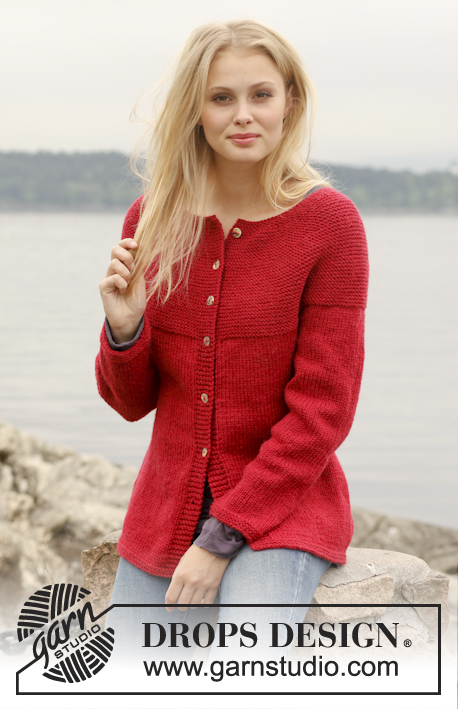
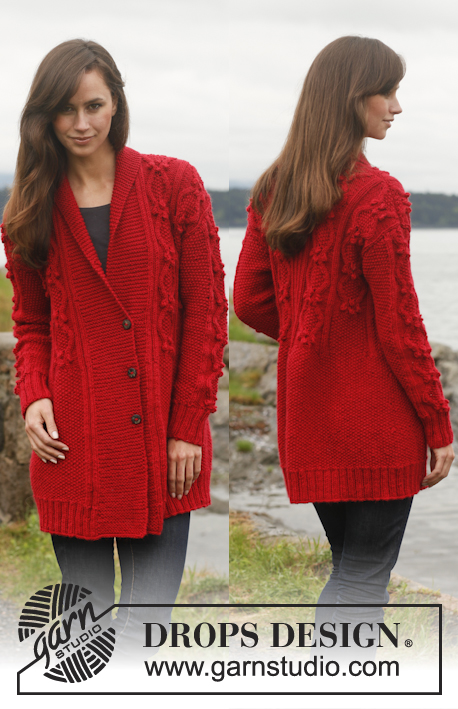
Knitted DROPS jacket with shawl collar in ”Fabel” and “Vienna” or ”Fabel” and “Melody” Size: S - XXXL.
DROPS 150-33 |
|
|
GARTER ST (back and forth on needle): K all rows. 1 ridge = 2 rows K. BUTTONHOLES: Dec for buttonholes on right band. 1 buttonhole = K tog third and fourth st from edge and make 1 YO. Dec for buttonholes when piece measures: SIZE S: 34, 40 and 46 cm SIZE M: 34, 40 and 46 cm SIZE L: 36, 42 and 48 cm SIZE XL: 36, 42 and 48 cm SIZE XXL: 38, 44 and 50 cm SIZE XXXL: 38, 44 and 50 cm ---------------------------------------------------------- BACK PIECE: Worked back and forth on needle. Cast on 54-58-62-68-76-80 sts on circular needle size 8 mm with 1 strand of each yarn. Work 2 RIDGES in garter st - see explanation above. Switch to circular needle size 9 mm and work in stocking st. REMEMBER THE KNITTING TENSION! When piece measures 5 cm, dec 1 st in each side, repeat dec every 10-10-10.5-10.5-9.5-9.5 cm 4-4-4-4-5-5 more times (= 5-5-5-5-6-6 times in total) = 44-48-52-58-64-68 sts. When piece measures 59-61-63-65-67-68 cm, cast on 3-2-2-1-1-1 new sts at the end of the next 2 rows = 50-52-56-60-66-70 sts. Work in stocking st until piece measures 74-77-80-83-86-88 cm, then cast off the middle 8-8-10-10-12-12 sts for neck and finish each shoulder separately. Continue to cast off 1 st on next row from neck 1 time = 20-21-22-24-26-28 sts remain on the shoulder. Cast off when piece measures 76-79-82-85-88-90 cm. LEFT FRONT PIECE: Worked back and forth on needle. Cast on 32-34-37-40-45-47 sts (incl 4 band sts) on circular needle size 8 mm with 1 strand of each yarn. Work 2 ridges in garter st. Switch to circular needle size 9 mm and then work in stocking st with 4 sts in garter st in left side seen from RS (= band). NOTE! Work band sts in garter st until finished measurements. REMEMBER THE KNITTING TENSION! When piece measures 5 cm, dec 1 st in right side seen from RS, repeat dec every 10-10-10.5-10.5-9.5-9.5 cm 4-4-4-4-5-5 more times (= 5-5-5-5-6-6 times in total) = 27-29-32-35-39-41 sts. AT THE SAME when piece measures 51-53-55-57-59-60 cm, work 1 more st in garter st (= left side) every 4-4-3-3-2.5-2.5 cm 6-6-8-8-10-10 times in total. NOTE: No sts are inc, only sts in stocking st are worked in garter st = 10-10-12-12-14-14 sts in garter st AT THE SAME TIME when piece measures 59-61-63-65-67-68 cm, cast on 3-2-2-1-1-1 new sts in the side at the end of next row from WS = 30-31-34-36-40-42 sts. When piece measures 76-79-82-85-88-90 cm, cast off 20-21-22-24-26-28 shoulder sts from RS and work the rest of row. Continue in garter st over the remaining 10-10-12-12-14-14 sts as follows: * 1 ridge in garter st over all sts, 1 ridge over only the outermost 7-7-9-9-11-11 sts *, repeat from *-* until collar measures 6-6-8-8-9-9 cm in the shorter side from the shoulder. Slip the sts on 1 stitch holder. RIGHT FRONT PIECE: Work as left front piece but reversed. In addition dec for BUTTONHOLES on band - see explanation above. SLEEVE: Worked back and forth on needle. Cast on 24-24-26-26-26-28 sts on circular needle size 8 mm with 1 strand of each yarn. Work 2 ridges in garter st. Switch to circular needle size 9 mm and work in stocking st. When piece measures 4 cm, inc 1 st in each side, repeat inc every 10-8-8-6-5-5 cm 4-5-5-6-7-7 more times (= 5-6-6-7-8-8 times in total) = 34-36-38-40-42-44 sts. Cast off when piece measures 49-49-48-47-45-44 cm (shorter measurements in the larger sizes because of wider shoulders). Knit another sleeve. ASSEMBLY: Sew the shoulder seams. Sew collar tog mid back with invisible sts. Sew collar to neck line in back of neck - sew edge to edge to avoid a chunky seam. Sew in sleeves, sew sleeve and side seams in front loop of outermost st. Sew on buttons. |
|

|
|
|
Have you made this or any other of our designs? Tag your pictures in social media with #dropsdesign so we can see them! Do you need help with this pattern?You'll find tutorial videos, a Comments/Questions area and more by visiting the pattern on garnstudio.com. © 1982-2024 DROPS Design A/S. We reserve all rights. This document, including all its sub-sections, has copyrights. Read more about what you can do with our patterns at the bottom of each pattern on our site. |


With over 40 years in knitting and crochet design, DROPS Design offers one of the most extensive collections of free patterns on the internet - translated to 17 languages. As of today we count 304 catalogues and 11422 patterns - 11422 of which are translated into English (UK/cm).
We work hard to bring you the best knitting and crochet have to offer, inspiration and advice as well as great quality yarns at incredible prices! Would you like to use our patterns for other than personal use? You can read what you are allowed to do in the Copyright text at the bottom of all our patterns. Happy crafting!
Comments / Questions (71)
Hej. Ska det bara vara 200gram Fabel och 300 gram melody i stL M Så jag inte köper för lite garn
21.09.2020 - 22:29DROPS Design answered:
Hej Valborg. Ja det stämmer. Se bara till att få den stickfasthet som uppges i mönstret så ska det vara tillräckligt. Mvh DROPS Design
22.09.2020 - 07:44Ik heb het vest gebreid met Fabel en Melody. Heerlijk om te dragen, licht en zacht. Maar het pluist ontzettend! Ook nadat ik het vest een keer gewassen heb. Dit is niet echt draagbaar zo. Wat kan ik doen om van dat pluizen af te komen?
24.03.2020 - 15:49DROPS Design answered:
Dag Ilse,
Via deze link vind je tips over hoe je het pluizen zoveel mogelijk tegen kunt gaan. Hopelijk heb je hier wat aan.
24.03.2020 - 18:30Als ik lichtgrijs wil nemen is het de bedoeling dat je altijd naturel bij neemt en met 2 draden breit? Ik ben een absolute beginner
16.03.2019 - 09:42DROPS Design answered:
Dag Belinda,
Dit patroon wordt met 2 draden gebreid, namelijk met 1 draad Fabel en 1 draad Vienna (of als alternatief voor Vienna kun je ook Melody gebruiken). Natuurlijk kun je zelf kijken welke kleurencombinatie je het leukst vindt. Als je een proeflapje maakt, kun je gelijk kijken wat het kleureffect is.
18.03.2019 - 14:14Jeg kan ikke se sjalskraven på foto på model o-316 Så hvordan strikkes den uden sjalskrave ? Venligstehilsner Annette
15.09.2018 - 11:21DROPS Design answered:
Hej Annette, Jo men du får en sjalskrave som på billedet, hvis du strikker stykket som står sidst under Venstre forstykke: Fortsæt at strikke retstrik over de resterende 10-10-12-12-14-14 m således: * 2 p retstrik over alle m, 2 p retstrik over kun de yderste 7-7-9-9-11-11 m *, gentag fra *-* til kraven måler 6-6-8-8-9-9 cm på det korteste fra skulderen. Sæt m på 1 tråd. God fornøjelse!
17.09.2018 - 12:08Hej Kan det virkelig passe at 200g altså 4 nøgler af fx Fabel + 250g/5 nøgler af Melody er nok til hele denne cardigan når man strikker med en tråd af hver slags?
12.06.2018 - 21:05DROPS Design answered:
Hej Pia, ja det stemmer, bare du sørger for at overholde strikkefastheden. God fornøjelse!
13.06.2018 - 14:58Bedankt voor de info, weer wat bij geleerd :-) Ik heb nog een vraag. Om tot een proeflapje van 10x10 cm te komen moet ik naalden van 10mm gebruiken. Maakt dit wat uit? Heb ik dan meer garen nodig?
15.12.2017 - 09:13DROPS Design answered:
Hallo Mieke, Nee, de dikte van de naalden maakt daarbij niet uit hoor. Als de stekenverhouding maar klopt, dan heb je evenveel garen nodig.
15.12.2017 - 10:34Hallo, dit vest wil ik in eskimo,print gaam breien maar dan wel 15 cm korter. Kan ik de minderingen toch zo aamhouden? Voor maat xl is dit om de 10,5 cm. De laatste maak ik dan bij 47 cm, bij 50 cm moet er dan 1 steek bij opgezet worden. Of is het beter om de 10 cm of misschien nog minder. Graag advies. Groet Mieke
14.12.2017 - 14:12DROPS Design answered:
Hoi Mieke, Als je hem 15 cm korter maakt zou ik de eerste 2 minderingen overslaan en pas vanaf ongeveer 10 cm beginnen met minderen. Omdat je de eerste 2 keer overslaat moet je dus ook 4 steken minder opzetten. Op deze manier blijft de belijning in tact, doordat je a.h.w. alleen stukje van de onderkant afgehaald hebt. Bij biede voorpanden doe je het zelfde, maar zet je 2 steken per voorpand minder op, omdat je daar alleen aan één kant mindert.
14.12.2017 - 14:53Hej kan jag byta melody mot brushed alpacka silk? tillsammans med fabel till detta mönster? Mira
28.11.2017 - 18:32DROPS Design answered:
Hei Mira. DROPS Melody og DROPS Brushed Alpaca Silk tilhører 2 forskjellige garngrupper, slik at du da vil få problemer med å overholde strikkefastheten som er oppgitt i denne oppskriften. Melody er litt tykkere enn Brushed Alpaca Silk. mvh DROPS design
29.11.2017 - 13:31Liebes Drops-Team, ich würde gerne die Jacke mit Brushed Alpaca Silk (doppelfädig) stricken. Soll ich Fabel wegen der Formstabilität dazunehmen? Besteht die Chance, dass ich auf die Maschenprobe komme? Liebe Grüße
23.11.2017 - 19:06DROPS Design answered:
Liebe Margit, am besten stricken Sie eine Maschenprobe, so wissen Sie, ob die Nadelgröße, Textur etc.. Ihnen anpasst. Viel Spaß beim stricken!
24.11.2017 - 08:32Har stikket flere jakker med garn Melody og Fabel, skikkelig kosejakke. Armene blir trange hvis en følger oppskrifta. Jeg plukket opp masker til arm på siste jakke, 50 masker i str S. Ble veldig fornøyd.
17.11.2017 - 11:45