
Popular categories
Looking for a yarn?


|
|
DROPS 75-26 |
|
|
|
|
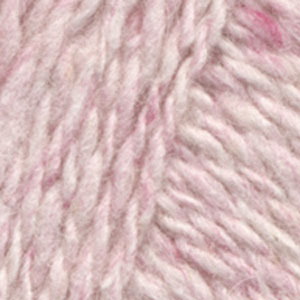
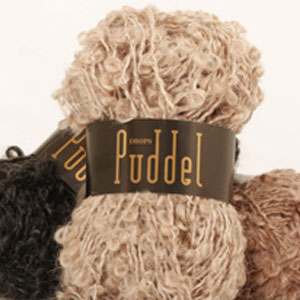
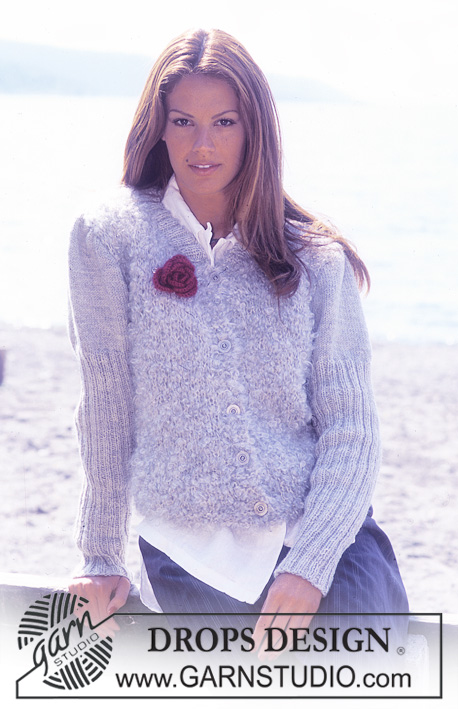
DROPS Cardigan in Angora-Tweed and Puddel. Boa in Puddel.
DROPS 75-26 |
|
|
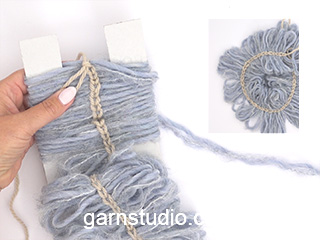
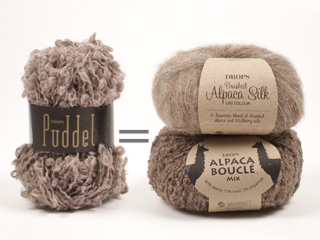
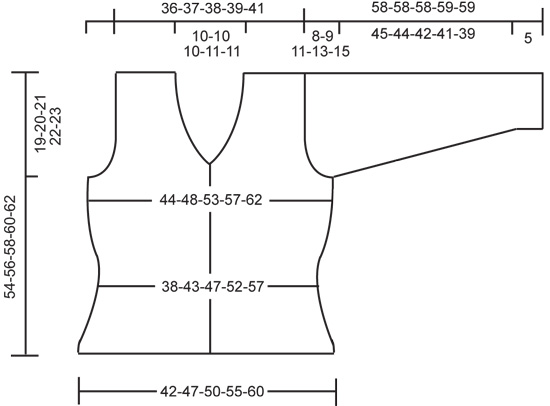
CARDIGAN: Gauge: 19 sts x 25 rows = 10 x 10 cm on larger needles with Angora-Tweed in stockinette st. Rib: * K 2, P 1 *, repeat from * - *. Garter st, when knitting flat: Knit all sts, all rows. Knitting tips (for neck shaping): Dec 1 st inside 5 edge sts knit in the pattern. All decs are made from right side. After 5 sts: sl 1, K 1, psso.Before 5 sts: K 2 tog. Buttonhole: Make buttonholes along right button band. 1 buttonhole = bind off the 3rd st from edge and yo on the next row over the bound off st. Make buttonholes when the piece measures: Size S: 1, 8, 14, 21 and 27 cm. Size M: 1, 8, 15, 21 and 28 cm. Size L: 1, 8, 15, 22 and 29 cm. Size XL: 1, 8, 16, 23 and 30 cm. Size XXL: 1, 9, 16, 24 and 31 cm. Body: Cast on 171-189-201-219-237 sts on smaller circular needles with Angora-Tweed. Knit as follows (row 1 = right side): K 1 (edge st in garter st), K 1, P 1, K 1, P 1, Rib over 159-177-189-207-225 sts (see instructions above), K 2, P 1, K 1, P 1, K 1 and K 1 (edge st in garter st). Make buttonholes along right buttonband (see instructions above). When the rib measures 2 cm change to larger circular needles and stockinette st - but continue to knit the 5 edge sts at each side at the center front edges in the same rib pattern to finished measurements. Put a marker in the work 45-50-53-57-62 sts in from each side – there are 81-89-95-105-113 sts between markers for the back. When the piece measures 5 cm dec 1 st each side of each marker every 3-3-5-5-5 cm a total of 4-4-3-3-3 times = 155-173-189-207-225 sts. Read the entire next section before knitting:Side inc: When the piece measures 18-19-20-21-22 cm inc 1 st each side of each marker every 3 cm a total of 5 times. V-neck: When the piece measures 28-29-30-31-32 cm bind off for V-neck at the center front – see knitting tips: dec 1 st every 4 rows a total of 14-15-15-15-16 times. Armhole: When the piece measures 35-36-37-38-39 cm bind off 3-3-4-4-4 sts at each side of markers. Knit each piece separately. Left front: Continue neck shaping (see instructions above) and at the same time bind off for armhole at the side every other row: 3 sts 0-0-1-1-2 times, 2 sts 1-2-2-3-4 times and 1 st 2-3-2-4-2 times. After all armhole and neck shaping 25-26-27-27-28 sts remain on shoulder. Bind off when the piece measures 54-56-58-60-62 cm. Right front: Knit the same as the left, reversing all shaping. Back: = 77-85-91-101-109 sts. Bind off for armhole at both sides as on front = 69-71-73-75-77 sts remain. When the piece measures 51-53-55-57-59 cm knit det 3 rows rib (* P 1, K 1 *) over the center 29-29-29-31-31 sts (knit the remaining sts in stockinette st). Then bind off the center 19-19-19-21-21 sts for the neck = 25-26-27-27-28 sts remain on each shoulder. Continue to knit the 5 sts at each neck edge in rib as before until the piece measures 54-56-58-60-62 cm, bind off. Sleeve: Cast on 25-25-26-27-27 sts on larger needles with Puddel and knit 8 rows garter st. Change to Angora-Tweed and smaller needles and stockinette st, increasing 1 st in each st on the 1st row = 50-50-52-54-54 sts. When the piece measures 11-10-9-9-9 cm inc 1 st at each side every 5-4-3.5-3-2.5 cm a total of 8-10-11-12-14 times = 66-70-74-78-82 sts. When the piece measures 50-49-47-46-44 cm bind off for sleeve cap at each side every other row: 3 sts 2-2-2-1-1 time, 2 sts 2-2-1-2-1 times, 1 st 3-4-8-11-14 times, then bind off 2 sts at each side until the piece measures 57-57-57-58-58 cm, then bind off 3 sts 1 time at each side. The piece measures approx. 58-58-58-59-59 cm, bind off. Assembly: Sew shoulder seams. Sew sleeve seams using edge st as seam allowance down to Puddel cuff - then sew in outermost st so the seam will not be too thick. Sew in sleeves - distribute sts from sleeves evenly in armhole. Sew on buttons. Collar: The collar is made as a boa and then sewn along neckline. Boa: Draw the template on cardboard with the measurements shown in diagram and cut out – see figure 1 («tegn.» = figure). Mark the center with a line. Make a loop with Angora-Tweed and lay it on the center line so that the loop and yarn are as seen in figure 2. Hold with left thumb on Angora-Tweed-loop and strand of Puddel at the same time. Wind Puddel around template in a Figure 8 to the right, through middle and around the left, then through the middle to the front, as shown in figure 3. Pull up Angora-Tweed-loop and finger crochet 1 ch around Puddel where it intersects. Using thumb and index finger on right hand, pull a strand from ball of Angora-Tweed around Puddel and through the loop, and pull up a new loop – see figure 4. Make a new Figure 8 with Puddel and finger crochet with the second loop. Continue in this manner. When the template is full, pull off Figure 8s and just leave last one in place to continue. Make boa approx. 62-64-66-69-71 cm long (to fit around neck of the cardigan), cut off both yarns. You may wish to reinforce the finger crochet so that the Puddel loops will not be pulled out – use 1 strand Angora-Tweed and crochet through boa again. Assembly: Lay boa around neck on the cardigan beginning at center front edge – sew in place with Angora-Tweed. BOA: Follow instructions for the collar. Make boa as long as you can with 1 ball Puddel. If you want a thicker boa in Puddel, follow instructions under model 17-75 and use 2 strands Puddel instead of 1 strand Italian Velvet. |
|

|
|
|
|
|
Have you made this or any other of our designs? Tag your pictures in social media with #dropsdesign so we can see them! Do you need help with this pattern?You'll find tutorial videos, a Comments/Questions area and more by visiting the pattern on garnstudio.com. © 1982-2024 DROPS Design A/S. We reserve all rights. This document, including all its sub-sections, has copyrights. Read more about what you can do with our patterns at the bottom of each pattern on our site. |


With over 40 years in knitting and crochet design, DROPS Design offers one of the most extensive collections of free patterns on the internet - translated to 17 languages. As of today we count 304 catalogues and 11422 patterns - 11422 of which are translated into English (UK/cm).
We work hard to bring you the best knitting and crochet have to offer, inspiration and advice as well as great quality yarns at incredible prices! Would you like to use our patterns for other than personal use? You can read what you are allowed to do in the Copyright text at the bottom of all our patterns. Happy crafting!