
Popular categories
Looking for a yarn?


|
|||||||||||||||||||
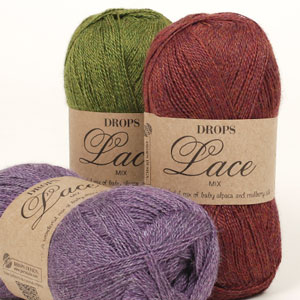
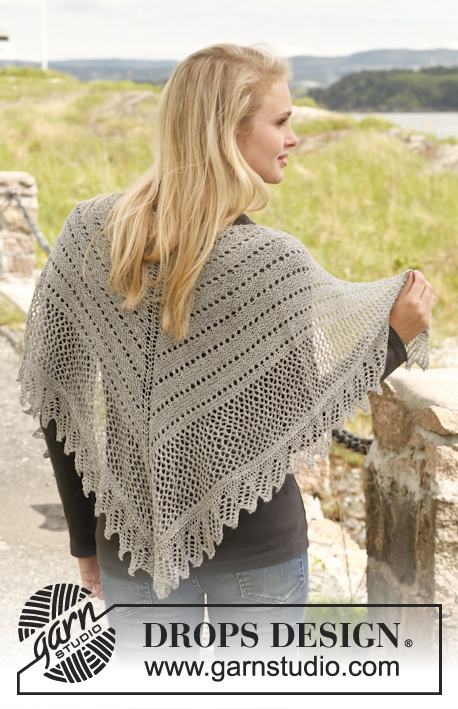
Silver Mist |
|||||||||||||||||||
 |
 |
||||||||||||||||||
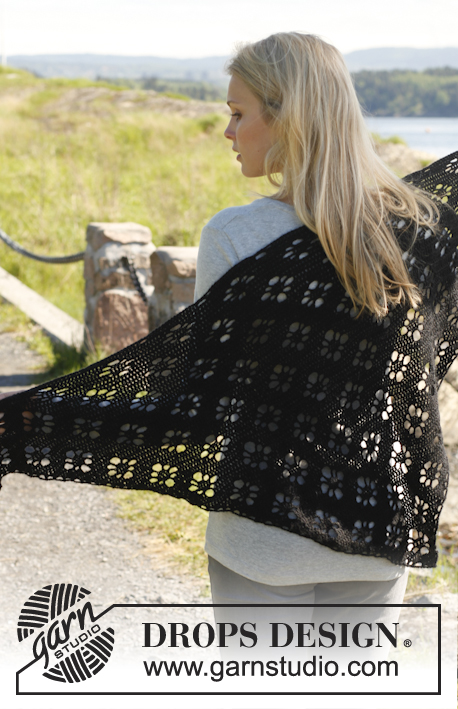
Knitted DROPS shawl in garter st with lace pattern in ”Lace”.
DROPS 150-38 |
|||||||||||||||||||
|
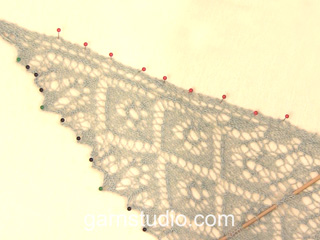
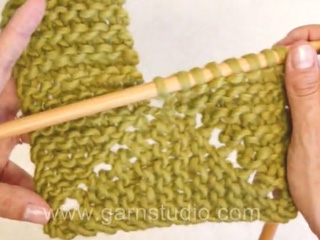
GARTER ST (back and forth on needle): K all rows. LACE PATTERN: Row 1-7: K from RS, K from WS Row 8 (from WS): * K 2 tog, 1 YO *, repeat from *-*. Row 9-12: K from RS, K from WS Repeat these 12 rows upwards. INCREASE TIP: All inc are done from RS. Inc 4 sts (1 st in each side, 2 sts in the middle) on every row from RS as follows: 3 sts in garter st, 1 YO, work until st with marker (= mid st), 1 YO, K 1 (= mid st), 1 YO, work until 3 sts remain on row, 1 YO, 3 sts in garter st. On next row (from WS) K all sts incl YOs. ---------------------------------------------------------- SHAWL: Worked back and forth on circular needle to make room for all the sts. The shawl is worked from mid back and down. Cast on 7 sts on circular needle size 3.5 mm with Lace. Insert 1 marker in 4th st (= mid st) and move it upwards in mid st when working. Work 1st row as follows (= RS): 3 sts in GARTER ST - read explanation above, 1 YO, K 1 (= mid st with marker), 1 YO, 3 sts in garter st = 9 sts. Then work LACE PATTERN with 3 sts in garter st each side while AT THE SAME TIME inc 4 sts on every row from RS - Read INCREASE TIP! Continue inc until there are 229 sts on the needle. Piece measures approx. 37 cm measured in knitting direction from cast-on edge to needle. Now work as follows: 3 sts in garter st, A.1, A.2 over the next 108 sts, work until 2 sts remain before mid st, work A.3, 1 st in garter st (= mid st), A.1, A.2 over the next 108 sts until 5 sts remain, work A.3 and 3 sts in garter st. Continue to work according to A.1/A.2/A.3 until diagrams have been worked 4 times in total vertically. Every time A.1/A.2/A.3 have been worked 1 time vertically, there is room for 2 more repetitions of A.2 between A.1 and A.3 on each side of mid st - AT THE SAME TIME on last row of last repetition (= WS) inc 8 sts evenly by working 2 sts in 1 st = 301 sts. Work 2 ridges in garter st over all sts (remember inc as before in each side and in the middle), there are 309 sts on the needle - cast off. LACE EDGE: Cast on 8 sts on circular needle size 3.5 mm with Lace. Work back and forth according to A.4, AT THE SAME TIME work edge tog with shawl – beg at the top of shawl and fasten edge along left diagonal side down to tip. Knit edge to shawl as follows - on every row from RS: Pick up the outermost st in front loop from shawl with right needle, work first st from left needle (1st st in A.4), pass the new st over, work the rest of row. When lace edge has been worked all the way down to tip of shawl, work in garter st over all sts, AT THE SAME TIME cast off 1 st at beg of every row from WS, continue in garter st until all sts have been cast off. Repeat along the right side of shawl but now work according to A.5. Knit edge to shawl as follows - on every row from WS: Pick up the outermost st in front loop from shawl with right needle, work first st from left needle (1st st in A.5), pass the new st over, work the rest of row. Sew tog cast-off edge on A.4 and A.5 at the bottom of tip. BLOCKING: Place the shawl in lukewarm water until it is soaking wet. Carefully squeeze the water out of the shawl - do not twist the shawl - then roll the shawl in a towel and squeeze to remove more water - the shawl will now only be moist. Place the shawl on a carpet or mattress - carefully stretch it out to size and fasten it with pins. NOTE: 1 pin in the outer st in each side of shawl, along the 2 diagonal sides, insert 1 pin in the middle of every repetition and 1 pin in mid st (= bottom of tip on shawl), lightly pull at every needle so that the edge is shaped into small tips. Leave shawl to dry like this. Repeat the process when the shawl has been washed. |
|||||||||||||||||||
Diagram explanations |
|||||||||||||||||||
|
|||||||||||||||||||

|
|||||||||||||||||||
|
Have you made this or any other of our designs? Tag your pictures in social media with #dropsdesign so we can see them! Do you need help with this pattern?You'll find tutorial videos, a Comments/Questions area and more by visiting the pattern on garnstudio.com. © 1982-2024 DROPS Design A/S. We reserve all rights. This document, including all its sub-sections, has copyrights. Read more about what you can do with our patterns at the bottom of each pattern on our site. |
|||||||||||||||||||


With over 40 years in knitting and crochet design, DROPS Design offers one of the most extensive collections of free patterns on the internet - translated to 17 languages. As of today we count 304 catalogues and 11422 patterns - 11422 of which are translated into English (UK/cm).
We work hard to bring you the best knitting and crochet have to offer, inspiration and advice as well as great quality yarns at incredible prices! Would you like to use our patterns for other than personal use? You can read what you are allowed to do in the Copyright text at the bottom of all our patterns. Happy crafting!
Comments / Questions (40)
Jag förstår inte hur jag ska göra från att diagrammen börjar.. Det står att det ska va 229 maskor, men enligt resten av beskrivningen verkar det bli 221 (108 st m på vardera sida + 2 extra m om mittm)? Sen undrar jag, blir det inte mönstret assymetriskt när jag stickar A1, A2 o sist A3 på båda sidor om mittmaskan? Borde inte sidorna spegla varandra så att A3 finns båda ggr närmast mittmaskan?
01.06.2014 - 07:25DROPS Design answered:
Hej Sara. Mönstret stemmer og bliver 229 hvis du fölger det: 3 rille, A.1 (=1 m), A.2 (= 108 m), A.3 (= 2 m), midtermaske (= 1), A.1 (=1 m) A.2 (=108 m), A.3 (=2 m) og 3 rille = 3+1+108+2+1+1+108+2+3 = 229. Hvis du strikker A.3 paa den anden sidde af midten spejler du ikke. Men strik som beskrevet og det skal gaa fint ;-)
03.07.2014 - 15:26I am interested in using this pattern but I can't find the information on how wide the long edge will be or how many balls of yarn I will need. Can you help me out with this info?
10.04.2014 - 22:58DROPS Design answered:
Dear Kathleen, for a shawl measuring approx. 65 cm at the back of neck and down along mid back (as on the picture), you will need 100 g DROPS Lace, i.e. 1 skein. Happy knitting!
11.04.2014 - 08:54Moet ik bij de kanten rand afkanten precies in de eerste naald van A4? Briei ik eerst door tott precies aan de punt? En dan nog die ribbels en ook die van A5 erbij? Wordt dat niet een gebobbel bij de punt? Bij het opspannen moet dit waar 3 steken samen zijn gebreid. Maar waar is dit,ik heb nergens 3 St. Samen gebreid.
03.02.2014 - 12:56DROPS Design answered:
Hoi Geke. U breit A.4 tot de punt. Dan breit u ribbelsteek over alle steken en kant u elke keer aan de goede kant een st af zodat u een schuin stuk krijgt. Dit doet u ook met A.5 en de schuine randen van beide delen naait u later aan elkaar. U hebt twee schuine delen, dus geen bobbels.
07.02.2014 - 10:26Ik heb 229 steken. Nu snap ik de volgende zin niet: Elke keer dat A.1/A.2/A.3 een keer in de hoogte is gebreid, is er ruimte voor 2 patroonherhalingen meer van A.2 tussen A.1 en A.3. enz.? En ik meerder net als tot nu toe aan begin en eind en voor en achter de midden steek met een omslag?
17.01.2014 - 19:21DROPS Design answered:
Hoi Geke. Je gaat steeds door met de meerderingen zoals beschreven. Het betekent dat als je de A.1/A.2 en A.3 1 keer in de hoogte hebt gebreid dan is er ruimte (de nieuwe st) voor meer herhalingen van A.2, tussen A.1 en A.3 enz.
22.01.2014 - 17:27Ik heb gisteren om uitleg gevraagd maar denk dat ik misschien niet het juiste emailadres had gegeven.
16.01.2014 - 19:42DROPS Design answered:
Hoi Geke. Ik stuur geen mails, het antwoord staat onder uw vraag.
17.01.2014 - 08:42Moet ik na dé mid.den steek Niet eerst A2 en dan A 1 breien. Dus het spiegelbeeld?
15.01.2014 - 18:41DROPS Design answered:
Nee, u breit zowel voor als na de middelste st A.1, A.2 een aantal keer en u eindigt met A.3
16.01.2014 - 11:47Ik heb 229 steken en moet nu verder met A.1. A.2 A.3.. Wat wordt er bedoelt met de zin:Elke keer dat A.1/A.2/A.3 een keer in de hoogte is gebreid,is er ruimte voor 2 patroonherhalingen meer van A.2 tussen A.1 en A.3 aan elke kant van de mid St.- meerder TEGELIJKERTIJD. Etc.? Moet ik 4x het patroon herhalen? Moet ik in iedere heengaande Ndl. Meerderen? Meerderen met een omslag voor en na de midden steek?
15.01.2014 - 17:27DROPS Design answered:
Hoi Geke. U breit deze patronen A.1, 2 en 3 tot alle naalden die getekend zijn een keer in de hoogte zijn gebreid. U meerdert in deze patronen A.1 en A.3 automatisch elke heengaande nld, zodat er na 8 naalden 2 keer 4 st extra zijn voor de middelste st en na de middelste st. Dat is dus ruimte voor 2 keer extra A.2 voor en na de middelste st. U begint opnieuw met A.1, A.2 en A.3, maar u breit A.2 twee keer vaker omdat u 8 st meer hebt voor en na de middelste st
16.01.2014 - 11:47Ne comprends pas où débute le tricot y a t'il une vidéo explicative ? Ou un schéma plus éxplicite?
08.01.2014 - 23:57DROPS Design answered:
Bonjour Mme Tremblais, le châle se commence au niveau de l'encolure dos, on monte 7 m et on va augmenter 4 m tous les 2 rangs pour former le triangle : 1 au début et 1 à la fin du rang + 2 au milieu du châle (de chaque côté de la m centrale). Bon tricot!
09.01.2014 - 09:01Buenas noches, les agradezco que me hayan contestado, ya terminé ahora comienzo con el borde, estoy haciendo el tejido con calma. Saludos.
17.08.2013 - 02:03Har börjat sticka sjal Silver Mist i Lace. Jag undrar, skall antalet maskor hela tiden vara samma till antalet på båda sidor om mittmaskan där man sätter märktråd (MT)
31.07.2013 - 22:47DROPS Design answered:
Ja du ökar samma antal m i varje sida om mittmaskan hela tiden :)
04.10.2013 - 09:53