
Popular categories
Looking for a yarn?


|
||||||||||||||||
Bluebelle |
||||||||||||||||
 |
 |
|||||||||||||||
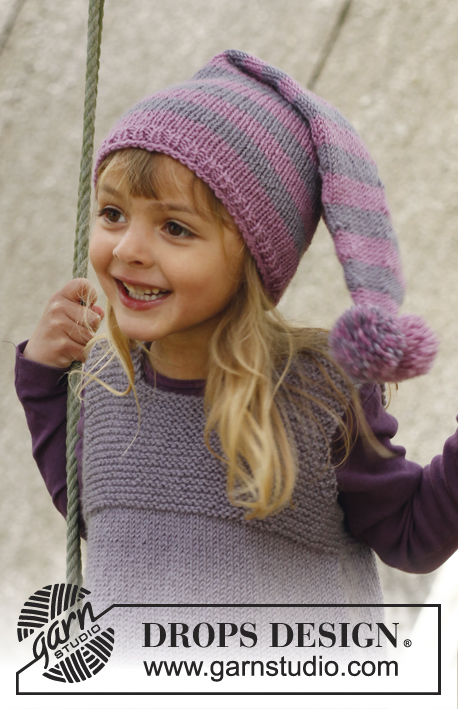
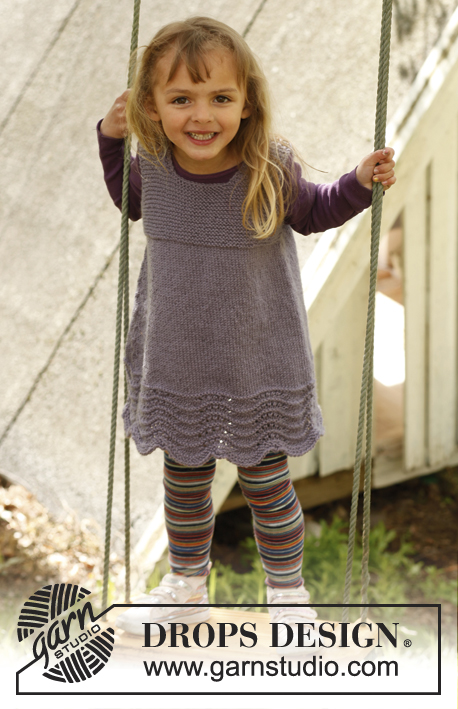
Knitted dress with lace pattern in DROPS Karisma. Size children 3 to 12 years
DROPS Children 23-1 |
||||||||||||||||
|
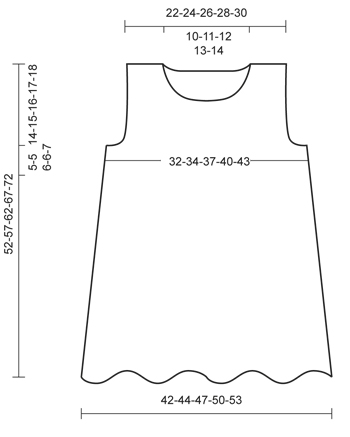
GARTER ST (in the round on circular needle): * K 1 round and P 1 round *, repeat from *-*. GARTER ST (back and forth on needle): K all rows. PATTERN: See diagrams A-1 and A-2. Diagrams show pattern from RS. DECREASE TIP 1 (applies to body): Dec 1 st on each side of marker as follows: Work until 2 sts remain before marker, slip 1 st as if to K, K 1, psso, (marker), K tog the next 2 sts. DECREASE TIP 2 (applies to armholes and neck line on front piece): All dec are done from RS! Dec 1 st at beg of row as follows: K 2, K the next 2 sts tog. Dec 1 st at end of row as follows: Work until 4 sts remain on needle, K the next 2 sts tog, K 2. BUTTON HOLES: 1 BUTTON HOLE = K 2 sts tog and make 1 YO. Cast off for 3 button holes evenly on band on left shoulder. MEASURING TIP: Because of the garter st all measurements must be done by holding the piece up otherwise the garment will be too long when worn. --------------------------------------------------------- BODY: Worked in the round on circular needle. Cast on 190-209-228-228-247 sts on circular needle size 4.5 mm with grey purple. Work 2 rounds in GARTER ST - Read explanation above. Then work A-1 over all sts 1 time vertically = 170-187-204-204-221 sts (= 10-11-12-12-13 repetitions). Then work A-2 over all sts until piece measures approx. 9-9-10-10-11 cm. K next round while AT THE SAME TIME dec 2-11-16-4-9 sts evenly on round = 168-176-188-200-212 sts. Then work in stocking st. REMEMBER THE KNITTING TENSION! When piece measures 10-10-11-11-12 cm, insert a marker at beg of round and a marker after 84-88-94-100-106 sts (= middle of sides), and move the marker upwards when working. On next round, dec 1 st on each side of every marker - READ DECREASE TIP 1 = 4 sts dec on round. Repeat dec every 2½-2½-3-3½-3½ cm a total of 10 times = 128-136-148-160-172 sts. When piece measures 33-37-40-44-47 cm (all dec should now be done), switch to circular needle size 4 mm and continue in garter st over all sts until finished measurements - READ MEASURING TIP! When piece measures 38-42-46-50-54 cm, cast off 4-4-5-5-6 sts for armholes on each side of both markers (= 8-8-10-10-12 cast off sts in each side). Finish each part separately. BACK PIECE: = 56-60-64-70-74 sts. Continue in garter st back and forth on circular needle size 4 mm - AT THE SAME TIME dec 1 st in each side of piece for armholes - READ DECREASE TIP 2. Repeat dec on every row from RS a total of 6-6-6-7-7 times = 44-48-52-56-60 sts remain. When piece measures 50-55-60-65-70 cm, cast off the middle 16-18-20-22-24 sts for neck. Now finish each shoulder separately. Then cast off on every row from neck as follows: 1 st 2 times = 12-13-14-15-16 sts remain on shoulder. When piece measures 52-57-62-67-72 cm, cast off sts on right shoulder, and then work a band on left shoulder. BAND - AT THE BACK: Work a band over sts on left shoulder as follows: On first row from WS, inc 1-0-1-0-1 st = 13-13-15-15-17 sts. Then work rib on next row from RS as follows: * K 1, P 1 *, repeat from *-* the entire row. When rib measures 2 cm, loosely cast off all sts with K over K and P over P. FRONT PIECE: = 56-60-64-70-74 sts. Continue in garter st back and forth on circular needle size 4 mm and dec for armholes as on back piece. AT THE SAME TIME when piece measures 45-49-53-57-61 cm, cast off the middle 14-14-16-16-18 sts for neck line. Now finish each shoulder separately. Then dec on every row from RS as follows: 1 st 3-4-4-5-5 times - READ DECREASE TIP 2 = 12-13-14-15-16 sts remain on shoulder. When piece measures 52-57-62-67-72 cm - READ MEASURING TIP - cast off on right shoulder. Work the left shoulder the same way as the right shoulder until piece measures 52-57-62-67-72 cm. Work now BAND – AT THE FRONT as explained below. BAND - AT THE FRONT: Work a band over sts on left shoulder as follows: On first row from WS, inc 1-0-1-0-1 st = 13-13-15-15-17 sts. Then work rib on next row from RS as follows: * K 1, P 1 *, repeat from *-* the entire row. On next row from RS, cast off for 3 button holes evenly - read explanation above. When rib measures 2 cm, loosely cast off all sts with K over K and P over P. ASSEMBLY: Sew right shoulder seam. Sew the buttons on to band on left back piece. --------------------------------------------------------- Hat - see pattern SmåDrops 23-6 --------------------------------------------------------- |
||||||||||||||||
Diagram explanations |
||||||||||||||||
|
||||||||||||||||

|
||||||||||||||||
|
||||||||||||||||
|
Have you made this or any other of our designs? Tag your pictures in social media with #dropsdesign so we can see them! Do you need help with this pattern?You'll find tutorial videos, a Comments/Questions area and more by visiting the pattern on garnstudio.com. © 1982-2024 DROPS Design A/S. We reserve all rights. This document, including all its sub-sections, has copyrights. Read more about what you can do with our patterns at the bottom of each pattern on our site. |
||||||||||||||||


With over 40 years in knitting and crochet design, DROPS Design offers one of the most extensive collections of free patterns on the internet - translated to 17 languages. As of today we count 304 catalogues and 11422 patterns - 11422 of which are translated into English (UK/cm).
We work hard to bring you the best knitting and crochet have to offer, inspiration and advice as well as great quality yarns at incredible prices! Would you like to use our patterns for other than personal use? You can read what you are allowed to do in the Copyright text at the bottom of all our patterns. Happy crafting!
Comments / Questions (65)
Irgendwie verstehe ich die Beschreibung für die Blende nicht. Wie nehme ich für die Blende an der Schulter Maschen wieder auf? Was bedeutet 1-0-1-0-1? Stricke ich die Blende nur in der Hinrunde 1 re, 1 li und wie dann in der Rückrunde?
03.04.2018 - 21:06DROPS Design answered:
Liebe Doro, in der erste Größe stricken Sie über die Maschen der Blende und gleichzeitig bei der Rückreihe 1 M zunehmen = es sind jetzt 13 M. Dann 2 cm Bündchen (1 re, 1 li) stricken. Viel Spaß beim stricken!
04.04.2018 - 08:53Nehme ich für den Halsausschnitt dann von "innen nach außen" ab? Also nur an der Innenseite des Schulterteils? Wie viele Maschen werden pro Reihe abgenommen und wie viele habe ich am Ende pro Schulter auf der Nadel ( für die Größe 3/4 Jahre)?
03.04.2018 - 21:02DROPS Design answered:
Liebe Doro, die Abnahme für den Halsausschnitt werden von der Vorderseite gestrickt, dh 1 M innerhalb 2 M gegen Halsausschnitt: Rechter Schulter: vor den 2 letzten Maschen und linker Schulter: nach den 2 ersten Maschen. Beim Rückenteil wird 1 M 2 Mal abgenommen = 12 M bleiben für den Schulter. Viel Spaß beim stricken!
04.04.2018 - 08:46Ich habe zwei Fragen die das Rückenteil betreffen: Soll nach dem Abketten für die Armlöcher für das Rückenteil in jeder Hinreihe abgenommen oder abgekettet werden? In der Anleitung steht abk. es wird aber auf den Hinweis zum Abnehmen 2 verwiesen. Abnehmen würde hier auch Sinn ergeben. Für den Halsausschnitt soll aber abgekettet werden, oder? Wie viele Maschen werden pro Reihe abgekettet und wie viele habe ich am Ende pro Schulter auf der Nadel ( für die Größe 3/4 Jahre)?
03.04.2018 - 15:01DROPS Design answered:
Liebe Doro, es wird für die Armlöcher abgenommen (= 1 M nach den 2 ersten M und vor den 2 letzten M) - genauso wie für den Halsausschnitt, Es wird nur abgenommen (nur die mittleren M für Halsausschnitt werden abgekettet). Viel Spaß beim stricken!
03.04.2018 - 17:06Hei, jeg lurer på om det er slik at det som menes med stolpe i oppskriften, er kant på halslinningen? Det står nemlig ikke spesifisert at man skal plukke opp noen masker..
27.01.2017 - 17:47DROPS Design answered:
Hej Marta. Ja, det er den du laver paa venstre skulder.
02.02.2017 - 14:47Wat een mooi patroon, dank jullie wel! Maar klopt het wel dat je voor de knopenbies twee keer twee centimeter na de laatste naald boordsteek moet breien? Dan wordt die schouder toch twee centimeter hoger dan de andere?
04.12.2016 - 11:01DROPS Design answered:
Hoi Ria. De knopenbies komt boven op de schouder te liggen (over de knopen als je ze knoopt). De schouder wordt dan niet hoger dan de ander.
05.12.2016 - 14:44Hallo, ich habe A1 und A2 gemeistert. Muss nun aber feststellen, dass der Rand sich sehr rollt. Was könnte ich falsch gemacht haben? Wieviel Maschen sollte ich für 18 Monate aufnehmen. Ich habe mit 171 M. angefangen , Nadel 5,5. Aber es erscheint mir viel zu groß. Für einen Tipp wäre ich dankbar. Herzliche Grüße, Sophie
23.12.2015 - 20:41DROPS Design answered:
Wir können Ihnen leider keine anderen Größen als die genannten anbieten, denn dann müsste das Kleidchen komplett umgerechnet werden. Zum Rand, der sich rollt: Dem können Sie am Ende entgegenwirken, indem Sie den Rand unter feuchte Tücher legen und trocken lassen.
29.12.2015 - 16:35Telpatroon A2 is volgens mij: eerste nld. Recht, tweede nld. Recht, derde nld. 3 x 2 steken samen breien, zes keer een omslag en vijf keer een steek breien, vierde nld. recht, vijfde nld. Recht, zesde nld. Averrecht. Wat doe ik fout? Ik krijg veel te veel steken op de nld
11.10.2015 - 22:42DROPS Design answered:
Hoi Miep. Je breit net zo veel st samen als omslagen (3 keer 2 st r samen breien = 6 omslagen) En vergeet niet dat je hebt 1 st r tussen elke omslag.
12.10.2015 - 14:54Sehr hübsch, schnell und einfach zu stricken. Wird ein tolles Weihnachtsgeschenk! 👍
02.10.2015 - 20:52Potreste fornire le spiegazioni di questo modello fatto con ferri tradizionali?avete dei modelli stupendi ma purtroppo tutti i prodotti lavorati ai ferri sono presentati con la lavorazione coi ferri circolari, questo è un grande limite per chi non conosce la tecnica. grazie mille!!
10.04.2015 - 14:16DROPS Design answered:
Buongiorno. Provi a dimezzare il numero delle m. P.es, per la taglia più piccola: avvii 95 m + 1 m ai lati per la cucitura. Avrà 5 ripetizioni di A.1 sulle m; diminuisca 1 m per avere 84 m (e non 164 come indicato) + le m ai lati. Diminuisca 1 m ai lati 10 volte e per gli scalfi intrecci le prime e le ultime 4 m. Dopo gli scalfi, le spieg. sono già per la lavorazione avanti e indietro sui ferri. Per un aiuto maggiore può scrivere sul nostro forum. Inoltre a questo link, può trovare molti video che possono aiutarla ad imparare a lavorare in tondo. Buon lavoro!
10.04.2015 - 17:57Claire wrote:
Body: I don't understand the diagram A-1: why is there a decrease in the number of stitches at the end of the row?
07.03.2015 - 13:53DROPS Design answered:
Dear Claire, A.1 is worked over 19 sts and you dec 2 sts in the middle of 1st row in A.1 - work then 2nd row in A.1 (there is now 17 sts in each repetition) before starting A.2. Happy knitting!
07.03.2015 - 17:47