
Popular categories
Looking for a yarn?


|
|
Chantal |
|
 |
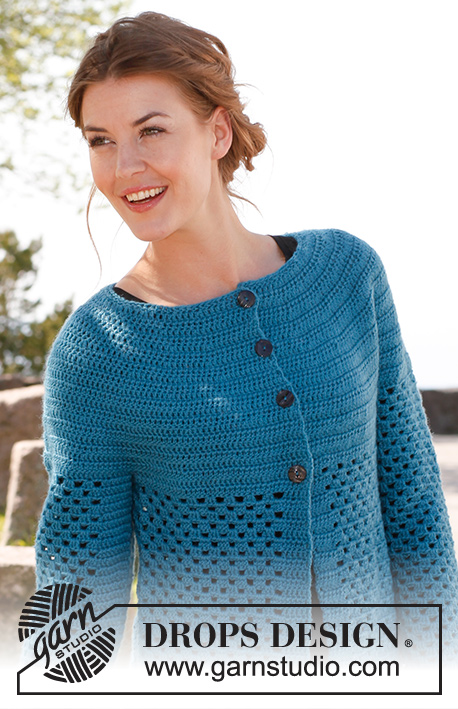 |
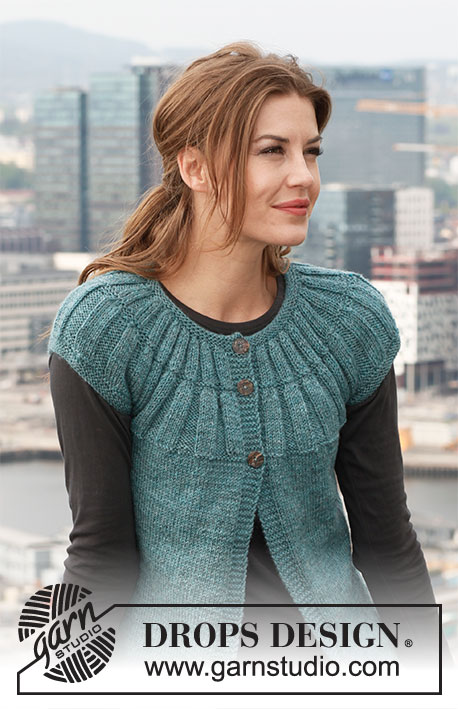
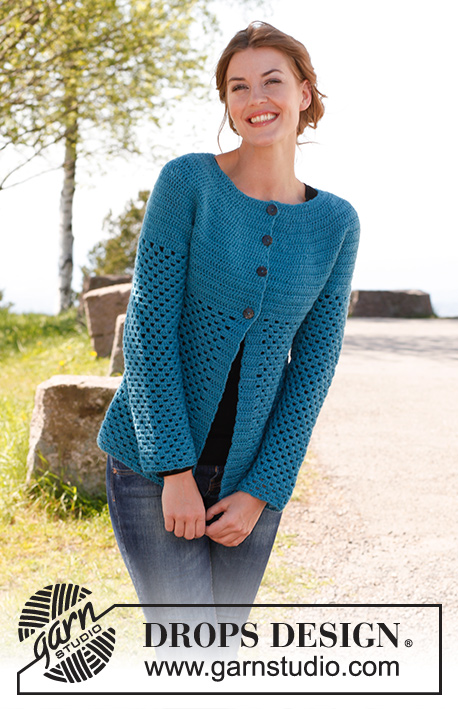
Crochet DROPS jacket in ”Karisma”. Size: S - XXXL.
DROPS 142-6 |
|
|
CROCHET INFO: Replace first tr on every round/row with 3 ch. Finish every round with 1 sl st in 3rd ch from beg of round. Finish every row with 1 tr in first tr from beg of previous row. INCREASE TIP: Inc by working 2 tr in 1 tr, first on one side of all markers on row, next time on the other side of all markers on row, continue inc like this. DECREASE TIP: Work 1 tr but wait with last pull through (= 2 sts on hook), then work next tr but on last pull through, pull thread through all sts on hook = 1 st dec. ---------------------------------------------------------- BODY: The piece is worked top down. Worked back and forth from mid front. Work 111-116-121-131-136-146 ch (incl 3 ch to turn with) on hook size 4 mm with Karisma. Work next row as follows: 1 tr in 4th ch (= 2 tr), 1 tr in each of the next 2 ch, * skip 1 ch, 1 tr in each of the next 4 ch *, repeat from *-* = 88-92-96-104-108-116 tr - read CROCHET INFO. Insert 19-20-21-23-24-26 markers in the piece as follows: Insert 1st marker after 8th tr, then insert 18-19-20-22-23-25 markers 4 tr apart, 8 tr remain after last marker. Work back and forth with tr while AT THE SAME TIME inc 1 tr at all markers as follows: On every other row 5-6-6-5-5-6 times and then on every 4th row 2-2-2-3-3-3 times – READ INCREASE TIP = 221-252-264-288-300-350 tr. Work 1 row while at the same time inc 14-7-7-7-19-5 tr evenly (do not inc over the first and last 6 tr = band) = 235-259-271-295-319-355 tr. Work next row as follows: 36-40-43-47-51-58 tr (front piece), 8 ch (= under sleeve), skip 52-56-56-60-64-68 tr from previous row (used for sleeve later), 59-67-73-81-89-103 tr (back piece), 8 ch (under sleeve), skip 52-56-56-60-64-68 tr from previous row (used for sleeve later) and 36-40-43-47-51-58 tr (front piece). Insert a marker and measure the piece from here. Work 1 tr in every tr/ch = 147-163-175-191-207-235 tr. Continue to work as follows: 1 tr in each of the first 6 tr (= band), * 1 ch, skip 3 tr, work 3 tr in next tr *, repeat from *-* and finish with 1 ch, skip 3 tr and work 1 tr in each of the last 6 tr (= 33-37-40-44-48-55 tr-groups with 6 tr in each side). Continue to work as follows: ROW 1: 1 tr in each of the first 6 tr, 3 tr in first ch, 1 ch, * skip 3 tr, 3 tr in next ch, 1 ch *, repeat from *-* until 1 ch and 6 tr remain, finish with 3 tr in last ch and 1 tr in each of the last 6 tr. ROW 2: 1 tr in each of the first 6 tr, * 1 ch, skip 3 tr, 3 tr in next ch *, repeat from *-* until 6 tr remain, finish with 1 ch and 1 tr in each of the last 6 tr. Repeat 1st and 2nd row upwards. When piece measures 10 cm from marker, inc 1 tr-group in the right side as follows: Work 3 tr + 1 ch in the first 8-9-10-11-12-13 ch, in next ch work as follows: 3 tr, 1 ch, 3 tr, 1 ch. When piece measures 17 cm, inc the same way in the left side – inc when 9-10-11-12-13-14 ch remain. When piece measures 24 cm, inc 1 tr-group in the right side, inc in the 10-11-12-13-14-15 ch the same way as before. When piece measures 31 cm, inc in the left side – inc when 10-11-12-13-14-15 ch remain. After all inc are done there are 37-41-44-48-52-59 tr-groups on row. Cut and fasten the thread when piece measures 37-37-39-39-41-42 cm from marker, piece measures 56-58-60-62-64-66 cm in total. SLEEVE: Worked in the round, top down. Beg by working mid under sleeve as follows: Work 1 dc in the 5th ch of the 8 ch worked for armhole on body. Work 3 ch (= 1 tr). Then work 1 tr in each of the next 3 ch. Then work 1 tr in every tr over sleeve, before working 1 tr in each of the remaining 4 ch under sleeve = 60-64-64-68-72-76 tr. Insert a marker mid under sleeve. Continue to work as follows: 1 tr in each of the first 10-10-10-12-12-14 tr, * 1 ch, skip 3 tr, work 3 tr in next tr *, repeat from *-* and work 1 tr in each of the last 10-10-10-12-12-14 tr. Continue with 1 tr in each of the 20-20-20-24-24-28 tr mid under sleeve, in every ch work 3 tr + 1 ch. Continue this pattern AT THE SAME TIME when piece measures 4 cm, dec 1 tr on each side of marker - READ DECREASE TIP. Repeat dec every 3½-3½-3½-3-3-2½ cm 9-9-9-11-11-13 more times = 40-44-44-44-48-48 tr. After all dec, work 3 tr + 1 ch in every ch. Cut and fasten the thread when sleeve measures 47-46-46-44-44-43 cm from marker – NOTE – shorter measurements in the larger sizes because of larger neck and broader shoulder width. ASSEMBLY: Sew buttons on to left front piece – the top button 1 cm from neck edge, the last in the transition between tr and tr-groups. Button the buttons between 2 tr on right front piece. |
|

|
|
|
Have you made this or any other of our designs? Tag your pictures in social media with #dropsdesign so we can see them! Do you need help with this pattern?You'll find tutorial videos, a Comments/Questions area and more by visiting the pattern on garnstudio.com. © 1982-2024 DROPS Design A/S. We reserve all rights. This document, including all its sub-sections, has copyrights. Read more about what you can do with our patterns at the bottom of each pattern on our site. |
|


With over 40 years in knitting and crochet design, DROPS Design offers one of the most extensive collections of free patterns on the internet - translated to 17 languages. As of today we count 304 catalogues and 11422 patterns - 11422 of which are translated into English (UK/cm).
We work hard to bring you the best knitting and crochet have to offer, inspiration and advice as well as great quality yarns at incredible prices! Would you like to use our patterns for other than personal use? You can read what you are allowed to do in the Copyright text at the bottom of all our patterns. Happy crafting!
Comments / Questions (128)
Hallo, ich habe das mit den Zunahmen wohl auch nicht ganz richtig gemacht. Können Sie mir sagen, wieviele Reihen die Blende (oben mit den ganzen Stäbchen) haben muss, bevor der Ärmel bzw. das Muster beginnt? Danke für Ihre Bemühungen.
08.01.2015 - 16:52DROPS Design answered:
Liebe Frau Brenninger, das variiert von Größe zu Größe, welche Größe häkeln Sie denn?
08.01.2015 - 22:30Do you have video tutorial for this pattern ?
16.12.2014 - 23:14DROPS Design answered:
Dear AnU, you will find relevant videos to that pattern under tab "videos" at the right side of the picture - for any individual assistance, you are welcome to contact your DROPS store - they will answer you even per mail or telephone. Happy crocheting!
17.12.2014 - 08:46Bij de groepjes van drie st en 1 l bleef mijn haakwerk niet mooi plat, dus heb ik groepjes van 3 st en 3 l gehaakt , de gaten zijn wel iets groter op die manier maar mijn haakwerk blijft tenminste plat. wat ik niet goed begrijp is waarom die meerderingen rechts en links na 10 cm onder arm niet op gelijke hoogte worden gehaakt : dus 2 x na 10 cm en 2 x na 17 cm bijv.,
16.12.2014 - 18:35Mooi patroon! Na enige studie begrijp ik geloof ik wel wat nou de bedoeling is met markeren en meerderen enzo (erg ingewikkeld beschreven...) Wat ik niet snap is waarom je tijdens de eerste toer steeds een losse over moet slaan, dan kun je die toch net zo goed gewoon niet opzetten?
20.09.2014 - 22:59DROPS Design answered:
Hoi Joke. Je doet dit om de onderrand meer elastisch te maken. Sla je geen losse over wordt de rand te strak en valt niet mooi.
24.09.2014 - 17:08I have a couple of questions as your patterns are most confusing. I understand the translation difficulties. 1 dc in 4th ch (= 2 dc), 1 dc in each of the next ch 2, * skip ch 1, 1 dc in each of the next 4 ch *, repeat from *-* = 88-92-96-104-108-116 dc - read CROCHET INFO is that pattern of 1 skp and 4 dc repeated in all the following rows or is it 1 dc without skipping across? The correction is just for the band correct?
10.09.2014 - 02:49DROPS Design answered:
Dear Katherin, you cast on more chains that you will have dc at the end of 1st row, so that you repeat from *-* (skipping 1 ch and working 1 dc in each of the next 4 ch all the row). You should get at the end 88-116 dc, you then continue over this number of sts as stated (ie with inc). The written pattern has been corrected as the correction has been uploaded, if you print the pattern after sept. 2012 you have the correct pattern. Happy crocheting!
10.09.2014 - 09:28Hallo, ich häkel diese Jacke in Größe L , verstehe aber das Zunehmen des Rumpfteils nicht.
07.09.2014 - 10:25DROPS Design answered:
Sie haben ja 20 Markierer angebracht. Nun häkeln Sie in der ersten Zunahme-R in das Stb RECHTS neben jedem Markierer je 2 Stb (und haben damit 20 M zugenommen). Dann häkeln Sie 1 R ohne Zunahmen. In der nächsten R häkeln Sie in das Stb LINKS neben jedem Markierer je 2 Stb und haben somit wieder 20 Stb zugenommen. Das machen Sie immer so weiter, bis Sie 6x in jeder 2. R zugenommen haben, dann arbeiten Sie die Zunahmen nur noch in jeder 4. R, und zwar 2x.
11.09.2014 - 09:49Dee wrote:
Please help me,i dont understand how to crochet this part : Work 1 row while at the same time inc 14-7-7-7-19-5 tr evenly (do not inc over the first and last 6 tr = band) = 235-259-271-295-319-355 tr.' How to do it? Thank you
18.08.2014 - 11:44DROPS Design answered:
Dear Dee, work a row with inc at this point, ie work evenly 2 tr in 1 tr on row, but keep the first and last 6 tr without inc. In 1st size, inc 14 tr evenly, in 2nd size, 7 tr evenly... Happy crocheting!
18.08.2014 - 12:57Hallo, ik ben de jas Chantal ah haken. Daar staat : Plaats 19 markeerders in het werk als volgt: plaats de 1e markeerder na het 8e stk, plaats dan 18 markeerders met 4 stk tussen elke markeerder, 8 stk over na de laatste markeerder. Haak heen en weer met stk en meerder TEGELIJKERTIJD 1 stk bij alle markeerders als volgt: om de toer 5 keer en elke 4e toer 2 = 221 Tot aan 'als volgt' snap ik het. Maar wat betekent de rest aub?
13.08.2014 - 15:32DROPS Design answered:
Hoi Annelies. Je meerdert 1 stk bij alle markeerders in elke 2e toer (om de toer) 5 keer en dan in elke 4e toer 2 keer.
13.08.2014 - 17:31Leider verstehe ich die Anleitung zum Rupfteil nicht. Wenn ich in jeder Reihe am Markierer zunehme und gleichzeitig noch die verteilten Maschen dann wird das Teil wellig und viel zu kurz. Was mache ich falsch?
09.08.2014 - 10:07DROPS Design answered:
Sie nehmen ja nicht in jeder R zu, sondern zuerst in jeder 2. R und dann in jeder 4. R. Und wenn Sie diese ganzen Abnahmen gemacht haben, nehmen Sie in der nächsten R gleichmäßig verteilt die angegebene M-Zahl zu, also danach, nicht gleichzeitig.
11.08.2014 - 22:08What is rad in crochet directions?
18.05.2014 - 01:14DROPS Design answered:
Dear Mrs Lenhard "rad" means "row" in norwegian. Happy crocheting!
19.05.2014 - 09:04