
Popular categories
Looking for a yarn?


|
|
Dalie Delight |
|
 |
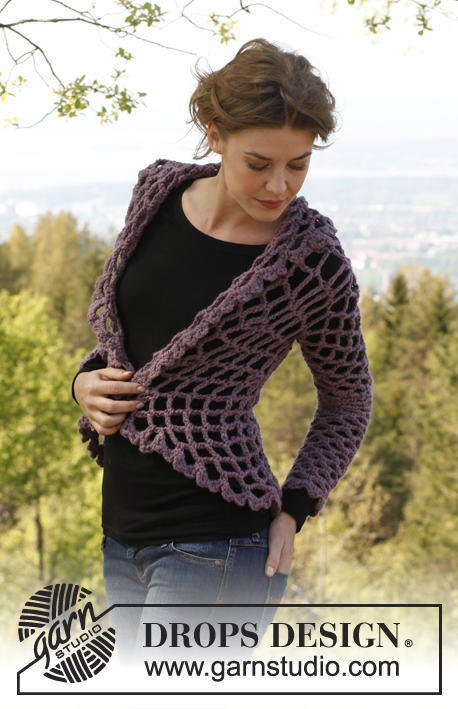 |
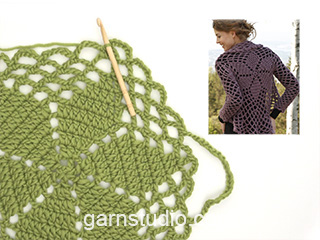
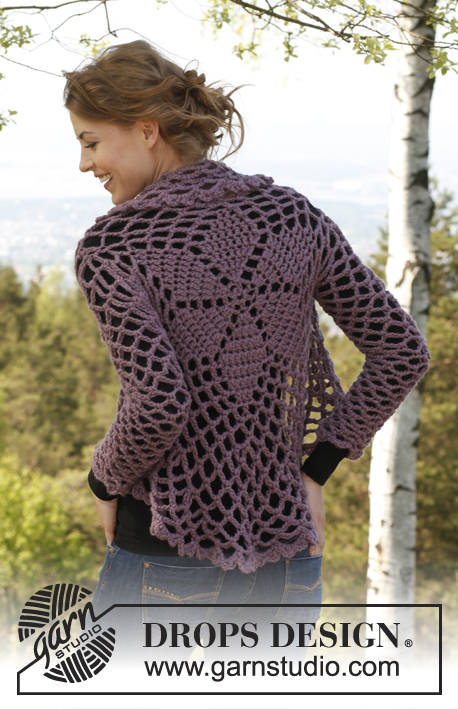
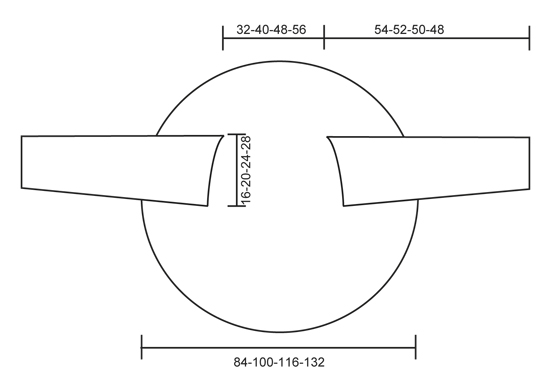
Crochet DROPS jacket worked in a circle in ”Andes”. Size: XS - XXXL.
DROPS 141-1 |
|
|
CROCHET TIP: Replace first dc on every dc round with ch 3. Finish every dc round with 1 sl st in 3rd ch from beg of round. Finish every round starting with 3 ch and a 1 sc in first ch-space with 1 sl st in 1st sc from beg of round. ---------------------------------------------------------- BODY: Worked in the round in a circle from mid back. Ch 4 with Andes on hook size 9 mm / M/13. Form a ring with 1 sl st in first ch. READ CROCHET TIP! ALL SIZES: ROUND 1: * 1 dc in ch-ring, ch 2 *, repeat from *-* 5 more times (= 6 dc in total with 2 ch between each). ROUND 2: 3 dc in first dc, ch 2, * 3 dc in next dc, ch 2 *, repeat from *-* the entire round (= 18 dc in total with 2 ch between every 3rd dc). ROUND 3: * 2 dc in first dc, 1 dc in next dc, 2 dc in next dc, ch 2 *, repeat from *-* the entire round (= 30 dc in total with 2 ch between every 5th dc). ROUND 4: * 2 dc in first dc, 1 dc in each of the next 3 dc, 2 dc in next dc, ch 2 *, repeat from *-* the entire round (= 42 dc in total with 2 ch between every 7th dc). ROUND 5: * 2 dc in first dc, 1 dc in each of the next 5 dc, 2 dc in next dc, ch 2 *, repeat from *-* the entire round (= 54 dc in total with 2 ch between every 9th dc). SIZE XS/S and M/L: ROUND 6: 1 sl st in first dc, * 1 dc in each of the next 7 dc, ch 4, 1 sc in ch-space from previous round, ch 4, skip 1 dc *, repeat from *-* the entire round. ROUND 7: 1 sl st in first dc, * 1 dc in each of the next 5 dc, ch 4, 1 sc in first ch-space, ch 5, 1 sc in next ch-space, ch 4, skip 1 dc *, repeat from *-* the entire round. ROUND 8: 1 sl st in first dc, * 1 dc in each of the next 3 dc, ch 4, 1 sc in first ch-space, ch 5, 1 sc in next ch-space, ch 5, 1 sc in next ch-space, ch 4, skip 1 dc *, repeat from *-* the entire round. ROUND 9: 1 sl st in first dc, * 1 dc in next dc, ch 4, 1 sc in first ch-space, ch 5, 1 sc in next ch-space, ch 5, 1 sc in next ch-space, ch 5, 1 sc in next ch-space, ch 4, skip 1 dc *, repeat from *-* the entire round = 30 ch-spaces. Piece measures approx. 18 cm / 7'' from the middle and out. SIZE XL/XXL and XXXL: ROUND 6: * 2 dc in first dc, 1 dc in each of the next 7 dc, 2 dc in next dc, ch 2 *, repeat from *-* the entire round (= 66 dc in total with 2 ch between every 11th dc). ROUND 7: 1 sl st in first dc, * 1 dc in each of the next 9 dc, ch 4, 1 sc in ch-space from previous round, ch 4, skip 1 dc *, repeat from *-* the entire round. ROUND 8: 1 sl st in first dc, * 1 dc in each of the next 7 dc, ch 4, 1 sc in first ch-space, ch 5, 1 sc in next ch-space, ch 4, skip 1 dc *, repeat from *-* the entire round. ROUND 9: 1 sl st in first dc, * 1 dc in each of the next 5 dc, ch 4, 1 sc in first ch-space, ch 5, 1 sc in next ch-space, ch 5, 1 sc in next ch-space, ch 4, skip 1 dc *, repeat from *-* the entire round. ROUND 10: 1 sl st in first dc, * 1 dc in each of the next 3 dc, ch 4, 1 sc in first ch-space, ch 5, 1 sc in next ch-space, ch 5, 1 sc in next ch-space, ch 5, 1 sc in next ch-space, ch 4, skip 1 dc *, repeat from *-* the entire round. ROUND 11: 1 sl st in first dc, * 1 dc in next dc, ch 4, 1 sc in first ch-space, ch 5, 1 sc in next ch-space, ch 5, 1 sc in next ch-space, ch 5, 1 sc in next ch-space, ch 5, 1 sc in next ch-space, ch 4, skip 1 dc *, repeat from *-* the entire round = 36 ch-spaces. Piece measures approx. 22 cm / 8 3/4'' from the middle and out. SIZE XS/S: ROUND 10: ch 3, 1 sc in first ch-space, * ch 6, 1 sc in next ch-space *, repeat from *-* 3 more times (= 4 ch-spaces), ch 25, skip 3 ch-spaces (= armhole), 1 sc in next ch-space, repeat from *-* 14 times, ch 25, skip 3 ch-spaces (= armhole), 1 sc in next ch-space, repeat from *-* 4 times but finish with 1 sl st in first sc from beg of round. ROUND 11: ch 3, 1 sc in first ch-space, * ch 6, 1 sc in next ch-space *, repeat from *-* the entire round but over the 25 ch worked over each armhole, work as follows: ch 6, 1 sc in 4th ch, ch 6, skip ch 5, 1 sc in next ch, ch 6, skip ch 5, 1 sc in next ch, ch 6, skip ch 5, 1 sc in next ch, ch 6, 1 sc in next ch-space (= 30 ch-spaces in total on round). ROUND 12: ch 3, 1 sc in first ch-space, * ch 6, 1 sc in next ch-space *, repeat from *-* the entire round – NOTE: But in every 5th ch-space work 1 extra ch-space (= ch 6 + 1 sc) = 36 ch-spaces in total. ROUND 13: ch 3, 1 sc in first ch-space, *6 ch, 1 sc in next ch-space*, repeat from *-* the entire round. ROUND 14: Work as 12th round but work 1 extra ch-space in every 6th ch-space = 42 ch-spaces in total. ROUND 15 and every uneven numbered round: Work as 13th round. ROUND 16 and every even numbered round: Work as 12th round but with 1 ch-space more between inc every time. Work until there are 60 ch-spaces in total on round. SIZE M/L: ROUND 10: ch 3, 1 sc in first ch-space, * ch 6, 1 sc in next ch-space *, repeat from *-* the entire round. NOTE: But in every 5th ch-space work 1 extra ch-space (= ch 6 + 1 sc) = 36 ch-spaces in total. ROUND 11: ch 3, 1 sc in first ch-space, *6 ch, 1 sc in next ch-space*, repeat from *-* the entire round. ROUND 12: ch 3, 1 sc in first ch-space, * ch 6, 1 sc in next ch-space *, repeat from *-* 4 more times (= 5 ch-spaces), work 31 ch, skip 4 ch-spaces (= armhole), 1 sc in next ch-space, repeat from *-* 16 times, 31 ch, skip 4 ch-spaces (= armhole), 1 sc in next ch-space, repeat from *-* 5 times but finish with 1 sl st in first sc from beg of round. ROUND 13: ch 3, 1 sc in first ch-space, * ch 6, 1 sc in next ch-space *, repeat from *-* the entire round but over the 31 ch worked over each armhole, work as follows: ch 6, 1 sc in 4th ch, * ch 6, skip ch 5, 1 sc in next ch *, repeat from *-* 3 more times, ch 6, 1 sc in next ch-space (= 36 ch-spaces in total on round). ROUND 14: ch 3, 1 sc in first ch-space, * ch 6, 1 sc in next ch-space *, repeat from *-* the entire round – NOTE: But in every 6th ch-space work 1 extra ch-space (= ch 6 + 1 sc) = 42 ch-spaces in total. ROUND 15: ch 3, 1 sc in first ch-space, *6 ch, 1 sc in next ch-space*, repeat from *-* the entire round. ROUND 16: Work as 14th round but work 1 extra ch-space in every 7th ch-space = 48 ch-spaces in total. ROUND 17 and every uneven numbered round: Work as 15th round. ROUND 18 and every even numbered round: Work as 14th round but with 1 ch-space more between inc every time. Work until there are 72 ch-spaces in total on round. SIZE XL/XXL and XXXL: ROUND 12: ch 3, 1 sc in first ch-space, * ch 6, 1 sc in next ch-space *, repeat from *-* the entire round. NOTE: But in every 6th ch-space work 1 extra ch-space (= ch 6 + 1 sc) = 42 ch-spaces in total. ROUND 13: ch 3, 1 sc in first ch-space, *6 ch, 1 sc in next ch-space*, repeat from *-* the entire round. SIZE XL/XXL: ROUND 14: ch 3, 1 sc in first ch-space, * ch 6, 1 sc in next ch-space *, repeat from *-* 5 more times (= 6 ch-spaces), ch 37, skip 5 ch-spaces (= armhole), 1 sc in next ch-space, repeat from *-* 18 times, ch 37, skip 5 ch-spaces (= armhole), 1 sc in next ch-space, repeat from *-* 6 times but finish with 1 sl st in first sc from beg of round. ROUND 15: ch 3, 1 sc in first ch-space, * ch 6, 1 sc in next ch-space *, repeat from *-* the entire round but over the 37 ch worked over each armhole, work as follows: ch 6, 1 sc in 4th ch, * ch 6, skip ch 5, 1 sc in next ch *, repeat from *-* 4 more times, ch 6, 1 sc in next ch-space (= 42 ch-spaces in total on round). ROUND 16: ch 3, 1 sc in first ch-space, * ch 6, 1 sc in next ch-space *, repeat from *-* the entire round – NOTE: But in every 7th ch-space work 1 extra ch-space (= ch 6 + 1 sc) = 48 ch-spaces in total. ROUND 17: ch 3, 1 sc in first ch-space, *ch 6, 1 sc in next ch-space*, repeat from *-* the entire round. ROUND 18: Work as 16th round but work 1 extra ch-space in every 8th ch-space = 54 ch-spaces in total. ROUND 19 and every uneven numbered round: Work as 17th round. ROUND 20 and every even numbered round: Work as 16th round but with 1 ch-space more between inc every time. Work until there are 84 ch-spaces in total on round. SIZE XXXL: ROUND 14: ch 3, 1 sc in first ch-space, * ch 6, 1 sc in next ch-space *, repeat from *-* the entire round. NOTE: But in every 7th ch-space work 1 extra ch-space (= ch 6 + 1 sc) = 48 ch-spaces in total. ROUND 15: ch 3, 1 sc in first ch-space, *6 ch, 1 sc in next ch-space*, repeat from *-* the entire round. ROUND 16: ch 3, 1 sc in first ch-space, * ch 6, 1 sc in next ch-space *, repeat from *-* 6 more times (= 7 ch-spaces), ch 43, skip 6 ch-spaces (= armhole), 1 sc in next ch-space, repeat from *-* 20 times, ch 43, skip 6 ch-spaces (= armhole), 1 sc in next ch-space, repeat from *-* 7 times but finish with 1 sl st in first sc from beg of round. ROUND 17: ch 3, 1 sc in first ch-space, * ch 6, 1 sc in next ch-space *, repeat from *-* the entire round but over the 43 ch worked over each armhole, work as follows: ch 6, 1 sc in 4th ch, * ch 6, skip ch 5, 1 sc in next ch *, repeat from *-* 5 more times, ch 6, 1 sc in next ch-space (= 48 ch-spaces in total on round). ROUND 18: ch 3, 1 sc in first ch-space, * ch 6, 1 sc in next ch-space *, repeat from *-* the entire round – NOTE: But in every 8th ch-space work 1 extra ch-space (= ch 6 + 1 sc) = 54 ch-spaces in total. ROUND 19: ch 3, 1 sc in first ch-space, ch 6, 1 sc in next ch-space, repeat from *-* the entire round. ROUND 20: Work as 18th round but work 1 extra ch-space in every 9th ch-space = 60 ch-spaces in total. ROUND 21 and every uneven numbered round: Work as 19th round. ROUND 22 and every even numbered round: Work as 20th round but with 1 ch-space more between inc every time. Work until there are 96 ch-spaces in total on round. ALL SIZES: Work last round as follows: ch 3, 1 sc in first ch-space, * 1 picot (= ch 3, 1 dc in first ch), 1 sc in same ch-space, 1 picot, 1 sc in next ch-space *, repeat from *-* the entire round. Cut and fasten the thread. Piece measures approx. 42-50-58-66 cm / 16½"-19 3/4"-22 3/4"-26" from the middle and out. SLEEVE: The sleeves are worked from armholes and down. Work as follows around one armhole: 1 sc in sc at the bottom of armhole (i.e. in the side with the longest distance between armholes), ch 6, skip the half ch-space and work 1 sc in next whole ch-space, * ch 6, 1 sc in next ch-space *, repeat from *-* 1-2-3-4 more times, ch 6, 1 sc in sc in the other end of armhole, ch 6, skip the half ch-space and work 1 sc in next whole ch-space, repeat from *-* 2-3-4-5 times, finish with 6 ch and 1 sl st in first sc on round = 8-10-12-14 ch-spaces. Work 4 more rounds with 6 ch in every ch-space and 1 sc in every ch-space – every round beg with ch 3 and 1 sc at the top of first ch-space. Then work 6 rounds with 5 ch in every ch-space. Then ch 4 in every ch-space (now every round beg with only 2 ch) until sleeve measures 53-51-49-47 cm / 21"-20"-19 1/4"-18½" (shorter measurements in the larger sizes because of wider shoulders, hold piece up when measuring so that it stretches to correct measurements). Work last round as follows: ch 2, 1 sl st at the top of first ch-space, * ch 3, 1 dc in first ch (= 1 picot), 1 sc in next ch-space *, repeat from *-* the entire round. Work another sleeve the same way in the other side. |
|
|
|
|
Have you made this or any other of our designs? Tag your pictures in social media with #dropsdesign so we can see them! Do you need help with this pattern?You'll find tutorial videos, a Comments/Questions area and more by visiting the pattern on garnstudio.com. © 1982-2024 DROPS Design A/S. We reserve all rights. This document, including all its sub-sections, has copyrights. Read more about what you can do with our patterns at the bottom of each pattern on our site. |
|


With over 40 years in knitting and crochet design, DROPS Design offers one of the most extensive collections of free patterns on the internet - translated to 17 languages. As of today we count 304 catalogs and 11422 patterns - 11417 of which are translated into English (US/in).
We work hard to bring you the best knitting and crochet have to offer, inspiration and advice as well as great quality yarns at incredible prices! Would you like to use our patterns for other than personal use? You can read what you are allowed to do in the Copyright text at the bottom of all our patterns. Happy crafting!
Comments / Questions (186)
Which stitch do I begin to work the sleeve in, where is the half chain loop to skip? Frustrated with badly worded instructions. Always have problems working drops patterns, find basic patterns are over complicated by very bad translation. Worked the m/l size, was massive, started again and worked xs/s and couldn't get it on as armholes tiny. Had to work a mixture of sizes to get something that might be wearable, collar too big and hanging down. Overall shapeless and dissapointing. 👎
15.05.2016 - 15:30DROPS Design answered:
Dear Mrs Hutton, start sleeve with 1 dc at the bottom of the armhole, then chain 6 and work 1 dc in next ch-space skipping the first ch-space that is smaller than the other one because of armhole. Remember you can get any further personnal assistance contacting your DROPS store. Happy crocheting!
17.05.2016 - 10:09Crocheting size M/L, confused with wording of round 18. Does "1 chain loop more between inc every time" mean inc in 6th ch loop then inc in the 7th then in the 8th and so on around until finished row. Or does it mean all row 18 inc's done at every 7th chain, then all row 20 inc's down at every 8th chain and so on? How many chain loops should I have at then end of row 18 and 20. Help very much appreciated. Stephanie
14.04.2016 - 10:16DROPS Design answered:
Dear Mrs Hutton, see answer below for the inc - you inc 6 ch-loops per inc round, you will then have 54 ch-loops at the end of round 18, 60 ch-loops at the end of round 20 etc... and 72 ch-loops at the end of round 24. Happy crocheting!
14.04.2016 - 11:42Crocheting size M/L, confused with wording of round 18. Does "1 chain loop more between inc every time" mean inc in 6th ch loop then inc in the 7th then in the 8th and so on around until finished row. Or does it mean all row 18 inc's done at every 7th chain, then all row 20 inc's down at every 8th chain and so on? How many chain loops should I have at then end of row 18 and 20. Help very much appreciated. Stephanie
13.04.2016 - 22:12DROPS Design answered:
Dear Mrs Hutton, on round 14 you inc 6 ch-loops on the round (= in every 6th ch-loop), on round 16 you inc 6 ch-loops on the round (= in every 7th ch-loop), on round 18 6 ch-loops on the round (= in every 8th ch-loop) and continue inc 6 ch-loops every other round, ie on round 20 inc in every 9th ch-loop and so on. Happy crocheting!
14.04.2016 - 09:43Per la taglia XL/XXL io ho terminato il giro 11 con una mbss nella 3 catenella dall'inizio del giro (contava come maglia alta). Ora per il giro 12 mi viene detto di iniziare conun arco di tre catenelle e poi di fare archi da 6 + 1 = 42 archi. Non riesco a capire. Mi potreste spiegare tutto il 12 giro?
18.02.2016 - 16:19DROPS Design answered:
Buonasera Giulia. Alla fine del giro 11 ci sono 36 archi di cat. Gira il lavoro con 3 cat, lavora 1 m.b nel primo arco , poi ripete: 6 cat + 1 m.b nell’arco successivo su tutto il giro. Deve però anche aumentare, come segue: al 6° arco di cat, lavora 6 cat + 1 m.b sempre in questo arco (quindi nel 6° arco ci sono 2 m.b). Dovrà fare così anche nel 12°, 18°, 24°, 30° e 36° arco di cat. Ha quindi aumentato 6 archi di cat e in tutto sul giro ci sono 42 archi di cat. Buon lavoro!
18.02.2016 - 22:11Buona sera. Devo fare le maniche, ma non riesco a capire da dove partire. Si lavorano in tondo? Quale è il mezzo arco da saltare? Un tutorial sarebbe gradito se possibile. Graxie
24.11.2015 - 23:28DROPS Design answered:
Buonasera Anna Rita. Proviamo a spiegare: deve iniziare la manica nella m.b lavorata prima di avviare le cat per gli scalfi. Lavora 6 cat, non lavora nelle cat che ci sono tra la m in cui ha appena lavorato e la m successiva, ma lavora la m.b nell’arco di cat successivo. Dovrebbe avere la stessa situazione quando arriva a lavorare una m.b nella m.b dalla parte opposta dello scalfo. Buon lavoro!
27.11.2015 - 22:57Amanda wrote:
Could you tell me the approximate chest measurement for each size please?
17.08.2015 - 09:49DROPS Design answered:
Dear Amanda, you will find at the bottom of the pattern a measurement chart with all measurements for each size in cm, taken flat from side to side. Compare these to a similar garment you have and like the shape to find out the matching size. Happy crocheting!
17.08.2015 - 09:59Hei, jeg lurer på hva forkortelsene betyr, og hva mener dere med * 1 st om om lm-ringen, 2 lm * med dette lurer jeg da på hva om betyr og st :-) på forhånd takk
29.07.2015 - 22:25Je suis arrivée aux emmanchures et je bloque je ne comprend pas ce que vous entendez par commencer par 1 ms en haut du 1er arceau alors que pour le reste du tour c'est dans l'arceau j'espère que ma question a été suffisamment claire et vous remercie de votre réponse
28.07.2015 - 19:58DROPS Design answered:
Bonjour Mme Volondat, on retrouve cette expression pour les manches: on commence chaque tour par 3 ml, puis on fait 1 ms dans le 1er arceau (= dans le haut du 1er arceau), et on continue ensuite avec des arceaux de 5 ml. Bon crochet!
29.07.2015 - 10:15T'Ra-Sha wrote:
I have looked through the other comments and the only one I can find that I think covers my problem is in Dutch. I am making XL/XXL and have come to round 18. It says at the end that I am meant to have 56 but no matter what I do I end up with 54, just like XXXL. Is the pattern wrong?
15.07.2015 - 13:51Hola. Tengo una duda con el patrón donde pone talla m/l vuelta 10 hacer bucle adicional. Donde hay que meter ese bucle? Gracias.
18.06.2015 - 19:10DROPS Design answered:
Hola Epozo, antes de la vta 10 hay 30 bucles en la vta. En la vta 10 en cada 5º bucle se trabaja de forma adicional 6 p.de cad + 1 p.b. que da un total de 36 bucles al final de la vta.
24.06.2015 - 10:23