DROPS Snow
DROPS Snow
100% Wool
from 2.00 £ /50g
Get the yarn to make this pattern from 30.00£.

The yarn cost is calculated from the pattern’s smallest size and the yarn’s cheapest product type. Looking for an even better price? You might find it on the DROPS Deals!

DROPS SS24

Russian Winter

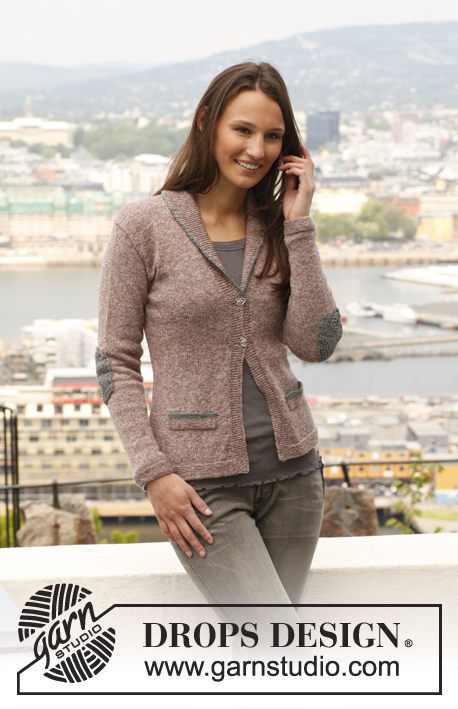
Knitted DROPS jumper with round yoke in ”Snow” or "Andes". Size: S - XXXL.

DROPS 142-30
DROPS design: Pattern no ee-422
Yarn group E
-----------------------------------------------------------
Size: S - M - L - XL - XXL - XXXL
Materials: DROPS SNOW from Garnstudio
500-550-600-650-700-800 g colour no 47m, light beige
100-100-100-150-150-150 g colour no 01, off white
100-100-100-150-150-150 g colour no 50, dark rose
50 g for all sizes in colour no 09, old pink

Or use:
Materials: DROPS ANDES from Garnstudio
600-600-700-700-800-900 g colour no 0619, beige
100-100-200-200-200-200 g colour no 0100, off white
100-100-200-200-200-200 g colour no 4090, heather
100 g for all sizes in colour no 4300, old pink

DROPS DOUBLE POINTED NEEDLES AND CIRCULAR NEEDLE (80 and 40 cm) SIZE 8 mm - or size needed to get 11 sts x 15 rows in stocking st = 10 x 10 cm.
DROPS DOUBLE POINTED NEEDLES AND CIRCULAR NEEDLE (80 cm and 40 cm) SIZE 7 mm - for rib.

-------------------------------------------------------

Alternative Yarn – See how to change yarns here
Yarn Groups A to F – Use the same pattern and change the yarn here
Yarn usage using an alternative yarn – Use our yarn converter here

-------------------------------------------------------

DROPS Snow
DROPS Snow
100% Wool
from 2.00 £ /50g
Get the yarn to make this pattern from 30.00£.

The yarn cost is calculated from the pattern’s smallest size and the yarn’s cheapest product type. Looking for an even better price? You might find it on the DROPS Deals!

Pattern instructions

NOTE: This pattern is written in British English. All measurements in charts are in cm. For conversion from cm to inches - click here. There are different terms for crocheting in British and American English. If this pattern includes crochet, click for "crochet terms" here. For this pattern in American English, please click here.
PATTERN:
See diagrams A.1 to A.3. Diagrams show pattern from RS. Pattern is worked in stocking st.
----------------------------------------------------------

BODY:
Worked in the round on circular needle.
Cast on 116-128-140-152-164-176 sts on circular needle size 7 mm with light beige. Switch to off white, work rib = K 2/P 2 for 7 cm. Switch to circular needle size 8 mm and K 1 round while at the same time dec 20 sts evenly = 96-108-120-132-144-156 sts. Insert a marker in first st at beg of round and a marker in the 49th-55th-61st-67th-73rd-79th st – these marks the sides. Work in stocking st and according to diagram A.1. When A.1 has been worked 1 time vertically, continue in stocking st with light beige. REMEMBER THE KNITTING TENSION! When piece measures 34-35-36-37-38-39 cm, work diagram A.2. When A.2 has been worked, work 1 round with light beige while at the same time casting off 7 sts in each side for armholes (i.e. st with marker + 3 sts on each side of this st) = 82-94-106-118-130-142 sts remain on needle. Now piece measures approx. 41-42-43-44-45-46 cm. Put piece aside and knit the sleeves.

SLEEVE:
Worked in the round on double pointed needles.
Cast on 28-28-32-32-36-36 sts on double pointed needles size 7 mm with light beige. Switch to off white, work rib = K 2/P 2. When piece measures 7 cm, switch to double pointed needles size 8 mm. Work in stocking st and diagram A.1, then continue with light beige and in stocking st. Insert a marker in first st at beg of round (= mid under sleeve). When piece measures 14 cm, inc 1 st on each side of st with marker, repeat inc every 8-8-6-6-5-5 cm 3-3-4-4-5-5 more times = 36-36-42-42-48-48 sts. AT THE SAME TIME when piece measures 35 cm, work A.2 - work the inc sts in pattern. After A.2, work 1 round with light beige while at the same time casting off 7 sts mid under sleeve (i.e. st with marker + 3 sts on each side of this st) = 29-29-35-35-41-41 sts remain on needle. The piece now measures approx. 43 cm in all sizes. Knit another sleeve.

YOKE:
Slip sleeves on to same circular needle size 8 mm as body = 140-152-176-188-212-224 sts. Insert a marker in st mid back – NOW ROUND BEG HERE! Work 1 round with light beige while AT THE SAME TIME adjusting the no of sts to 140-160-180-180-200-220. Work 0-1-0-1-0-1 cm in stocking st with light beige. Then continue to work and dec according to A.3 - work up to arrow for your size = 70-80-90-90-90-99 sts. Work 1 round while at the same time dec 10-20-26-26-22-31 sts evenly = 60-60-64-64-68-68 sts. Then work an elevation in the back as follows: K 8 sts past st with marker mid back, turn and P 17 sts back, turn and K 25 sts, turn and P 33 sts, turn and K 41 sts, turn and P 49 sts. Turn and work 1 round until mid back.

NECK:
Switch to short circular needle size 7 mm and work rib = K 2/P 2 until neck measures 12-12-13-13-14-14 cm. Loosely cast off with K over K and P over P.

ASSEMBLY:
Sew the openings under the sleeves tog.

Diagram

symbols = K 2 tog
symbols = light beige
symbols = off white
symbols = old pink
symbols = dark rose
diagram
diagram
Do you have a question? See a list of frequently asked questions (FAQ)

Knitting tension is what determines the final measurements of your work, and is usually measured per 10 x 10 cm. It is provided like so: number of stitches in width x number of rows in height - eg: 19 stitches x 26 rows = 10 x 10 cm.

The knitting tension is very individual; some people knit/crochet loosely while others work tightly. You adjust the knitting tension with the needle size, which is why the suggested needle size is only meant as a guide! You need to adjust this (up or down) to ensure that YOUR knitting tension matches the knitting tension provided in the pattern. If you work with a different knitting tension than provided you will have a different yarn consumption, and your work will have different measurements than what the pattern suggests.

The knitting tension also determines which yarns can replace each other. As long as you achieve the same knitting tension you can replace one yarn with another.

See DROPS lesson: How to measure your tension/gauge

See DROPS video: How to make a gauge tension swatch

The required amount of yarn is provided in grams, eg: 450 g. To calculate how many balls you’ll need you first need to know how many grams are in 1 ball (25g, 50g or 100g). This information is available if you click on the individual yarn quality on our pages. Divide the amount required with the amount of each ball. For example, if each ball is 50g (the most common amount), the calculation will be as follows: 450 / 50 = 9 balls.

The important thing when changing from one yarn to another is that the knitting/crochet tension remains the same. This is so that the measurements of the finished piece will be the same as on the sketch provided. It is easier to achieve the same knitting tension using yarns from the same yarn group. It is also possible to work with multiple strands of a thinner yarn to achieve the knitting tension of a thicker one. Please try our yarn converter. We recommend you to always work a test swatch.

Please NOTE: when changing yarn the garment might have a different look and feel to the garment in the photo, due to individual properties and qualities of each yarn.

See DROPS lesson: Can I use a different yarn than the one mentioned in the pattern?

All our yarns are categorised into yarn groups (from A to F) according to thickness and knitting tension – group A contains the thinnest yarns and group F the thickest. This makes it easier for you to find alternative yarns to our patterns, should you wish to switch yarn. All yarns within the same group have a similar knitting tension and can easily replace each other. However, different yarn qualities have different structures and properties which will give the finished work a unique look and feel.

Click here for an overview of the yarns in each yarn group

At the top of all our patterns you’ll find a link to our yarn calculator, which is a helpful tool should you wish to use a different yarn than suggested. By filling in the yarn quality you wish to replace, the amount (in your size) and number of strands, the calculator will present good alternative yarns with the same knitting tension. Additionally it will tell you how much you’ll require in the new qualities and whether you’ll need to work with multiple strands. Most skeins are 50g (some are 25g or 100g).

If the pattern is worked with multiple colours, every colour will have to be calculated separately. Similarly, if the pattern is worked with several strands of different yarns (for example 1 strand Alpaca and 1 strand Kid-Silk) you will have to find alternatives for each, individually.

Click here to see our yarn calculator

Since different yarns have different qualities and textures we have chosen to keep the original yarn in our patterns. However, you can easily find options among our available qualities by using our yarn calculator, or simply pick a yarn from the same yarn group.

It is possible that some retailers still have discontinued yarns in stock, or that someone has a few skeins at home that they would like to find patterns for.

The yarn calculator will provide both alternative yarn as well as required amount in the new quality.

If you think it's hard to decide what size to make, it can be a good idea to measure a garment you own already and like the size of. Then you can pick the size by comparing those measures with the ones available in the pattern's size chart.

You'll find the size chart at the bottom of the pattern.

See DROPS lesson: How to read size chart

The needle size provided in the pattern serves only as a guide, the important thing is to follow the knitting tension. And since knitting tension is very individual, you will have to adjust the needle size to ensure that YOUR tension is the same as in the pattern – maybe you’ll have to adjust 1, or even 2 needle sizes, up or down to achieve the correct tension. For this, we recommend that you work test swatches.

Should you work with a different knitting tension than the one provided, the measurements of the finished garment might deviate from the measurement sketch.

See DROPS lesson: How to measure your tension/gauge

See DROPS video: How to make a tension/gauge swatch

Working a garment top-down provides more flexibility and room for personal adjustment. For example it is easier to try the garment on while working, as well as making adjustments to length of yoke and shoulder caps.

The instructions are carefully explaining every step, in the correct order. Diagrams are adjusted to the knitting direction and are worked as usual.

The diagram depicts all rows/rounds, and every stitch seen from the right side. It is read from bottom to top, from right to left. 1 square = 1 stitch.

When working back and forth, every other row is worked from the right side and every other row is worked from the wrong side. When working from the wrong side, the diagram will have to be worked reversed: from left to right, knit stitches are purled, purl stitches are knit etc.

When working in the round every round is worked from the right side and the diagram are worked from right to left on all rounds.

See DROPS lesson: How to read knitting diagrams

The diagram depicts all rows/rounds, and every stitch seen from the right side. It is worked from bottom to top, from right to left.

When working back and forth every other row is worked from the right side: from right to left and every other row is worked from the wrong side: from left to right.

When working in the round, every row in the diagram are worked from the right side, from right to left.

When working a circular diagram you start in the middle and work your way outwards, counter clockwise, row by row.

The rows usually start with a given number of chain stitches (equivalent to the height of the following stitch), this will either be depicted in the diagram or explained in the pattern.

See DROPS lesson: How to read crochet diagrams

Instructions for working several diagrams after each other on the same row/round, will often be written like so: “work A.1, A.2, A.3 a total of 0-0-2-3-4 times". This means you work A.1 once, then A.2 is worked once, and A.3 is repeated (in width) the number of times provided for your size – in this case like so: S = 0 times, M = 0 times, L=2 times, XL= 3 times and XXL = 4 times.

The diagrams are worked as usual: begin with the first row in A.1, then work the first row in A.2 etc.

See DROPS lesson: How to read knitting diagrams

See DROPS lesson: How to read crochet diagrams

The total width of the garment (from wrist-to-wrist) will be larger in the larger sizes, despite the actual sleeves being shorter. The larger sizes have longer sleeve caps and wider shoulders, so there will be a good fit in all sizes.

The measurement sketch/schematic drawing provides information regarding the full length of the garment. If it’s a jumper or a jacket the length is measured from the highest point on the shoulder closest to the neckline, and straight down to the bottom of the garment. It is NOT measured from the tip of shoulder. Similarly, the length of yoke is measured from the highest point on the shoulder and down to where yoke is split into body and sleeves.

On a jacket measures are never taken along bands, unless specifically stated. Always measure inside band stitches when measuring the length.

See DROPS lesson: How to read a schematic drawing

Diagrams are often repeated on the round or in height. 1 repeat is the diagram the way it appears in the pattern. If it says to work 5 repeats of A.1 in the round, then you work A.1 a total of 5 times after/next to each other in the round. If it says to work 2 repeats of A.1 vertically/in height you work the entire diagram once, then begin again at the start and work the entire diagram one more time.

Chain stitches are slightly narrower than other stitches and to avoid working the cast-on edge too tight, we simply chain more stitches to begin with. The stitch count will be adjusted on the following row to fit the pattern and measurement sketch.

The rib edge is more elastic and will contract slightly compared to, for example, stocking stitch. By increasing before the rib edge, you avoid a visible difference in width between the rib edge and the rest of the body.

It’s very easy to cast off too tightly, and by making yarn overs while casting off (and simultaneously casting these off) you avoid a too tight cast off edge.

See DROPS video: How to bind off with yarn overs (yo)

To achieve an even increase (or decrease) you can increase on, for example: every 3rd and 4th row alternately, like so: work 2 rows and increase on the 3rd row, work 3 rows and increase on the 4th. Repeat this until the increase is complete.

See DROPS lesson: Increase or decrease 1 st on every 3rd and 4th row alternately

Should you prefer to work in the round instead of back and forth, you may of course adjust the pattern. You’ll need to add steeks mid-front (usually 5 stitches), and follow the instructions. When you would normally turn and work from the wrong side, simply work across the steek and continue in the round. At the end you’ll cut the piece open, pick up stitches to work bands, and cover the cut edges.

See DROPS video: How to knit steeks and cut open

Should you prefer to work back and forth instead of in the round, you may of course adjust the pattern so you work the pieces separately and then assemble them at the end. Divide the stitches for the body in 2, add 1 edge stitch in each side (for sewing) and work the front and back pieces separately.

See DROPS lesson: Can I adapt a pattern for circular needles into straight needles?

Pattern repeats can vary slightly in the different sizes, in order to get the correct proportions. If you’re not working the exact same size as the garment in the photo, yours might deviate slightly. This has been carefully developed and adjusted so that the complete impression of the garment is the same in all sizes.

Make sure to follow instructions and diagrams for your size!

If you have found a pattern you like which is available in women’s size it’s not very difficult to convert it to men’s size. The biggest difference will be the length of sleeves and body. Start working on the women size that you think would fit across the chest. The additional length will be worked right before you cast off for the armhole/sleeve cap. If the pattern is worked top-down you can add the length right after the armhole or before the first decrease on sleeve.

Regarding additional yarn amount, this will depend on how much length you add, but it is better with a skein too many than too few.

All yarns will have excess fibres (from production) that might come off as lint or shedding. Brushed yarns (ie hairier yarns) have more of these loose, excess fibres, causing more shedding.

Shedding also depends on what is worn under or over the garment, and whether this pulls at the yarn fibres. It’s therefore not possible to guarantee that there will be no shedding

Below are some tips on how to get the best result when working with hairier yarns:

1. When the garment is finished (before you wash it) shake it vigorously so the looser hairs come off. NOTE: do NOT use a lint roller, brush or any method that pulls at the yarn.

2. Place the garment in a plastic bag and put it in your freezer - the temperature will cause the fibres to become less attached to each other, and excess fibres will come off easier.

3. Leave in the freezer for a few hours before taking it out and shaking it again.

4. Wash the garment according to the instructions on the yarn label.

Pilling is a natural process that happens to even the most exclusive of fibers. It's a natural sign of wear and tear that is hard to avoid, and that is most visible in high friction areas of your garment like a sweater's arms and cuffs.

You can make your garment look as new by removing the pilling, using a fabric comb or a pill/lint remover.

Still can't find the answer you need? Then scroll down and leave your question so one of our experts can try to help you. This will be done normally within 5 to 10 working days.
In the meantime, you can read the questions and answers that others have left to this pattern or join the DROPS Workshop on Facebook to get help from fellow knitters/crocheters!

You might also like...

Post a comment to pattern DROPS 142-30

We would love to hear what you have to say about this pattern!

If you want to leave a question, please make sure you select the correct category in the form below, to speed up the answering process. Required fields are marked *.

Comments / Questions (86)

country flag Weimer Sandra wrote:

Bonjour J'ai un petit souci je viens de rassembler les manches au tube qui forme le bas du pull mais pourriez vous me dire ou l'on commence les diminutions et comment je dois placer mes Etoiles car dans les explications je ne comprends rien ! merci pour l'aide apporter !

11.11.2013 - 10:30

DROPS Design answered:

Bonjour Mme Weimer, lorsque vous reprenez toutes les mailles pour l'empiècement, les tours commencent au milieu dos, après avoir ajusté le nbe de mailles à 140-160-180-180-200-220 et tricoté 1 cm jersey si nécessaire (cf tailles), commencez le diagramme A.3 en bas à droite en lisant tous les tours de droite à gauche - les dim sont marquées dans le diag par le symbole "/" (=2 m ens à l'end). Bon tricot!

11.11.2013 - 11:20

country flag Elisa wrote:

Salve, premetto che adoro questo maglione e vorrei davvero provare a farlo, purtroppo non ho capito bene come lavorare l'alta per il collo sul dietro... C'è bisogno di un terzo ferro?

30.10.2013 - 08:35

DROPS Design answered:

Buongiorno Elisa, per lavorare la parte alta del collo non serve un terzo f, ma si lavora a f accorciati, cioè si lavora solo su una parte delle m sul f, si gira, si tira il filo e si torna indietro: se segue attentamente le istruzioni riuscirà benissimo a lavorarla, altrimenti ci riscriva. Buon lavoro!

30.10.2013 - 10:21

country flag Karin wrote:

Habe von diesem Pullover drei Stück gestrickt, einmal wie auf dem Foto, zweimal in Grundfarbe schwarz mit blau bzw bordeaux. Jedesmal die Traumnote "Traumpullover" bekommen. Und: "Schade, dass es noch so warm ist!" Ein tolles Muster!

09.09.2013 - 11:42

country flag María wrote:

Que talla debería hacer si uso la talla 42 de España o 12 americana , y para la talla 38? Gracias es un modelo precioso

05.09.2013 - 22:51

DROPS Design answered:

Hola Maria! Para escoger la talla correcta sigue las medidas de la prenda que tienes siempre debajo del patrón. La talla 42 está más cerca de la L y la talla 38 de la S.

06.09.2013 - 13:08

country flag June wrote:

Skøn trøje. Har I opskriften til børn? Str. 7-8 år? Mvh June

23.06.2013 - 20:44

DROPS Design answered:

Hej June. Nej, vi har den desvaerre ikke til börn, men vi har lignende mönstre med rundt baerestykke hvis du kigger i vores SmaaDROPS. Du kan jo eventuelt tilpasse og bruge mönstret her paa en af disse? God fornöjelse.

24.06.2013 - 12:11

country flag Mariette wrote:

Het lukt me niet om het patroon te vinden op de website. Kunt u het naar mij mailen? vriendelijke groet, Mariette

14.02.2013 - 17:12

DROPS Design answered:

U staat al op het patroon als u dit bericht heeft geschreven. Scroll naar beneden om het patroon te zien. U kunt het vervolgens printen door op Afdrukken: patroon te drukken en volg de aanwijzingen.

18.02.2013 - 16:02

country flag Judith wrote:

Beim Ab ketten für die Armlöcher komme ich ein wenig durcheinander. Welche Maschen außer den markierten - davon doch auch nicht alle?- muss ich ab ketten? Judith

17.01.2013 - 15:31

DROPS Design answered:

Siehe unten

18.01.2013 - 08:04

country flag Judith wrote:

Beim Abketten für das Armloch komm ich ein wenig durcheinander. Man soll auf jeder Seite 7 M ab ketten. Die markierte Masche und jeweils drei davor und dahinter richtig? Bezieht sich das nur auf die 1. und 79. markierte Masche? Judith

17.01.2013 - 14:21

DROPS Design answered:

Liebe Judith, es werden auf jeder Seite 7 M für das „Armloch“ abgekettet (d.h. die markierte Masche und auf jeder Seite dieser M nochmals 3 M). Ja, bei Größe XXL ist die 1. und die 79. Masche markiert. Es gibt bei Raglan als Armloch nur diese kleine Öffnung.

18.01.2013 - 08:04

Marian Van Der Waal wrote:

Ik woon in nederland, en snap het patroon niet, ik zelf ben nu bezig met het patroon uit de serie "killing"daar heeft zij ook altijd z'n soort trui aan maar deze vind ik ook heel mooi en zou best ned.patroon van willen kopen.

16.01.2013 - 19:37

DROPS Design answered:

Je kan dit patroon gratis printen. Click gewoon op "Afdrukken: patroon" en volg de instructies. Veel breplezier.

17.01.2013 - 09:37

country flag Florence wrote:

Bonjour, j'ai réalisé le pull en S et je me retrouve avec une largeur de 38 cm au lieu de 44 pour le torse alors que mon échantillon correspond avec celui indiqué... êtes-vous sûrs des mesures?

15.01.2013 - 21:02

DROPS Design answered:

Bonjour Florence, On tricote parfois avec une tension différente en rond et en allers retours. L'échantillon est de 11 m = 10 cm, et en taille S on a 96 m, soit environ 44 cm pour le dos/devant. Bon tricot !

16.01.2013 - 14:03