
Popular categories
Looking for a yarn?


|
|||||||
Santorini Blue |
|||||||
 |
 |
||||||
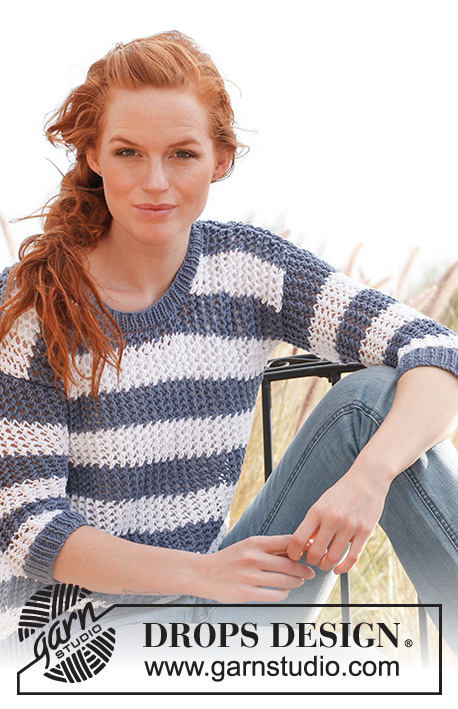
Knitted DROPS jumper with lace pattern in ”Paris”. Size S-XXXL
DROPS 139-33 |
|||||||
|
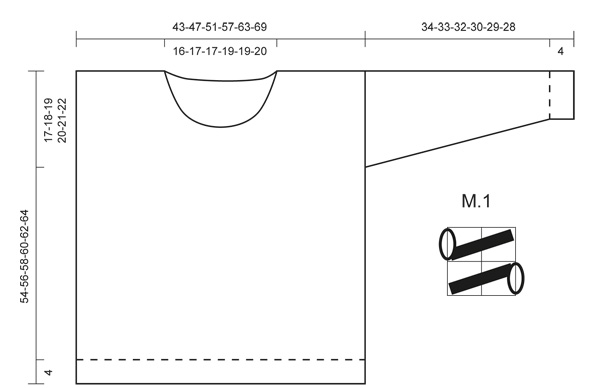
GARTER ST (back and forth on needle): K all rows. NOTE: All edge sts are worked in garter st. PATTERN: See diagram M.1. The diagram shows both rows in the pattern seen from RS. STRIPES: Work * 10 rows white, 10 rows denim blue *. Repeat from *-*. INCREASE TIP: Inc 1 st by getting the thread between 2 sts from previous row - K this st twisted, i.e. work in back loop of st instead of front to avoid holes. NOTE: Work inc sts in stockinette st until they can be worked in pattern in each side. ---------------------------------------------------------- BACK PIECE: Worked back and forth on needle. Cast on 70-76-82-94-102-110 sts with denim blue on circular needle size 4.5 mm / US 7. Work rib (K 1/P 1) with 1 edge st in garter st - Read explanation above - in each side for 4 cm / 1½". NOTE: On last row from WS, dec 8-8-8-12-12-12 sts evenly = 62-68-74-82-90-98 sts. Then switch to needle size 5 mm / US 8 and white - At the same time work diagram M.1 and STRIPES - Read explanation above - with 1 edge st in each side. REMEMBER THE GAUGE! When piece measures 37-38-39-40-41-42 cm / 14½"-15"-15¼"-15¾"-16⅛"-16½", insert a marker in each side of piece (armholes beg here). Continue to work until piece measures 52-54-56-58-60-62 cm / 20½"-21¼"-22"-22¾"-23⅝"-24⅜". Now bind off the middle 18-20-20-22-22-24 sts for neck and finish each shoulder separately. Bind off 2 sts at beg of next row from neck = 20-22-25-28-32-35 sts remain on the shoulder. Loosely bind off all sts when piece measures 54-56-58-60-62-64 cm / 21¼"-22"-22¾"-23⅝"-24⅜"-25¼". FRONT PIECE: Cast on and work as on back piece until piece measures 43-45-46-48-49-51 cm / 17"-17¾"-18"-19"-19¼"-20". Now bind off the middle 12-14-14-16-14-16 sts for neck and finish each shoulder separately. Then bind off for neck at the beg of every row from neck (= every other row) as follows: bind off 2 sts 1 time, 1 st 1 time. Then bind off 1 st at beg of every other row from neck (= every 4th row) a total of 2-2-2-2-3-3 times = 20-22-25-28-32-35 sts remain on shoulder. Loosely bind off all sts when piece measures 54-56-58-60-62-64 cm / 21¼"-22"-22¾"-23⅝"-24⅜"-25¼". SLEEVE: Worked back and forth on needle. Cast on 38-40-42-46-48-50 sts with denim blue on circular needle size 4.5 mm / US 7. Work rib K 1/P 1 with 1 edge st in each side for 4 cm / 1½". NOTE: On last row from WS, dec 8-8-8-10-10-10 sts evenly = 30-32-34-36-38-40 sts. Then switch to needle size 5 mm / US 8 and white - At the same time work diagram M.1 and STRIPES. When piece measures 5 cm / 2", inc 1 st - Read INCREASE TIP above - inside 1 edge st in each side. Repeat inc every 2½- 2½-2½-2-2-1½ cm / ⅞"-⅞"-⅞"-¾"-¾"-½" a total of 10-10-10-12-12-12 times = 50-52-54-60-62-64 sts. Continue until piece measures 34-33-32-30-29-28 cm / 13½"-13"-12½"-11¾"-11⅜"-11" (shorter measurements in the larger sizes because of wider shoulders). Loosely bind off all sts. Knit another sleeve the same way. ASSEMBLY: Graft or sew shoulder seams from RS with neat stitches. Sew in sleeves between markers in each side inside 1 edge st. Sew sleeve and side seams in one. NECK EDGE: Work around the neck with denim blue on circular needle size 4.5 mm / US 7 as follows: Beg mid back, pick up from RS approx. 90 to 110 sts inside 1 edge st around the neck. K next round - while AT THE SAME TIME adjusting no of sts to 90-94-98-104-108-112. Then work rib (K 1/P 1) until neck edge measures 2 cm / ¾", loosely bind off all sts with K over K and P over P. |
|||||||
Diagram explanations |
|||||||
|
|||||||
|
|||||||
|
Have you made this or any other of our designs? Tag your pictures in social media with #dropsdesign so we can see them! Do you need help with this pattern?You'll find tutorial videos, a Comments/Questions area and more by visiting the pattern on garnstudio.com. © 1982-2024 DROPS Design A/S. We reserve all rights. This document, including all its sub-sections, has copyrights. Read more about what you can do with our patterns at the bottom of each pattern on our site. |
|||||||


With over 40 years in knitting and crochet design, DROPS Design offers one of the most extensive collections of free patterns on the internet - translated to 17 languages. As of today we count 304 catalogs and 11422 patterns - 11417 of which are translated into English (US/in).
We work hard to bring you the best knitting and crochet have to offer, inspiration and advice as well as great quality yarns at incredible prices! Would you like to use our patterns for other than personal use? You can read what you are allowed to do in the Copyright text at the bottom of all our patterns. Happy crafting!
Comments / Questions (139)
Mám upleteno s dlouhým rukávem. Na to jsem si přikoupila přadénko modré.Pěkně ho sešít bude piplačka, ale už se na něj těším.
18.10.2013 - 09:29Hur kan man göra om man vill sticka tröjan med lång ärm? Den är väldigt fin i övrigt. Tack på förhand! /Amanda
18.08.2013 - 20:43DROPS Design answered:
Det är en ganska smal ärm, så de cm du vill lägga till på ärmen, kan du lägga till innan du börjar öka enl beskrivningen. Fråga gärna i butiken där du köper garnet.
21.08.2013 - 12:25Opm.2 Zoals u het beschrijft, de draad over de naald naar voren halen, krijg ik een beetje ander patroon dat naar links trekt. Over de hele trui is dat 10 centimeter! Nu brei ik: draad naar voren onder de naald, 2 r.samen, daarmee komt de lus van rechter steek - over de naald - naar de volgende steek. Ik kan dat eventueel met een foto laten zien.
02.07.2013 - 15:41DROPS Design answered:
Hoi Trees. Wij schrijven: de draad van voren naar achteren om de naald leggen Jij schrijft: Zoals u het beschrijft, de draad over de naald naar voren halen... Dus je doet het iets anders. Ik denk dat het beter is dat je naar een winkel gaat. Zij kunnen dan precies zien wat je doet (en kunnen helpen met de juiste manier). Succes.
04.07.2013 - 12:42Opm 1. Bij het 'continentaal' breien, vind ik moeilijk te zien wat er wordt gedaan. Ik ga ook pas naar een instructiefilmpje kijken, als mijn werk niet overeenkomt met het patroon.
02.07.2013 - 15:352. Na lang puzzelen kwam ik erachter dat het geen omslag is als je rechtshandig breit, maar de steek naar de verkeerde kan van het werkhalen en dan 2 steken samen breien. Dus de omslag is niet over de naald, maar voor de naald langs. Voor de averechtse kant kom ik er niet uit en heb ik de normale omslag aangehouden. Het werk lijkt er nu wat meer op, al weet ik niet of dit nu zo de bedoeling is. Is er meer ervaring hierover?
28.06.2013 - 16:45DROPS Design answered:
Een omslag is bij ons altijd de draad van voren naar achteren om de naald leggen. Breit u 2 st recht samen, dan is de draad achter, dus dan haalt u de draad naar voren en legt u hem over de naald voor u verder breit. Breit u 2 st av samen, dan is de draad al voor, dus u haalt hem over de naald en dan weer naar voren om verder te breien.
01.07.2013 - 11:391.Ben ik nu de enige die last heeft van het linkshandige breien op de instructievideo's? Ik heb deze hele trui gebreid, maar het trok naar links. Ik gaf de schuld aan de goedkope wol die ik had gebruikt. Dit was mijn eerste trui na 20 jaar. Ik heb paris gekocht en begonnen aan de mouw om te kijken hoe het uitpakte, maar ook hier trok het hele werk naar links. Wat kan er misgaan met 1 omslag en 2 samen breien. Video kwam ik niet uit omdat ik met rechts omsla (volgens mij normaal in NL).
28.06.2013 - 16:45DROPS Design answered:
Het is geen linkshandig breien op de video's maar "continentaal" breien. Dit is de normale manier van breien in Scandinavië. Het maakt ook niets uit of u met de draad links of rechts breit - ook niet voor dit patroon. De steken zijn precies hetzelfde. Zie vervolg bij uw tweede opmerking.
01.07.2013 - 11:39Hej, jag undrar över mönstrets förklaring, det står att Maskorna stickas räta på alla varv men i M1 står det att de ihopstickade maskorna på avigsidan ska stickas ihop avigt. Hur ska det vara? Ska det vara slätstickning eller rätstickning och alla ihoptagningarna är räta även från avigsidan? Stort tack på förhand för hjälpen. :-)
14.05.2013 - 06:58Margot answered:
Räta alla varv gäller bara kantmaskorna, detta har kommenterats tidigare!
14.05.2013 - 10:06Dorthe wrote:
Jeg kan ikke få garnet til at slå til på trods af strikkefasthed passer! Har andre dette problem?
02.04.2013 - 22:43Det ble min også.....Da jeg hadde strikket ryggen og en arm lagde jeg en prøvlapp for å finne ut hva jeg gjorde feil. og feilen fant jeg!!!! når man strikker 2 rett sammen skal man strikke i bakre ledd, ikke i fremste ledd som de aller fleste gjør når d står at man skal strikke 2 rett sammen. Arbeidet ble helt annerledes.....Håper dette er til hjelp for dere som sliter. Kanskje en ide å få det med i mønsterforklaringa. Mvh. Marielle....
27.03.2013 - 01:03Working this pattern now. I LOVE the way it works up and how fast and EASY it is !!!
04.03.2013 - 15:39