
Popular categories
Looking for a yarn?


|
|
Julia |
|
|
|
|
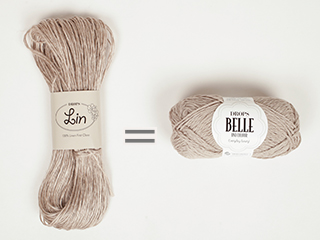
Crochet DROPS hat in Delight and Lin or Delight and Belle.
DROPS 137-12 |
|
|
CROCHET INFO: Replace first tr at beg of every tr round with 3 ch, finish the round with 1 sl st in 3rd ch from beg of round. At beg of every dc round, replace first dc with 1 ch and finish round with 1 sl st in ch from beg of round. PATTERN: 4 rounds dc, 1 round tr, 7 rounds dc, 1 round tr, then work dc until given measurements (see pattern). -------------------------------------------------------- HAT: Work 5 ch on hook size 4 mm with 1 thread Delight and 1 thread Lin/1 thread Belle (= 2 threads). Form a ring with one sl st in first st. READ CROCHET INFO! ROUND 1: Work 8 tr in ch-ring. ROUND 2: Work 2 tr in every tr = 16 tr. ROUND 3: Work 2 tr in every tr = 32 tr. ROUND 4: * 1 tr in first tr, 2 tr in next tr *, repeat from *-* the entire round = 48 tr. ROUND 5: * 1 tr in each of the first 2 tr, 2 tr in next tr *, repeat from *-* the entire round = 64 tr. ROUND 6: * 1 tr in each of the first 3 tr, 2 tr in next tr *, repeat from *-* the entire round = 80 tr. Inc in Size S/M are now done. ROUND 7 (Size L/XL): * 1 tr in each of the first 4 tr, 2 tr in next tr *, repeat from *-* the entire round = 96 tr. Inc in Size L/XL are now done. Then continue with PATTERN - see explanation above - until hat measures approx. 17-19 cm from the top. REMEMBER THE CROCHET TENSION! Continue to crochet the brim as follows: ROUND 1: Work *1 tr in the first/next 2 dc, 1 ch*, repeat from *-* around = 80-96 tr with 1 ch between each. ROUND 2: Work 1 tr in every tr and 1 tr around every ch = 120-144 tr. ROUND 3: Work 1 tr in every tr = 120-144 tr. ROUND 4: Work 1 dc in every tr = 120-144 dc, cut and fasten the threads. |
|
|
Have you made this or any other of our designs? Tag your pictures in social media with #dropsdesign so we can see them! Do you need help with this pattern?You'll find tutorial videos, a Comments/Questions area and more by visiting the pattern on garnstudio.com. © 1982-2024 DROPS Design A/S. We reserve all rights. This document, including all its sub-sections, has copyrights. Read more about what you can do with our patterns at the bottom of each pattern on our site. |


With over 40 years in knitting and crochet design, DROPS Design offers one of the most extensive collections of free patterns on the internet - translated to 17 languages. As of today we count 304 catalogues and 11415 patterns - 11415 of which are translated into English (UK/cm).
We work hard to bring you the best knitting and crochet have to offer, inspiration and advice as well as great quality yarns at incredible prices! Would you like to use our patterns for other than personal use? You can read what you are allowed to do in the Copyright text at the bottom of all our patterns. Happy crafting!
Comments / Questions (19)
Bonjour je ne comprends pas le tour1 de la bordure pouvez m aider Merci
21.03.2024 - 20:09DROPS Design answered:
Bonjour Mme Messinese, vous crochetez (2 brides, 1 maille en l'air) tout le tour, vous avez ainsi 80 ou 96 brides + 40-48 mailles en l'air, au tour suivant, crochetez 1 bride dans chaque bride et dans chaque maille en l'air tout le tour = 120-144 brides. Bon crochet!
22.03.2024 - 07:3250 Gramm je Garn hat für den Hut nicht gereicht. Musste von jeder Farbe ein Knäuel nachbestellen
12.03.2023 - 11:29Rand van de hoed: als je de foto vergroot bekijkt, is de eerste toer van de rand: *1 stk in iedere van de eerste 2 v, 1 l* (en niet 1 l tussen elk stokje, maar 1 l na telkens 2 stk).
17.06.2021 - 08:08De opgegeven benodigde hoeveelheid van elk 50 gr Delight en 50 gr Belle is te weinig. Je hebt van elke soort 100 gr nodig. En inderdaad, de rand van de hoed golft veel te hard. In deze omschrijving is iets niet juist.
17.06.2021 - 07:41Olá! Sou muito grata por você disponibilizar tantas receitas lindas de crochê e tricô... são lindos produtos! Deixo aqui um pedido: será que tem como disponibilizar também o gráfico dessas receitas? Porque pra mim fica muito mais fácil ler o gráfico, a receita escrita acho mais demorada pra fazer. Mas mesmo assim, MUITO OBRIGADA!
24.02.2021 - 23:35De bol van de hoed is te plat als je volgens het beschreven patronen haakt het middenstuk is ok maar de rand golft. De hoed isniet overeenkomstig de getoonde foto. Het lijkt wel de hoed van Roodjapjes grootmoeder. Heeft niets te maken met te los haken, dit is mijn 2e poging. Jammer dat ik geen foto jan bijsluiten. Nu ga ik een andere oplossing zoeken. Met vriendelijke groet.
12.09.2020 - 14:17Ik heb deze muts gehaakt, maar heb een probleem met de rand. In plaats van mooi uitlopend zoals op de foto, heeft mijn muts duidelijk een rand en het golft ook nog. Balen. Waar zit de fout en wat kan ik er aan doen?
13.04.2016 - 18:20DROPS Design answered:
Hoi Marike. Ik denk dat je dan te losjes haakt. Controleer de stekenverhouding of haak strakker (met een kleinere naald)
14.04.2016 - 14:01Die Krempe wellt sich bei der hohen Maschenanzahl SEHR und gleicht gar nicht dem Bild dazu. Ich denke, statt Stäbchen plus jeweils LM muss im Wechsel Stäbchen und Stäbchen mit LM gehäkelt werden, so dass man in der folgenden Runde mit anstatt 160 Maschen mit 120 Maschen weiterhäkelt. So sieht es dann eher wie auf dem Foto aus (großes Loch und schmales Loch im Wechsel). Täusche ich mich?
27.10.2014 - 11:36DROPS Design answered:
Liebe Melanie, Sie könnten Recht haben, auf dem Foto sieht es wirklich eher so aus, als würde nach jedem 2. Stb eine Lm gemacht und in der folgenden R dann 1 Stb in jedes Stb + in jede Lm gehäkelt. Ich werde die Frage an die Designerinnen weiterleiten, allerdings kann eine Antwort etwas dauern. Sie können die Krempe aber natürlich trotzdem schon problemlos so häkeln, wie Sie es vorgeschlagen haben, wenn sie Ihnen so besser gefällt.
27.10.2014 - 12:20Còmo hago para poner un patron en favoritos?
03.04.2014 - 17:52DROPS Design answered:
Hola Gabriela. Hay que marcar "AGREGAR A FAVORITOS" encima de la foto del patrón.
04.04.2014 - 09:35Klobouček je nádherný,...již jsem začala háčkovat...ale bohužel jak je uvedeno tak jedno klubíčko příze Lin nestačí... takže spotřeba necelé klubíčko Delight a jedno a kousek klubíčka Lin.
01.05.2013 - 08:40