DROPS Baby Merino
DROPS Baby Merino
100% Wool
from 3.50 £ /50g
Get the yarn to make this pattern from 14.00£.

The yarn cost is calculated from the pattern’s smallest size and the yarn’s cheapest product type. Looking for an even better price? You might find it on the DROPS Deals!

DROPS SS24

Litte William`s Body

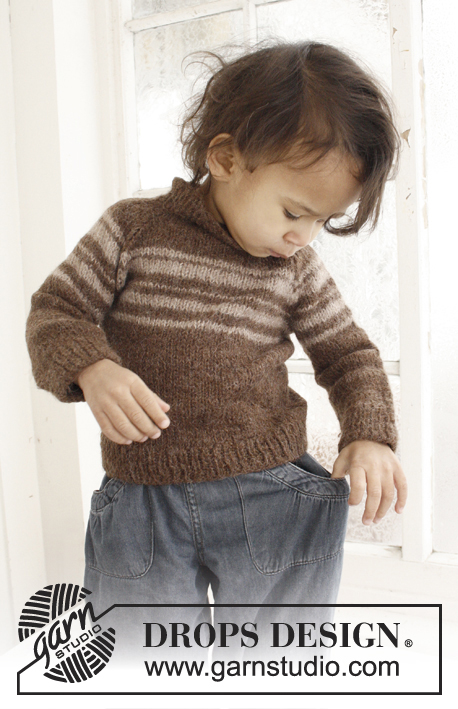
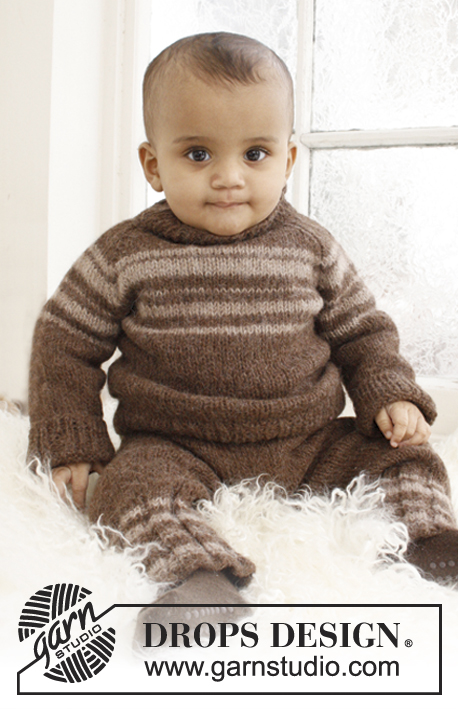
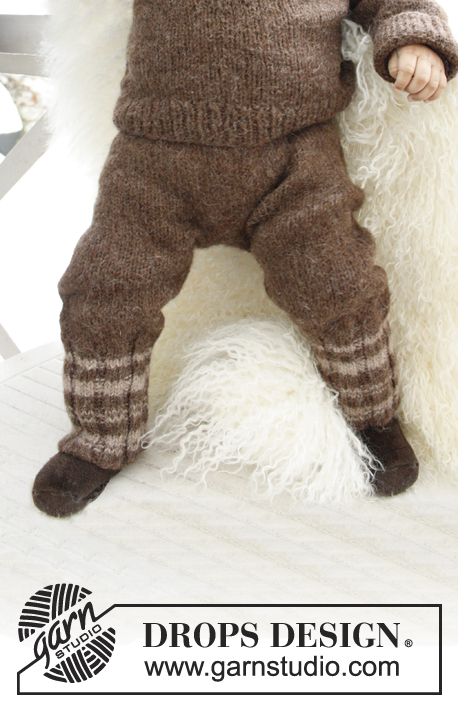
Knitted body with raglan and Nordic pattern for baby and children in DROPS BabyMerino or DROPS BabyAlpaca Silk

DROPS Baby 21-32
DROPS design: Pattern no BM-037-by
Yarn group A
--------------------------------------------------------
Size: 1/3 - 6/9 - 12/18 months (2 - 3/4) years
Size in cm: 56/62 - 68/74 - 80/86 (92 - 98/104)
Materials: DROPS BABY MERINO from Garnstudio
Colour no 18, brown: 150-150-200 (200-200) g
Colour no 17, beige: 50 g for all sizes

Or use:
DROPS BABYALPACA SILK from Garnstudio
Colour no 5670, brown: 150-200-200 (200-200) g
Colour no 2110, wheat: 50 g for all sizes

DROPS CIRCULAR NEEDLE SIZE 2.5 mm (60 cm) - or size needed to get 26 sts x 34 rows in stocking st = 10 x 10 cm.
DROPS CIRCULAR NEEDLE SIZE 2 mm (60 cm) - for rib
DROPS DOUBLE POINTED NEEDLES SIZE 2.5 mm – for sleeve.
DROPS DOUBLE POINTED NEEDLES SIZE 2 mm – for rib
DROPS MOTHER-OF-PEARL BUTTONS, NO 521 (15 mm): 6 pieces for all sizes

-------------------------------------------------------

Alternative Yarn – See how to change yarns here
Yarn Groups A to F – Use the same pattern and change the yarn here
Yarn usage using an alternative yarn – Use our yarn converter here

-------------------------------------------------------

DROPS Baby Merino
DROPS Baby Merino
100% Wool
from 3.50 £ /50g
Get the yarn to make this pattern from 14.00£.

The yarn cost is calculated from the pattern’s smallest size and the yarn’s cheapest product type. Looking for an even better price? You might find it on the DROPS Deals!

Pattern instructions

NOTE: This pattern is written in British English. All measurements in charts are in cm. For conversion from cm to inches - click here. There are different terms for crocheting in British and American English. If this pattern includes crochet, click for "crochet terms" here. For this pattern in American English, please click here.
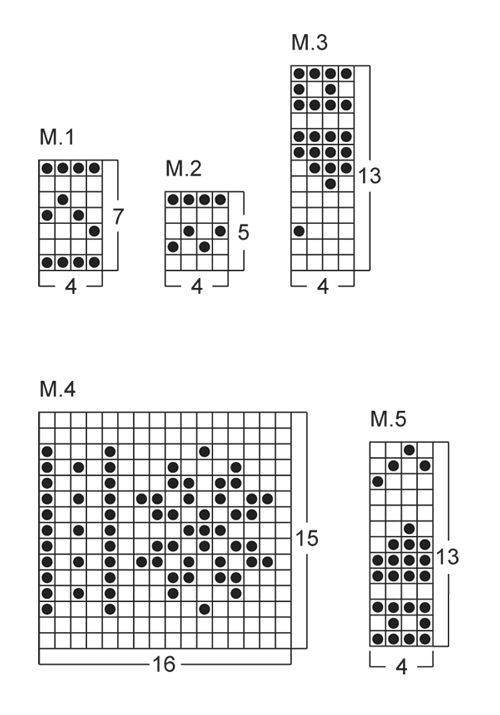
ST WORKED TWISTED:
Work in back loop of st instead of front.
INCREASE TIP:
Inc 1 st before and after st with marker by making 1 YO. On next row work YO twisted to avoid holes.
DECREASE TIP 1 (applies to front and back piece):
Dec from RS 1 st after and before 1 edge st in each side as follows:
After 1 edge st: Slip 1 st as if to K, K 1, psso.
Before 1 edge st: K 2 tog.
Dec from WS 1 st after and before 1 edge st in each side as follows:
After 1 edge st: P 2 twisted tog.
Before 1 edge st: P 2 tog.
DECREASE TIP 2 (applies to sleeve):
Dec 1 st on each side of marker as follows: Work until 2 sts remain before marker, slip 1 st as if to K, K 1, psso, (marker), K tog the next 2 sts.
PATTERN ON YOKE:
See diagrams M.1 - M.3. Firstly work diagrams M.1, M.2, and M.3 1 time vertically, then diagram M.2 0-0-0 (1-1) time = 25-25-25 (30-30) rows in total.
PATTERN ON BODY/SLEEVE:
See diagrams M.4 and M.5. First work diagram M.4 and then diagram M.5 1 time vertically.
--------------------------------------------------------

YOKE:
The piece is first worked back and forth and then in the round. Worked top down from the neck.
Cast on 49-57-65 (73-81) sts on circular needle size 2 mm with brown. Work rib back and forth (1st row = RS) as follows: * K 1, P 1 *, repeat from *-*, K last st on row. When rib measures approx. 1 cm, K next row from WS - While at the same time inc 7-9-11 (13-15) sts evenly on row = 56-66-76 (86-96) sts. On next row (= RS) switch to circular needle size 2.5 mm and work as follows: K 1 (= mid back), K 7-9-12 (14-16) (= right back piece), K 1, insert a marker in this st, K 8-9-8 (9-10) (= right sleeve), K 1, insert a marker in this st, K 20-24-30 (34-38) (= front piece), K 1, insert a marker in this st, K 8-9-8 (9-10) (= left sleeve), K 1, insert a marker in this st, K 7-9-12 (14-16) (= left back piece), K 1 (= mid back) = 4 sts with markers in total before increase for raglan. REMEMBER THE KNITTING TENSION. READ ALL OF THE FOLLOWING SECTION BEFORE CONTINUING!
Continue in stocking st - While at the same time inc on next row from RS 1 st on each side of every st with marker = 8 new sts per inc. Repeat inc from RS on every other row a total of 12-12-12 (13-15) times, then on every 4th row a total of 2-3-4 (4-4) times. At the same time when piece measures 3-4-5 (5-6) cm from cast on edge, work PATTERN ON YOKE - Read explanation above. NOTE: Work the new sts gradually in the pattern. When piece measures 8-9-9 (10-10) cm from cast on edge, cast on 4 sts at the end of next row from WS (= sts at the bottom of neck opening, worked into the pattern) - Now work the piece in the round on circular needle from here.
When PATTERN ON YOKE has been worked (all inc are now done), there are 172-190-208 (226-252) sts on needle. Front piece = back piece = 48-54-62 (68-76) sts. Slip sts on sleeves and sts with markers (38-41-42 (45-50) sts for each sleeve) on a stitch holder. Now divide the piece, front/back piece and sleeves are finished separately.

BODY:
Front piece + back piece = 96-108-124 (136-152) sts. Continue in the round on circular needle (round beg in the side). On the next round, work 1st round in diagram M.4 as follows: Cast on 4 sts for armhole, work 48-54-62 (68-76) sts (= front piece), cast on 8 sts for armhole, work 48-54-62 (68-76) sts (= back piece), cast on 4 sts for armhole = a total of 112-124-140 (152-168) sts on needle. On next round (= 2nd round in diagram M.4), inc 0-4-4 (8-8) sts evenly = 112-128-144 (160-176) sts. Continue with diagram M.4 and then diagram M.5 1 time vertically. Then work in stocking st with brown until piece measures 15-17-19 (21-23) cm from armhole (piece measures approx. 26-29-32 (35-38) cm in total). Now divide the piece and front and back piece are finished separately.

BACK PIECE:
= 56-64-72 (80-88) sts. Then work back and forth (1st row = RS) in stocking st and dec for leg opening as follows: K 1 (= edge st), dec 1 st - Read DECREASE TIP 1 above, work until 3 sts remain, dec 1 st - Read DECREASE TIP 1 above, K 1 (= edge st). Continue in stocking st, repeat dec on every row from RS (= on every other row) inside 1 edge st in each side a total of 20-23-27 (30-34) times = 16-18-18 (20-20) sts remain. Then switch to circular needle size 2 mm and work rib (K 1/P 1) for 1½ cm, loosely cast off all sts.

FRONT PIECE:
= 56-64-72 (80-88) sts. Then work back and forth (1st row = RS) in stocking st and dec for leg opening as follows: K 1, dec 1 st - Read DECREASE TIP 1 above, work until 3 sts remain, dec 1 st - Read DECREASE TIP 1 above, K 1. Continue in stocking st and repeat dec on every row inside 1 edge st in each side a total of 6-6-8 (8-10) times, then on every row from RS (= on every other row) a total of 14-17-19 (22-24) times = 16-18-18 (20-20) sts remain. Then switch to circular needle size 2 mm and work rib (K 1/P 1). On next row from RS, cast off for 3 button holes as follows: Work 1 st, * 1 YO, K the next 2 sts tog, work 4-5-5 (6-6) sts *, repeat from *-* 1 more time, 1 YO, K the next 2 sts tog, work the last st. On next row work the YOs twisted. When rib measures approx. 1½ cm, loosely cast off all sts.

SLEEVE:
Worked in the round on double pointed needles, top down. Slip sts from stitch holder on to double pointed needles size 2.5 mm = 38-41-42 (45-50) sts, and cast on 8 sts mid under sleeve = 46-49-50 (53-58) sts. Insert a marker before 1st st on round and move the marker upwards (round beg mid under sleeve). Continue with diagram M.4 and then diagram M.5 (beg with 1st st in the repetition on 1st round in diagram M.4). When sleeve measures 2-3-3 (3-3) cm, dec 1 st before and after marker - Read DECREASE TIP 2 above. Repeat dec every 1½-1½-2 (2½-2½) cm a total of 7-7-7 (6-8) times = 32-35-36 (41-42) sts. Continue until sleeve measures 12-15-18 (20-23) cm from armhole. On next round, dec 0-1-0 (1-0) sts = 32-34-36 (40-42) sts. Then switch to double pointed needles size 2 mm and continue in rib (K 1/P 1) for 3-3-3 (4-4) cm. Loosely cast off all sts.

NECK OPENING:
Knit up approx. 21 - 25 sts from RS along the opening on right back piece with brown on double pointed needles size 2 mm. Work rib (K 1/P 1) back and forth for approx. 1½ cm (= right band, 1st row = WS). Loosely cast off all sts. Repeat along the opening on left back piece, but on 2nd row (= RS) cast off for 3 button holes (1 button hole = 1 YO, K 2 tog) evenly on band. When rib measures approx. 1½ cm, loosely cast off all sts. Place band with button holes on top of the other at the bottom of neck opening and fasten through both layers with stitches.

LEG OPENING:
Knit up from RS approx. 16 sts per 5 cm along one leg opening inside 1 edge st with brown on circular needle size 2 mm, no of sts must be divisible by 2 + 1. On next row (= WS) work as follows: * P 1, K 1 *, finish with P 1. Continue back and forth in rib for 1 cm, loosely cast off all sts. Repeat on the other leg opening.

ASSEMBLY:
Sew the openings under the sleeves. Sew buttons on to rib at the bottom of back piece, and on to right band in neck opening.

This pattern has been corrected.

Updated online: 26.01.2012
New chart M.5 has been published.

Diagram

symbols = brown
symbols = beige
diagram
diagram

Each of our patterns has specific tutorial videos to help you.

Do you have a question? See a list of frequently asked questions (FAQ)

Knitting tension is what determines the final measurements of your work, and is usually measured per 10 x 10 cm. It is provided like so: number of stitches in width x number of rows in height - eg: 19 stitches x 26 rows = 10 x 10 cm.

The knitting tension is very individual; some people knit/crochet loosely while others work tightly. You adjust the knitting tension with the needle size, which is why the suggested needle size is only meant as a guide! You need to adjust this (up or down) to ensure that YOUR knitting tension matches the knitting tension provided in the pattern. If you work with a different knitting tension than provided you will have a different yarn consumption, and your work will have different measurements than what the pattern suggests.

The knitting tension also determines which yarns can replace each other. As long as you achieve the same knitting tension you can replace one yarn with another.

See DROPS lesson: How to measure your tension/gauge

See DROPS video: How to make a gauge tension swatch

The required amount of yarn is provided in grams, eg: 450 g. To calculate how many balls you’ll need you first need to know how many grams are in 1 ball (25g, 50g or 100g). This information is available if you click on the individual yarn quality on our pages. Divide the amount required with the amount of each ball. For example, if each ball is 50g (the most common amount), the calculation will be as follows: 450 / 50 = 9 balls.

The important thing when changing from one yarn to another is that the knitting/crochet tension remains the same. This is so that the measurements of the finished piece will be the same as on the sketch provided. It is easier to achieve the same knitting tension using yarns from the same yarn group. It is also possible to work with multiple strands of a thinner yarn to achieve the knitting tension of a thicker one. Please try our yarn converter. We recommend you to always work a test swatch.

Please NOTE: when changing yarn the garment might have a different look and feel to the garment in the photo, due to individual properties and qualities of each yarn.

See DROPS lesson: Can I use a different yarn than the one mentioned in the pattern?

All our yarns are categorised into yarn groups (from A to F) according to thickness and knitting tension – group A contains the thinnest yarns and group F the thickest. This makes it easier for you to find alternative yarns to our patterns, should you wish to switch yarn. All yarns within the same group have a similar knitting tension and can easily replace each other. However, different yarn qualities have different structures and properties which will give the finished work a unique look and feel.

Click here for an overview of the yarns in each yarn group

At the top of all our patterns you’ll find a link to our yarn calculator, which is a helpful tool should you wish to use a different yarn than suggested. By filling in the yarn quality you wish to replace, the amount (in your size) and number of strands, the calculator will present good alternative yarns with the same knitting tension. Additionally it will tell you how much you’ll require in the new qualities and whether you’ll need to work with multiple strands. Most skeins are 50g (some are 25g or 100g).

If the pattern is worked with multiple colours, every colour will have to be calculated separately. Similarly, if the pattern is worked with several strands of different yarns (for example 1 strand Alpaca and 1 strand Kid-Silk) you will have to find alternatives for each, individually.

Click here to see our yarn calculator

Since different yarns have different qualities and textures we have chosen to keep the original yarn in our patterns. However, you can easily find options among our available qualities by using our yarn calculator, or simply pick a yarn from the same yarn group.

It is possible that some retailers still have discontinued yarns in stock, or that someone has a few skeins at home that they would like to find patterns for.

The yarn calculator will provide both alternative yarn as well as required amount in the new quality.

If you think it's hard to decide what size to make, it can be a good idea to measure a garment you own already and like the size of. Then you can pick the size by comparing those measures with the ones available in the pattern's size chart.

You'll find the size chart at the bottom of the pattern.

See DROPS lesson: How to read size chart

The needle size provided in the pattern serves only as a guide, the important thing is to follow the knitting tension. And since knitting tension is very individual, you will have to adjust the needle size to ensure that YOUR tension is the same as in the pattern – maybe you’ll have to adjust 1, or even 2 needle sizes, up or down to achieve the correct tension. For this, we recommend that you work test swatches.

Should you work with a different knitting tension than the one provided, the measurements of the finished garment might deviate from the measurement sketch.

See DROPS lesson: How to measure your tension/gauge

See DROPS video: How to make a tension/gauge swatch

Working a garment top-down provides more flexibility and room for personal adjustment. For example it is easier to try the garment on while working, as well as making adjustments to length of yoke and shoulder caps.

The instructions are carefully explaining every step, in the correct order. Diagrams are adjusted to the knitting direction and are worked as usual.

The diagram depicts all rows/rounds, and every stitch seen from the right side. It is read from bottom to top, from right to left. 1 square = 1 stitch.

When working back and forth, every other row is worked from the right side and every other row is worked from the wrong side. When working from the wrong side, the diagram will have to be worked reversed: from left to right, knit stitches are purled, purl stitches are knit etc.

When working in the round every round is worked from the right side and the diagram are worked from right to left on all rounds.

See DROPS lesson: How to read knitting diagrams

The diagram depicts all rows/rounds, and every stitch seen from the right side. It is worked from bottom to top, from right to left.

When working back and forth every other row is worked from the right side: from right to left and every other row is worked from the wrong side: from left to right.

When working in the round, every row in the diagram are worked from the right side, from right to left.

When working a circular diagram you start in the middle and work your way outwards, counter clockwise, row by row.

The rows usually start with a given number of chain stitches (equivalent to the height of the following stitch), this will either be depicted in the diagram or explained in the pattern.

See DROPS lesson: How to read crochet diagrams

Instructions for working several diagrams after each other on the same row/round, will often be written like so: “work A.1, A.2, A.3 a total of 0-0-2-3-4 times". This means you work A.1 once, then A.2 is worked once, and A.3 is repeated (in width) the number of times provided for your size – in this case like so: S = 0 times, M = 0 times, L=2 times, XL= 3 times and XXL = 4 times.

The diagrams are worked as usual: begin with the first row in A.1, then work the first row in A.2 etc.

See DROPS lesson: How to read knitting diagrams

See DROPS lesson: How to read crochet diagrams

The total width of the garment (from wrist-to-wrist) will be larger in the larger sizes, despite the actual sleeves being shorter. The larger sizes have longer sleeve caps and wider shoulders, so there will be a good fit in all sizes.

The measurement sketch/schematic drawing provides information regarding the full length of the garment. If it’s a jumper or a jacket the length is measured from the highest point on the shoulder closest to the neckline, and straight down to the bottom of the garment. It is NOT measured from the tip of shoulder. Similarly, the length of yoke is measured from the highest point on the shoulder and down to where yoke is split into body and sleeves.

On a jacket measures are never taken along bands, unless specifically stated. Always measure inside band stitches when measuring the length.

See DROPS lesson: How to read a schematic drawing

Diagrams are often repeated on the round or in height. 1 repeat is the diagram the way it appears in the pattern. If it says to work 5 repeats of A.1 in the round, then you work A.1 a total of 5 times after/next to each other in the round. If it says to work 2 repeats of A.1 vertically/in height you work the entire diagram once, then begin again at the start and work the entire diagram one more time.

Chain stitches are slightly narrower than other stitches and to avoid working the cast-on edge too tight, we simply chain more stitches to begin with. The stitch count will be adjusted on the following row to fit the pattern and measurement sketch.

The rib edge is more elastic and will contract slightly compared to, for example, stocking stitch. By increasing before the rib edge, you avoid a visible difference in width between the rib edge and the rest of the body.

It’s very easy to cast off too tightly, and by making yarn overs while casting off (and simultaneously casting these off) you avoid a too tight cast off edge.

See DROPS video: How to bind off with yarn overs (yo)

To achieve an even increase (or decrease) you can increase on, for example: every 3rd and 4th row alternately, like so: work 2 rows and increase on the 3rd row, work 3 rows and increase on the 4th. Repeat this until the increase is complete.

See DROPS lesson: Increase or decrease 1 st on every 3rd and 4th row alternately

Should you prefer to work in the round instead of back and forth, you may of course adjust the pattern. You’ll need to add steeks mid-front (usually 5 stitches), and follow the instructions. When you would normally turn and work from the wrong side, simply work across the steek and continue in the round. At the end you’ll cut the piece open, pick up stitches to work bands, and cover the cut edges.

See DROPS video: How to knit steeks and cut open

Should you prefer to work back and forth instead of in the round, you may of course adjust the pattern so you work the pieces separately and then assemble them at the end. Divide the stitches for the body in 2, add 1 edge stitch in each side (for sewing) and work the front and back pieces separately.

See DROPS lesson: Can I adapt a pattern for circular needles into straight needles?

Pattern repeats can vary slightly in the different sizes, in order to get the correct proportions. If you’re not working the exact same size as the garment in the photo, yours might deviate slightly. This has been carefully developed and adjusted so that the complete impression of the garment is the same in all sizes.

Make sure to follow instructions and diagrams for your size!

If you have found a pattern you like which is available in women’s size it’s not very difficult to convert it to men’s size. The biggest difference will be the length of sleeves and body. Start working on the women size that you think would fit across the chest. The additional length will be worked right before you cast off for the armhole/sleeve cap. If the pattern is worked top-down you can add the length right after the armhole or before the first decrease on sleeve.

Regarding additional yarn amount, this will depend on how much length you add, but it is better with a skein too many than too few.

All yarns will have excess fibres (from production) that might come off as lint or shedding. Brushed yarns (ie hairier yarns) have more of these loose, excess fibres, causing more shedding.

Shedding also depends on what is worn under or over the garment, and whether this pulls at the yarn fibres. It’s therefore not possible to guarantee that there will be no shedding

Below are some tips on how to get the best result when working with hairier yarns:

1. When the garment is finished (before you wash it) shake it vigorously so the looser hairs come off. NOTE: do NOT use a lint roller, brush or any method that pulls at the yarn.

2. Place the garment in a plastic bag and put it in your freezer - the temperature will cause the fibres to become less attached to each other, and excess fibres will come off easier.

3. Leave in the freezer for a few hours before taking it out and shaking it again.

4. Wash the garment according to the instructions on the yarn label.

Pilling is a natural process that happens to even the most exclusive of fibers. It's a natural sign of wear and tear that is hard to avoid, and that is most visible in high friction areas of your garment like a sweater's arms and cuffs.

You can make your garment look as new by removing the pilling, using a fabric comb or a pill/lint remover.

Still can't find the answer you need? Then scroll down and leave your question so one of our experts can try to help you. This will be done normally within 5 to 10 working days.
In the meantime, you can read the questions and answers that others have left to this pattern or join the DROPS Workshop on Facebook to get help from fellow knitters/crocheters!

You might also like...

Post a comment to pattern DROPS Baby 21-32

We would love to hear what you have to say about this pattern!

If you want to leave a question, please make sure you select the correct category in the form below, to speed up the answering process. Required fields are marked *.

Comments / Questions (43)

country flag Madelaine wrote:

Strikke minste oppskrift, men det ser ut å bli på tok for smått med kun 49 m hals, og etter ökning 56. får kun 9 cm mellom to raglanfellinger frem överst og ikke 12. Har dere sjekket at det stemmer?

09.11.2018 - 00:30

Cecilia wrote:

Hola, estoy tejiendo el patrón y tengo una duda, cuando se cierra el círculo del tejido? o se teje con las agujas circulares con el tejido abierto? porque me señala derecho y reves del tejido, y en circular es siempre derecho. Gracias!

23.09.2018 - 16:21

DROPS Design answered:

Hola Cecilia. Este jersey primero se trabaja de ida y vuelta y después en redondo. Se trabaja siempre con agujas circulares. Cuando la pieza mida 8-9-9 (10-10) cm a partir de la orilla de montaje hay que tejer la pieza en redondo.

30.09.2018 - 18:39

country flag Victoria wrote:

Yoke says to k last stitch on first row but does that stitch always get knit on every row? Not sure why?

13.03.2018 - 23:16

DROPS Design answered:

Dear Victoria, that stitch is the edge stitch. The edge stitches on bot the beginning and at the end of the rows are always knitted (on each row). This gives a definite egde to the piece that is easy to handle, easy to pick up stitches or sewn together later on. Happy Knitting!

17.03.2018 - 13:25

country flag Liisa Kaarla wrote:

Hei, Jeg strikker ikke til vanlig og lurte på hvordan man finner ut antall masker man skal legge opp i denne oppskriften hvis man ikke ville strikke den som body men som genser?

27.07.2015 - 10:32

DROPS Design answered:

Hej Liisa, Du strikker opskriften ovenfra og ned, så det er bare at afslutte med en kant når du har den længde du vil have. God fornøjelse!

28.07.2015 - 13:50

country flag Ina wrote:

Jeg lurer også på det med antall masker i halsen. Jeg strikker str 12/18mnd. Det blir for trang for min gutt iallefall, kanskje kan jeg ta de 6 maskene som skal legges opp før en starter med glattstrikk med i ribbekanten?

08.11.2014 - 13:15

DROPS Design answered:

Hej Ina, da de første pinde strikkes frem og tilbage, samtidig som du tager ud og da du bagefter strikker yderligere en kant på, så skal halsen være stor nok. God fornøjelse!

25.11.2014 - 09:38

country flag Anikjl wrote:

Dommage qu on ne peut le faire avec les aiguilles normales!!!

15.10.2014 - 10:09

DROPS Design answered:

Bonjour Anikjl, vous pouvez recompter chaque pièce pour la tricoter en allers-retours, ou bien vous aider des différents tutoriels vidéo pour apprendre à tricoter en rond. Bon tricot!

15.10.2014 - 10:35

country flag Sanne wrote:

Kan det virkelig passe, at der kun skal være 47 masker rundt i halsen i str. 1-3 måneder? Synes den virker meget lille, har lige strikket en anden body i samme str., som har hele 80 masker i halsen.

13.10.2014 - 23:00

DROPS Design answered:

Hej Sanne, Det lyder som om det er for lidt... Vi skal se på den så kommer vi tilbage med en rettelse! Takf for information!

23.10.2014 - 10:42

country flag Morgane wrote:

There are not enough stitches on my sleeves to do complete repetitions of the charted pattern. How do I maintain the pattern in the sleeves?

26.09.2014 - 22:53

DROPS Design answered:

Dear Morgane, you are correct, maintain the pattern in the sleeves - nber of sts will not fit pattern because of dec. Happy knitting!

29.09.2014 - 09:18

Mary wrote:

Vorderteil: 3 Knopflöcher einstriceken!

24.09.2014 - 20:19

country flag Daniela wrote:

Eine Frage zur Öffnung im Schritt. Bleibt dieser offen? Wird zusammengenäht? Oder gehören - wie ich es eher vermute noch drei der 6 Knöpfe hier angenäht? Dann jedoch die Knopflöcher nicht vergessen...

24.09.2014 - 13:48

DROPS Design answered:

Liebe Daniela, Sie arbeiten 2 x 3 Knopflöcher ein, beschrieben unter "Vorderteil" (das ist dann die Öffnung unten) und "Öffnung am Rücken".

24.09.2014 - 23:38