
Popular categories
Looking for a yarn?


|
|
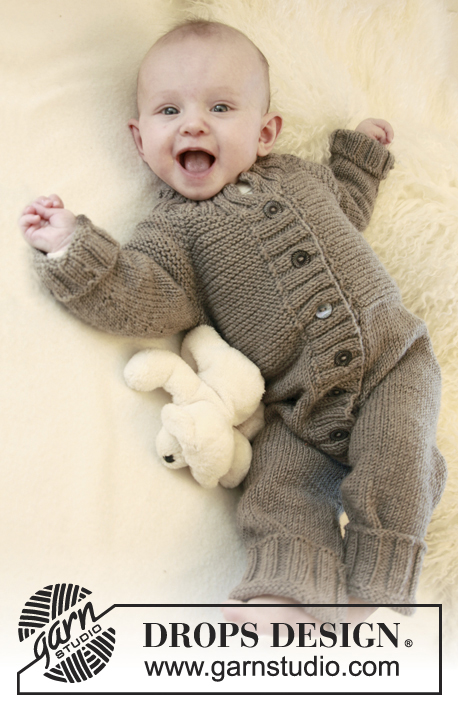
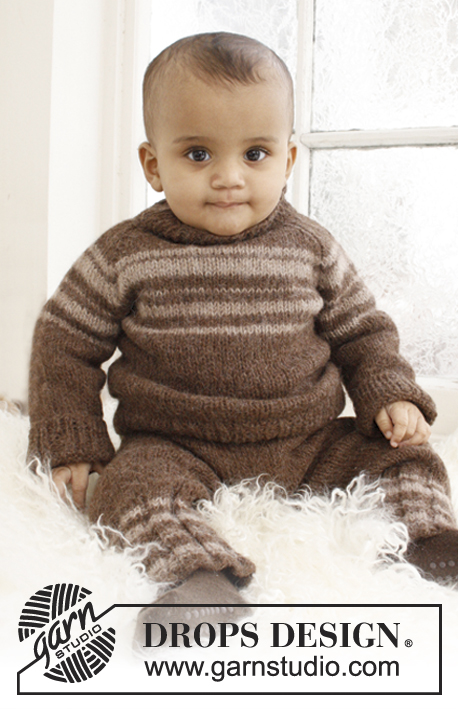
William |
|
|
|
|
Knitted jumper with raglan and stripes for baby and children in DROPS Lima
DROPS Baby 21-29 |
|
|
RIB: * K 1, P 1 *, repeat from *-*. STRIPES: 2 rounds light brown, 3 rounds brown, 3 rounds light brown, 2 rounds brown, 1 round light brown, 3 rounds brown, 4 rounds light brown, 1 round brown, 2 rounds light brown. DECREASE TIP FOR RAGLAN WITHOUT BUTTON BAND: K 2 tog, * Work until 3 sts remain before next marker, slip 1 st as if to K, K 1, psso, K 2, K 2 tog *, repeat from *-* at the next 2 markers, work until 4 sts remain on needle, slip 1 st as if to K, K 1, psso, K 2. DECREASE TIP FOR RAGLAN WITH BUTTON BAND: DEC AS FOLLOWS FROM RS: Work 4 band sts in garter st, K 2 tog, * Work until 3 sts remain before next marker, slip 1 st as if to K, K 1, psso, K 2, K 2 tog *, repeat from *-* at the next 2 markers, work until 6 sts remain on needle, slip 1 st as if to K, K 1, psso, work 4 band sts in garter st. DEC AS FOLLOWS FROM WS: Work 4 band sts in garter st, P 2 tog, * Work until 3 sts remain before next marker, P 2 twisted tog (i.e. work in back loop of st instead of front), P 2, P 2 tog *, repeat from *-* at the next 2 markers, work until 6 sts remain on needle, P 2 twisted tog, work 4 band sts in garter st. NOTE: Make sure that the sts lay in the correct direction from RS. GARTER ST (back and forth on needle): K all rows. BUTTON HOLES: Bind off for button holes on the raglan band which is on the sleeve part – assess if this is needed in the larger sizes. Make hole as follows: K 1, K 2 tog, 1 YO, K 1. Bind off for button holes when band measures: Size 1/3 months: 2, 5 and 8 cm / 3/4", 2" and 3 1/8'' Size 6/9 months: 3, 6 and 9 cm / 1 1/8", 2 3/8" and 3½'' Size 12/18 months: 3, 7 and 10 cm / 1 1/8", 2 3/4" and 4" Size 2 years: 3, 7 and 11 cm / 1 1/8", 2 3/4" and 4 3/8" Size 3/4 years: 4, 8 and 12 cm / 1½", 3 1/8" and 4¾'' -------------------------------------------------------- JUMPER: Worked in the round on circular needle from bottom up. BODY: Cast on 102-114-126 (138-150) sts on circular needle size 3.5 mm / US 4 with brown Lima. K1 round, then continue with RIB for 3 cm / 1 1/8'' - see explanation above. Switch to circular needle size 4.5 mm / US 7 and K 1 round. Work next round as follows: Insert a marker in the 1st st (= beg of round), K 50-56-62 (68-74) sts, insert a marker in next st (= mid in the side), K 50-56-62 (68-74) sts. Continue in stockinette st. When piece measures 14-15-18 (21-23) cm / 5½"-6"-7" (8 1/4"-9"), work STRIPES - see explanation above. AT THE SAME TIME when piece measures 16-17-20 (23-25) cm / 6¼''-6¾''-8'' (9''-9¾''), on next round bind off 5 sts in each side for armholes (= st with marker + 2 sts on each side of this) = 92-104-116 (128-140) sts. Put piece aside and knit the sleeves. SLEEVE: Cast on 30-30-36 (36-36) sts on double pointed needles size 3.5 mm / US 4 with brown Lima. K 1 round, continue with rib for 3 cm / 1 1/8''. Switch to double pointed needles size 4.5 mm / US 7, continue in stockinette st. Insert a marker in the 1st st on round, AT THE SAME TIME when piece measures 6 cm / 2 3/8'', inc 2 sts mid under sleeve on each side of marker, repeat inc on every 3-2-3 (2.5-2.5) cm / 1 1/8"-3/4"-1 1/8" (7/8"-7/8") a total of 4-6-5 (7-9) times = 38-42-46 (50-54) sts. When piece measures 15-17-18 (23-27) cm / 6"-6 3/4"-7" (9"-10 5/8") work STRIPES. When piece measures 17-19-20 (25-29) cm / 6 3/4"-7½"-8" (9 3/4"-11 3/8") (adjust so that same no stripes has been worked as on body), on next round bind off 5 sts mid under sleeve = 33-37-41 (45-49) sts. Put piece aside and knit another sleeve. YOKE: Slip sleeves on to same circular needle as body where armholes were bound off = 158-178-198 (218-238) sts. Insert a marker in every transition between body and sleeves. Then continue the piece with or without button holes – see explanation below. YOKE WITH BUTTONS: Then the piece is worked back and forth from right "raglan seam" at the front. Cast on 4 extra sts on the front piece part (= button band) = 162-182-202 (222-242) sts. Read all of the following section before continuing! Continue in stockinette st and with stripes as well as 4 sts in GARTER ST at beg and end of row (for button band). At the same time dec for raglan – see DECREASE TIP – dec on every other row: 11-11-12 (12-13) times and then on every row: 1-3-4 (6-7) times. NOTE: Also bind off for BUTTON HOLES - see explanation above. At the same time when piece measures 23-25-29 (32-35) cm / 9"-9 3/4"-11 3/8" (12½"-13 3/4"), slip the middle 13-13-13 (15-15) sts in the front on a stitch holder for neck and work each side separate. Continue to bind off towards the neck on every other row: 2 sts 1 time and 1 st 2-2-2 (3-3) times. After all dec for raglan and bind offs for neck, a total of 45-49-53 (53-57) sts remain on needle. YOKE WITHOUT BUTTONS: Then work in the round. Continue in stockinette st and with stripes. At the same time dec for raglan – see DECREASE TIP – dec on every other row: 11-11-12 (12-13) times and then on every row: 1-3-4 (6-7) times. At the same time when piece measures 23-25-29 (32-35) cm / 9"-9 3/4"-11 3/8" (12½"-13 3/4"), slip the middle 13-13-13 (15-15) sts on a stitch holder for neck and continue back and forth on needle. Continue to cast off towards the neck in beg of every row each side: 2 sts 1 time and 1 st 2-2-2 (3-3) times. After all dec for raglan and bind offs for neck, 41-45-49 (49-53) sts remain on needle. NECK: Work in the round for yoke without buttons and back and forth for yoke with buttons. Pick up approx. 23 to 27 sts at the front of neck (including sts on stitch holder) with brown = 68 to 84 sts. Slip all sts on double pointed needles size 3.5 mm / US 4 – work 1 round/row in stockinette st while at the same time dec/inc sts evenly to 64-76 sts. Work rib K 1/P 1 for 4 cm / 1½'', loosely bind off. ASSEMBLY: Sew tog the openings under the sleeves. If button band has been worked: Place button bands on top of each other with the button holes part at the top and fasten in the bottom edge from WS. Sew on buttons. |
|

|
|
|
Have you made this or any other of our designs? Tag your pictures in social media with #dropsdesign so we can see them! Do you need help with this pattern?You'll find tutorial videos, a Comments/Questions area and more by visiting the pattern on garnstudio.com. © 1982-2024 DROPS Design A/S. We reserve all rights. This document, including all its sub-sections, has copyrights. Read more about what you can do with our patterns at the bottom of each pattern on our site. |


With over 40 years in knitting and crochet design, DROPS Design offers one of the most extensive collections of free patterns on the internet - translated to 17 languages. As of today we count 304 catalogs and 11422 patterns - 11417 of which are translated into English (US/in).
We work hard to bring you the best knitting and crochet have to offer, inspiration and advice as well as great quality yarns at incredible prices! Would you like to use our patterns for other than personal use? You can read what you are allowed to do in the Copyright text at the bottom of all our patterns. Happy crafting!
Comments / Questions (31)
Ich stricke den Pullover mit der Passe mit Knöpfen. Zu den Maschen, die für den Halsausschnitt auf einen Hilfsfaden gelegt werden sollen, habe ich zwei Fragen: 1. Ist die Raglanabnahme dann schon vollständig abgeschlossen? 2. Von welchem Punkt stricke ich hin und zurück? Bislang war es die Öffnung zwischen rechtem Ärmel und Vorderteil. Jetzt habe ich eine zweite Öffnung auf beiden Seiten der Maschen auf dem Hilfsfaden. Das kann so nicht funktionieren, oder wo liegt mein Denkfehler? Danke.
12.01.2019 - 07:17DROPS Design answered:
Liebe Malika, wenn die Maschen für den Hals stillgelegt sind, sind alle Raglanabnahme noch nicht fertig, stricken Sie nur jedes Teil weiter (nach und vor Öffnung) mit Raglanabnahmen wie zuvor und dazu die für den Hals. Viel Spaß beim stricken!
14.01.2019 - 13:22Ich stricke den pullover in gr. 104. Muss ich nach insgesamt 23 cm mit den Streifen anfangen, oder 3cm Bündchen und ab da 23 cm?
08.01.2019 - 21:51DROPS Design answered:
Liebe Lisa, die 23 cm werden von der Anschlagskante gemessen. Viel Spaß beim stricken!
09.01.2019 - 08:46Hello. William without buttons 12/18 mths. I started working on the yoke with 198 st.I have dec12 times alternately =12x8 leaving 102 st, I dec 4 times on every row leaving 70 st. 13 st onto holder leaving 57. I do not understand how i continue and end up with 53 st. I am starting with brown at a raglan seam. Presumably I now work back and forth in knit and purl. Do I now stop decreasing at the raglan seams and dec either end? But dec 2 once and dec 1 twice = -8 which leaves 49. Please help Thx
19.12.2018 - 12:19DROPS Design answered:
Dear Mrs Ogden-Swift, 198 sts refer to the 3rd size, you dec for raglan 8 sts x 12 every 2nd round + 8 sts x 4 every round = 8 sts x 16 times in total = 128 sts are dec for raglan. You slip the middle 13 sts on front piece on a st holder for neck then continue back and forth binding off for neck on each side: 2 sts x 1 + 2 sts x 1 (= 4 sts on each side x 2 sides = 8 sts = 13 +8 = 21 sts for neck). 198 sts - 128 sts dec for raglan - 21 sts for neck = 49 sts remain after all decreases are done. Happy knitting!
19.12.2018 - 13:49Hallo, ich stricke den Pulli in der 92, ich verstehe aber leider nicht richtig, wie ich beim Vorder-und Hinterteil, sowie bei den Ärmeln abnehmen muss. In der Anleitung steht, ich soll 5M. abnehmen. Muss ich 5M in einer Runde an der gleichen stelle abnehmen oder je eine Masche in 5 Runden? Danke für die Hilfe, Lea
11.12.2018 - 14:39DROPS Design answered:
Liebe Lea, die 5 Maschen für den Armlöcher sollen abgekettet werden, nicht abgenommen - dann legen Sie alle Maschen zur selben Rundnadel (siehe Video) um die Passe weiterzustricken. Viel Spaß beim stricken!
11.12.2018 - 15:05Selam wrote:
Hi Im working on tge biggest size with out bottons. Do I put on hold 15 sts on the front and back for the necj when piece measures 35cm?30 sts in total) Does that mean after that i work back and forth?
24.04.2016 - 16:02DROPS Design answered:
Dear Selam, you have to put only the 15 middle sts on a stitch holder (on the front), and continue to work back and forth on the remaining sts. Happy knitting!
24.04.2016 - 17:33Sofia B wrote:
Hej. Jag har precis som Vibeke problem när det kommer till att lägga upp 15m på tråd mittfram? Hur gårjag vidare efter detta? Förstår inte alls var man ska minska maskantal efter detta och hur man gör. Tacksam för svar.
02.01.2015 - 21:59DROPS Design answered:
Hej Sofia, du har m på stickan bak, plockar upp m på ena sidan halsen fram, m från tråden fram och plockar upp m på andra sidan fram. Lycka till !
04.02.2015 - 15:10Hallo, ich habe Probleme bei den Abnahmen. "...auf einen Hilfsfaden legen. Weiter bei jeder 2. R. gegen den Hals abk.: 1 Mal 2 M. und 2-2-2 (3-3) Mal 1 M. " Ich verstehe nicht was gegen den Hals abketten bedeutet? Und was passiert bei den stillgelegten Maschen - läuft der Faden hier einfach über die komplette Länge mit? Das würde aber dazu führen, dass innen vorne über mehrere Reihen ein langer Faden läuft - kann das sein? Vielen Dank!
22.11.2014 - 11:22DROPS Design answered:
Sie legen die mittleren M des Vorderteils für den Halsausschnitt auf einen Hilfsfaden, dann stricken Sie in Hin- und Rück-R weiter. Dabei ketten Sie nun zu Beginn jeder R (d.h. an der einen Seite zu Beginn jeder Hin-R, an der anderen Seite zu Beginn jeder Rück-R), d.h. an beiden Seiten des Halsausschnitts, die entsprechende Anzahl M ab (das soll "gegen den Hals" bedeuten). Da Sie ja in Hin- und Rück-R stricken, läuft der Faden nicht mit.
03.12.2014 - 08:53Hej - kunne man ikke overtale jer til at lave opskriften på denne trøje, så den også dækker til lidt større børn? jeg ville meget gerne strikke den til både min dreng på 4 et halvt og min datter på snart 8. Den ser skøn ud! vh Christina
12.11.2014 - 09:38DROPS Design answered:
Hej Christina. Vi skal notere det, men der er ikke planer om en ny börnekollektion paa kort sigt. Maaske kan du bruge één af de eksisterende börnemönstre og tilpasse og tilföje striberne fra denne?
12.11.2014 - 11:39Hei! Strikker modellen med knappestolpe. Har kommet dit en setter de 13 midterste m på en tråd til halsmasker (jeg strikker strl 1-3mnd). Skal jeg sette 13 m foran og 13 bak på hver sin tråd, eller bare foran?Hvordan strikker jeg videre? Har strikket alle maskene frem og tilbake på rundp. Det går vel ikke når noen masker i midten er på tråd? Må jeg strikke delene på hver side av disse m ferdig hver for seg? Har to fellinger igjen på raglan og må samtidig felle mot hals.
20.10.2014 - 10:59DROPS Design answered:
Hej Vibeke, Ja du sætter 13 m på en tråd foran og så må du strikke stykkerne færdig hver for sig, både med raglanindtagninger og indtagningerne mod halsen. God fornøjelse!
28.10.2014 - 09:19Bonjour, les explications du raglan sans boutons ne sont VRAIMENT pas claires... J'ai pourtant fait pas mal de raglans... Dois-je faire ça?(voir DIMINUTIONS RAGLAN ci-dessus – , diminuer 11-11-12 (12-13) fois tous les 2 rangs et 1-3-4 (6-7) fois tous les rang.) Et continuer jusqu'à ce qu'il reste 4 m, glisser 1 m à l'end, 1 m end, passer la m glissée par-dessus la m tricotée, 2 m end.): continuer jusqu'à ce qu'il reste 4 m : Je ne comprends pas. Merci!
21.07.2014 - 13:12DROPS Design answered:
Bonjour Mme Brandt, pour la version boutonnée, vous continuez en jersey comme avant avec les 4 m point mousse de chaque côté (et les rayures) et diminuez pour le raglan comme indiqué sous "diminutions raglan avec bordure de boutonnage", tous les 2 rangs puis tous les rangs (cf taille): on diminue (sur l'endroit): 1 m après les 4 m, puis 2 m à chaque marqueur (1 dim, 2 m, 1 dim) puis avant les 4 m. Bon tricot!
21.07.2014 - 13:22