
Popular categories
Looking for a yarn?


|
|
Happy Days |
|
 |
 |
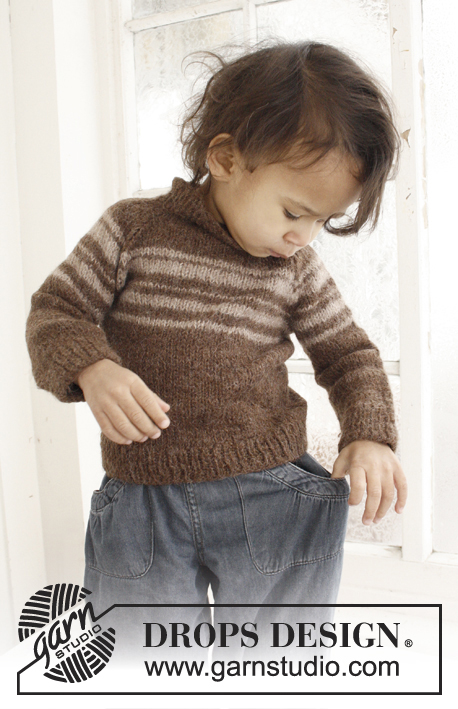
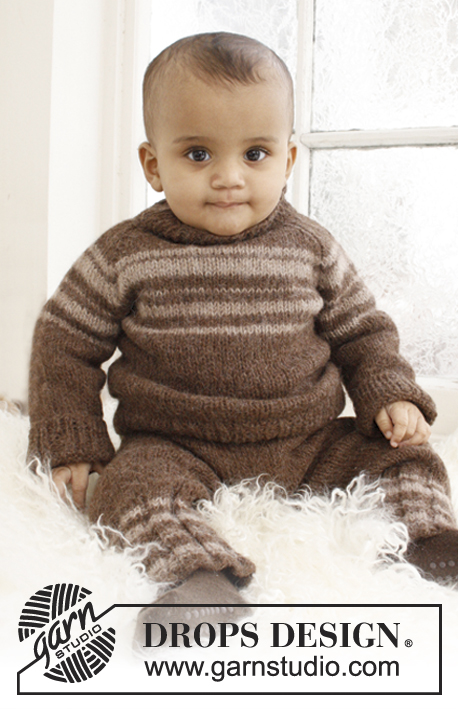
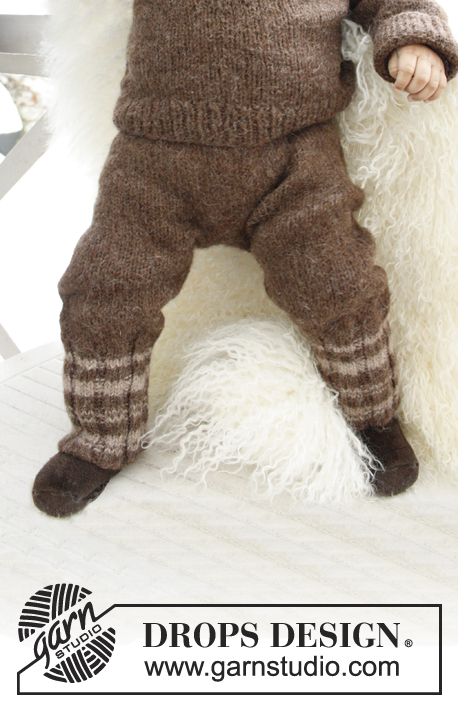
Knitted jumpsuit with raglan for baby and children in DROPS Merino Extra Fine
DROPS Baby 21-23 |
|
|
GARTER ST (back and forth on needle): K all rows. DECREASE TIP: All dec are done from RS. Dec as follows before marker: K 2 tog. Dec as follows after marker: Slip 1 st as if to K, K 1, psso. ------------------------------------------------------- LEG: Worked in the round on double pointed needles. Cast on 48-54-60 (66-72) sts on double pointed needles size 3.5 mm / US 4 with Merino Extra Fine. Insert a marker at beg of round = inside of leg. K 1 round, then work rib K 3/P 3. Work rib for 4-4-4 (5-5) cm / 1½"-1½"-1½" (2"-2"). K 1 round while dec 6 sts evenly = 42-48-54 (60-66) sts. Switch to double pointed needles size 4.5 mm / US 7. P 1 round, then work in stockinette st. When piece measures 6-6-6 (7-7) cm / 2⅜"-2⅜"-2⅜" (2¾"-2¾"), inc 1 st on each side of marker, repeat inc every 3-4-5 (5-7) cm / 1⅛"-1½"-2" (2"-2¾") a total of 4 times = 50-56-62 (68-74) sts. When piece measures 16-20-23 (25-32) cm / 6¼"-8"-9" (9¾"-12½"), divide at inside of leg and finish the piece back and forth on needle (to make it easier to slip the legs on the same circular needle). Cast on 1 edge st in each side = 52-58-64 (70-76) sts. When piece measures 18-22-25 (29-34) cm / 7"-8¾"-9¾" (11⅜"-13⅜"), dec 1 edge st in each side. Put piece aside and knit another leg the same way. SUIT: Slip both legs on the same circular needle size 4.5 mm / US 7 = 100-112-124 (136-148) sts. Continue to work back and forth from mid front as follows (1st row = RS): bind off 4 sts, K the rest of row. Turn piece, bind off 4 sts and P the rest of row = 92-104-116 (128-140) sts. Continue in stockinette st back and forth over all sts. When piece measures 27-35-43 (43-50) cm / 10⅝"-13¾"-17" (17"-19¾"), work in garter st until finished measurements - see explanation above. When piece measures 37-45-53 (58-65) cm / 14½"-17¾"-21" (22¾"-25½"), work next row (from RS) as follows: Work 17-20-23 (26-29) sts in stockinette st (= right front piece), bind off 8 sts for armhole, work 42-48-54 (60-66) sts in stockinette st (= back piece), bind off 8 sts for armhole, work 17-20-23 (26-29) sts in stockinette st (= left front piece). Put piece aside and knit the sleeves. SLEEVE: Worked in the round on double pointed needles. Cast on 36-42-42 (48-48) sts on double pointed needles size 3.5 mm / US 4 with Merino Extra Fine. K 1 round, continue in rib = K 3/P 3. When piece measures 3 cm / 1⅛", K 1 round while AT THE SAME TIME dec 6-10-8 (12-10) sts evenly = 30-32-34 (36-38) sts. Switch to double pointed needles size 4.5 mm / US 7 and P 1 round. Insert a marker at beg of round = mid under sleeve. Then work in stockinette st. AT THE SAME TIME when piece measures 5 cm / 2", inc 1 st on each side of marker mid under sleeve, repeat inc on every 5th-5th-6th (6th-6th) round a total of 6-6-7 (8-9) times = 42-44-48 (52-56) sts. When piece measures 17-18-21 (24-28) cm / 6¾"-7"-8¼" (9½"-11"), bind off 8 sts mid under sleeve (i.e. Bind off 4 sts on each side of marker) = 34-36-40 (44-48) sts. Put piece aside and knit another sleeve. YOKE: Slip sleeves on to same circular needle as body where armholes were bind off = 144-160-180 (200-220) sts. Insert a marker in all transitions between sleeves and body = 4 markers. Work in garter st back and forth over all sts. AT THE SAME TIME on 3rd row, dec 1 st on each side of all markers for raglan - Read DECREASE TIP! Repeat dec every other row (every row from RS) a total of 10-11-12 (13-15) times. AT THE SAME TIME when dec for raglan has been done 7-6-6 (6-7) times, bind off for neck at beg of every row in each side: 2 sts 3-3-4 (5-5) times and then 1 st 0-2-2 (2-3) times. After all dec for raglan and bind offs for neck, 52-56-64 (72-74) sts remain on the needle and piece measures approx. 45-53-62 (68-77) cm / 17¾"-21"-24⅜" (26¾"-30⅜") up to shoulder. Bind off all sts. BAND: Knit up 63-75-91 (95-103) sts along right front piece from bottom up to neck on circular needle size 3.5 mm / US 4 with Merino Extra Fine. K 1 row from WS and K 1 row from RS. Then work rib as follows (from WS): 1 st in garter st, * P 2, K 2 *, repeat from *-* and finish with P 2. When rib measures 2 cm / ¾", bind off for button holes on next row from RS as follows: Rib over the first 10-10-2 (6-2) sts, * P 2 tog, 1 YO, 10 sts in rib * repeat from *-* a total of 4-5-7 (7-8) times, finish with P 2 tog, 1 YO, K 2, 1 st in garter st. Continue with rib until band measures 4 cm / 1½", bind off with K over K and P over P. Repeat on the left side but without button holes. NECK EDGE: Knit up approx. 80 to 120 sts (divisible by 4 sts) around the neck on double pointed needles size 3.5 mm / US 4. Work as follows: 1 st in garter st, then rib K 2/P 2 until 1 st remains on needle – work 1 st in garter st. Repeat for 3 cm / 1⅛". Bind off. ASSEMBLY: Sew opening under the sleeves and sew seam on inside of legs inside 1 edge st. Sew left band to where 8 sts were bound off mid front. Sew the buttons on to the left front band. |
|

|
|
|
Have you made this or any other of our designs? Tag your pictures in social media with #dropsdesign so we can see them! Do you need help with this pattern?You'll find tutorial videos, a Comments/Questions area and more by visiting the pattern on garnstudio.com. © 1982-2024 DROPS Design A/S. We reserve all rights. This document, including all its sub-sections, has copyrights. Read more about what you can do with our patterns at the bottom of each pattern on our site. |
|


With over 40 years in knitting and crochet design, DROPS Design offers one of the most extensive collections of free patterns on the internet - translated to 17 languages. As of today we count 304 catalogs and 11422 patterns - 11417 of which are translated into English (US/in).
We work hard to bring you the best knitting and crochet have to offer, inspiration and advice as well as great quality yarns at incredible prices! Would you like to use our patterns for other than personal use? You can read what you are allowed to do in the Copyright text at the bottom of all our patterns. Happy crafting!
Comments / Questions (30)
When doing the increases on the leg of the 'Happy Days Suit' what kind of increase do you suggest? I started with yarn over but two yarn overs in a row leaves a large hole. This brings me to my next question, do the increases go directly before and after the marker? This means they should be right beside each other right? Thanks so much for your help!
06.10.2014 - 19:05DROPS Design answered:
Dear Erin, when you inc 1 st each side of marker you can use the increase shown in video below, so that you won't have any hole. Happy knitting!
07.10.2014 - 09:18Nach 16-20-23 (25-32) cm die Hallo, können sie mir bitte an dieser Stelle weiterhelfen? Ich verstehe den folgenden Satz nicht richtig. "Arbeit bei der Markierung teilen und hin und zurück weiterstricken (damit das Zusammensetzen der Beine leichter ist)" Nehme ich die Maschen auf eine Rundnadel und stricke dann hin und zurück, so dass ich quasi eine "Öffnung" habe? Vielen Dank im Voraus für eine Antwort auf meine erste Frage zu diesem Strampler...
26.08.2014 - 00:37DROPS Design answered:
Ja genau, Sie stricken die Rd bis zur Markierung, dann wenden Sie und stricken eine Rück-R, dann weiter hin- und zurück. Damit ergibt sich quasi ein "Schlitz", der später zusammengenäht wird. Dies erfolgt, damit die Maschen später nicht zur sehr spannen, wenn der Rumpf gestrickt wird, was passieren würde, wenn man die Beine bis zum Ende rund stricken würde.
30.08.2014 - 13:23Bonjour, dans l'explication française - "jambes" : est-ce qu'il faut répéter les augmentations tous les (...) cm ou les rangs? Si ce sont les cm, ça veut dire qu'on augmente même après la division? Merci
11.06.2014 - 21:24DROPS Design answered:
Bonjour Ludmila, les augmentations des jambes commencent à 6 cm de hauteur totale et se répètent 4 fois au total tous les 3-7 cm (cf taille), toutes les augmentations sont terminées quand on divise l'ouvrage, ex dans la 1ère taille on augmente à 6, 9, 12 et 15 cm et on divise l'ouvrage à 16 cm. Bon tricot!
12.06.2014 - 08:48Peut on remplacer les aiguilles doubles pointes par je aiguilles circulaires? Merci
06.05.2014 - 08:42DROPS Design answered:
Bonjour Maryse, tout à fait, vous pouvez tricotez avec la technique du magic loop si nécessaire (cf vidéo ci-dessous). Bon tricot!
06.05.2014 - 09:17Elika wrote:
Väike viga kehaosa kudumise lõpupoole. Ripskoes tuleb kududa viimaste mõõtudeni mitte 5.5cm. Loe ing k tõlget until finished measurements
07.03.2014 - 19:17Hej igen, ingen af grunde nævnte passer. Nu har jeg tørretumblet den i 1,5 timer og den har den rigtige størrelse. Det står for resten intet om anbefalinger til vask på garnets nøgle. Hvor kan jeg ser dem? Hilsner
28.12.2013 - 18:49DROPS Design answered:
Hej Anna. Det hjælper absolut ikke at smide i tørretumbler! Vaskeanvisninger står på indersiden af banderolen til garnet. Læs også det link jeg postede i mit sidste svar til dig vedr. vaskeanvisninger generelt. Ellers må du kontakte din DROPS butik for videre hjælp og vurdering, ved klager og eventuelle ombytninger kan de hjælpe dig videre.
29.12.2013 - 10:01Jeg har lige vasket den dragt i hånden, den blev kæmpe stor, passer til det 6-årige barn. Hvad er det galt med garnet? Er utrolig ked af det:(
28.12.2013 - 15:53DROPS Design answered:
Hej Anne. Det er meget ærgeligt. Der kan være flere grunde til at din dragt er blevet større: strikkefasthed (er den blevet strikket for løst), har den ligget for længe i blød eller indeholdt dit vaskemiddel blødgørende ingredienter (skyllemiddel). Du kan også se mere her vedrørende vaskeanvisninger på garn generelt.
28.12.2013 - 17:48Hei, Lahkeen ohjeen lopussa kerrotaan näin: Luo kumpaankin reunaan 1 reunas = 52-58-64 (70-76) s. Kun työn pituus on 18-22-25 (29-34) cm, päätä kummankin reunan reunas. Siis mitä tarkoittaa "reunaan 1 reunas" ja päätä kummankin "reunan reunas"?
01.10.2013 - 21:16DROPS Design answered:
Reunasilmukka on työn ulkoreunassa oleva silmukka, josta sauma myöhemmin ommellaan. Voit neuloa reunasilmukoilla ainaoikeaa tai sileää neuletta, mielesi mukaan.
02.10.2013 - 12:07Jeg strikket denne, men med hette. Den ble utrolig fin, og garnet er helt fantastisk å strikke med!
02.01.2013 - 19:31Ohjeen viimeistelyssä puhutaan hupun kiinnittämisestä. Tässä mallissa ei ole huppua. Ohje on: --Happy Days. Neulottu DROPS housupuku Merino Extra fine-langasta
18.11.2012 - 16:41