
Popular categories
Looking for a yarn?


|
|
Winter Jolly |
|
|
|
|
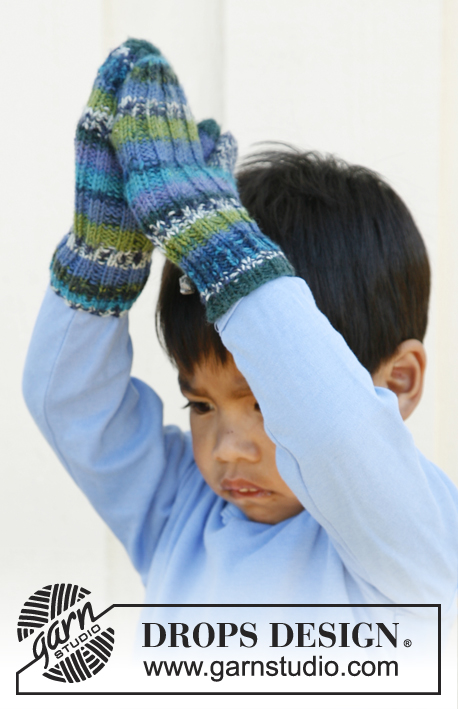
Knitted balaclava hat in DROPS Delight, with pompom. Size children 3 to 12 years.
DROPS Children 22-38 |
|
|
DECREASE TIP: Work until 2 sts remain before marker, K 2 tog (marker), slip 1 st as if to K, K 1, psso. HAT: Work from bottom up. Cast on 324-348-372 sts on circular needle size 2.5 mm / US 1or2 (60 cm / 24") with Delight. Work 4 rounds in rib = K 2/P 2. Work next round as follows: * K 2, P 2, P 2 tog, P 2, P 2 tog, P 2 *, repeat from *-* the entire round = 270-290-310 sts. Continue with * K 2, P 8 *, and at the same time on 3rd-4th-5th round, dec 1 st in every P-section by P the last 2 P sts tog, repeat dec every 3rd-4th-5th round until only 2 P sts remain in every P-section – NOTE: Dec alternately at the beg and end of every P-section (switch to a shorter circular needle when there are too few sts for the long one) = 108-116-124 sts. Piece measures approx. 7-8-10 cm / 2¾"-3⅛"-4". Work K 2/P 2 for 3-4-5 cm / 1⅛"-1½"-2". On next round, inc all 2 P sts to 3 P sts = 135-145-155 sts. Work 2 rounds with K 2/P 3. On next round, bind off the first 12 sts for opening for face. NOW MEASURE PIECE FROM HERE! Then work back and forth on circular needle until finished measurements. AT THE SAME TIME bind off 1 st at beg of every row 7 times in each side = 109-119-129 sts remain on needle. Continue rib with 1 st in garter st in each side for approx. 16-18-20 cm / 6¼"-7"-8" (from where the first 12 sts were bound off), finish after 1 row from WS. Continue with upper piece. UPPER PIECE: Work 1 row in rib as before (from RS) and cast on 37 new sts at the end of row = 146-156-166 sts. Work 1 round over all sts as follows: P 1, * K 2, P 3 *, repeat from *-* until 3 sts remain before the new sts, K 2, P 1, then work the new sts as follows: * K 2, P 3 *, repeat from *-*, and finish with K the last 2 sts (i.e. the rib does not work out in the transitions between upper piece and the rest of the cowl, this will not be visible because of dec). Now work back and forth over the new sts while at the same time dec sts from each side, i.e. work as follows: Turn piece, * work back from WS until 1 st remains of the new sts, then P 2 tog. Turn piece, slip first as if to K, work until 1 st remains of the new sts, slip this st as if to K, K 1 and psso. Turn piece, slip first st as if to P *, repeat from *-* until 38-43-48 sts have been dec in each side. 70 sts now remain on needle and the rib works out the entire round in K 2/P 3. Continue with the tail. TAIL: Now continue in the round on double pointed needle over all sts – insert a marker in the middle of the 2 K sts at the beg and end of upper piece. When 3-3-4 rounds have been worked, dec 1 st on each side of both markers – SEE DECREASE TIP, repeat dec every 4th-4th-5th round a total of 15 times = 10 sts remain on needle. Cut the yarn and pull it through the remaining sts, tighten tog and fasten. Tail measures approx. 17-17-21 cm / 6¾"-6¾"-8¼". EDGE AROUND FACE: Pick up 130-140-150 sts on a short circular needle size 2.5 mm / US 1or2 inside 1 edge st around the face opening – NOTE: Along the upper piece knit up 2 sts over the 2 K sts and 2 sts over the 3 P sts. Then work rib = K 2/P 2 (make sure that K and P sts match on top of each other at the top of upper piece) for approx. 5-6-7 cm / 2"-2⅜"-2¾". Bind off with K over K and P over P. Fold the rib double towards WS and sew to the pick up-edge. POMPOM: Make a dense pompom with a diameter of approx 4-5 cm / 1½"-2" and fasten at the tip of the tail. |
|
|
Have you made this or any other of our designs? Tag your pictures in social media with #dropsdesign so we can see them! Do you need help with this pattern?You'll find tutorial videos, a Comments/Questions area and more by visiting the pattern on garnstudio.com. © 1982-2024 DROPS Design A/S. We reserve all rights. This document, including all its sub-sections, has copyrights. Read more about what you can do with our patterns at the bottom of each pattern on our site. |


With over 40 years in knitting and crochet design, DROPS Design offers one of the most extensive collections of free patterns on the internet - translated to 17 languages. As of today we count 304 catalogs and 11422 patterns - 11417 of which are translated into English (US/in).
We work hard to bring you the best knitting and crochet have to offer, inspiration and advice as well as great quality yarns at incredible prices! Would you like to use our patterns for other than personal use? You can read what you are allowed to do in the Copyright text at the bottom of all our patterns. Happy crafting!
Comments / Questions (48)
Hallo ich bin ein wenig verwirrt, was die Größenangabe und die zu wählende Größe betrifft. Meine Kind ist 2,5 Jahre und hat ca 52 cm Kopfumfang (gesamt). Die Größe 51/53 empfehlen Sie für 6-9 Jährige. Sind ihre Umfang-Angaben bezüglich Gesamt-Kopf-Umfang oder ohne die Aussparung für das Gesicht? Vielen Dank!
12.08.2016 - 22:38DROPS Design answered:
Liebe Anja, die Mütze ist sehr dehnbar, Sie können gut die Grösse 3-5 stricken.
17.08.2016 - 14:12Ik zit aan het bovendeel, maar ik brei al gans de tijd met gewone naalden, dat gaat niet zeker, aangezien ik langs beide kanten bij de nieuwe steken moet kunnen minderen, en met gewone naalden kan ik er niet aan é langs beide kanten .mag ik nu nog overzetten op rondbreinaalden ,? Hartelijk dank
25.03.2016 - 00:12DROPS Design answered:
Hoi Gina. Als het voor jou beter uitkomt en prettiger voelt, dan mag je altijd op een andere naald breien.
07.04.2016 - 16:10Je eindigt de kraag met 2 steken rechts, 3 steken averechts, en dan moet je voortdoen na het afzetten van de 12 steken voor aangezicht, met boordsteek, maar boordsteek is toch 2 rechts, 2 averechts? dat klopt dan toch niet meer ?
23.03.2016 - 23:56DROPS Design answered:
Hoi Gina. Je had de 2 av gemeerderd naar 3 av, dus je breit ook zo door na het afkanten van de 12 st.
24.03.2016 - 14:35Non capisco le diminuzioni sopra la testa! ho 37m nuove e devo diminuirne 36(ne deve rimanere 1sola), poi altre 38 ad ogni lato, quindi 76..In totale ne rimangono 34. ed anche se ne diminuisco solo 38 ne rimangono 72 non 70.Dove sbaglio??
26.12.2015 - 23:47DROPS Design answered:
Buonasera Lelletta. Lavora avanti e indietro, a coste, sulle 37 m avviate. Al primo ferro, sul rov, lavora l’ultima di queste m insieme a rov con la m successiva; al ferro successivo, passa l’ultima di queste m a dir, lavora la m successiva a dir, accavalla la m passata. In questo modo unisce la parte superiore della testa ai lati della testa. Ripete queste diminuzioni 38 volte per parte, quindi finché non rimangono 70 m, che sono le m della punta. Buon lavoro!
29.12.2015 - 20:32Danke für Ihre Antwort. Ich hatte die Anteilung nicht sorgfältig gelesen und bin schon selbst darauf gekommen.
22.12.2015 - 18:34In Anleitung steht:...Gleichzeitig bei jeder 3.-4-5. Runde .... zusammenstricken = 108 Maschen. Die Arbeit mißt 7 cm. Ich habe zwei Reihen gestrickt wie die Maschen erscheinen, dann 3 Reihen (3., 4. und 5. Reihe) die Abnahmen gestrickt. Wann mißt die Arbeit 7 cm? Nach dem Abnehmen mißt sie bei mir ca. 3 cm. Soll sie 7 cm messen, nachdem noch die danach angegeben 3 cm 2 re, 2 li wurden. Ich finde es nicht ganz verständlich beschrieben. Für eine Erklärung bedanke ich mich herzlich.
18.12.2015 - 15:21DROPS Design answered:
Die Angabe 3.-4.-5. Rd bezieht sich auf die unterschiedlichen Größen. D.h. in der kleinsten Größe nehmen Sie in jeder 3. Rd ab, in der mittleren Größe in jeder 4. Rd und in der größten Größe in jeder 5. Rd. Wenn Sie die Abnahmen alle gemacht haben, müssten Sie ca. bei den cm angelangt sein, die für Ihre Größe gelten. 7 cm gilt für die kleinste Größe, 8 cm für die mittlere und 10 cm für die größte.
22.12.2015 - 09:39Sto lavorando la parte sopra la testa, ma nel primo giro in tondo,se seguo la vostra sequenza si sfalsano le coste! Infatti, io dovrei iniziare con 1 m rov. *3 m rov 2m dir*.Come devo comportarmi? Inoltre non comprendo la frase che vi trascrivo qui : "(questo vuol dire che le coste non seguono la transizione tra la parte sopra la testa ed il resto del cappuccio". Vi saluto ringraziandoVi per la Vostra solita disponibilità
23.11.2015 - 19:49DROPS Design answered:
Buongiorno Lelletta. Deve continuare a lavorare le coste come impostate. La frase che non le è chiara fa riferimento alle ultime 3 m prima di lavorare le m avviate: in questo punto non c’è regolarità nelle coste, non avrà quindi la sequenza 2 dir, 3 rov, 2 dir. Ma questo non risulterà evidente proseguendo con le diminuzioni da lavorare subito dopo. Buon lavoro!
24.11.2015 - 15:39Buonasera! sto lavorando la parte sopra la testa, ma a me il primo giro in tondo inizia con 1m. dir. *3 m rov. 2 dir.*. Il numero delle maglie è giusto (109). Se procedo con la Vs spiegazione si sfalsano le coste! Continuo come mi vengono le maglie? Inoltre, non riesco a comprendere la vostra frase che riporto: "questo vuol dire che le coste non seguono la transizione tra la parte sopra la testa ed il resto del cappuccio ". SalutandoVi, Vi ringrazio molto per la Vostra solita disponibilità!
23.11.2015 - 19:02DROPS Design answered:
Buongiorno Lelletta. Deve continuare a lavorare le coste come impostate. La frase che non le è chiara fa riferimento alle ultime 3 m prima di lavorare le m avviate: in questo punto non c’è regolarità nelle coste, non avrà quindi la sequenza 2 dir, 3 rov, 2 dir. Ma questo non risulterà evidente proseguendo con le diminuzioni da lavorare subito dopo. Buon lavoro!
24.11.2015 - 15:39Buonasera! Avrei deciso di confezionare questo grazioso cappellino, ma guardando la foto sembra che il bordo intorno al viso, come pure il pompon abbiano due colori, mentre voi indicate come materiale solamente DROPS DELIGHT colore 03 blu. E' un errore o una esposizione errata dell'immagine? Vi ringrazio per la risposta e Vi saluto cordialmente!
30.10.2015 - 20:51DROPS Design answered:
Buonasera Lelletta, sono le sfumature del delight 03 che creano quei colori: a causa delle diverse sfumature dei gomitoli, il cappello potrebbe risultare un pò diverso da quello della foto. Buon lavoro!
30.10.2015 - 21:38Bonjour, Je suis rendue à faire la pointe mais je suis complètement bloquée. J'ai beau relire les explications, je ne comprends pas où il faut placer les marqueurs. Que voulez-vous dire pas "dans" les deux mailles centrales? Entre? L'idéal serait une figure pour m'aider à comprendre...Merci.
26.10.2015 - 13:30DROPS Design answered:
Bonjour Véronique, on place un marqueur entre les 2 m end du début et de la fin du dessus de la tête (les 70 m) et diminuez tous les 4-5 tours (cf taille) comme indiqué sous "diminutions" au tout début des explications. on va ainsi diminuer 4 m à chaque tour de diminutions jusqu'à ce qu'il reste 10 m. Bon tricot!
27.10.2015 - 14:07