
Popular categories
Looking for a yarn?


|
|
Wild Flower |
|
 |
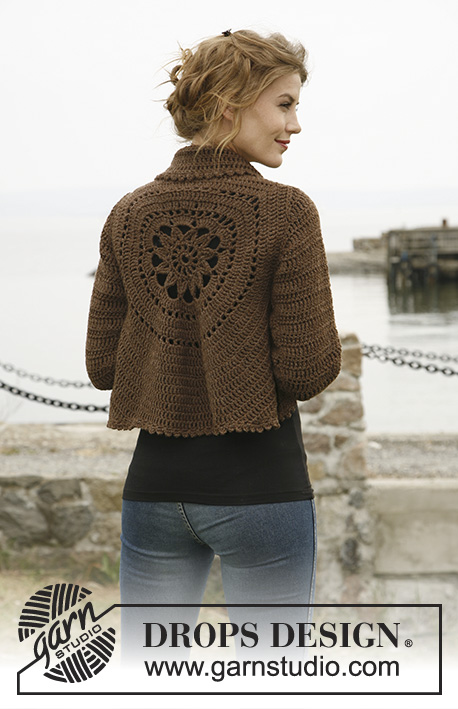 |
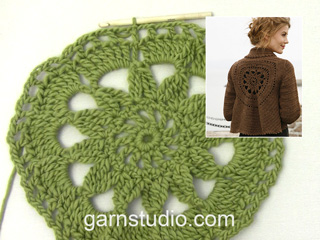
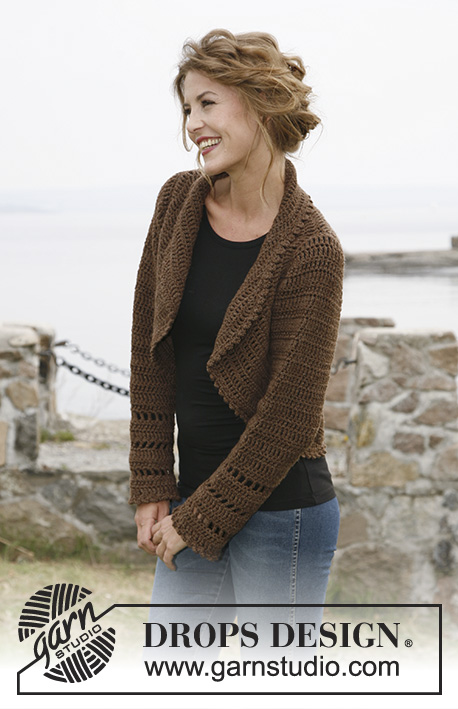
Crochet DROPS jacket worked in a circle in ”Nepal”. Size: S to XXXL
DROPS 132-2 |
|
|
CROCHET TIP: Replace first tr on every round/row with ch 4. DECREASE TIP 1 (applies to the body): Dec as follows: Work tr until 3 tr remain, * in the first of these work 1 dc, in the next 1 hdc and in the last 1 sc, turn with ch 1, skip sc, work 1 sl st in hdc and 1 sl st in dc, then 1 sc in first tr, 1 hdc in next tr and 1 dc in next tr, work tr until 3 tr remain at end of row *, repeat from *-* until a total of 6-8-12 rows have been worked. DECREASE TIP 2 (applies to sleeve cap): Dec at beg of row by working sl st over the no of tr to be dec. Dec at end of row by working until same no of sts to be dec remains, turn piece. -------------------------------------------------------- -------------------------------------------------------- BODY: Worked in the round in a circle from mid back. Ch 8 on hook size 5 mm / H/8 with Nepal and form a ring with 1 sl st in first ch. ROUND 1: Work 12 sc in ch-ring, finish with 1 sl st in first sc. ROUND 2: ch 5 (= 1 dc + 2 ch), * 1 dc in next sc, ch 2 *, repeat from *-* the entire round and finish with 1 sl st in 3rd ch from beg of round = 12 dc with 2 ch between each. ROUND 3: 1 ch, continue to crochet as follows in every ch-space the entire round: 1 sc + ch 1 + 1 sc + ch 1, finish round with 1 sl st in first ch = 24 sc with 1 ch between each. ROUND 4: 1 sl st in first sc, 1 sl st in first ch, ch 5, 1 dtr in same ch, * ch 7, then work 4 dtr tog as follows: Work 2 dtr in same ch as last dtr but wait with last YO and pull through on both dtr, skip 1 sc + 1 ch + 1 sc, work 1 dtr in next ch but wait with last YO and pull through, then work last dtr in same ch and pull last YO through all 5 sts on hook *, repeat from *-* a total of 11 times, ch 7, work 2 dtr tog in same ch (but wait with last YO and pull through on both), work 1 sl st in 5th ch from beg of round and pull thread through all 3 sts on hook. ROUND 5: 1 sl st in first ch-space, ch 4 (= 1 tr), 7 tr in same ch-space, then work 8 tr in every ch-space, finish with 1 sl st in 4th ch from beg of round = a total of 96 tr. ROUND 6: ch 5 (= 1 dc + 2 ch), * skip 1 tr, 1 dc in next tr, ch 2 *, repeat from *-* the entire round and finish with 1 sl st in 3rd ch from beg of round = 48 ch-spaces. ROUND 7 – READ CROCHET TIP: Work 1 tr in every dc and work 1 and 2 tr alternately in every ch-space the entire round = 120 tr. ROUND 8: Work 1 tr in every tr but work 2 tr in every 10th tr = 132 tr. ROUND 9: ch 5 (= 1 dc + 2 ch), * skip 1 tr, 1 dc in next tr, ch 2 *, repeat from *-* the entire round and finish with 1 sl st in 3rd ch from beg of round = 66 ch-spaces. ROUND 10: Work 1 tr in every dc and work 1 and 2 tr alternately in every ch-space the entire round = 165 tr. ROUND 11: Work 1 tr in every tr but work 2 tr in every 15th tr = 176 tr. ROUND 12: Work 1 tr in every tr but work 2 tr in every 16th tr = 187 tr. Piece measures approx. 20 cm / 8" from center and outwards. SIZE S/M: ROUND 13: ch 1, then work 1 sc in each of the first 45 tr (= up towards neck), ch 30 loosely, skip the next 27 tr (= armhole), then work 1 sc in each of the next 88 tr (= down towards back), ch 30 loosely, skip the next 27 tr (= armhole) and fasten with 1 sl st in first sc on round. ROUND 14: Work 1 tr in every sc - but inc 2 tr evenly over the first 45 sc (= 47 tr), then work 30 tr in ch-row over armhole, work 1 tr in every sc – but inc 3 tr evenly over the bottom 88 sc (= 91 tr), and work 30 tr in ch-row over armhole = 198 tr. ROUND 15 to 19: Continue with tr – while at the same time inc 6 tr evenly on every round. After 19th round there are 228 tr on the round and piece measures approx. 33 cm / 13" from center and outwards. Continue working only over 79 tr in each side – i.e. do not work over 35 tr at top by neck or 35 tr at bottom of back. Continue with explanation under FRONT PIECE. SIZE L/XL: ROUND 13: Work 1 tr in every tr but work 2 tr in every 17th tr = 198 tr. ROUND 14: ch 1, then work 1 sc in each of the first 50 tr (= up towards neck), ch 32 loosely, skip the next 29 tr (= armhole), then work 1 sc in each of the next 90 tr (= down towards back), ch 32 loosely, skip the next 29 tr (= armhole) and fasten with 1 sl st in first sc on round. ROUND 15: Work 1 tr in every sc - but inc 3 tr evenly over the first 50 sc (= 53 tr), then work 32 tr in ch-row over armhole, work 1 tr in every sc – but inc 3 tr evenly over the bottom 90 sc (= 93 tr), and work 32 tr in ch-row over armhole = 210 tr. ROUND 16 to 20: Continue with tr – while at the same time inc 6 tr evenly on every round. After 20th round there are 240 tr on the round and piece measures approx. 35 cm / 13¾" from center and outwards. Continue working only over 81 tr in each side – i.e. do not work over 39 tr at top by neck or 39 tr at bottom of back. Continue with explanation under FRONT PIECE. SIZE XXL and XXXL: ROUND 13: Work 1 tr in every tr but work 2 tr in every 17th tr = 198 tr. ROUND 14: Work 1 tr in every tr but work 2 tr in every 18th tr = 209 tr. ROUND 15: ch 1, then work 1 sc in each of the first 54 tr (= up towards neck), ch 36 loosely, skip the next 32 tr (= armhole), then work 1 sc in each of the next 91 tr (= down towards back), ch 36 loosely, skip the next 32 tr (= armhole) and fasten with 1 sl st in first sc on round. ROUND 16: Work 1 tr in every sc - but inc 2 tr evenly over the first 54 sc (= 56 tr), then work 36 tr in ch-row over armhole, work 1 tr in every sc – but inc 3 tr evenly over the bottom 91 sc (= 94 tr), and work 36 tr in ch-row over armhole = 222 tr. ROUND 17 to 22: Continue with tr – while at the same time inc 6 tr evenly on every round. After 22nd round there are 258 tr on the round and piece measures approx. 37 cm / 14½" from center and outwards. Continue working only over 89 tr in each side – i.e. do not work over 40 tr at top by neck or 40 tr at bottom of back. Continue with explanation under FRONT PIECE. LEFT FRONT PIECE - ALL SIZES: = 79-81-89 tr. Insert a marker after 23-24-27 sts in from each side (= 33-33-35 sts between markers). Then work tr back and forth over these sts while at the same time inc 1 st at every marker on every row (i.e. inc 2 sts on row, inc alternately before and after marker) and dec 3 sts at beg and end of every row in each side – SEE DECREASE TIP 1 until a total of 6-8-12 rows back and forth have been worked. RIGHT FRONT PIECE: Work same way as on left piece over 79-81-89 tr in right side. SLEEVE (worked back and forth): Ch 46-48-53 loosely (includes 4 ch to turn with) on hook size 5 mm / H/8 with Nepal. ROW 1: 1 tr in 5th ch from hook, 1 tr in each of the next 2-4-2 ch, * skip ch 1, 1 tr in each of the next 6 ch *, repeat from *-* until 4 ch remain, skip 1 ch and work 1 tr in each of the last 3 ch = 37-39-43 tr. ROW 2: 1 tr in every tr – READ CROCHET TIP! ROW 3: ch 6 (= 1 tr + 2 ch), skip 1 tr, 1 tr in next tr, * ch 2, skip 1 tr, 1 tr in next tr *, repeat from *-* the entire row = 18-19-21 ch-spaces. ROW 4: Work 1 tr in every tr and 1 tr in every ch-space = 37-39-43 tr. Repeat row 2-4 a total of 3 times. Piece measures approx. 18 cm / 7". Then work tr on all rows until finished measurements, while at the same time inc as follows: SIZE S/M: * Inc 1 tr in one side by working 2 tr in next to last tr. On next row inc 1 tr in the other side the same way. Inc 1 more time the same way in each side, then work 1 row without inc *, repeat from *-* a total of 3 times = 12 inc = 49 tr. SIZE L/XL + XXL/XXXL: * Inc 1 tr in one side by working 2 tr in next to last tr. On next row inc 1 tr in the other side the same way *, repeat from *-* a total of 8 times = 16 inc = 55-59 tr. ALL SIZES: Continue to work until piece measures 49 cm / 19¼" in all sizes. Now dec on every row in each side for sleeve cap – SEE DECREASE TIP 2: 3 tr 1 time, 2 tr 3 times and 3 tr 1 time = 25-31-35 tr remain at the top. Fasten off. ASSEMBLY: Sew sleeve seams tog edge to edge to avoid a chunky seam. Work 1 round around the entire body and at bottom of sleeves as follows: * ch 5, 1 dc in first ch, skip 1 st, fasten with 1 sc in next st *, repeat from *-* the entire round and finish with 1 sl st in first ch. Sew in the sleeves. If desired, close the jacket with a pin or sew on a button on to left front piece (try the jacket on to see where button should be) and button it in crochet edge. |
|
|
|
|
Have you made this or any other of our designs? Tag your pictures in social media with #dropsdesign so we can see them! Do you need help with this pattern?You'll find tutorial videos, a Comments/Questions area and more by visiting the pattern on garnstudio.com. © 1982-2024 DROPS Design A/S. We reserve all rights. This document, including all its sub-sections, has copyrights. Read more about what you can do with our patterns at the bottom of each pattern on our site. |
|


With over 40 years in knitting and crochet design, DROPS Design offers one of the most extensive collections of free patterns on the internet - translated to 17 languages. As of today we count 304 catalogs and 11422 patterns - 11417 of which are translated into English (US/in).
We work hard to bring you the best knitting and crochet have to offer, inspiration and advice as well as great quality yarns at incredible prices! Would you like to use our patterns for other than personal use? You can read what you are allowed to do in the Copyright text at the bottom of all our patterns. Happy crafting!
Comments / Questions (433)
Ich häkle die Jacke in Grösse L/XL. Nun habe ich die ersten 20 Runden fertig gehäkelt, und das Teil ist nur 26cm lang von der Mitte her gemessen. Was habe ich nur falsch gemacht? Die Ärmellöcher scheinen auch zu eng. Die Maschenprobe stimmte überein und die 240 Doppelstäbchen habe ich genau erreicht. Ich wäre überglücklich über eine Antwort. Mit lieben Grüssen, Angelina
08.09.2015 - 22:35DROPS Design answered:
Rechnerisch müsste sich der passende Radius ergeben. Haben Sie denn 5,5 R auf 10 cm Höhe gehabt bei der Maschenprobe? Sie sollten zudem ein ausreichend großes Stück (also mindestens 12 x 12 cm) bei der Maschenprobe häkeln und sie beim Messen nicht dehnen.
13.09.2015 - 13:40J'avais terminé mon ouvrage et je me suis rendue compte qu'à partir des 198 m j'ai fais les augmentations au dessus d'une des emmanchures , il faut faire les augmentations au mêmes intervalles pour obtenir les 228 m et pas au dessus des emmanchures, c'est bien ça ?
04.09.2015 - 19:14DROPS Design answered:
Bonjour Sandrine, après le tour 14 en taille S/M, vous avez 198 DB, vous continuez ensuite en DB aux tours suivants (15 à 19), en augmentant 6 DB à chaque tour, c'est-à-dire qu'au tour 15 vous avez 204 m, au tour 16: 210m, au tour 17: 216m, au tour 18: 22m, et au tour 19: 222 m. Bon crochet!
07.09.2015 - 09:21Pour les diminutions des côtés on ne commence pas à diminuer au début du rang il faut bien crocheter jusqu'au 3 dernières DB pour faire les 1 ères diminutions c'est bien ça ?
31.08.2015 - 15:25DROPS Design answered:
Bonjour Sandrine, pour le devant, on commence d'abord en DB puis diminuez comme indiqué sous "Diminutions 1 (dos et devants). Bon crochet!
31.08.2015 - 17:53Aida wrote:
My turn out way Big , but i Love it, so warm and cosy ! simply beautifull.
11.06.2015 - 16:56Is the gauge correct on this pattern? Am I reading it wrong, 14 rows of tr crochet is much more than 4" vertically (top to bottom)?. Please also could you give me the number of this pattern as I now cannot find it. Thank you so much for tour help, Pam
15.05.2015 - 19:27DROPS Design answered:
Dear Pam, gauge is correct and should be 14 tr x 5½ rows with tr vertically = 4'' x 4'' - remember to adapt your crochet hook size to get the correct tension. This pattern is DROPS 132-2. Happy crocheting!
16.05.2015 - 09:49Hallo liebes Drops Team, Erst einmal vielen dank für die Anleitung. Bis zu den vor der teilen habe ich mich jetzt durch gebissen. Mein erstes häkelstück. Jetzt habe ich das rechte und das linke Vorderteil gehandelt Maschen zu und ab genommen und Sitze hier nun etwas verwirrt da ich nicht drauf komme wie und wo ( ich häkel die Jacke in S )die 33 Maschen zusammen kommen. Sind das die Anzahl der Maschen von den Seitenteilen? LG aus Hamburg CH.Mainz
11.05.2015 - 20:27DROPS Design answered:
Das ist etwas ungenau formuliert und wird in der Anleitung gleich verdeutlicht. Die 33 M beziehen sich auf die Maschen, die sich zwischen den Markierern eines Vorderteils befinden. Sie häkeln die Vorderteile ja jeweils über 79 M. Bei diesen 79 M setzen Sie nach 23 M den ersten Markierer und dann vor den letzten 23 M den anderen Markierer, dazwischen befinden sich dann 33 M (23 + 33 + 23 = 79). An den Markierern müssen Sie die Zunahmen wie beschrieben arbeiten. Bei weiteren Fragen melden Sie sich gerne.
16.05.2015 - 15:29Bonjour, J'ai fait la rosace mais elle ondule beaucoup : est-ce normal ?
16.04.2015 - 08:57DROPS Design answered:
Bonjour Rozenn, la fleur du milieu dos devrait être plate, vérifiez et conservez la bonne tension. La vidéo ci-dessous vous montre la réalisation de cette fleur et pourra sans doute vous aider. Bon crochet!
16.04.2015 - 09:49Bonjour, pour diminué les manches, il est indiqué 1x3db br, 3x2db br et 1x3db br. je suis un peu perdue... que faut il faire? merci de votre réponse :D
11.04.2015 - 14:41DROPS Design answered:
Bonjour Gaëlle, diminuez pour les manches au début et à la fin de chaque rang (cf "diminutions 2"): 1 fois 3 DB, 3 fois 2 DB et 1 fois 3 DB - voir vidéo ci-dessous (en B mais le principe est le même). Bon crochet!
13.04.2015 - 08:58Hej! Nu har jag läst alla liknande frågor när det gäller framstyckena på denna kofta. Jag fattar inte det där med ökningar före och efter markören. Kan Ni hjälpa mig att förklara HUR jag ska göra framstycket på ett enkelt sätt? Jag får ju inte hjälp i butiken och inte heller på handarbets sidorna på Facebook. Ska jag behöva repa upp hela koftan för detta? Svara på svenska. Tack på förhand! Mvh Pio
01.04.2015 - 23:38DROPS Design answered:
HejPio, Så här står det: "samtidigt som det ökas 1 m vid varje markör på varje varv (dvs att det ökas 2 m på v, öka varannan gång före och efter markören)". Det betyder først ökar du på höger sida av varje markör, och på nästa varv ökar du på den andra sidan av varje markör. Lycka till!
15.05.2015 - 11:25Bonjour, je suis un peu perdue pour commencer les devants, vous marquez: "augmenter 1 m à chaque marqueur, à chaque rang (c'est-à-dire qu'on augmente de 2 m par rang, augmenter alternativement avant et après le marqueur) et diminuer 3 m au début et à la fin de chaque rang de chaque côté " augmenter une maille? on fait deux brides? merci de votre réponse
23.03.2015 - 17:53DROPS Design answered:
Bonjour Gaëlle, on augmente effectivement 2 B par rang, 1 à chaque marqueur (1 augm = 2 B dans la même m) tous les rangs (alternativement avant et après les marqueurs), et en même temps on diminue 3 m au début et à la fin de chaque rang (cf "Diminutions 1" au début des explications. Bon crochet!
24.03.2015 - 09:10