DROPS Snow
DROPS Snow
100% Wool
from 2.00 £ /50g
DROPS Andes
DROPS Andes
65% Wool, 35% Alpaca
from 4.70 £ /100g
Get the yarn to make this pattern from 22.00£.

The yarn cost is calculated from the pattern’s smallest size and the yarn’s cheapest product type. Looking for an even better price? You might find it on the DROPS Deals!

DROPS SS24

Lady of the Lake

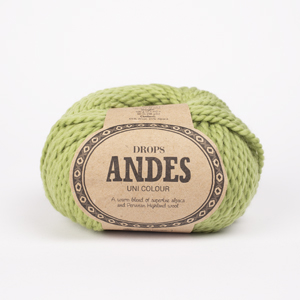
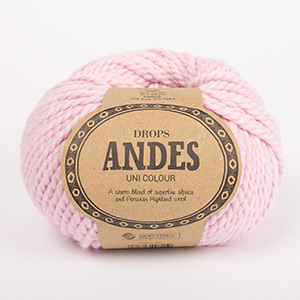
Knitted DROPS jacket with lace pattern worked sideways in ”Snow” or “Andes”. Size: S - XXXL.

DROPS 134-48
DROPS design: Pattern no EE-368
Yarn group E
--------------------------------------------------------
Size: S - M - L - XL - XXL - XXXL

Materials: DROPS SNOW from Garnstudio
Colour no 052, light blue/grey:
500-550-600-650-750-800 g

DROPS CIRCULAR NEEDLE SIZE 8 mm (80 cm) - or size needed to get 11 sts x 15 rows in stocking st with Snow = 10 x 10 cm (diagram M.1 = width approx. 4½ cm, diagram M.2 = approx. 12 cm).
DROPS CIRCULAR NEEDLE SIZE 7 mm (80 cm) - for band.

DROPS METAL BUTTONS, NO 542: 3 pieces for all sizes

-------------------------------------------------------

Alternative Yarn – See how to change yarns here
Yarn Groups A to F – Use the same pattern and change the yarn here
Yarn usage using an alternative yarn – Use our yarn converter here

-------------------------------------------------------

DROPS Snow
DROPS Snow
100% Wool
from 2.00 £ /50g
DROPS Andes
DROPS Andes
65% Wool, 35% Alpaca
from 4.70 £ /100g
Get the yarn to make this pattern from 22.00£.

The yarn cost is calculated from the pattern’s smallest size and the yarn’s cheapest product type. Looking for an even better price? You might find it on the DROPS Deals!

Pattern instructions

NOTE: This pattern is written in British English. All measurements in charts are in cm. For conversion from cm to inches - click here. There are different terms for crocheting in British and American English. If this pattern includes crochet, click for "crochet terms" here. For this pattern in American English, please click here.
INCREASE TIP 1:
Inc 1 st by getting thread between 2 sts from previous row - P this st twisted, i.e. work in back loop of st instead of front to avoid holes.

INCREASE TIP 2:
Inc 1 st by getting thread between 2 sts from previous row - K this st twisted, i.e. work in back loop of st instead of front to avoid holes.

PATTERN:
See diagrams M.1 to M.3B (the diagrams show the pattern from RS).

BUTTON HOLES:
Cast off for 3 button holes on right front band.
1 BUTTON HOLE = cast off 1 st and cast on 1 new st on next row over this st.
--------------------------------------------------------

LEFT BACK AND FRONT PIECE:
Left back and front piece is worked in one. Worked back and forth on circular needle, beg from mid back. Cast on 81-83-85-88-90-92 sts for back piece on circular needle size 8 mm with Snow. On 1st row (= WS) K all sts. Work next row (2nd row = RS) as follows: Work diagram M.1A (= 3 sts), work diagram M.1 (= 5 sts) 5-5-5-6-6-6 times, then work diagram M.2 (= 18 sts), 31-33-35-33-35-37 sts in stocking st, finish with P 1, K 1, P 1 and K 1 (= 4 edge sts in rib until finished measurements). Work another 2-2-4-4-6-6 rows like this with 4 edge sts in rib in the side. Then inc for neck as follows:
Row 1 (= WS): Work until 3 sts remain on needle (= diagram M.1A), P 1, K 1, inc 1 st - Read INCREASE TIP 1 above, finish with K 1.
Row 2 (= RS): Work diagram M.1B over the first 4 sts on needle, continue with pattern.
Row 3: Work until 4 sts remain on needle (= diagram M.1B), P 1, K 1, P 1, inc 1 st and finish with K 1 = 83-85-87-90-92-94 sts.
Row 4: Work diagram M.1 over the first 5 sts on needle, continue with pattern (= 6-6-6-7-7-7 repetitions of diagram M.1 in total).
Row 5: Work the entire row, cast on 84-86-88-91-93-95 sts for front piece at the end of row = 167-171-175-181-185-189 sts on needle.
Row 6 (= RS): K 1, P 1, K 1, P 1 (= 4 edge sts in rib until finished measurements), 31-33-35-33-35-37 sts in stocking st, 1st row in diagram M.2, K 1, then diagram M.1 a total of 12-12-12-14-14-14 times (= 60-60-60-70-70-70 sts), diagram M.2, 31-33-35-33-35-37 sts in stocking st, finish with P 1, K 1, P 1 and K 1 (= 4 edge sts in rib until finished measurements). Continue with pattern and 4 edge sts in rib in each side of piece. REMEMBER THE KNITTING TENSION!
When diagram M.2 on back piece has been worked a total of 4-4-5-5-6-6 times (back piece measures approx. 23-23-28-28-33-33 cm from cast on edge), insert 2 markers in the piece from RS as follows: 58-60-62-60-62-64 sts (= front piece), 1 marker, 51-51-51-61-61-61 sts (= sleeve), 1 marker, 58-60-62-60-62-64 sts (= back piece). Now divide the piece at the markers and finish each part separately.

LEFT FRONT PIECE:
Work 1st row (= RS) as follows: Work 58-60-62-60-62-64 sts (until 1st marker) in pattern and stocking st as before, turn piece. At beg of next row (= WS) cast off 23 sts (= 1 repetition of diagram M.1 and diagram M.2) in all sizes, work the rest of row. Cast off 10-12-12-12-12-12 sts at beg of the next 2 rows from WS = 15-13-15-13-15-17 sts remain on needle, loosely cast off all sts on next row.

SLEEVE:
= 51-51-51-61-61-61 sts (= 1 K st + 10-10-10-12-12-12 repetitions of diagram M.1). K 2 rows in diagram M.1 (1st row = RS). At beg of the next 2 rows cast off 1 st. Repeat cast off at beg of every row in each side a total of 5 times = 41-41-41-51-51-51 sts (1 K st + 8-8-8-10-10-10 repetitions of diagram M.1). When piece measures approx. 35-35-36-39-42-42 cm (adjust so that last row is 2nd row in diagram M.1), loosely cast off all sts with K over K and P over P.

LEFT BACK PIECE:
= 58-60-62-60-62-64 sts. On 1st row from RS cast off 23 sts at beg of row in all sizes, work the rest of row. Cast off 10-12-12-12-12-12 sts at beg of the next 2 rows from RS = 15-13-15-13-15-17 sts remain on needle, loosely cast off all sts on next row.

RIGHT BACK AND FRONT PIECE:
Right back and front piece is worked in one. Cast on 81-83-85-88-90-92 sts for back piece on circular needle size 8 mm with Snow. On 1st row (= WS) K all sts. Work next row (2nd row = RS) as follows: K 1, P 1, K 1 and P 1 (= 4 edge sts in rib until finished measurements), 31-33-35-33-35-37 sts in stocking st, then work diagram M.2 (= 18 sts), diagram M.3 (= 5 sts) 5-5-5-6-6-6 times, finish with diagram M.3A (= 3 sts). Work another 3-3-5-5-7-7 rows like this with 4 edge sts in rib in the side. Then inc for neck as follows:
Row 1 (= RS): Work until 3 sts remain on needle (= diagram M.3A), K 1, P 1, inc 1 st - Read INCREASE TIP 2 above, finish with P 1.
Row 2 (= WS): Work diagram M.3B over the first 4 sts on needle, continue with pattern.
Row 3: Work until 4 sts remain on needle (= diagram M.3B), K 1, P 1, K 1, inc 1 st and finish with P 1 = 83-85-87-90-92-94 sts.
Row 4: Work diagram M.3 over the first 5 sts on needle, work the rest of row (= 6-6-6-7-7-7 repetitions of diagram M.3 in total).
Row 5 (= RS): Work the entire row. At the end of row, cast on 84-86-88-91-93-95 new sts for front piece = 167-171-175-181-185-189 sts on the needle.
Row 6 (= WS): P 1, K 1, P 1, K 1 (= 4 edge sts in rib until finished measurements), 31-33-35-33-35-37 sts in stocking st, 8th row in diagram M.2, P 1, then diagram M.3 a total of 12-12-12-14-14-14 times (= 60-60-60-70-70-70 sts), diagram M.2, 31-33-35-33-35-37 sts in stocking st, finish with K 1, P 1, K 1 and P 1 (= 4 edge sts in rib until finished measurements). On next row from RS, work 1st row in diagram M.2 on front piece. Work as on left back and front piece but reversed.

ASSEMBLY:
Sew tog both parts mid back with stitches. Sew sleeve and side seams in one.

BAND:
Worked back and forth on circular needle size 7 mm. Beg at the bottom edge on right front piece, knit up from RS approx. 180-210 sts up along right front piece, around the neck and down along left front piece. K next row (= WS) - while at the same time adjusting no of sts to 191-195-201-209-215-219. Work next row from RS as follows: K 1, * P 1, K 1 *, repeat from *-* the rest of row. Continue like this with rib for approx. 4-4-4-5-5-5 cm. Then insert 2 markers; 78-80-80-84-86-88 sts in from each side = 35-35-41-41-43-43 sts between markers in back of neck. On next row from RS, inc 17-17-20-20-21-21 sts between markers as follows: Work until 1st marker, then K 1, * inc 1 st, P 1, K 1 *, repeat from *-* until 2nd marker, work the rest of row = 208-212-221-229-236-240 sts. Continue with K over K and P over P. When band measures 5-5-5-6-6-6 cm, evenly cast off for 3 button holes on left band next to diagram M.2 - Read explanation above. When band measures 8-8-8-9-9-9 cm, loosely cast off all sts.


Diagram

symbols = K from RS, P from WS
symbols = P from RS, K from WS
symbols = 1 YO between 2 sts
symbols = K 2 tog
symbols = slip 1 st as if to K, K 1, psso
diagram
diagram
Do you have a question? See a list of frequently asked questions (FAQ)

Knitting tension is what determines the final measurements of your work, and is usually measured per 10 x 10 cm. It is provided like so: number of stitches in width x number of rows in height - eg: 19 stitches x 26 rows = 10 x 10 cm.

The knitting tension is very individual; some people knit/crochet loosely while others work tightly. You adjust the knitting tension with the needle size, which is why the suggested needle size is only meant as a guide! You need to adjust this (up or down) to ensure that YOUR knitting tension matches the knitting tension provided in the pattern. If you work with a different knitting tension than provided you will have a different yarn consumption, and your work will have different measurements than what the pattern suggests.

The knitting tension also determines which yarns can replace each other. As long as you achieve the same knitting tension you can replace one yarn with another.

See DROPS lesson: How to measure your tension/gauge

See DROPS video: How to make a gauge tension swatch

The required amount of yarn is provided in grams, eg: 450 g. To calculate how many balls you’ll need you first need to know how many grams are in 1 ball (25g, 50g or 100g). This information is available if you click on the individual yarn quality on our pages. Divide the amount required with the amount of each ball. For example, if each ball is 50g (the most common amount), the calculation will be as follows: 450 / 50 = 9 balls.

The important thing when changing from one yarn to another is that the knitting/crochet tension remains the same. This is so that the measurements of the finished piece will be the same as on the sketch provided. It is easier to achieve the same knitting tension using yarns from the same yarn group. It is also possible to work with multiple strands of a thinner yarn to achieve the knitting tension of a thicker one. Please try our yarn converter. We recommend you to always work a test swatch.

Please NOTE: when changing yarn the garment might have a different look and feel to the garment in the photo, due to individual properties and qualities of each yarn.

See DROPS lesson: Can I use a different yarn than the one mentioned in the pattern?

All our yarns are categorised into yarn groups (from A to F) according to thickness and knitting tension – group A contains the thinnest yarns and group F the thickest. This makes it easier for you to find alternative yarns to our patterns, should you wish to switch yarn. All yarns within the same group have a similar knitting tension and can easily replace each other. However, different yarn qualities have different structures and properties which will give the finished work a unique look and feel.

Click here for an overview of the yarns in each yarn group

At the top of all our patterns you’ll find a link to our yarn calculator, which is a helpful tool should you wish to use a different yarn than suggested. By filling in the yarn quality you wish to replace, the amount (in your size) and number of strands, the calculator will present good alternative yarns with the same knitting tension. Additionally it will tell you how much you’ll require in the new qualities and whether you’ll need to work with multiple strands. Most skeins are 50g (some are 25g or 100g).

If the pattern is worked with multiple colours, every colour will have to be calculated separately. Similarly, if the pattern is worked with several strands of different yarns (for example 1 strand Alpaca and 1 strand Kid-Silk) you will have to find alternatives for each, individually.

Click here to see our yarn calculator

Since different yarns have different qualities and textures we have chosen to keep the original yarn in our patterns. However, you can easily find options among our available qualities by using our yarn calculator, or simply pick a yarn from the same yarn group.

It is possible that some retailers still have discontinued yarns in stock, or that someone has a few skeins at home that they would like to find patterns for.

The yarn calculator will provide both alternative yarn as well as required amount in the new quality.

If you think it's hard to decide what size to make, it can be a good idea to measure a garment you own already and like the size of. Then you can pick the size by comparing those measures with the ones available in the pattern's size chart.

You'll find the size chart at the bottom of the pattern.

See DROPS lesson: How to read size chart

The needle size provided in the pattern serves only as a guide, the important thing is to follow the knitting tension. And since knitting tension is very individual, you will have to adjust the needle size to ensure that YOUR tension is the same as in the pattern – maybe you’ll have to adjust 1, or even 2 needle sizes, up or down to achieve the correct tension. For this, we recommend that you work test swatches.

Should you work with a different knitting tension than the one provided, the measurements of the finished garment might deviate from the measurement sketch.

See DROPS lesson: How to measure your tension/gauge

See DROPS video: How to make a tension/gauge swatch

Working a garment top-down provides more flexibility and room for personal adjustment. For example it is easier to try the garment on while working, as well as making adjustments to length of yoke and shoulder caps.

The instructions are carefully explaining every step, in the correct order. Diagrams are adjusted to the knitting direction and are worked as usual.

The diagram depicts all rows/rounds, and every stitch seen from the right side. It is read from bottom to top, from right to left. 1 square = 1 stitch.

When working back and forth, every other row is worked from the right side and every other row is worked from the wrong side. When working from the wrong side, the diagram will have to be worked reversed: from left to right, knit stitches are purled, purl stitches are knit etc.

When working in the round every round is worked from the right side and the diagram are worked from right to left on all rounds.

See DROPS lesson: How to read knitting diagrams

The diagram depicts all rows/rounds, and every stitch seen from the right side. It is worked from bottom to top, from right to left.

When working back and forth every other row is worked from the right side: from right to left and every other row is worked from the wrong side: from left to right.

When working in the round, every row in the diagram are worked from the right side, from right to left.

When working a circular diagram you start in the middle and work your way outwards, counter clockwise, row by row.

The rows usually start with a given number of chain stitches (equivalent to the height of the following stitch), this will either be depicted in the diagram or explained in the pattern.

See DROPS lesson: How to read crochet diagrams

Instructions for working several diagrams after each other on the same row/round, will often be written like so: “work A.1, A.2, A.3 a total of 0-0-2-3-4 times". This means you work A.1 once, then A.2 is worked once, and A.3 is repeated (in width) the number of times provided for your size – in this case like so: S = 0 times, M = 0 times, L=2 times, XL= 3 times and XXL = 4 times.

The diagrams are worked as usual: begin with the first row in A.1, then work the first row in A.2 etc.

See DROPS lesson: How to read knitting diagrams

See DROPS lesson: How to read crochet diagrams

The total width of the garment (from wrist-to-wrist) will be larger in the larger sizes, despite the actual sleeves being shorter. The larger sizes have longer sleeve caps and wider shoulders, so there will be a good fit in all sizes.

The measurement sketch/schematic drawing provides information regarding the full length of the garment. If it’s a jumper or a jacket the length is measured from the highest point on the shoulder closest to the neckline, and straight down to the bottom of the garment. It is NOT measured from the tip of shoulder. Similarly, the length of yoke is measured from the highest point on the shoulder and down to where yoke is split into body and sleeves.

On a jacket measures are never taken along bands, unless specifically stated. Always measure inside band stitches when measuring the length.

See DROPS lesson: How to read a schematic drawing

Diagrams are often repeated on the round or in height. 1 repeat is the diagram the way it appears in the pattern. If it says to work 5 repeats of A.1 in the round, then you work A.1 a total of 5 times after/next to each other in the round. If it says to work 2 repeats of A.1 vertically/in height you work the entire diagram once, then begin again at the start and work the entire diagram one more time.

Chain stitches are slightly narrower than other stitches and to avoid working the cast-on edge too tight, we simply chain more stitches to begin with. The stitch count will be adjusted on the following row to fit the pattern and measurement sketch.

The rib edge is more elastic and will contract slightly compared to, for example, stocking stitch. By increasing before the rib edge, you avoid a visible difference in width between the rib edge and the rest of the body.

It’s very easy to cast off too tightly, and by making yarn overs while casting off (and simultaneously casting these off) you avoid a too tight cast off edge.

See DROPS video: How to bind off with yarn overs (yo)

To achieve an even increase (or decrease) you can increase on, for example: every 3rd and 4th row alternately, like so: work 2 rows and increase on the 3rd row, work 3 rows and increase on the 4th. Repeat this until the increase is complete.

See DROPS lesson: Increase or decrease 1 st on every 3rd and 4th row alternately

Should you prefer to work in the round instead of back and forth, you may of course adjust the pattern. You’ll need to add steeks mid-front (usually 5 stitches), and follow the instructions. When you would normally turn and work from the wrong side, simply work across the steek and continue in the round. At the end you’ll cut the piece open, pick up stitches to work bands, and cover the cut edges.

See DROPS video: How to knit steeks and cut open

Should you prefer to work back and forth instead of in the round, you may of course adjust the pattern so you work the pieces separately and then assemble them at the end. Divide the stitches for the body in 2, add 1 edge stitch in each side (for sewing) and work the front and back pieces separately.

See DROPS lesson: Can I adapt a pattern for circular needles into straight needles?

Pattern repeats can vary slightly in the different sizes, in order to get the correct proportions. If you’re not working the exact same size as the garment in the photo, yours might deviate slightly. This has been carefully developed and adjusted so that the complete impression of the garment is the same in all sizes.

Make sure to follow instructions and diagrams for your size!

If you have found a pattern you like which is available in women’s size it’s not very difficult to convert it to men’s size. The biggest difference will be the length of sleeves and body. Start working on the women size that you think would fit across the chest. The additional length will be worked right before you cast off for the armhole/sleeve cap. If the pattern is worked top-down you can add the length right after the armhole or before the first decrease on sleeve.

Regarding additional yarn amount, this will depend on how much length you add, but it is better with a skein too many than too few.

All yarns will have excess fibres (from production) that might come off as lint or shedding. Brushed yarns (ie hairier yarns) have more of these loose, excess fibres, causing more shedding.

Shedding also depends on what is worn under or over the garment, and whether this pulls at the yarn fibres. It’s therefore not possible to guarantee that there will be no shedding

Below are some tips on how to get the best result when working with hairier yarns:

1. When the garment is finished (before you wash it) shake it vigorously so the looser hairs come off. NOTE: do NOT use a lint roller, brush or any method that pulls at the yarn.

2. Place the garment in a plastic bag and put it in your freezer - the temperature will cause the fibres to become less attached to each other, and excess fibres will come off easier.

3. Leave in the freezer for a few hours before taking it out and shaking it again.

4. Wash the garment according to the instructions on the yarn label.

Pilling is a natural process that happens to even the most exclusive of fibers. It's a natural sign of wear and tear that is hard to avoid, and that is most visible in high friction areas of your garment like a sweater's arms and cuffs.

You can make your garment look as new by removing the pilling, using a fabric comb or a pill/lint remover.

Still can't find the answer you need? Then scroll down and leave your question so one of our experts can try to help you. This will be done normally within 5 to 10 working days.
In the meantime, you can read the questions and answers that others have left to this pattern or join the DROPS Workshop on Facebook to get help from fellow knitters/crocheters!

Post a comment to pattern DROPS 134-48

We would love to hear what you have to say about this pattern!

If you want to leave a question, please make sure you select the correct category in the form below, to speed up the answering process. Required fields are marked *.

Comments / Questions (58)

country flag Diane wrote:

Bonjour, Merci pour votre réponse. Mon commentaire concernait la portion de la manche. Puisque nous devons lire les diagrammes de même façon, que ce soit en faisant M2 ou ceux de la manche, soit end/env, j'ai obtenu un style tout à fait différent sur la portion de la manche que ce que je vois sur le modèle de la photo. La manche que je fais me donne un point de riz. Ce qui n'est pas le cas pour la manche du modèle de la photo. C'est tout de même très joli.

12.11.2015 - 12:53

country flag Diane wrote:

Bonjour, je termine la seconde moitié de cette veste et je remarque que le motif de la manche me donne un point de riz, avec un jour régulier. C'est tres joli mais bien différent du modèle de la photo. Est-ce que la lecture des mailles pour la section des manches devrait être différente de M.2 pour qu'elles soient comme celles de la photo? Quoi qu'il en soit, je trouve que mon tricot est vraiment très beau! Merci

07.11.2015 - 12:51

DROPS Design answered:

Bonjour Diane, dans M.2, on n'a pas de point de riz, mais 2 m env au début, 2 m env au milieu et 2 m env à la fin - les cases blanches se tricotent en jersey endroit. Bon tricot!

09.11.2015 - 11:38

country flag Erica wrote:

I noticed that the sizing (both in the description and the diagram) lists the same size twice in a row, three times over, rather than increasing in sizes. It looks like this : 34½"-34½"-43½"-43½"-51"-51" Is this correct or are there actually 6 different sizes?

29.10.2015 - 00:36

DROPS Design answered:

Dear Erica, there are 6 different sizes - see measurement chart in cm (convert here into inc) - and read more about measurement chart here. Happy knitting!

29.10.2015 - 09:23

country flag Diane wrote:

Bonjour, Je ne comprends pas comment je dois faire le diagramme M1 dans la manche de la demi gauche de la veste. On dit "au début des rangs suivants, rabattre 1 m. Répéter ces diminutions d'1 m. Au début... Comment dois-je faire pour conserver le même motif en faisant ces diminutions? Je m'y suis repris à 2 fois et je bloque toujours à cet endroit! Merci pour vos conseils toujours appréciés.

10.10.2015 - 02:54

DROPS Design answered:

Bonjour Diane, pendant les diminutions de la manche, tricotez les m de M.1 comme elles se présentent (end/env), mais sans tricoter le jour du milieu après avoir diminué la 1ère de ces 2 m end pour que le nombre de m soit juste. Bon tricot!

12.10.2015 - 09:18

country flag Mimma wrote:

Thank you for answering but what about the bottom part of the cardigan I have knitted it 2 and it does not look lie the picture I appreciate if you could help me as I like it for my daughter Thank you Mimma

10.07.2015 - 21:09

DROPS Design answered:

Dear Mimma, the bottom part (in stockinette) of front piece is cast on at the end of row 5 (the bottom part - in stockinette - on back piece is worked from the beg: 31-37 sts in st st at the end of row from RS). Happy knitting!

27.07.2015 - 09:50

country flag Mimma wrote:

Please explain better this pattern would like the back of this pattern to explain how it looks please and thank you

09.07.2015 - 21:00

DROPS Design answered:

Dear Mimma, you start working the left half-back piece + front piece in 1 piece sideways starting from mid back/mid front towards side/sleeve then work another piece reversed (right half back piece + front piece) and sew them tog in mid back (sew cast on edge tog). Happy knitting!

10.07.2015 - 08:39

country flag Diane wrote:

Je débute cette veste et j'aimerais savoir comment faire pour monter 84 mailles à la fin du rang 5 du demi dos gauche? Merci

07.12.2014 - 14:34

DROPS Design answered:

Bonjour Diane, voici en vidéo comment monter des mailles en fin de rang. Bon tricot!

08.12.2014 - 09:03

country flag Caterina wrote:

Salve,è possibile vedere una foto di questo modello anche sul retro del lavoro, per capire come si assembla?grazie

14.10.2014 - 14:42

DROPS Design answered:

Buongiorno Caterina. Purtroppo al momento non è disponibile una fotografia del dietro. Per la confezione può esserle però utile il seguente video: Buon lavoro!

14.10.2014 - 16:00

Chantal wrote:

Bonjour, j'ai de la difficulté avec la couture au milieu du dos, il mentionne à point soignée, de chaque côté j'ai une bordure qui fait comme un point mousse, est-ce que je doit le cacher avec la couture ou cela doit donner comme un ourlet. Merci!

05.06.2013 - 02:12

DROPS Design answered:

Bonjour Chantal, pour faire la couture au milieu dos, vous pouvez vous aider de la vidéo. Si vous ne voulez pas conserver la côte mousse au milieu dos, vous pouvez coudre après ce rang. Bon tricot!

05.06.2013 - 10:42

country flag Maigrot wrote:

Bonjour, j'ai des difficultés de compréhension concernant le 1er rang du 1/2 dos gauche et devant ; il est indiqué de tricoter le mailles du 1er rang (soit l'envers du tricot)à l'endroit. Or, une fois les mailles montées, le 1er rang que l'on tricote est toujours un rang endroit.Dois je comprendre que vous parlez du rang suivant le 1er rang endroit?

25.02.2012 - 18:22

DROPS Design answered:

Bonjour Maigrot, le 1er rang peut être indifféremment sur l'endroit ou sur l'envers d'un ouvrage. Dans ce cas, le 1er rang sera un rang sur l'envers, et le 2ème rang sera l'endroit de l'ouvrage. Bon tricot !

27.02.2012 - 10:33