
Popular categories
Looking for a yarn?


|
|||||||||||||||||||
One Time Dance |
|||||||||||||||||||
 |
 |
||||||||||||||||||
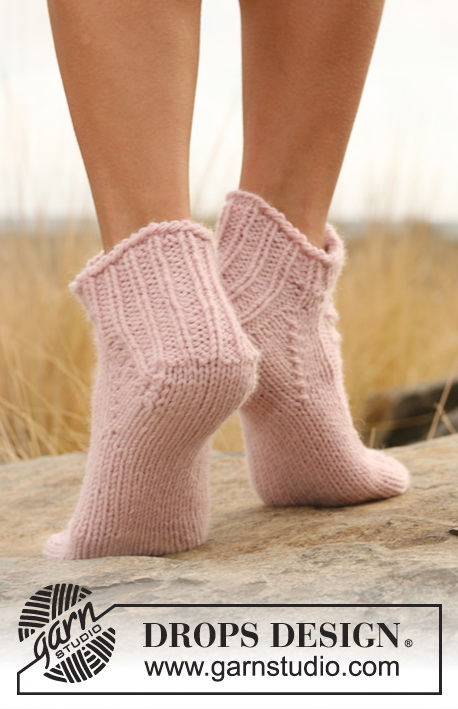
Knitted DROPS short sock with lace pattern in "Nepal".
DROPS 127-37 |
|||||||||||||||||||
|
LACE PATTERN: See diagram M.1 (= 19 sts), M.2 (= 15 sts) and M.3 (= 15 sts). The diagrams show the patterns from RS. HEEL DECREASE (worked in stockinette st): Row 1 (= RS): Work until 6-6-7 sts remain, slip 1 st as if to K, K1, psso, turn piece. Row 2 (= WS): Work until 6-6-7 sts remain, slip 1 st as if to P, P1, psso, turn piece. Row 3 (= RS): Work until 5-5-6 sts remain, slip 1 st as if to K, K1, psso, turn piece. Row 4 (= WS): Work until 5-5-6 sts remain, slip 1 st as if to P, P1, psso, turn piece. Continue dec like this with 1 less st before each dec until there are 9-11-11 sts on needle. -------------------------------------------------------- SOCK: Worked in the round on double pointed needles. Cast on 45-48-51 sts on double pointed needles size 4.5 mm / US 7 with Nepal. K 2 rounds, then work 5 rounds rib = K1/P2. On next round work LACE PATTERN - see explanation above - as follows: Continue with rib K1/P2 over the first 21-24-27 sts, K3, diagram M.1 (= 19 sts), K2 = 41-44-47 sts. REMEMBER THE GAUGE! When M.1 is worked 1 time vertically, continue working M.2 over M.1. Continue this way until piece measures 4 cm/1½" in all sizes. Now keep the first 22-25-28 sts on needle for heel and slip the last 19-19-19 sts (i.e. M.2 + 2 sts on each side) on a stitch holder (= mid upper foot). Work rib back and forth as before on heel sts for 5-5½-6 cm/ 2"-2¼"-2⅜". NOTE! On last row from WS dec 3-4-5 sts evenly by K 2 tog in the K-sections = 19-21-23 sts for heel. Insert a marker, now measure piece from here. Continue with HEEL DECREASE - see explanation above! After heel dec, knit up 9-10-12 sts along each side of heel and slip the 19-19-19 sts from stitch holder back on needle = 46-50-54 sts. Insert a marker on each side of the 21-23-25 sts on mid upper foot (= 3-4-5 sts on each side of M.2). Continue with stockinette st and M.2 - AT THE SAME TIME dec in each side as follows: K tog the last 2 sts before the marker on upper foot twisted (i.e. knit in the back loop of the 2 sts instead front loop) and K tog the first 2 sts after the last marker on upper foot. Repeat the dec every other round a total of 5-6-6 times = 36-38-42 sts. Continue until piece measures 18-20-22 cm/7"-8"-8¾" from marker on heel - adjust to finish after 1 whole repetition of M.2 (= approx. 4-4-5 cm/1½"-1½"-2" remain). Insert a marker in each side so that there are 19-19-21 sts under foot and 17-19-21 st on upper foot (= 1-2-3 sts on each side of M.2). Beg to decrease for toes. READ ALL OF THE FOLLOWING SECTION BEFORE CONTINUING! (NOTE! The dec under foot and on upper foot are uneven but the dec are worked on the same round.) Dec for toes under foot as follows (inside the markers): K tog the 2 sts after the marker twisted and K tog the 2 sts before the marker. Repeat the dec on every other round a total of 4-4-4 times, then on every round a total of 3-3-4 times, AT THE SAME TIME dec for toes on upper foot as follows: Work M.3 over M.2 (1-2-3 sts on each side of M.2 is worked in stockinette st as before). Finish the round by knitting the 3 last sts in largest size = 10-12-14 sts remain on needle. Cut the thread and pull it through the remaining sts, tighten tog and fasten. |
|||||||||||||||||||
Diagram explanations |
|||||||||||||||||||
|
|||||||||||||||||||

|
|||||||||||||||||||
|
Have you made this or any other of our designs? Tag your pictures in social media with #dropsdesign so we can see them! Do you need help with this pattern?You'll find tutorial videos, a Comments/Questions area and more by visiting the pattern on garnstudio.com. © 1982-2024 DROPS Design A/S. We reserve all rights. This document, including all its sub-sections, has copyrights. Read more about what you can do with our patterns at the bottom of each pattern on our site. |
|||||||||||||||||||


With over 40 years in knitting and crochet design, DROPS Design offers one of the most extensive collections of free patterns on the internet - translated to 17 languages. As of today we count 304 catalogs and 11422 patterns - 11417 of which are translated into English (US/in).
We work hard to bring you the best knitting and crochet have to offer, inspiration and advice as well as great quality yarns at incredible prices! Would you like to use our patterns for other than personal use? You can read what you are allowed to do in the Copyright text at the bottom of all our patterns. Happy crafting!
Comments / Questions (36)
A la phrase: "au dernier rang sur l'envers répartir 4 diminutions en tricotant 2 mailles ensemble à l'endroit pour les sections endroit = 21 m pour la talon" faut-il faire ces diminutions de chaque côté des 25 m ou seulement côté droit lorsque l'on voit le travaille à l'envers ?
22.04.2017 - 17:48DROPS Design answered:
Bonjour Bilou, sur l'envers, vous tricotez 2 m end, 1 m env. Pour diminuer, tricotez à 4 reprises (2 m ens à l'end) au lieu de (2 m end) pour diminuer 4 m, diminuez à intervalles réguliers sur ce rang. Bon tricot!
24.04.2017 - 09:19Désolée, je me suis répétée 2 fois pour la fin de la question. La suite de ma question portait sur la phrase: "Au dernier rang su l'envers répartir 3-4-5 diminutions en tricotant 2 m ens à l'end dans les sections endroit" ?
19.04.2017 - 17:36DROPS Design answered:
Bonjour Bilou, vous tricotez le talon sur les 22-25-28 premières mailles, soit en côtes 1 m end/2 m env. Tricotez ces mailles pendant 5-5,5-6 cm, et au dernier rang sur l'envers, diminuez en tricotant 3-4-5 fois 2 m ens à l'end (sur l'envers = ces mailles sont à l'env, vu sur l'endroit). Bon tricot!
20.04.2017 - 08:25Au début des explications, lorsque vous dites: "Continuer jusqu'à 4 cm de hauteur totale", il faut mesurer à partir du motif ou de la totalité de l'ouvrage ? puis juste après, "sur un arrêt de maille (= dessus du pied) que cela veut-il dire ? Encore un peu après: " conserver ensuite les 25 premières mailles.........sur un arrêt de mailles (=dessus du pied) ? expliquez moi.
19.04.2017 - 17:30DROPS Design answered:
Bonjour Bilou, vous continuez d'abord jusqu'à ce que l'ouvrage mesure 4 cm au total (= depuis le rang de montage) - les 19 dernières m du tour sont ensuite placées en attente (au choix sur un fil ou un arrêt de mailles), on va ensuite tricoter le talon, on reprendra ces mailles plus tard. Voici un tuto en images montrant comment tricoter des chaussettes du début jusqu'à la fin. Bon tricot!
20.04.2017 - 08:20Suite à votre réponse du 10.04.17, la phrase est la suivante: " Continuer jusqu'à 20 cm de hauteur totale a partir du marqueur du talon. Arrêter après un motif complet de M.2 (il reste environ 4-4-5). "
18.04.2017 - 16:19DROPS Design answered:
Bonjour Bilou, il manquait "cm" pour compléter la phrase: il reste encore environ 4-4-5 cm avant la fin de la chaussette et la longueur totale. Bon tricot!
18.04.2017 - 16:39Arrivée aux diminutions du talon, il me reste 44 m ( 4 dans vos explications) ? comment détermine t-on l'avant et après le marqueur
09.04.2017 - 17:46DROPS Design answered:
Chere Bilou! Ecrivez-moi a quelle moment exactement vous etes (copiez toute la phrase). Je vais verifier.
10.04.2017 - 23:27Bonjour, après avoir tricoté M 1 et M 2 au dessus de M 1, J'ai du mal a comprendre, faut-il a chaque fois, avant de refaire M 2, refaire M 1 et dans ce cas, le nombre de mailles ne correspond pas. Après avoir recommencé plusieurs fois et demandé l'aide de mes amies tricoteuses, j'ai fais M 1 une fois puis M 2 plusieurs fois à la suite et je n'obtiens pas le visuel du modèle ? Je désespère !
07.04.2017 - 10:01DROPS Design answered:
Bonjour Bilou, une fois que vous avez tricoté M.1, continuez en suivant M.2, vous ne tricotez plus M.1 mais M.2 vient se positionner juste au-dessus des mailles de M.1.Commencez bien les diagrammes en bas à droite et lisez tous les rangs de droite à gauche. Bon tricot!
07.04.2017 - 11:27Bonjour , Pour les diminutions avant la pointe du pied 19 mailles sous le pied et 19 mailles dessus pied, il me semble qu'habituellement on fait 2 mailles ens torse avant le marqueur et 2 mailles ens à l'endroit après le marqueur , est-ce qu'il y a une erreur ?
25.03.2017 - 16:44DROPS Design answered:
Bonjour Nathalie, c'est bien ainsi que l'on doit diminuer: 2 m ens torse à l'end après le marqueur et 2 m ens à l'end avant le marqueur. Bon tricot!
27.03.2017 - 08:59And last question...are the M1 and M2 centered on each other, or offset? The M1 has k3 st before it, but there are no k sts before the M2.
24.05.2015 - 04:56DROPS Design answered:
M1/M2 are not centered, you have first 21 sts with rib (= back of foot), M1/M2 = top of foot and then K2 to finish row. When you have worked the 19 sts in M1, continue as before: 21 sts with rib P1/K2, then work M2, and finish round with K2. Happy knitting!
26.05.2015 - 09:55Also this part after the M1 over M2 part "Continue with rib K1/P2 over the first 21-24-27 sts, K3, diagram M.1 (= 19 sts), K2 = 41sts." I don't know What to do with K2=41.
24.05.2015 - 04:54DROPS Design answered:
41 sts is the total amount of remaining sts you have in first size after this row, work: 21 sts with rib K1/P2, then K3, diagram M.1 (= 19 sts including 4 dec), K2.
26.05.2015 - 09:53Thanks Lena, I figured that part out when I looked a bit closer at the directions. But I did run into another problem...where the lace pattern begins. I don't know exactly what this part means "When M.1 is worked 1 time vertically, continue working M.2 over M.1." I'm sure I will have another problem after that. I am a guy, and a beginner. so that's 2 strikes against me lol. I like this hobby, I play guitars, and this keeps my hands and fingers exercised.
24.05.2015 - 02:30DROPS Design answered:
Dear Jerry, when you have worked the 19 sts in M.1 (= 1 time in height = M.1 is just 1 row - a total of 4 sts are dec on this row), work M.2 over the remaining 15 sts - read more about diagrams here. Happy knitting!
26.05.2015 - 09:51