
Popular categories
Looking for a yarn?


|
|
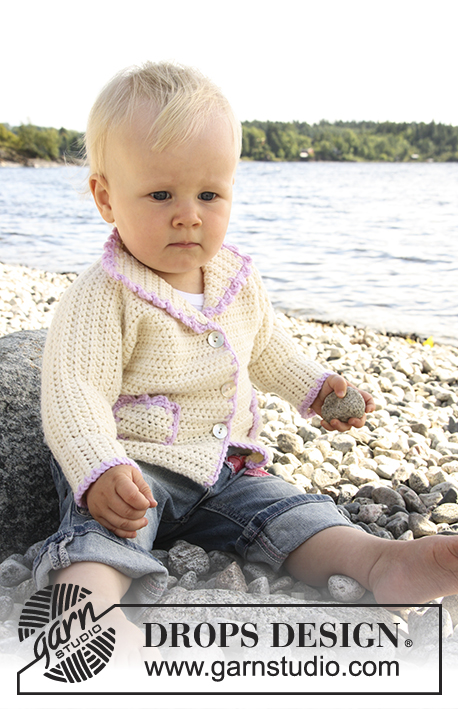
DROPS Baby 20-18 |
|
|
|
|
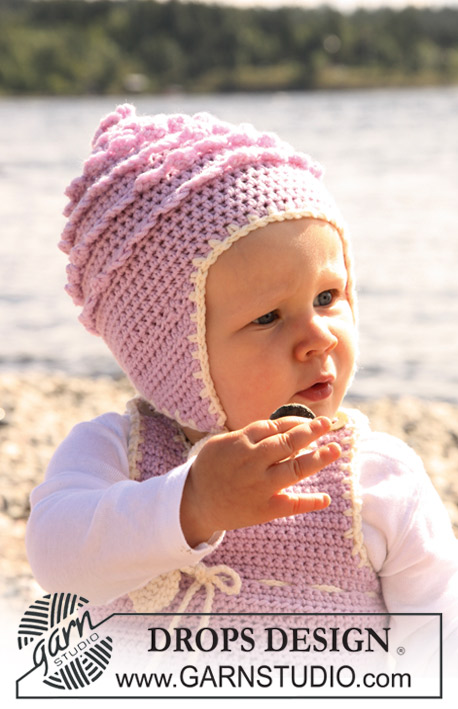
Crochet slippers for baby and children in DROPS Merino Extra Fine
DROPS Baby 20-18 |
|
|
SLIPPER CROCHET INFO: At beg of round with dc replace first dc with 1 ch and finish round with 1 sl st in first ch from beg of round. At beg of round with tr replace first tr with 3 ch and finish round with 1 sl st in 3rd ch from beg of round. Crochet in each tr (not between). DECREASING TIP: Dec 1 dc/tr by working 2 dc/tr tog as follows: Crochet 1 dc/tr but wait with the last pull-through (= 2 sts on hook), crochet next dc/tr and when doing the last pull-through pull thread through all 3 sts on hook – 1 dec dc/tr. -------------------------------------------------------- -------------------------------------------------------- SLIPPER: See CROCHET INFO and beg with square mid upper foot. Crochet 4 ch with crochet hook size 4 mm and Merino Extra Fine and form a ring with 1 sl st in first ch. ROUND 1: 8 dc in ring. ROUND 2: 3 ch, 1 tr in first dc, * 1 tr + 1 dtr + 1 tr in next dc, 2 tr in next dc *, repeat from *-* a total of 4 times, but finish with 1 sl st in 3rd ch from beg of round (instead of 1 tr) = 1 dtr in each corner with 4 tr between each corner. ROUND 3: 3 ch, 1 tr in next tr, 1 tr in next tr, * 1 tr + 1 dtr + 1 tr in dtr in corner, 1 tr in each of the next 4 tr *, repeat from *-* a total of 3 times, 1 tr + 1 dtr + 1 tr in dtr in corner, 1 tr in next tr and 1 sl st in 3rd ch from beg of round = 1 dtr in each corner with 6 tr between each corner. ROUND 4 (only for Size 2 years + 3/4 years): 3 ch, 1 tr in each of the next 3 tr, * 1 tr + 1 dtr + 1 tr in dtr in corner, 1 tr in each of the next 6 tr *, repeat from *-* a total of 3 times, 1 tr + 1 dtr + 1 tr in dtr in corner, 1 tr in each of the next 2 tr and 1 sl st in 3rd ch from beg of round = 1 dtr in each corner with 8 tr between each corner. ALL SIZES: 1 ch, 1 sl st in each of the first 3-3-3 (4-4) tr (i.e. to dtr in first corner), 1 ch, * 2 dc in dtr in corner, 1 dc in each of the 6-6-6 (8-8) tr *, repeat from *-* a total of 3 times, 2 dc in dtr in corner, then work 16-18-22 (26-28) ch and fasten with 1 sl st in first dc from beg of round (= for leg part). Now insert a marker mid front = mid between the 6-6-6 (8-8) tr at the front. Continue as follows: ROUND 1: 1 ch, 1 dc in each of the first 7-7-7 (9-9) dc, work 2 dc tog – see DECREASING TIP- 6-6-6 (8-8) dc, 2 dc tog, then 22-24-28 (34-36) dc (1 dc in each dc and remaining dc in ch-loop) = 38-40-44 (54-56) dc. ROUND 2: 1 dc in each dc all the way round. Repeat round 1 and 2, i.e. for every round there will be 1 less dc at beg of round before 2 dc tog and 1 dc less at the end of round after 2 dc tog (a constant of 6-6-6 (8-8) dc mid front). When piece measures 1.5-2-2.5 (3-4) cm from marker work 1 sl st in each dc to first corner, then crochet sole with dc back and forth on the middle 6-6-8 (8-10) dc at the front (i.e. 3-3-4 (4-5) dc each side of marker). When 1 row remains before sole measures 8-9-10 (12-14) cm work the last row, AT THE SAME TIME dec 1 dc each side = 4-4-6 (6-8) dc. Sew sole to slipper edge to edge with neat sts. LEG: Work 2 rows with dc back and forth on the 16-18-22 (26-28) ch crochet at the back of slipper (work 1 sl st in the side before turning piece each side). Work 1 round with dc round the opening – work 1 dc in each of the 16-18-22 (26-28) dc + 1 dc in each of the 6-6-6 (8-8) dc at the front of slipper = 22-24-28 (34-36) dc on the round. Continue as follows: ROUND 1: * 2 ch, skip 1 dc, 1 dc in next st *, repeat from *-* and finish with 2 ch and 1 sl st in first ch = 11-12-14 (17-18) ch-loops. ROUND 2: 1 sl st in first ch-loop, 3 ch, then 1 tr in each dc and 1 tr in each ch-loop from previous round, finish with 1 sl st in 3rd ch = 22-24-28 (34-36) tr. Work 1-1-2 (2-3) rounds with 1 tr in each tr, change to off-white and work next round as follows: 1 dc in first tr, * 2 ch, skip 1 tr, 1 dc in next tr *, repeat from *-* and finish with 2 ch and 1 sl st in dc from beg of round. Cut and fasten threads. TIE STRINGS: Work 4 ch with crochet hook size 4 mm with off-white, work 3 tr tog in the first of the 4 ch (i.e. work 3 tr but wait with last YO and pull-through on all 3 tr, then pull last YO through all 4 sts on hook), continue working ch until string measures approx 35 cm, then work 3 tr tog in 4th ch from hook, pull thread through last st on hook, cut and fasten thread. Thread string through eyelet row and tie at the front. |
|
|
Have you made this or any other of our designs? Tag your pictures in social media with #dropsdesign so we can see them! Do you need help with this pattern?You'll find tutorial videos, a Comments/Questions area and more by visiting the pattern on garnstudio.com. © 1982-2024 DROPS Design A/S. We reserve all rights. This document, including all its sub-sections, has copyrights. Read more about what you can do with our patterns at the bottom of each pattern on our site. |


With over 40 years in knitting and crochet design, DROPS Design offers one of the most extensive collections of free patterns on the internet - translated to 17 languages. As of today we count 304 catalogues and 11422 patterns - 11422 of which are translated into English (UK/cm).
We work hard to bring you the best knitting and crochet have to offer, inspiration and advice as well as great quality yarns at incredible prices! Would you like to use our patterns for other than personal use? You can read what you are allowed to do in the Copyright text at the bottom of all our patterns. Happy crafting!
Comments / Questions (17)
På rad 5 og etter de kjedemaskene: skal det hekles først en luftmaske og deretter 2 fastmasker i hjørnet, eller er den ene luftmasken en av de 2 fastmaskene?
31.01.2021 - 18:09Dobrý den, v českém návodě chybí video. Pod návodem na anglické verzi jsem ho našla, u českého však ne. Bez videa jsem některé věci v návodu nechápala nebo si nebyla jistá jak je to myšleno. Tak jsem vám chtěla navrhnout přidat video i na českou verzi návodu. Děkuji
25.02.2017 - 12:39Jeg forstår ikke under alle str når jeg har lavet 16 lm hvor jeg skal fæste dem med en km 😕 Jeg er lidt ny i hækling og går helt i stå med en fin firkant. Håber i kan pensle det ud eller vise det i en video 😃 Tusind tak for en fantastisk hjemmeside 👍
03.07.2016 - 15:28DROPS Design answered:
Hej Tina. Du skal faeste dem i den förste fm i begyndelsen af din omg. Du laver hermed en aabning til foden. Du haekler fod langs "undersiden" af disse lm + firkanten. Og bagefter haekler du skaftet paa "oversiden" af disse lm (de 2 rk med fm og st, som du kan se paa billedet).
05.07.2016 - 14:34Goedendag, Allereerst wat een super leuk patroon. Ik heb het slofje af, op de zool na. Ik snap niet zo goed hoe ik deze moet haken. Hebben jullie een afbeelding van de zool? Mvg Iris van der Pol
04.01.2016 - 22:42DROPS Design answered:
Hoi Iris. We hebben geen afbeelding van de onderkant. Je haakt de zool van de middelste 6-6-8 (8-10) v aan de voorkant (dus 3-3-4 (4-5) v aan iedere kant van de markeerdraad). Je haakt heen en weer tot de zool ca. 8-9-10 (12-14) cm meet. (dwz, je haakt de zool van de voorkant (tenen) tot aan de achterkant (hiel) en naait vervolgens de zool vast aan de zijkanten + hiel
05.01.2016 - 15:18Ich häkle die Größe 12-18 Monate: Danach wie folgt: Ich häkle .........danach 28 fM.....restliche Maschen in den Luftmaschenbogen. Bei mir bleiben zwei Maschen von dem Luftmaschenbogen übrig. Habe es 2x versucht und jedesmal bleiben 2M übrig. Was mache ich falsch?!? MFG Jutta
30.06.2014 - 11:42DROPS Design answered:
Liebe Jutta, die Lm im Bogen gehen nicht mit der Anzahl der fM auf - und das ist auch nicht nötig, denn Sie häkeln UM den Bogen, nicht IN die einzelnen Lm des Lm-Bogens. Dadurch lassen sich die fM gleichmäßig verschieben. Wichtig ist, dass Sie am Ende 44 fM haben.
02.07.2014 - 15:15In "all sizes" section of vamp of slipper, are these supposed to be slip stiches or sgl crochet? both are used.
06.01.2014 - 19:13Que significa "p.e."?
10.12.2013 - 14:03DROPS Design answered:
Hola Alejandra. P.e. = punto enano o punto bajísimo.
12.12.2013 - 09:12Je confirme que Les explications sont pas très clairs, j'ai arreté le travail Car je comprend plus comment continuer surtout pour la semelle. Dommage, le modele est trop beau ..
01.11.2013 - 13:36DROPS Design answered:
Bonjour Hilary, après avoir diminué tous les 2 tours, à 1.5-4 cm du marqueur (cf taille), vous continuez sur les 6-10 ms du milieu devant, en ms, en allers et retours jusqu'à la longueur indiquée, puis diminuez 1 ms au début et à la fin du rang. La semelle se coud ensuite bord à bord au chausson. Bon crochet!
01.11.2013 - 14:30Nataliya wrote:
So easy and nice pattern! Thank you!
13.10.2013 - 07:02Nataliya wrote:
So easy and nice pattern! Thank you! Looks lovely
13.10.2013 - 07:02