
Popular categories
Looking for a yarn?


|
||||
Tamzyn |
||||
 |
 |
|||
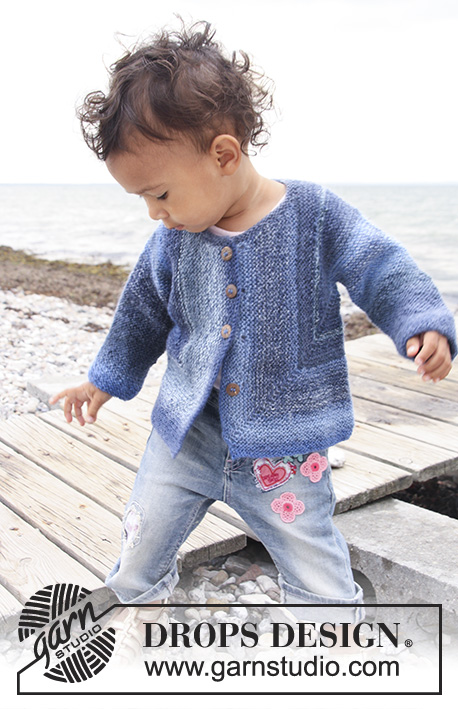
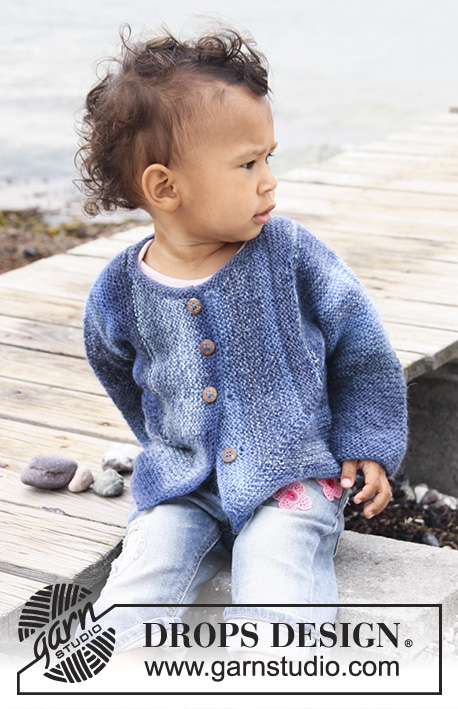
Knitted domino jacket in garter st for baby and children in DROPS Delight
DROPS Baby 20-15 |
||||
|
INCREASE TIP: Inc 1 st in each side of marker by making 1 YO. Work YO twisted on next row (i.e. knit in back loop of st instead of front loop) to avoid holes. ---------------------------------------------------------- JACKET: Work the piece sideways. Work 2 pieces and finish by sewing pieces tog in the back. Work the pieces from the sleeve edge towards the mid of jacket. RIGHT HALF: Worked back and forth on circular needle. Cast on 36-38-40 (40-42-44) sts on circular needle size 3 mm / US 2or3 with Delight. K back and forth on all rows until completed (= garter st). REMEMBER THE GAUGE! AT THE SAME TIME when piece measures 6-6-5 (5-6-6) cm / 2⅜"-2⅜"-2" (2"-2⅜"-2⅜"), inc 1 st in each side, repeat the inc on every 8th row a total of 6-7-9 (11-13-14) times = 48-52-58 (62-68-72) sts. Work until piece measures 17-19-20 (25-29-33) cm / 6¾"-7½"-8" (9¾"-11⅜"-13") – adjust so that the last row is worked from WS. BODY: K 1 row (= RS), at end of row cast on 41-43-50 (53-58-60) sts (= towards the back) = 89-95-108 (115-126-132) sts. NOW MEASURE PIECE FROM HERE! K 1 row, turn, insert a marker in the 2nd st on needle from RS (= in right side). Continue – AT THE SAME TIME inc 1 st on each side of the st with marker every other row a total of 38-40-46 (48-50-52) times – SEE INCREASE TIP. AT THE SAME TIME when piece measures 8.5-9-10.5 (11-12-13) cm / 3¼"-3½"-4¼" (4⅜"-4¾"-5⅛") work only over the last 60-65-74 (79-86-91) sts in the left side seen from RS (= back piece), slip the remaining sts on a stitch holder. BACK PIECE: Work until piece measures 13-14-16 (17-18-19) cm / 5⅛"-5½"-6¼" (6¾"-7"-7½") (from where back piece sts was cast on), bind off. FRONT PIECE: Put sts from stitch holder back on needle but leave 9-10-10 (10-12-12) sts towards the back on the stitch holder for neckline. Continue inc on every other row – AT THE SAME TIME dec 1 st towards the neck (= towards sts on stitch holder) on every 4th row a total of 6-7-7 (7-7-7) times. AT THE SAME TIME when piece measures 14-15-17 (18-19-20) cm / 5½"-6"-6¾" (7"-7½"-8") (from where inc on front piece started and towards mid front) bind off for 3-4-4 (5-5-5) button holes as follows (from neck, i.e. from WS): K 2, bind off 2 sts, * K 12-9-11 (9-10-10) sts, bind off 2 sts *, repeat from *-* a total of 2-3-3 (4-4-4) times, K rest of row. On next row cast on 2 new sts over the bound off sts. After all inc and dec there are 90-93-109 (115-121-126) sts on the needle. When finished with inc on right side, bind off 51-52-62 (66-70-74) sts from the neckline and down the front band of jacket (bind off from WS) = 39-41-47 (49-51-52) sts left on needle. K back and forth over these sts for approx. 1-1-2 (2-3-3) cm / ⅜"-⅜"-¾" (3/4"-1⅛"-1⅛") (fold piece at the shoulder and check that the front piece is the same length as back piece). Bind off. LEFT HALF: Work as right half but without button holes – this piece is assembled with wrong side out. ASSEMBLY: Put the 2 pieces towards each other and sew tog mid back – sew edge to edge to avoid a chunky seam. Fold the jacket and sew underarm and side seams in front loop of outermost sts. Sew on buttons. NECKLINE: Knit up 55 to 80 sts (including sts on stitch holder) around the neck on circular needle size 3 mm / US 2or3 with Delight. K 3 rows back and forth, bind off. |
||||
Diagram explanations |
||||
|
||||

|
||||
|
Have you made this or any other of our designs? Tag your pictures in social media with #dropsdesign so we can see them! Do you need help with this pattern?You'll find tutorial videos, a Comments/Questions area and more by visiting the pattern on garnstudio.com. © 1982-2024 DROPS Design A/S. We reserve all rights. This document, including all its sub-sections, has copyrights. Read more about what you can do with our patterns at the bottom of each pattern on our site. |
||||


With over 40 years in knitting and crochet design, DROPS Design offers one of the most extensive collections of free patterns on the internet - translated to 17 languages. As of today we count 304 catalogs and 11422 patterns - 11417 of which are translated into English (US/in).
We work hard to bring you the best knitting and crochet have to offer, inspiration and advice as well as great quality yarns at incredible prices! Would you like to use our patterns for other than personal use? You can read what you are allowed to do in the Copyright text at the bottom of all our patterns. Happy crafting!
Comments / Questions (191)
Très agréable à réaliser,très beau résultat !!! Merci pour toutes ces explications & vidéo! Bon tricot!
03.05.2015 - 20:34Judy Tomlin wrote:
My local wool store does not have Delight yarn, but does carry Fabel. Would Fabel be acceptable for the guage required on this pattern?
19.03.2015 - 21:12DROPS Design answered:
Dear Mrs Tomlin, DROPS Delight & Fabel both belong to group A so that you can use Fabel here - click here to calculate amount of yarn when using alternative. Happy knitting!
20.03.2015 - 09:11I'm still struggling with this pattern and hope to find someone who can help me or I shall have to abandon it. I wouldn't call myself a novice but I think this pattern is a translation to english, hence so much confusion. I will not be buying your patterns again unfortunately a I am so totally confused. It would be helpful to state level of expertise needed for patterns too. I haven't found any useful youtube videos to help either.
03.03.2015 - 19:01DROPS Design answered:
Dear Mrs Innes, we are sorry to hear that you have worries with this pattern, it is a very popular pattern that has been worked so many times succesfully. If you need help, you are welcome to ask your question there or contact your DROPS store. Happy knitting!
04.03.2015 - 09:36Georgia Mosesson wrote:
I am not sure how to increase on either side of stich with marker ,please explain how to do this. Thank you, Georgia
02.03.2015 - 20:43DROPS Design answered:
Dear Mrs Mosesson, increase are done with a YO, on next row, work YO into back of loop - see also video below - work until st with marker, make a YO, K st with marker, make a YO. Happy knitting!
03.03.2015 - 08:59Bonjour, j'ai tricote la première partie sans problème, faut il inverser cote dos et devant pour l autre partie (tricoter en vis versa?)
03.01.2015 - 10:11DROPS Design answered:
Bonjour Murielle, la 2e partie se tricote exactement comme la 1ère mais elle sera cousue sur l'envers pour qu'elle soit l'inverse de la 1ère partie. Bon tricot!
03.01.2015 - 15:23Ops non ci ho pensato: ho rimediato prendendo il filo srotolando un po' il gomitolo però ti assicuro che lo portato quasi uguale. Un' altra volta controllo. Grazie infinite per avermi risposto. Jvonne
26.12.2014 - 16:48Ho iniziato il lato sinistro del golfino ma i colori e le righe mi vengono tutte diverse dal primo pezzo. Ho usato lo stesso filato e colore della foto cosa mi dici è bello ugualmente? Non da lo stesso effetto. Grazie jvonne
21.12.2014 - 12:39DROPS Design answered:
Buongiorno Jvonne, per avere la stessa sfumatura dovrebbe iniziare l'altro lato con un gomitolo che abbia la stessa sequenza di sfumature di quello precedente. In ogni caso è molto carino anche se i due lati non sono identici. Buon lavoro!!
23.12.2014 - 14:17Do you have this pattern in larger children's sizes and adult sizes? Regards Elise
15.12.2014 - 16:32DROPS Design answered:
Dear Mrs Hansen, what about this one, 127-12 ? Click here to find a choice of jacket worked in Fabel. Happy knitting!
15.12.2014 - 17:35I'm stuck. I've done the right sleeve on 4 double pointed needles but am unclear how to continue and would appreciate your advice.
07.12.2014 - 18:23DROPS Design answered:
Dear Mrs Innes, if you have worked the sleeve in the round, you have then to continue back and forth on a circular needle, casting on the sts for back piece and inc for front piece as stated. Happy knitting!
09.12.2014 - 13:37Hallo, ih habe nun beide Teile fertig gestrickt und zusammengenäht. Jetzt habe ich aber noch auf jeder Seite 10 Maschen auf der Hilfsnadel. Jetzt soll man laut Anleitung rundum den HHalsausschnitt neue Maschen anschlagen und ca. 3cm stricken. Aber was mache ich jetzt mit den Maschen auf dwr Hilfsnadel? Komme hier leider nicht weiter. Freue mich auf eure Hilfe.
29.11.2014 - 14:04DROPS Design answered:
Die M auf der Hilfsnadel gehören zu den M für die Halsblende dazu. Sie stricken also die auf der Hilfsnadel stillgelegten M des einen Vorderteils zurück auf die Arbeitsnadel, fassen dann aus dem Halsausschnitt M auf und stricken die stillgelegten M des anderen Vorderteils auf die Nadel. Insgesamt müssen Sie dann die angegebene M-Zahl auf der Nadel haben (auf eine M mehr oder weniger kommt es dabei nicht an).
01.12.2014 - 13:29