DROPS Baby Merino
DROPS Baby Merino
100% Wool
from 3.50 £ /50g
Get the yarn to make this pattern from 10.50£.

The yarn cost is calculated from the pattern’s smallest size and the yarn’s cheapest product type. Looking for an even better price? You might find it on the DROPS Deals!

DROPS SS24

Nova

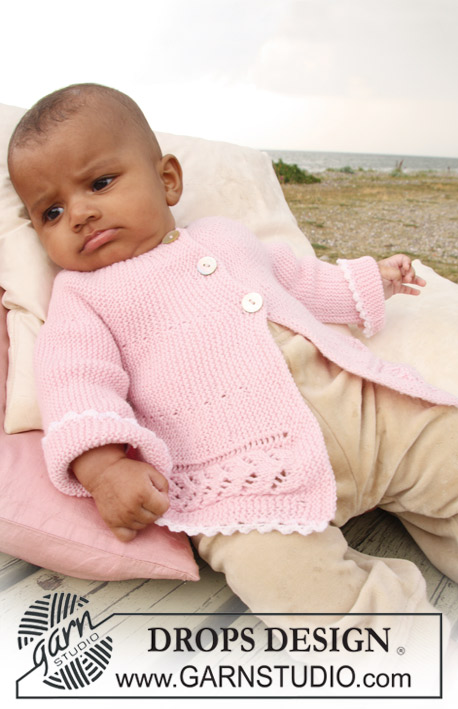
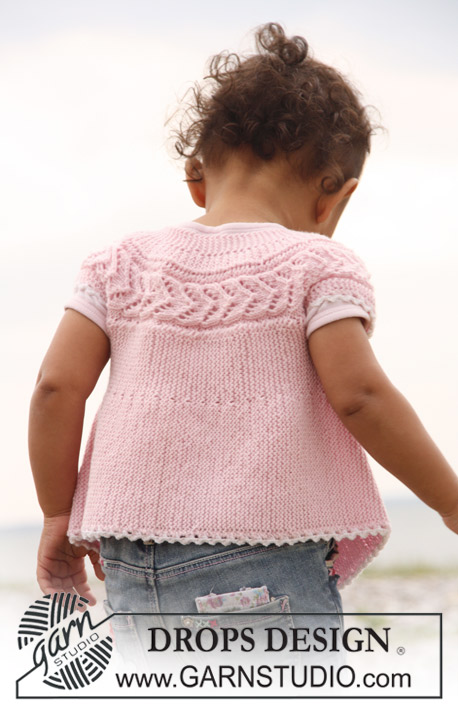
Short sleeve cardigan knitted from side to side in garter st and lace pattern for baby and children in DROPS BabyMerino

DROPS Baby 20-14
DROPS design: Pattern no BM-005-by
--------------------------------------------------------
Size: 6/9-12/18-24 months (3/4-5/6) years
Size in cm: 62/68 - 74/80 - 86/92 (98/104 -110/116)

Materials: DROPS BABY MERINO from Garnstudio
100-150-150 (150-200) g colour no 05, light pink
50 g for all sizes colour no 01, white

DROPS POINTED NEEDLES size 2.5 mm - or size needed to get 26 sts x 51 rows in garter st = 10 x 10 cm.
DROPS CROCHET HOOK size 3 mm – for crochet borders.

DROPS MOTHER OF PEARL BUTTONS, no 521: 3 pcs.

-------------------------------------------------------

Alternative Yarn – See how to change yarns here
Yarn Groups A to F – Use the same pattern and change the yarn here
Yarn usage using an alternative yarn – Use our yarn converter here

-------------------------------------------------------

DROPS Baby Merino
DROPS Baby Merino
100% Wool
from 3.50 £ /50g
Get the yarn to make this pattern from 10.50£.

The yarn cost is calculated from the pattern’s smallest size and the yarn’s cheapest product type. Looking for an even better price? You might find it on the DROPS Deals!

Pattern instructions

NOTE: This pattern is written in British English. All measurements in charts are in cm. For conversion from cm to inches - click here. There are different terms for crocheting in British and American English. If this pattern includes crochet, click for "crochet terms" here. For this pattern in American English, please click here.
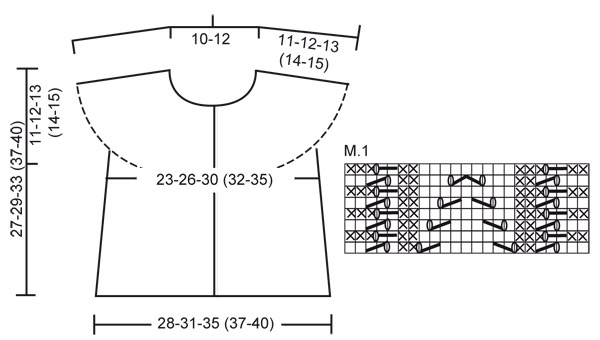
SLEEVELESS TOP:

PATTERN: See diagram M.1. Diagram shows the pattern from RS.

KNITTING TIP: When turning mid piece, slip first st as if to K, tighten thread and work return row in order to avoid a hole in transition.
--------------------------------------------------------
--------------------------------------------------------

SLEEVELESS TOP:
Beg on left front piece and work towards the armhole, work wide shoulder, work back piece, the other shoulder and then right front piece.

LOOSELY cast on 62-68-78 (88-96) sts on needle size 2.5 mm with light pink and K 8 rows for front band (first row = RS).
Work next row as follows from RS: K 41-45-52 (60-65) sts, K the next 15 sts AT THE SAME TIME inc 8 sts evenly (inc 1 st by making 1 YO), K the last 6-8-11 (13-16) sts = 70-76-86 (96-104) sts. K 1 row on all sts (work YO into back of loop to avoid a hole).
Continue as follows: K 41-45-52 (60-65) sts (K these sts on all rows), chart M.1 (= 23 sts), K 6-8-11 (13-16) sts (K these sts on all rows).
AT THE SAME TIME work shortened rows as follows - SEE KNITTING TIP:
* work the first 30-32-38 (42-47) sts, turn piece and work return row, work the first 46-50-57 (65-70) sts, turn (for all sizes this will be after 5 sts in M.1) and work return row, work the first 64-70-80 (90-98) sts, turn and work return row, work all 70-76-86 (96-104) sts, turn and work return row *, repeat from *-* until piece measures approx 16-18-19 (20,5-22) cm from cast on row, measured where widest (= bottom edge).
Cut the thread.

Now slip the first 41-45-52 (60-65) sts towards bottom edge on a stitch holder (= the side) = 29-31-34 (36-39) sts left on needle for wide shoulder.
Continue with shortened rows as follows (first row = from RS): * Work in pattern on the first 23-25-28 (30-33) sts, turn and work return row, work in pattern on all 29-31-34 (36-39) sts, turn and work return row *, repeat from *-* until piece measures 16-17-18 (18-20) cm from where sts were put on stitch holder. Cut the thread. Slip the 41-45-52 (60-65) sts from stitch holder at the side back on needle for back piece and insert a marker in piece. Continue from bottom edge of jacket (first row = RS) in pattern and with shortened rows as described for front piece.
When piece measures 28-31-35 (37-40) cm from marker at the side, measured where widest (= bottom edge) cut the thread. Slip the first 41-45-52 (60-65) sts from bottom edge on a stitch holder (= the side). Continue on remaining sts for wide shoulder as described for the first shoulder until shoulders are the same length. Cut the thread. Slip the 41-45-52 (60-65) sts from stitch holder at the side back on needle and continue as described for the other front piece. When right front piece is the same length as left front piece (without front band) work next row from RS as follows:
work 41-45-52 (60-65) sts, work the next 23 sts AT THE SAME TIME dec 8 sts evenly (dec by K2 tog), work the last 6-8-11 (13-16) sts = 62-68-78 (88-96) sts.
Now work front band as follows: K 3 rows on all sts.
On next row from RS make 3 buttonholes as follows (i.e. from bottom edge towards the top): K 41-45-53 (61-65) sts, 1 YO, K2 tog, K 7-8-9 (10-12) sts, 1 YO, K2 tog, K 7-8-9 (10-12) sts, 1 YO, K2 tog and finish with K1. Turn and K all sts. K 5 rows on all sts and cast off loosely.

CROCHET BORDER:
Crochet a border round bottom edge of jacket and round shoulder edges with crochet hook size 3 mm with white as follows: 1 dc, * 3 ch, 1 tr in the first of the 3 ch, skip approx 1 cm, 1 dc *, repeat from *-*. Cut and fasten thread.

ASSEMBLY:
Sew on buttons.

This pattern has been corrected.

Updated online: 21.01.2011
VEST:... * work the first 30-32-38 (42-47) sts, turn piece and work return row, work the first 46-50-57 (65-70) sts, turn (for all sizes this will be after 5 sts in M.1) and work return row,...
Updated online: 26.10.2011
Materials: DROPS BABY MERINO from Garnstudio
100-150-150 (150-200) g colour no 05, light pink

Diagram

symbols = K from RS, P from WS
symbols = P from RS, K from WS
symbols = K2 tog
symbols = slip 1 st as if to K, K1, psso
symbols = K2 tog into back of loop
symbols = slip 1 st as if to K, K2 tog, psso
symbols = 1 YO between 2 sts
diagram
Do you have a question? See a list of frequently asked questions (FAQ)

Knitting tension is what determines the final measurements of your work, and is usually measured per 10 x 10 cm. It is provided like so: number of stitches in width x number of rows in height - eg: 19 stitches x 26 rows = 10 x 10 cm.

The knitting tension is very individual; some people knit/crochet loosely while others work tightly. You adjust the knitting tension with the needle size, which is why the suggested needle size is only meant as a guide! You need to adjust this (up or down) to ensure that YOUR knitting tension matches the knitting tension provided in the pattern. If you work with a different knitting tension than provided you will have a different yarn consumption, and your work will have different measurements than what the pattern suggests.

The knitting tension also determines which yarns can replace each other. As long as you achieve the same knitting tension you can replace one yarn with another.

See DROPS lesson: How to measure your tension/gauge

See DROPS video: How to make a gauge tension swatch

The required amount of yarn is provided in grams, eg: 450 g. To calculate how many balls you’ll need you first need to know how many grams are in 1 ball (25g, 50g or 100g). This information is available if you click on the individual yarn quality on our pages. Divide the amount required with the amount of each ball. For example, if each ball is 50g (the most common amount), the calculation will be as follows: 450 / 50 = 9 balls.

The important thing when changing from one yarn to another is that the knitting/crochet tension remains the same. This is so that the measurements of the finished piece will be the same as on the sketch provided. It is easier to achieve the same knitting tension using yarns from the same yarn group. It is also possible to work with multiple strands of a thinner yarn to achieve the knitting tension of a thicker one. Please try our yarn converter. We recommend you to always work a test swatch.

Please NOTE: when changing yarn the garment might have a different look and feel to the garment in the photo, due to individual properties and qualities of each yarn.

See DROPS lesson: Can I use a different yarn than the one mentioned in the pattern?

All our yarns are categorised into yarn groups (from A to F) according to thickness and knitting tension – group A contains the thinnest yarns and group F the thickest. This makes it easier for you to find alternative yarns to our patterns, should you wish to switch yarn. All yarns within the same group have a similar knitting tension and can easily replace each other. However, different yarn qualities have different structures and properties which will give the finished work a unique look and feel.

Click here for an overview of the yarns in each yarn group

At the top of all our patterns you’ll find a link to our yarn calculator, which is a helpful tool should you wish to use a different yarn than suggested. By filling in the yarn quality you wish to replace, the amount (in your size) and number of strands, the calculator will present good alternative yarns with the same knitting tension. Additionally it will tell you how much you’ll require in the new qualities and whether you’ll need to work with multiple strands. Most skeins are 50g (some are 25g or 100g).

If the pattern is worked with multiple colours, every colour will have to be calculated separately. Similarly, if the pattern is worked with several strands of different yarns (for example 1 strand Alpaca and 1 strand Kid-Silk) you will have to find alternatives for each, individually.

Click here to see our yarn calculator

Since different yarns have different qualities and textures we have chosen to keep the original yarn in our patterns. However, you can easily find options among our available qualities by using our yarn calculator, or simply pick a yarn from the same yarn group.

It is possible that some retailers still have discontinued yarns in stock, or that someone has a few skeins at home that they would like to find patterns for.

The yarn calculator will provide both alternative yarn as well as required amount in the new quality.

If you think it's hard to decide what size to make, it can be a good idea to measure a garment you own already and like the size of. Then you can pick the size by comparing those measures with the ones available in the pattern's size chart.

You'll find the size chart at the bottom of the pattern.

See DROPS lesson: How to read size chart

The needle size provided in the pattern serves only as a guide, the important thing is to follow the knitting tension. And since knitting tension is very individual, you will have to adjust the needle size to ensure that YOUR tension is the same as in the pattern – maybe you’ll have to adjust 1, or even 2 needle sizes, up or down to achieve the correct tension. For this, we recommend that you work test swatches.

Should you work with a different knitting tension than the one provided, the measurements of the finished garment might deviate from the measurement sketch.

See DROPS lesson: How to measure your tension/gauge

See DROPS video: How to make a tension/gauge swatch

Working a garment top-down provides more flexibility and room for personal adjustment. For example it is easier to try the garment on while working, as well as making adjustments to length of yoke and shoulder caps.

The instructions are carefully explaining every step, in the correct order. Diagrams are adjusted to the knitting direction and are worked as usual.

The diagram depicts all rows/rounds, and every stitch seen from the right side. It is read from bottom to top, from right to left. 1 square = 1 stitch.

When working back and forth, every other row is worked from the right side and every other row is worked from the wrong side. When working from the wrong side, the diagram will have to be worked reversed: from left to right, knit stitches are purled, purl stitches are knit etc.

When working in the round every round is worked from the right side and the diagram are worked from right to left on all rounds.

See DROPS lesson: How to read knitting diagrams

The diagram depicts all rows/rounds, and every stitch seen from the right side. It is worked from bottom to top, from right to left.

When working back and forth every other row is worked from the right side: from right to left and every other row is worked from the wrong side: from left to right.

When working in the round, every row in the diagram are worked from the right side, from right to left.

When working a circular diagram you start in the middle and work your way outwards, counter clockwise, row by row.

The rows usually start with a given number of chain stitches (equivalent to the height of the following stitch), this will either be depicted in the diagram or explained in the pattern.

See DROPS lesson: How to read crochet diagrams

Instructions for working several diagrams after each other on the same row/round, will often be written like so: “work A.1, A.2, A.3 a total of 0-0-2-3-4 times". This means you work A.1 once, then A.2 is worked once, and A.3 is repeated (in width) the number of times provided for your size – in this case like so: S = 0 times, M = 0 times, L=2 times, XL= 3 times and XXL = 4 times.

The diagrams are worked as usual: begin with the first row in A.1, then work the first row in A.2 etc.

See DROPS lesson: How to read knitting diagrams

See DROPS lesson: How to read crochet diagrams

The total width of the garment (from wrist-to-wrist) will be larger in the larger sizes, despite the actual sleeves being shorter. The larger sizes have longer sleeve caps and wider shoulders, so there will be a good fit in all sizes.

The measurement sketch/schematic drawing provides information regarding the full length of the garment. If it’s a jumper or a jacket the length is measured from the highest point on the shoulder closest to the neckline, and straight down to the bottom of the garment. It is NOT measured from the tip of shoulder. Similarly, the length of yoke is measured from the highest point on the shoulder and down to where yoke is split into body and sleeves.

On a jacket measures are never taken along bands, unless specifically stated. Always measure inside band stitches when measuring the length.

See DROPS lesson: How to read a schematic drawing

Diagrams are often repeated on the round or in height. 1 repeat is the diagram the way it appears in the pattern. If it says to work 5 repeats of A.1 in the round, then you work A.1 a total of 5 times after/next to each other in the round. If it says to work 2 repeats of A.1 vertically/in height you work the entire diagram once, then begin again at the start and work the entire diagram one more time.

Chain stitches are slightly narrower than other stitches and to avoid working the cast-on edge too tight, we simply chain more stitches to begin with. The stitch count will be adjusted on the following row to fit the pattern and measurement sketch.

The rib edge is more elastic and will contract slightly compared to, for example, stocking stitch. By increasing before the rib edge, you avoid a visible difference in width between the rib edge and the rest of the body.

It’s very easy to cast off too tightly, and by making yarn overs while casting off (and simultaneously casting these off) you avoid a too tight cast off edge.

See DROPS video: How to bind off with yarn overs (yo)

To achieve an even increase (or decrease) you can increase on, for example: every 3rd and 4th row alternately, like so: work 2 rows and increase on the 3rd row, work 3 rows and increase on the 4th. Repeat this until the increase is complete.

See DROPS lesson: Increase or decrease 1 st on every 3rd and 4th row alternately

Should you prefer to work in the round instead of back and forth, you may of course adjust the pattern. You’ll need to add steeks mid-front (usually 5 stitches), and follow the instructions. When you would normally turn and work from the wrong side, simply work across the steek and continue in the round. At the end you’ll cut the piece open, pick up stitches to work bands, and cover the cut edges.

See DROPS video: How to knit steeks and cut open

Should you prefer to work back and forth instead of in the round, you may of course adjust the pattern so you work the pieces separately and then assemble them at the end. Divide the stitches for the body in 2, add 1 edge stitch in each side (for sewing) and work the front and back pieces separately.

See DROPS lesson: Can I adapt a pattern for circular needles into straight needles?

Pattern repeats can vary slightly in the different sizes, in order to get the correct proportions. If you’re not working the exact same size as the garment in the photo, yours might deviate slightly. This has been carefully developed and adjusted so that the complete impression of the garment is the same in all sizes.

Make sure to follow instructions and diagrams for your size!

If you have found a pattern you like which is available in women’s size it’s not very difficult to convert it to men’s size. The biggest difference will be the length of sleeves and body. Start working on the women size that you think would fit across the chest. The additional length will be worked right before you cast off for the armhole/sleeve cap. If the pattern is worked top-down you can add the length right after the armhole or before the first decrease on sleeve.

Regarding additional yarn amount, this will depend on how much length you add, but it is better with a skein too many than too few.

All yarns will have excess fibres (from production) that might come off as lint or shedding. Brushed yarns (ie hairier yarns) have more of these loose, excess fibres, causing more shedding.

Shedding also depends on what is worn under or over the garment, and whether this pulls at the yarn fibres. It’s therefore not possible to guarantee that there will be no shedding

Below are some tips on how to get the best result when working with hairier yarns:

1. When the garment is finished (before you wash it) shake it vigorously so the looser hairs come off. NOTE: do NOT use a lint roller, brush or any method that pulls at the yarn.

2. Place the garment in a plastic bag and put it in your freezer - the temperature will cause the fibres to become less attached to each other, and excess fibres will come off easier.

3. Leave in the freezer for a few hours before taking it out and shaking it again.

4. Wash the garment according to the instructions on the yarn label.

Pilling is a natural process that happens to even the most exclusive of fibers. It's a natural sign of wear and tear that is hard to avoid, and that is most visible in high friction areas of your garment like a sweater's arms and cuffs.

You can make your garment look as new by removing the pilling, using a fabric comb or a pill/lint remover.

Still can't find the answer you need? Then scroll down and leave your question so one of our experts can try to help you. This will be done normally within 5 to 10 working days.
In the meantime, you can read the questions and answers that others have left to this pattern or join the DROPS Workshop on Facebook to get help from fellow knitters/crocheters!

You might also like...

Post a comment to pattern DROPS Baby 20-14

We would love to hear what you have to say about this pattern!

If you want to leave a question, please make sure you select the correct category in the form below, to speed up the answering process. Required fields are marked *.

Comments / Questions (200)

country flag Lelletta wrote:

Buonasera! Avrei voluto salvare tra i preferiti questo bel giacchino, ma vedo he non c'è più la possibilità di farlo ed inoltre sono spariti anche i modelli che avevo precedentemente salvato! Perchè avete tolto una opzione così comoda? Grazie se vorrete rispondermi e comunque buon lavoro! Lelletta

21.01.2019 - 22:24

DROPS Design answered:

Buonasera Lelletta. La funzione preferiti verrà ripristinata a breve. Buon lavoro!

21.01.2019 - 23:29

country flag Michaela wrote:

Dobrý den, v návodu je psáno Pokračujeme následovně: 41-45-52 (60-65) ok hladce (tato oka pleteme ve všech řadách hladce), vzor M. 1 (= 23 ok), 6-8-11 (13-16) ok hladce (tato oka pleteme ve všech řadách hladce). SOUČASNĚ pleteme zkrácené řady – viz TIP NA PLETENÍ: Nevím kdy přesně začít se zkrácenými řadami. Můžete mi prosím poradit. Děkuji

11.01.2019 - 19:07

country flag Cindy wrote:

Ich bin beim ärmel stehen geblieben, es steht das man 33 maschen stricken soll danach zurück und danach über alle 39 maschen und zurück, danach wiederhollen. jedoch wurde ja die vorderseite bereits beim muster nach 5 maschen gedreht, wird das beim ärmel danach auch gemacht? Merci

08.09.2018 - 10:09

DROPS Design answered:

Liebe Cindy, die verkürzten Reihen werden auch bei den Ärmeln gestrickt, dh wie beschrieben: *2 Reihe über 33 M, 2 Reihe über alle die 39 M* bis die Arbeit 20 cm von den stillgelegten Maschen mißt. Viel Spaß beim stricken!

11.09.2018 - 08:09

country flag Kelly wrote:

I’m having trouble with the beginning of the pattern. As you start the pattern it says to knit 52 in my case, then M1, then the remaining 11. The problem I’m having is that the pattern says AT THE SAME TIME knit 38 and so on. How do you do the first set of instructions and the second AT THE SAME TIME? Do the perhaps mean on the next row or something. Although that wouldn’t work either. Thank you for your help.

29.08.2018 - 19:18

DROPS Design answered:

Dear Kelly, In the first row, you knit 52 sttiches, then M,1 ( keep in mind that you have to increase 8 stiches in M1!), then the last 11 sts. Then, you K 1 row on all sts (work YO into back of loop to avoid a hole). On the 3rd row, you continue as follows: K 41-45-52 (60-65) sts (K these sts on all rows), chart M.1 (= 23 sts), K 6-8-11 (13-16) sts (K these sts on all rows). This is when you start the shortened rows. If you never worked shortened rows you recommend that you see the video tutorials that you can find on the left of the pattern. Happy Knitting!

30.08.2018 - 14:03

country flag Melanie wrote:

Hallo, ich bin Linkshänderin und stricke auch von links nach rechts. In der Regel kann ich strickschriften gut für mich umwandeln. Nur in der Rückreihe von dem Muster weiß ich nicht, wie ich die zwei Maschen in den hinteren Maschenbogen zusammenstricke. Mein Muster sieht dann komisch aus. Habt ihr eine Idee?

11.03.2018 - 09:28

DROPS Design answered:

Liebe Melanie, am besten Stricken Sie eine Maschenprobe mit einer kleineren Maschenanzahl, und probieren Sie wie Sie am besten die Rückreihen stricken sollen. Ihr DROPS Laden kann Ihnen auch damit helfen, auch telefonisch oder per Mail. Viel Spaß beim stricken!

12.03.2018 - 09:28

country flag Charlotte Johansen wrote:

Jeg strikker baby 20-12 med hulmønster i bunden og ikke som vist i videoen 20-14 Har jeg ret når jeg ikke vender i mønsteret men. Når jeg så har strikke de 16 cm skal jeg klippe garnet og HVAD så nu forstår jeg ikke mere jeg kunne godt tænke mig en video af den overgang hvor jeg også skal slå masker op til ærme.

06.07.2017 - 21:21

DROPS Design answered:

Hej Bente, hvis du strikker Baby 20-12 så skal du følge den opskrift, her er der også vendepinde. Har du flere spørgsmål så skriv det gerne inde på den opskrift du strikker efter husk også at skrive hvilken størrelse du strikker. God fornøjelse!

12.07.2017 - 14:01

country flag Vivi Busch-Christensen wrote:

Hei - er det mulig å strikke denne jakken med lange ermer? Tusen takk for svar. Mvh Vivi Busch-Christensen

13.06.2017 - 19:55

DROPS Design answered:

Hei Vivi. Oppskriften til denne jakken er kun i korte ermer, men ta en titt på en annen oppskrift vi har, DROPS Baby 20-12. Dette en lignende jakke med lange ermer. Mulig du greier selv å regne ut hva du må gjøre for å få lange ermer til Baby 20-14. God Fornøyelse!

14.06.2017 - 08:37

country flag Susanne Nielsen wrote:

Dette er den yndigste lille trøje. Jeg læste alle spørgsmål og svar igennem før jeg begyndte. Jeg så videoen. Jeg pillede op i begyndelsen og måtte begynde forfra. Efter de første omgange gik det som en leg og jeg er meget tilfreds med resultatet.

21.04.2017 - 23:44

country flag Herti Anderle wrote:

Liebe Amalthea! Falls du wieder einmal die Kommentare hier anschaut - vielen Dank für deine Beschreibung, ohne die hätte ich das Jäckchen nie stricken können. An alle, die bei dieser Anleitung verzweifeln - lest die Beschreibung von Amalthea und schreibt euch das Muster mit Buchstaben auf ein Blatt, die Vorderansicht = Hinreihe rechts beginnend und die Rückreise links beginnend .So habe ich mir leichter getan.

04.02.2017 - 22:49

country flag Ine wrote:

Sorry! Ik zie nu pas jullie mooie filmpje. Ik zal alles maar uithalen.... Het lukt me overigens nauwelijks om de continentale manier van breien te begrijpen. Het 50 jaar geleden geleerde is blijkbaar erg blijven hangen!

02.01.2017 - 12:44