
Popular categories
Looking for a yarn?


|
||||||||||||||||
DROPS 125-25 |
||||||||||||||||
|
|
||||||||||||||||
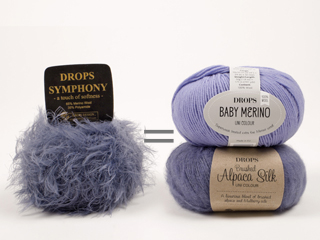
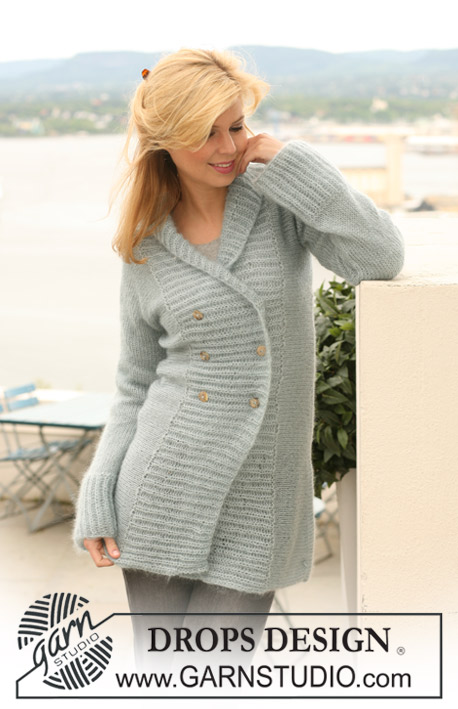
Knitted DROPS jacket with cables in ”Symphony”. Size S to XXXL.
DROPS 125-25 |
||||||||||||||||
|
GARTER ST (back and forth on needle): K all rows. DECREASING TIP: Dec 1 st by P2 tog. Dec on the right and left side of P-section alternately. P the 2 sts tog either just before or just after the cable. PATTERN: See diagrams M.1 to M.4. Diagrams show the pattern from RS. In Size S, M and L work M.1 and M.2, in Size XL, XXL and XXXL work M.3 and M.4 BUTTONHOLES: Make buttonholes on right front band. 1 buttonhole = work tog 3rd and 4th st and make 1 YO. Make buttonholes when piece measures: Size S: 25, 33, 41, 49, 57, 65 and 73 cm. Size M: 25, 33, 41, 49, 57, 66 and 75 cm. Size L: 25, 33, 41, 50, 59, 68 and 77 cm. Size XL: 25, 34, 43, 52, 61, 70 and 79 cm. Size XXL: 25, 33, 41, 49, 57, 65, 73 and 81 cm. Size XXXL: 25, 33, 41, 49, 57, 65, 74 and 83 cm. -------------------------------------------------------- The piece is worked back and forth on circular needle from mid front in order to fit in all sts. BODY PIECE: Cast on 183-192-201-221-230-239 sts (includes 6 front band sts each side) on circular needle size 7 mm with Symphony. NOTE! Work front band in GARTER ST throughout - see above. P 1 row from WS and continue as follows from RS: 6 front band sts, P5, * K 8-8-8-10-10-10, P 9-10-11-11-12-13 *, repeat from *-* a total of 9 times and finish with K 8-8-8-10-10-10, P 5 and 6 front band sts. Continue like this for approx 6 cm. Now work next row as follows (from RS): 6 front band sts, P 5, * M.1/M.3 – see above - P 9-10-11-11-12-13 *, repeat from *-* a total of 5 times, then work * M.2/M.4, P 9-10-11-11-12-13 *, repeat from *-* a total of 4 times, and finish with M.2/M.4, P 5 and 6 front band sts. Continue in pattern like this until piece measures approx 30 cm from cast on row - REMEMBER BUTTONHOLES on right front band – see above. Now dec 1 st from RS - see DECREASING TIP - in all 9-10-11-11-12-13 P-sections = 174-183-192-212-221-230 sts. Continue in pattern as before. Repeat the dec from RS when piece measures 45 cm (= 165-174-183-203-212-221 sts) and 60 cm = 156-165-174-194-203-212 sts. Continue in pattern as before until piece measures 64-65-66-67-68-69 cm. Insert a marker 43-45-47-52-54-56 sts in from each side (= the sides, marker sits in the middle of cable each side, back piece = 70-75-80-90-95-100 sts). On next row from RS work pattern as before, but work the 8-8-8-10-10-10 sts over cable each side (= 4-4-4-5-5-5 sts each side of marker) as follows: K 1-1-1-2-2-2, K2 tog, K2 tog, K2 tog, K 1-1-1-2-2-2, i.e. dec 3 sts each side. Work 1 row from WS and work next row from RS as follows: 6 front band sts, P 5, M.1/M.3, P 6-7-8-8-9-10, M.1/M.3, P 6-7-8-8-9-10, cast off 5-5-5-7-7-7 sts for armhole, P 6-7-8-8-9-10, M.1/M.3, P 6-7-8-8-9-10, M.1/M.3, P 6-7-8-8-9-10, M.2/M.4, P 6-7-8-8-9-10, M.2/M.4, P 6-7-8-8-9-10, cast off 5-5-5-7-7-7 sts for armhole, P 6-7-8-8-9-10, M.2/M.4, P 6-7-8-8-9-10, M.2/M.4, P 5, 6 front band sts. Now complete each piece separately. RIGHT FRONT PIECE: = 39-41-43-47-49-51 sts. Continue back and forth (first row = from WS) in pattern as before. AT THE SAME TIME cast off for armhole at the beg of every row from WS: 2 sts 0-1-1-2-2-2 times and 1 st 2-2-3-3-4-5 times = 37-37-38-40-41-42 sts. Continue until piece measures 9-10-11-12-13-14 cm from the division (approx 74-76-78-80-82-84 cm from cast on row). Now slip 8 sts towards front edge on a stitch holder and cast off to shape the neckline at the beg of every row from RS: 4 sts 1 time, 2 sts 2-2-2-3-3-3 times and 1 st 3 times = 18-18-19-19-20-21 sts left on needle. Continue in pattern as before. When piece measures 19-20-21-22-23-24 cm from the division (approx 84-86-88-90-92-94 cm in total) work next row as follows from RS: P 6-7-8-8-9-10, K 1-1-1-2-2-2, K2 tog, K2 tog, K2 tog, K 1-1-1-2-2-2, P 4-3-3-1-1-1 = 15-15-16-16-17-18 sts. Work 1 row from WS and then cast off with K over K and P over P. LEFT FRONT PIECE: Like right front piece, but mirrored. BACK PIECE: = 62-67-72-80-85-90 sts. Continue back and forth (first row = from WS) in pattern as before. AT THE SAME TIME cast off for armhole each side at beg of every row: 2 sts 0-1-1-2-2-2 times and 1 st 2-2-3-3-4-5 times = 58-59-62-66-69-72 sts. Continue until piece measures 17-18-19-20-21-22 cm from the division (approx 82-84-86-88-90-92 cm in total). Now work next row as follows from RS: P 4-3-3-1-1-1, M.1/M.2, P 6-7-8-8-9-10, K 1-1-1-2-2-2, K2 tog, K2 tog, K2 tog, K 1-1-1-2-2-2, P 6-7-8-8-9-10, K 1-1-1-2-2-2, K2 tog, K2 tog, K2 tog, K 1-1-1-2-2-2, P 6-7-8-8-9-10, M.2/M.4 and P 4-3-3-1-1-1 = 52-53-56-60-63-66 sts. Work 1 row from WS and continue in pattern, AT THE SAME TIME cast off the middle 16-17-18-22-23-24 sts for neck and complete each shoulder separately. Continue until piece measures 19-20-21-22-23-24 cm from the division (approx 84-86-88-90-92-94 cm in total) and work next row as follows from RS: P 4-3-3-1-1-1, K 1-1-1-2-2-2, K2 tog, K2 tog, K2 tog, K 1-1-1-2-2-2, P 6-7-8-8-9-10 = 15-15-16-16-17-18 sts. Work 1 row from WS and then cast off with K over K and P over P. Repeat on the other shoulder. SLEEVE: Worked in the round. Cast on 42-43-44-46-47-50 sts on double pointed needles size 7 mm with Symphony. K 1 round. Insert a marker at beg of round = mid under sleeve. Continue as follows: K 4-4-4-5-5-5, P 6-6-6-4-4-5, K 8-8-8-10-10-10, P 6-7-8-8-9-10, K 8-8-8-10-10-10, P 6-6-6-4-4-5, K 4-4-4-5-5-5. Continue like this until piece measures approx 4 cm. Now continue all K-sections in M.1/M.3 (also the 8-8-8-10-10-10 sts mid under sleeve) = 3 cables. AT THE SAME TIME when piece measures approx 8 cm inc 2 sts mid under sleeve (i.e. 1 st each side of cable mid under sleeve). Repeat the inc on every 5.5-4-3.5-3-3-3 cm a total of 8-10-11-12-13-13 times = 58-63-66-70-73-76 sts. P inc sts, i.e. when all inc are complete there are 14-16-17-16-17-18 P sts each side of cable mid under sleeve. Continue until piece measures a total of 50-49-49-48-48-47 cm. Now cast off 8-8-8-10-10-10 sts mid under sleeve (= cable) and complete piece back and forth on needle. Cast off for sleeve cap each side at the beg of every row as: 2 sts 2 times, 1 st 2-3-3-4-4-5 times, then 2 sts each side until piece measures 56-56-56-56-56-56 cm, now cast off 3 sts 1 time each side. On next row from RS work the 8-8-8-10-10-10 sts in each cable as follows: K 1-1-1-2-2-2, K2 tog, K2 tog, K2 tog, K 1-1-1-2-2-2, work P-sts as before. On next row cast off with K over K and P over P. Knit the other sleeve in the same way, but work M.2/M.4 instead of M.1/M.3. ASSEMBLY: Sew shoulder seams. Set in sleeves. COLLAR: Pick up approx 50 to 70 sts from RS (includes sts on stitch holder) on circular needle size 7 mm round neck. K 1 row from WS, K 1 row from RS, K 1 row from WS and K 1 row from RS, AT THE SAME TIME inc evenly to 74-78-82-86-90-94 sts (do not inc on front bands). Work next row as follows from WS: 6 front band sts, K2, * P2, K2 *, repeat from *-* and finish with 6 front band sts. When piece measures 10 cm inc 1 st in each P-section from RS = 89-94-99-104-109-114 sts. Continue with K over K and P over P. Repeat the inc when piece measures 20 cm = 104-110-116-122-128-134 sts. Continue with K over K and P over P and cast off when collar measures approx 30-30-30-32-32-32 cm. Sew buttons on left front band. |
||||||||||||||||
Diagram explanations |
||||||||||||||||
|
||||||||||||||||

|
||||||||||||||||

|
||||||||||||||||
|
Have you made this or any other of our designs? Tag your pictures in social media with #dropsdesign so we can see them! Do you need help with this pattern?You'll find tutorial videos, a Comments/Questions area and more by visiting the pattern on garnstudio.com. © 1982-2024 DROPS Design A/S. We reserve all rights. This document, including all its sub-sections, has copyrights. Read more about what you can do with our patterns at the bottom of each pattern on our site. |
||||||||||||||||


With over 40 years in knitting and crochet design, DROPS Design offers one of the most extensive collections of free patterns on the internet - translated to 17 languages. As of today we count 304 catalogues and 11422 patterns - 11422 of which are translated into English (UK/cm).
We work hard to bring you the best knitting and crochet have to offer, inspiration and advice as well as great quality yarns at incredible prices! Would you like to use our patterns for other than personal use? You can read what you are allowed to do in the Copyright text at the bottom of all our patterns. Happy crafting!
Comments / Questions (11)
Ik heb 221 steken opgezet en de eerste pen averechts gebreid de 2de tour het tel patroon aangehouden . maar mijn vraag is moet er elke keer tussen heet tel patroon een averechtse pen gebreid worden want als ik het patroon blijft doen dan wordt alles geribbeld. en volgens mij moet er op de kabel steken niet geribbeld zijn maar recht. lees ik het nu verkeerd
22.03.2016 - 19:07DROPS Design answered:
Hoi Carla. Nee, je breit alleen het telpatroon in de hoogte, dwz, 11 naalden tussen elke kabel in M.1/M.2. Kijk ook hier hoe je onze telpatronen moet lezen
23.03.2016 - 13:57Lisa wrote:
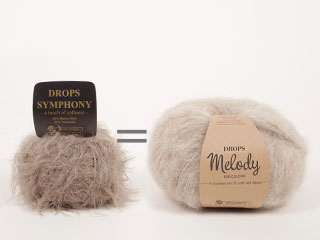
I am not sure I understand the sizing for this pattern. My bust is 95 cm which seems to be between sizes - can you advise which way to go? second, I would like to knit this using melody, but I'm guessing that will make fairly light weight piece that won't really be warm enough as an outer jacket. If that is so, I think it makes more sense to size down for a trim fit, but I'm just not sure. please help :)
26.09.2015 - 22:03DROPS Design answered:
Dear Lisa, please click here to read more about measurement chart and finding out the matching size. Happy knitting!
28.09.2015 - 09:48Kan ik de kraag ook kleiner maken? Of zijn de verhoudingen dan niet mooi?
11.01.2014 - 18:55DROPS Design answered:
Hoi Gerda. Je kan natuurlijk altijd aanpassen als je de kraag te breed vindt. Bij het breien van de kraag kan je het vest even passen en kijken of je het mooier vindt als de kraag kleiner is. Veel plezier
13.01.2014 - 12:38Je moet het proeflapje breien zoals er in het patroon vermeld wordt. Het hoeft niet noodzakelijk te zijn dat de kabels of motieven in het proeflapje zitten.
19.12.2011 - 12:11Hallo, Inmiddels heb ik mijzelf aangeleerd om te breien met rondbreinaalden en continentaal. Maar ik heb een vraag over het proeflapje. Die moet in tricotsteek gebreid worden. Klopt dit, want ik meen dat het proeflapje altijd in het te breien patroon moet worden gemaakt, in dit geval met kabels. Of is dit niet nodig? Met vriendelijke groet, Christa
16.12.2011 - 22:02Hallo, Dit vest wil ik heel graag breien, maar dan op "gewone breinaalden", dus niet op rondbreinaalden. Hoe moet ik het patroon dan lezen, of is dat niet mogelijk? Of heeft u misschien een patroon van dit prachtige vest die geschikt is voor gewone breinaalden? Met vriendelijke groet, Christa
18.09.2011 - 16:21Flot trøje
31.07.2010 - 00:43Très jolie veste vivement les explication
23.07.2010 - 08:42Superbe, on n'a qu'une envie, la porter, bien au chaud, bien confortable et chic en même temps !
05.07.2010 - 07:53Elegant!!!
24.06.2010 - 05:49