Popular categories
Looking for a yarn?

100% Alpaca
from 4.85 $ /50g
The yarn cost is calculated from the pattern’s smallest size and the yarn’s cheapest product type. Looking for an even better price? You might find it on the DROPS Deals!
Rib Romance
Knitted DROPS jumper in rib and garter st in ”Alpaca”. Size S - XXXL.
DROPS design: Pattern no Z-525
--------------------------------------------------------
Size: S - M - L - XL - XXL - XXXL
Finished measurements:
Bust: 82-90-98-108-120-132 cm / 32¼"-35½"-38½"-42½"-47¼"-52"
Full length: 58-60-62-64-66-68 cm / 22¾"-23⅝"-24⅜"-25¼"-26"-26¾"
Materials: DROPS ALPACA from Garnstudio
color no 3900, tomato: 400-400-450-500-550-600 g
DROPS CIRCULAR NEEDLE (80 + 40 cm / 32" and 16") size 3 mm/US 2or3 - or size needed to get 24 sts x 32 rows in stockinette st and 24 sts x 48 rows in garter st = 10 x 10 cm / 4" x 4". NOTE: It is important to adhere to the gauge to get the right shape of jumper.
DROPS DOUBLE POINTED NEEDLES size 3 mm / US 2or3.
-------------------------------------------------------
Alternative Yarn – See how to change yarns here
Yarn Groups A to F – Use the same pattern and change the yarn here
Yarn usage using an alternative yarn – Use our yarn converter here
-------------------------------------------------------

100% Alpaca
from 4.85 $ /50g
The yarn cost is calculated from the pattern’s smallest size and the yarn’s cheapest product type. Looking for an even better price? You might find it on the DROPS Deals!
- English (US/in)
- Česky - not translated
- Dansk
- Deutsch
- Eesti keel
- English (UK/cm)
- Español
- Français
- Íslenska - not translated
- Italiano
- Magyar
- Nederlands
- Norsk
- Polski
- Português
- Suomi
- Svenska
- English (UK/cm), Bulgaria
- English (UK/cm), Croatia
- English (UK/cm), Greece
- English (UK/cm), Latvia
- English (UK/cm), Lithuania
- English (UK/cm), Romania
- English (UK/cm), Slovenia
- Česky, Slovakia - not translated
Pattern instructions
MEASUREMENT TIP:
Because of the weight of the yarn make all measurements while the garment is hanging.
INCREASING TIP:
Inc 1 st each side of the 2 K sts each side on body piece and each side of the 2 K sts mid under sleeve.
Inc 1 st by making 1 YO, on next row work YO into back of loop to avoid a hole – incorporate inc sts in rib/garter st as you go along.
DECREASING TIP-1 (applies to the rib mid front and mid back on body piece):
Beg 4 sts before marker and dec as follows: Slip 1 st as if to K, K2 tog, psso, 1 YO, K2 (marker sits mid between these 2 sts), 1 YO, K3 tog.
On next round K the middle 6 sts.
DECREASING TIP-2 (applies to garter st mid front and mid back on body piece and at top of sleeves – hole pattern):
Beg 3 sts before marker and dec as follows: slip 1 st as if to K, K1, psso, 1 YO, K2 (marker sits mid between these 2 sts), 1 YO, K2 tog.
On next round work the 6 middle sts as follows: K2, P2, K2.
DECREASING TIP-3 (applies to garter st on bottom part of sleeve):
Dec as described under DECREASING TIP-1, but work the 6 sts as follows on next round: K2, P2, K2 (instead of K6).
DECREASING TIP-4 (applies to raglan):
Dec as follows in each transition between body piece and sleeves (beg 3 sts before marker): K2 tog, K2 (marker sits mid between these 2 sts), slip 1 st as if to K, K1, psso.
--------------------------------------------------------
JUMPER:
Worked in the round.
BODY PIECE:
Cast on 272-304-336-368-416-464 sts on circular needle size 3 mm / US 2or3 with Alpaca. Work 2 rounds rib as follows: K1, * P2, K2 *, repeat from *-* to end and finish with P2 and K1. Now insert 4 markers in piece with 68-76-84-92-104-116 sts between each (insert first marker at beg of round).
Continue in rib AT THE SAME TIME inc 1 st each side of 1st and 3rd marker (= at the sides) - See INCREASING TIP - and dec 1 st each side of 2nd and 4th marker (= mid front/mid back) - See DECREASING TIP-1. Continue the inc and dec on every other round (no of sts will be constant).
When piece measures 33-34-35-36-37-38 cm / 13"-13⅜"-13¾"-14¼"-14½"-15" - See MEASUREMENT TIP (measured along the side) – K 1 round AT THE SAME TIME dec 76-88-104-112-128-148 sts evenly –
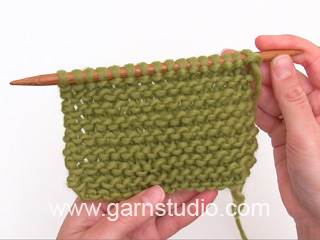
NOTE: 19-22-26-28-32-37 sts on left front piece, 19-22-26-28-32-37 sts on right front piece, 19-22-26-28-32-37 sts on right back piece and 19-22-26-28-32-37 sts on left back piece (i.e. 38-44-52-56-64-74 sts in total on front piece and on back piece) – do not dec on the 6 sts mid front and mid back = 196-216-232-256-288-316 sts. Continue in GARTER ST - see above - AT THE SAME TIME continue the hole pattern mid front and mid back - See DECREASING TIP-2 (the side inc are now complete). REMEMBER THE GAUGE!
When piece measures 35-36-37-38-39-40 cm / 13¾"-14¼"-14½"-15"-15¼"-15¾" bind off 12-12-12-16-16-16 sts each side for armhole (i.e. 6-6-6-8-8-8 sts each side of marker 1 and 3) = 86-96-104-112-128-142 sts left on front and back piece. Put piece aside and knit the sleeves.
SLEEVE:
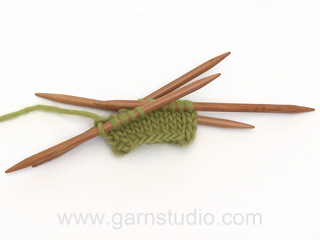
Cast on 64-66-68-68-70-70 sts on double pointed needles size 3 mm / US 2or3 with Alpaca. Insert a marker after 32-33-34-34-35-35 sts (= mid upper sleeve), and let the marker follow the piece as you go along. Work first round as follows: K 29-30-31-31-32-32, slip 1 st as if to K, K1, psso, K2 (marker sits mid between these 2 sts), K2 tog and K 29-30-31-31-32-32. P 1 round. Now work next round as follows: K 29-30-31-31-32-32, slip 1 st as if to K, K1, psso, K2 tog and K 29-30-31-31-32-32. There are now 60-62-64-64-66-66 sts on needle. P 1 round and now continue in garter st. AT THE SAME TIME inc 2 sts mid under sleeve - See INCREASING TIP - and dec 1 st each side of marker mid upper sleeve - See DECREASING TIP-3. Continue the inc and dec on every other round (no of sts will be constant).
When piece measures 9-8-8-8-6-9 cm / 3½"-3⅛"-3⅛"-3⅛"-2⅜"-3½" inc 2 extra sts mid under sleeve – NOTE: inc these each side of the middle 6 sts under sleeve. Repeat this inc a total of 19-21-22-24-26-28 times in SIZE S: on every 9th round, SIZE M + L: on every 8th round, SIZE XL + XXL: on every 7th round and SIZE XXXL: on every 6th round = 98-104-108-112-118-122 sts. When piece measures 46-46-46-45-45-45 cm / 18"-18"-18"-17¾"-17¾"-17¾", measured mid under sleeve – see MEASUREMENT TIP and adjust to the same no of garter st rows as on body piece – work shortened rows back and forth as follows (NOTE: K every row and continue the hole pattern mid upper sleeve on every row from RS acc to DECREASING TIP-2 – discontinue the inc mid under sleeve):
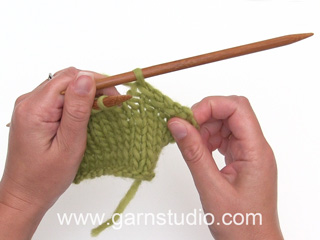
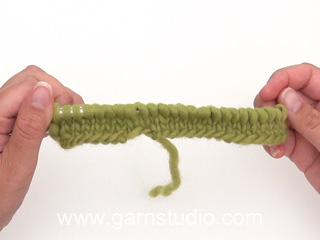
Beg from RS mid under sleeve and work 16-16-18-18-20-20 sts past marker, turn piece, slip first st as if to K, tighten thread and work 32-32-36-36-40-40 sts.
Turn piece, slip 1 st as if to K, tighten thread and work 48-48-54-54-60-60 sts, turn piece, slip 1 st as if to K, tighten thread and work 64-64-72-72-80-80 sts.
Turn piece, slip first st as if to K, tighten thread and work 80-80-90-90-100-100 sts, turn piece, slip first st as if to K, tighten thread and work row back to mid under sleeve.
Now bind off the first 6-6-6-8-8-8 sts at beg of round, work 86-92-96-96-102-106 sts and bind off the remaining 6-6-6-8-8-8 sts. Put piece aside and knit the other sleeve.
YOKE:
Slip sleeves on the same circular needle as body piece where bind off for armholes = 344-376-400-416-460-496 sts. Insert a marker in each transition between body piece and sleeves (= 4 markers). READ ALL OF THE FOLLOWING SECTION BEFORE CONTINUING!
Continue in garter st and hole pattern as before (on sleeves continue hole pattern acc to DECREASING TIP-2 as on body piece, i.e. the hole pattern continues mid front/mid back and mid upper sleeves, but no inc are made).
AT THE SAME TIME dec for raglan as follows - See DECREASING TIP-4:
Beg on the first K round and then dec on every 4th round (i.e. on every other K-round) a total of 13-13-13-16-15-15 times and then on every other round (i.e. on every K-round) a total of 20-23-25-22-26-28 times.
AT THE SAME TIME when piece measures 53-54-56-57-59-60 cm / 21"-21¼"-22"-22½"-23¼"-23⅝" – measured along the side - slip the middle 6-6-10-12-12-24 sts on a stitch holder for neck. Continue back and forth on circular needle from mid front, AT THE SAME TIME bind off for neck at beg of row each side as follows: 2 sts 1-1-2-3-3-4 times and 1 st until piece measures 58-60-62-64-66-68 cm / 22¾"-23⅝"-24⅜"-25¼"-26"-26¾" - measured along the side all the way to shoulder - REMEMBER MEASUREMENT TIP.
After all dec for raglan and neck there are approx 64 to 100 sts left on needle, bind off loosely.
NECKLINE:
Pick up approx 80-100 sts round neck (includes sts on stitch holder at front) on small circular needle size 3 mm / US 2or3 with Alpaca. K 1 round AT THE SAME TIME dec evenly to 78-82-86-90-94-96 sts. P 1 round. Then K 1 round, AT THE SAME TIME inc evenly to 120-128-132-132-136-140 sts. Work rib, K2/P2 - make sure to have K2 mid front. When rib measures 8-8-9-9-10-10 cm / 3⅛"-3⅛"-3½"-3½"-4"-4" bind off loosely with K over K and P over P.
ASSEMBLY:
Sew openings under sleeves.
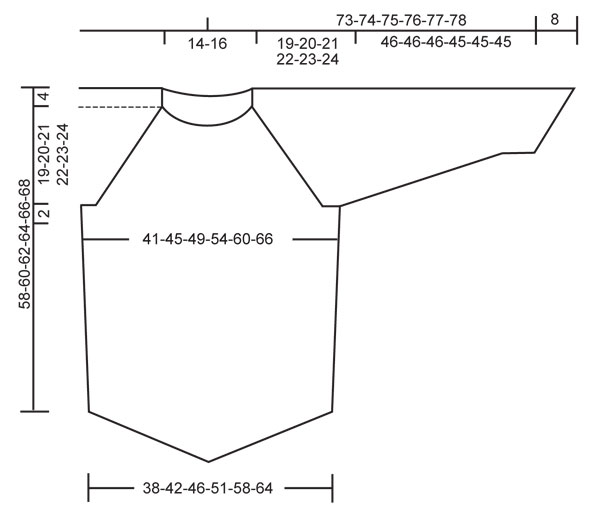
Diagram
All measurements in charts are in cm.
What can you do with our patterns? You can share DROPS patterns online, using the pattern original picture, materials, name and number. But you are NOT ALLOWED to reproduce the complete pattern digitally in any way. Yarn stores are welcome to use the DROPS pattern database to promote the sale of our assortment. You can print out our patterns, make as many copies as you’d like. The only thing we ask is that you don't make any changes / additions to the original printed document. And that the patterns according to the DROPS philosophy are given out to the consumers for free. Editorials that wish to publish our patterns in printed books or magazines can contact us for more information. The sale of garments based on DROPS patterns is permitted as long as they are sold as single items or per order. Further commercial use of the patterns is not permitted. It has to be clearly stated that the garment is made based on a design from DROPS DESIGN. The use of clothing labels of which DROPS DESIGN forms part is conditioned by the inclusion of the following text: “A DROPS DESIGN made by …..”. The use of DROPS photos for marketing purposes/sales is only permitted in connection with the use/sale of DROPS products. The photos may not be cut or edited and the logo should be clearly visible.
We reserve the right to withdraw the permission for use of our patterns at any time, notwithstanding the reason.
Each of our patterns has specific tutorial videos to help you.
These step-by-step tutorials might also help you:
Why is the knitting/crochet tension so important?
Knitting tension is what determines the final measurements of your work, and is usually measured per 10 x 10 cm. It is provided like so: number of stitches in width x number of rows in height - eg: 19 stitches x 26 rows = 10 x 10 cm.
The knitting tension is very individual; some people knit/crochet loosely while others work tightly. You adjust the knitting tension with the needle size, which is why the suggested needle size only serve as a guide! You need to adjust this (up or down) to ensure that YOUR knitting tension matches the knitting tension provided in the pattern. If you work with a different knitting tension than provided you will have a different yarn consumption, and your work will have different measurements than what the pattern suggests.
The knitting tension also determines which yarns can replace each other. As long as you achieve the same knitting tension you can replace one yarn with another.
See DROPS lesson: How to measure your tension/gauge
See DROPS video: How to make a gauge tension swatch
How do I know how many balls of yarn I need?
The required amount of yarn is provided in grams, eg: 450 g. To calculate how many balls you’ll need you first need to know how many grams are in 1 ball (25g, 50g or 100g). This information is available if you click on the individual yarn quality on our pages. Divide the amount required with the amount of each ball. For example, if each ball is 50g (the most common amount), the calculation will be as follows: 450 / 50 = 9 balls.
Can I use a different yarn than what the pattern suggests?
The important thing when changing from one yarn to another is that the knitting/crochet tension remains the same. This is so that the measurements of the finished piece will be the same as on the sketch provided. It is easier to achieve the same knitting tension using yarns from the same yarn group. It is also possible to work with multiple strands of a thinner yarn to achieve the knitting tension of a thicker one. Please try our yarn converter. We recommend you to always work a test swatch.
Please NOTE: when changing yarn the garment might have a different look and feel to the garment in the photo, due to individual properties and qualities of each yarn.
See DROPS lesson: Can I use a different yarn than the one mentioned in the pattern?
What are the yarn groups?
All our yarns are categorised into yarn groups (from A to F) according to thickness and knitting tension – group A contains the thinnest yarns and group F the thickest. This makes it easier for you to find alternative yarns to our patterns, should you wish to switch yarn. All yarns within the same group have a similar knitting tension and can easily replace each other. However, different yarn qualities have different structures and properties which will give the finished work a unique look and feel.
How do I use the yarn converter?
At the top of all our patterns you’ll find a link to our yarn converter, which is a helpful tool should you wish to use a different yarn than suggested. By filling in the yarn quality you wish to replace, the amount (in your size) and number of strands, the converter will present good alternative yarns with the same knitting tension. Additionally it will tell you how much you’ll require in the new qualities and whether you’ll need to work with multiple strands. Most skeins are 50g (some are 25g or 100g).
If the pattern is worked with multiple colours, every colour will have to be converted separately. Similarly, if the pattern is worked with several strands of different yarns (for example 1 strand Alpaca and 1 strand Kid-Silk) you will have to find alternatives for each, individually.
Why do you show discontinued yarns in the patterns?
Since different yarns have different qualities and textures we have chosen to keep the original yarn in our patterns. However, you can easily find options among our available qualities by using our yarn converter, or simply pick a yarn from the same yarn group.
It is possible that some retailers still have discontinued yarns in stock, or that someone has a few skeins at home that they would like to find patterns for.
The yarn converter will provide both alternative yarn as well as required amount in the new quality.
What size should I knit?
If you think it's hard to decide what size to make, it can be a good idea to measure a garment you own already and like the size of. Then you can pick the size by comparing those measures with the ones available in the pattern's size chart.
You'll find the size chart at the bottom of the pattern.
See DROPS lesson: How to read size chart
Why do I get the wrong knitting tension with the suggested needle size?
The needle size provided in the pattern serves only as a guide, the important thing is to follow the knitting tension. And since knitting tension is very individual, you will have to adjust the needle size to ensure that YOUR tension is the same as in the pattern – maybe you’ll have to adjust 1, or even 2 needle sizes, up or down to achieve the correct tension. For this, we recommend that you work test swatches.
Should you work with a different knitting tension than the one provided, the measurements of the finished garment might deviate from the measurement sketch.
See DROPS lesson: How to measure your tension/gauge
See DROPS video: How to make a gauge tension swatch
Why is the pattern worked top-down?
Working a garment top-down provides more flexibility and room for personal adjustment. For example it is easier to try the garment on while working, as well as making adjustments to length of yoke and shoulder caps.
The instructions are carefully explaining every step, in the correct order. Diagrams are adjusted to the knitting direction and are worked as usual.
How do I work according to a knitting diagram?
The diagram depicts all rows/rounds, and every stitch seen from the right side. It is read from bottom to top, from right to left. 1 square = 1 stitch.
When working back and forth, every other row is worked from the right side and every other row is worked from the wrong side. When working from the wrong side, the diagram will have to be worked reversed: from left to right, knit stitches are purled, purl stitches are knit etc.
When working in the round every round is worked from the right side and the diagram are worked from right to left on all rounds.
See DROPS lesson: How to read knitting diagrams
How do I work according to a crochet diagram?
The diagram depicts all rows/rounds, and every stitch seen from the right side. It is worked from bottom to top, from right to left.
When working back and forth every other row is worked from the right side: from right to left and every other row is worked from the wrong side: from left to right.
When working in the round, every row in the diagram are worked from the right side, from right to left.
When working a circular diagram you start in the middle and work your way outwards, counter clockwise, row by row.
The rows usually start with a given number of chain stitches (equivalent to the height of the following stitch), this will either be depicted in the diagram or explained in the pattern.
See DROPS lesson: How to read crochet diagrams
How do I work several diagrams simultaneously on the same row/round?
Instructions for working several diagrams after each other on the same row/round, will often be written like so: “work A.1, A.2, A.3 a total of 0-0-2-3-4 times". This means you work A.1 once, then A.2 is worked once, and A.3 is repeated (in width) the number of times provided for your size – in this case like so: S = 0 times, M = 0 times, L=2 times, XL= 3 times and XXL = 4 times.
The diagrams are worked as usual: begin with the first row in A.1, then work the first row in A.2 etc.
See DROPS lesson: How to read knitting diagrams
See DROPS lesson: How to read crochet diagrams
Why are the sleeves shorter in larger sizes?
The total width of the garment (from wrist-to-wrist) will be larger in the larger sizes, despite the actual sleeves being shorter. The larger sizes have longer sleeve caps and wider shoulders, so there will be a good fit in all sizes.
Where on the garment is the length measured?
The measurement sketch/schematic drawing provides information regarding the full length of the garment. If it’s a jumper or a jacket the length is measured from the highest point on the shoulder (usually closest to the neckline), and straight down to the bottom of the garment. It is NOT measured from the tip of shoulder. Similarly, the length of yoke is measured from the highest point on the shoulder and down to where yoke is split into body and sleeves.
See DROPS lesson: How to read a schematic drawing
What is a repeat?
Diagrams are often repeated on the round or in height. 1 repeat is the diagram the way it appears in the pattern. If it says to work 5 repeats of A.1 in the round, then you work A.1 a total of 5 times after/next to each other in the round. If it says to work 2 repeats of A.1 vertically/in height you work the entire diagram once, then begin again at the start and work the entire diagram one more time.
Why does the piece start with more chain stitches than it’s worked with?
Chain stitches are slightly narrower than other stitches and to avoid working the cast-on edge too tight, we simply chain more stitches to begin with. The stitch count will be adjusted on the following row to fit the pattern and measurement sketch.
Why increase before the rib edge when the piece is worked top-down?
The rib edge is more elastic and will contract slightly compared to, for example, stocking stitch. By increasing before the rib edge, you avoid a visible difference in width between the rib edge and the rest of the body.
Why increase in the cast-off edge?
It’s very easy to cast off too tightly, and by making yarn overs while casting off (and simultaneously casting these off) you avoid a too tight cast off edge.
See DROPS video: How to bind off with yarn overs (yo)
How do I increase/decrease on every 3rd and 4th row/round alternately?
To achieve an even increase (or decrease) you can increase on, for example: every 3rd and 4th row alternately, like so: work 2 rows and increase on the 3rd row, work 3 rows and increase on the 4th. Repeat this until the increase is complete.
See DROPS lesson: Increase or decrease 1 st on every 3rd and 4th row alternately
How can I work a jacket in the round instead of back and forth?
Should you prefer to work in the round instead of back and forth, you may of course adjust the pattern. You’ll need to add steeks mid-front (usually 5 stitches), and follow the instructions. When you would normally turn and work from the wrong side, simply work across the steek and continue in the round. At the end you’ll cut the piece open, pick up stitches to work bands, and cover the cut edges.
See DROPS video: How to knit steeks and cut open
Can I work a jumper back and forth instead of in the round?
Should you prefer to work back and forth instead of in the round, you may of course adjust the pattern so you work the pieces separately and then assemble them at the end. Divide the stitches for the body in 2, add 1 edge stitch in each side (for sewing) and work the front and back pieces separately.
See DROPS lesson: Can I adapt a pattern for circular needles into straight needles?
Why is the pattern slightly different than what I see in the photo?
Pattern repeats can vary slightly in the different sizes, in order to get the correct proportions. If you’re not working the exact same size as the garment in the photo, yours might deviate slightly. This has been carefully developed and adjusted so that the complete impression of the garment is the same in all sizes.
Make sure to follow instructions and diagrams for your size!
How do I make a women’s size garment into a men’s size one?
If you have found a pattern you like which is available in women’s size it’s not very difficult to convert it to men’s size. The biggest difference will be the length of sleeves and body. Start working on the women size that you think would fit across the chest. The additional length will be worked right before you cast off for the armhole/sleeve cap. If the pattern is worked top-down you can add the length right after the armhole or before the first decrease on sleeve.
Regarding additional yarn amount, this will depend on how much length you add, but it is better with a skein too many than too few.
How do I prevent a hairy garment from shedding?
All yarns will have excess fibres (from production) that might come off as lint or shedding. Brushed yarns (ie hairier yarns) have more of these loose, excess fibres, causing more shedding.
Shedding also depends on what is worn under or over the garment, and whether this pulls at the yarn fibres. It’s therefore not possible to guarantee that there will be no shedding
Below are some tips on how to get the best result when working with hairier yarns:
1. When the garment is finished (before you wash it) shake it vigorously so the looser hairs come off. NOTE: do NOT use a lint roller, brush or any method that pulls at the yarn.
2. Place the garment in a plastic bag and put it in your freezer - the temperature will cause the fibres to become less attached to each other, and excess fibres will come off easier.
3. Leave in the freezer for a few hours before taking it out and shaking it again.
4. Wash the garment according to the instructions on the yarn label.
Why does my garment pill?
Pilling is a natural process that happens to even the most exclusive of fibers. It's a natural sign of wear and tear that is hard to avoid, and that is most visible in high friction areas of your garment like a sweater's arms and cuffs.
You can make your garment look as new by removing the pilling, using a fabric comb or a pill/lint remover.
In the meantime, you can read the questions and answers that others have left to this pattern or join the DROPS Workshop on Facebook to get help from fellow knitters/crocheters!
Rib Romance |
|
|
|
|
Knitted DROPS jumper in rib and garter st in ”Alpaca”. Size S - XXXL.
DROPS 122-18 |
|
|
GARTER ST (in the round): K 1 round, P 1 round. MEASUREMENT TIP: Because of the weight of the yarn make all measurements while the garment is hanging. INCREASING TIP: Inc 1 st each side of the 2 K sts each side on body piece and each side of the 2 K sts mid under sleeve. Inc 1 st by making 1 YO, on next row work YO into back of loop to avoid a hole – incorporate inc sts in rib/garter st as you go along. DECREASING TIP-1 (applies to the rib mid front and mid back on body piece): Beg 4 sts before marker and dec as follows: Slip 1 st as if to K, K2 tog, psso, 1 YO, K2 (marker sits mid between these 2 sts), 1 YO, K3 tog. On next round K the middle 6 sts. DECREASING TIP-2 (applies to garter st mid front and mid back on body piece and at top of sleeves – hole pattern): Beg 3 sts before marker and dec as follows: slip 1 st as if to K, K1, psso, 1 YO, K2 (marker sits mid between these 2 sts), 1 YO, K2 tog. On next round work the 6 middle sts as follows: K2, P2, K2. DECREASING TIP-3 (applies to garter st on bottom part of sleeve): Dec as described under DECREASING TIP-1, but work the 6 sts as follows on next round: K2, P2, K2 (instead of K6). DECREASING TIP-4 (applies to raglan): Dec as follows in each transition between body piece and sleeves (beg 3 sts before marker): K2 tog, K2 (marker sits mid between these 2 sts), slip 1 st as if to K, K1, psso. -------------------------------------------------------- JUMPER: Worked in the round. BODY PIECE: Cast on 272-304-336-368-416-464 sts on circular needle size 3 mm / US 2or3 with Alpaca. Work 2 rounds rib as follows: K1, * P2, K2 *, repeat from *-* to end and finish with P2 and K1. Now insert 4 markers in piece with 68-76-84-92-104-116 sts between each (insert first marker at beg of round). Continue in rib AT THE SAME TIME inc 1 st each side of 1st and 3rd marker (= at the sides) - See INCREASING TIP - and dec 1 st each side of 2nd and 4th marker (= mid front/mid back) - See DECREASING TIP-1. Continue the inc and dec on every other round (no of sts will be constant). When piece measures 33-34-35-36-37-38 cm / 13"-13⅜"-13¾"-14¼"-14½"-15" - See MEASUREMENT TIP (measured along the side) – K 1 round AT THE SAME TIME dec 76-88-104-112-128-148 sts evenly – NOTE: 19-22-26-28-32-37 sts on left front piece, 19-22-26-28-32-37 sts on right front piece, 19-22-26-28-32-37 sts on right back piece and 19-22-26-28-32-37 sts on left back piece (i.e. 38-44-52-56-64-74 sts in total on front piece and on back piece) – do not dec on the 6 sts mid front and mid back = 196-216-232-256-288-316 sts. Continue in GARTER ST - see above - AT THE SAME TIME continue the hole pattern mid front and mid back - See DECREASING TIP-2 (the side inc are now complete). REMEMBER THE GAUGE! When piece measures 35-36-37-38-39-40 cm / 13¾"-14¼"-14½"-15"-15¼"-15¾" bind off 12-12-12-16-16-16 sts each side for armhole (i.e. 6-6-6-8-8-8 sts each side of marker 1 and 3) = 86-96-104-112-128-142 sts left on front and back piece. Put piece aside and knit the sleeves. SLEEVE: Cast on 64-66-68-68-70-70 sts on double pointed needles size 3 mm / US 2or3 with Alpaca. Insert a marker after 32-33-34-34-35-35 sts (= mid upper sleeve), and let the marker follow the piece as you go along. Work first round as follows: K 29-30-31-31-32-32, slip 1 st as if to K, K1, psso, K2 (marker sits mid between these 2 sts), K2 tog and K 29-30-31-31-32-32. P 1 round. Now work next round as follows: K 29-30-31-31-32-32, slip 1 st as if to K, K1, psso, K2 tog and K 29-30-31-31-32-32. There are now 60-62-64-64-66-66 sts on needle. P 1 round and now continue in garter st. AT THE SAME TIME inc 2 sts mid under sleeve - See INCREASING TIP - and dec 1 st each side of marker mid upper sleeve - See DECREASING TIP-3. Continue the inc and dec on every other round (no of sts will be constant). When piece measures 9-8-8-8-6-9 cm / 3½"-3⅛"-3⅛"-3⅛"-2⅜"-3½" inc 2 extra sts mid under sleeve – NOTE: inc these each side of the middle 6 sts under sleeve. Repeat this inc a total of 19-21-22-24-26-28 times in SIZE S: on every 9th round, SIZE M + L: on every 8th round, SIZE XL + XXL: on every 7th round and SIZE XXXL: on every 6th round = 98-104-108-112-118-122 sts. When piece measures 46-46-46-45-45-45 cm / 18"-18"-18"-17¾"-17¾"-17¾", measured mid under sleeve – see MEASUREMENT TIP and adjust to the same no of garter st rows as on body piece – work shortened rows back and forth as follows (NOTE: K every row and continue the hole pattern mid upper sleeve on every row from RS acc to DECREASING TIP-2 – discontinue the inc mid under sleeve): Beg from RS mid under sleeve and work 16-16-18-18-20-20 sts past marker, turn piece, slip first st as if to K, tighten thread and work 32-32-36-36-40-40 sts. Turn piece, slip 1 st as if to K, tighten thread and work 48-48-54-54-60-60 sts, turn piece, slip 1 st as if to K, tighten thread and work 64-64-72-72-80-80 sts. Turn piece, slip first st as if to K, tighten thread and work 80-80-90-90-100-100 sts, turn piece, slip first st as if to K, tighten thread and work row back to mid under sleeve. Now bind off the first 6-6-6-8-8-8 sts at beg of round, work 86-92-96-96-102-106 sts and bind off the remaining 6-6-6-8-8-8 sts. Put piece aside and knit the other sleeve. YOKE: Slip sleeves on the same circular needle as body piece where bind off for armholes = 344-376-400-416-460-496 sts. Insert a marker in each transition between body piece and sleeves (= 4 markers). READ ALL OF THE FOLLOWING SECTION BEFORE CONTINUING! Continue in garter st and hole pattern as before (on sleeves continue hole pattern acc to DECREASING TIP-2 as on body piece, i.e. the hole pattern continues mid front/mid back and mid upper sleeves, but no inc are made). AT THE SAME TIME dec for raglan as follows - See DECREASING TIP-4: Beg on the first K round and then dec on every 4th round (i.e. on every other K-round) a total of 13-13-13-16-15-15 times and then on every other round (i.e. on every K-round) a total of 20-23-25-22-26-28 times. AT THE SAME TIME when piece measures 53-54-56-57-59-60 cm / 21"-21¼"-22"-22½"-23¼"-23⅝" – measured along the side - slip the middle 6-6-10-12-12-24 sts on a stitch holder for neck. Continue back and forth on circular needle from mid front, AT THE SAME TIME bind off for neck at beg of row each side as follows: 2 sts 1-1-2-3-3-4 times and 1 st until piece measures 58-60-62-64-66-68 cm / 22¾"-23⅝"-24⅜"-25¼"-26"-26¾" - measured along the side all the way to shoulder - REMEMBER MEASUREMENT TIP. After all dec for raglan and neck there are approx 64 to 100 sts left on needle, bind off loosely. NECKLINE: Pick up approx 80-100 sts round neck (includes sts on stitch holder at front) on small circular needle size 3 mm / US 2or3 with Alpaca. K 1 round AT THE SAME TIME dec evenly to 78-82-86-90-94-96 sts. P 1 round. Then K 1 round, AT THE SAME TIME inc evenly to 120-128-132-132-136-140 sts. Work rib, K2/P2 - make sure to have K2 mid front. When rib measures 8-8-9-9-10-10 cm / 3⅛"-3⅛"-3½"-3½"-4"-4" bind off loosely with K over K and P over P. ASSEMBLY: Sew openings under sleeves. |
|

|
|
|
Have you made this or any other of our designs? Tag your pictures in social media with #dropsdesign so we can see them! Do you need help with this pattern?You'll find tutorial videos, a Comments/Questions area and more by visiting the pattern on garnstudio.com. © 1982-2024 DROPS Design A/S. We reserve all rights. This document, including all its sub-sections, has copyrights. Read more about what you can do with our patterns at the bottom of each pattern on our site. |
With over 40 years in knitting and crochet design, DROPS Design offers one of the most extensive collections of free patterns on the internet - translated to 17 languages. As of today we count 304 catalogs and 11422 patterns - 11417 of which are translated into English (US/in).
We work hard to bring you the best knitting and crochet have to offer, inspiration and advice as well as great quality yarns at incredible prices! Would you like to use our patterns for other than personal use? You can read what you are allowed to do in the Copyright text at the bottom of all our patterns. Happy crafting!












Comments / Questions (55)
Buongiorno, ho difficoltà con le maniche. Sono arrivata al punto dei ferri accorciati però sono perplessa perché la parte superiore (quella col motivo) è più bassa della parte che andrà attaccata al sottomanica, esattamente di 9 cm. Pensavo che i ferri accorciati servissero a far crescere in altezza la parte più bassa (quella col motivo), invece le indicazioni si riferiscono alla parte sotto, quella dove inizia il giro. Sbaglio qualcosa? Grazie per la risposta.
07.02.2024 - 10:34DROPS Design answered:
Buonasera Stella, non ci sono errori nelle spiegazioni delle maniche, può seguire le istruzioni riportate. Buon lavoro!
17.03.2024 - 19:03Denne oppskriften stemmer rett og slett ikke. Særlig ermene blir feil, beregningen av lengde i henhold til strikkefasthet er gjort "rett opp" mens måling gjøres langs en skrå kant. Fellingen på bærestykket stemmer heller ikke, da felletips 2 faktisk ikke feller noen masker siden det som strikkes sammen kompenseres av kast. Dermed sitter man igjen med alt for mange masker. Grethe som stilte gjentatte spørsmål i 2013 har helt rett... Genseren er flott, men oppskriften er feil.
20.01.2022 - 22:27Hei. Jeg er akkurat ferdig med fellingen i bolen, der vrangborden slutter. Men nå er jeg veldig usikker på om felling tips 2 (der man strikker sammen og gjør kast) bør gjøres på en RETT rad eller en VRANG rad i rillene videre? Det burde stått tips om, for det påvirker hvilken rad man feller på. Dessuten hadde det vært fint om det i stedet for "fell jevnt fordelt" faktisk stod en anbefalt fordeling. Når man lager oppskriften har man jo allerede gjort utregningen...
13.01.2022 - 22:37DROPS Design answered:
Hej, når du tager ind jævnt fordelt tager du maskeantallet der skal tages ind over og deler med det antal masker som skal tages ind (eks 60/6=10 da strikker du hver 9og10 maske sammen). Tag ind på retsiden, og sørg for at ribben stemmer fra retsiden. God fornøjelse!
27.01.2022 - 10:09Grazie mille!
20.04.2021 - 18:36Buonasera, non riesco a far combaciare i punti dove ci sono le diminuzioni -1 e gli aumenti, dove devo lavorare le 6 maglie a dritto nel ferro di ritorno, quindi legaccio o rasato? E per le diminuzioni? Grazie mille!
20.04.2021 - 00:41DROPS Design answered:
Buonasera Lelletta, durante la diminuzioni le 6 maglie centrali vanno lavorate a diritto sul ferro successivo. Buon lavoro!
20.04.2021 - 18:17I am going to knit this sweater, however my tension 24 stitches only measures 9 cm. As Alpaca is a fine wool I prefer to knit on the 3mm needle. Do you think it would work if I made it a size or maybe 2 bigger than normal.
30.01.2020 - 13:09DROPS Design answered:
Dear Mrs May, you can first block your swatch and check measurements afterwards - should your tension still not work, rather try again with another needle size otherwise you would have to recalculate the pattern to match your tension - read more about tension here. Happy knitting!
30.01.2020 - 13:23Ik heb een probleem. Brei maat M. Moet na de eerste 8 cm 21 keer meerderen. D.i. 21 X 2,5 cm = 52,5 cm., dus in totaal 60,5 cm. wat doe ik fout
28.09.2019 - 11:43DROPS Design answered:
Dag Lia,
Bij een stekenverhouding van 48 naalden in de hoogte = 10 cm, zou je, als je op elke 8e naald meerdert, om de 1,7 cm. meerderen, en dan kom je op een kleine 36 cm. Met de eerst 8 cm erbij is dat 44 cm.
29.09.2019 - 18:04Bij de mouwen heb ik een probleem. Na de eerste 8 cm (maat M) moet ik 21 X meerderen elke 8e naald. D.i. 21 X 8 nld. = 168 nld. 168:32=41 cm + de 8 cm van het begin is 49 cm.. Wat gaat er fout
28.09.2019 - 11:37Bonjour Je me pose une question, à la fin des augmentations des manches : ... Commencer sur l'endroit au milieu sous la manche et tricoter 16-16-18-18-20-20 m après le marqueur, tourner , glisser la 1ère m à l'end, serrer le fil et tricoter 32-32-36-36-40-40 m. ... Est-ce bien SOUS la manche qu'il faut faire ces rangs supplémentaires ou au niveau du dessin, la manche, du fait du biais, étant déjà moins haute sur le dessus de celle-ci ? Merci de votre aide/
24.09.2019 - 08:32DROPS Design answered:
Bonjour Sylvana, les rangs raccourcis commencent bien au milieu sous la manche (= début des tours). Bon tricot!
24.09.2019 - 10:53I love the look of this jumper but would like to knit with an Australian 8ply Bendigo Wool. Could you please tell me if there is a conversion from 5 to 8 ply available. Many thanks Kay
27.04.2019 - 00:24DROPS Design answered:
Dear Kay, We are able to provide free patterns thanks to our yarns sold throughout the world. You will therefore understand that we can only recomand you to contact your DROPS Store for any further help & assistance. Thank you for your comprehension.
29.04.2019 - 08:12