
Popular categories
Looking for a yarn?


|
|
DROPS 79-10 |
|
|
|
|
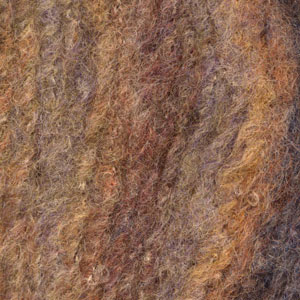
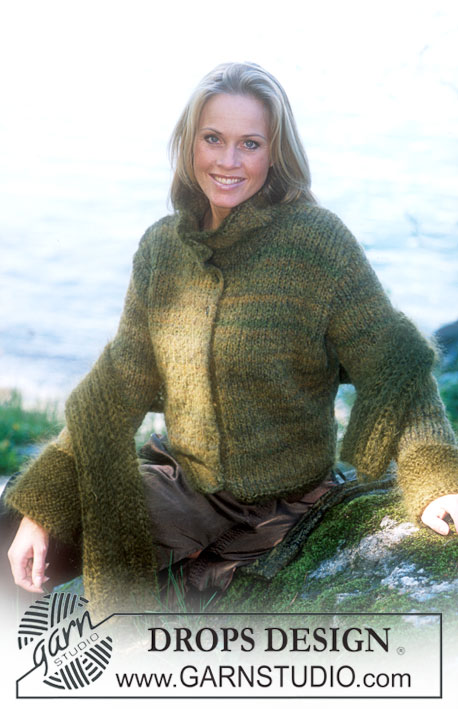
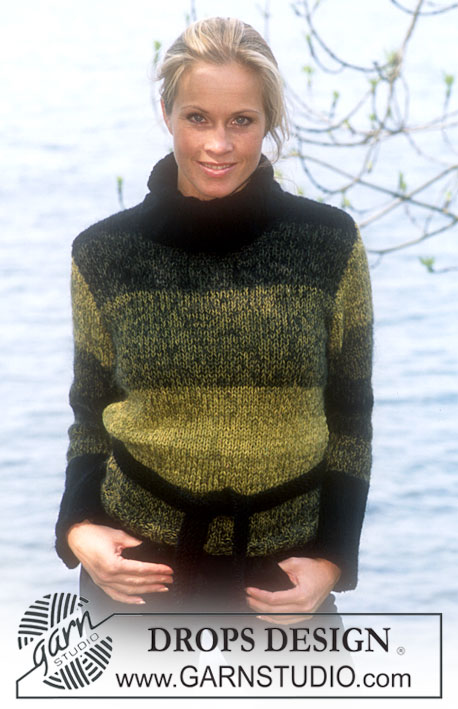
DROPS Cardigan and Scarf in Vienna
DROPS 79-10 |
|
|
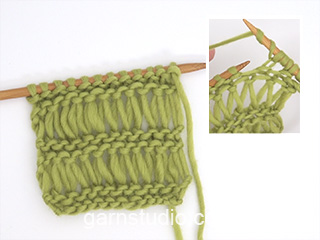
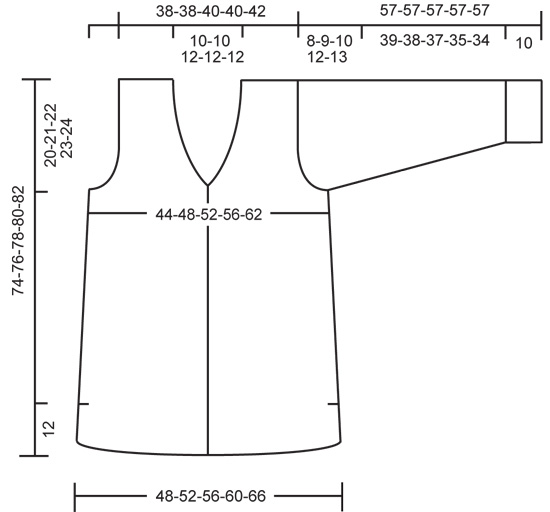
Cardigan: Knitting Tension: 10 stitches x 16 rows using 8mm needle in stocking stitch = 10 x 10 cm. Increasing and decreasing: All increases and decreases are done from the right side of the jacket. Increasing: (for collar) Increase by knitting 2 sts in the last but one st on front band. Decreasing: (for neckline) Decrease as follows: On left side (when worn): knit 2 together just before the 4 front band sts, on right side (when worn): slip st as if to knit, knit 1, psso just after the 4 front band sts. Back: Loosely cast on 48-52-56-60-66 sts using 8mm needle, change to 7mm needle and knit 4 rows garter stitch. Change back to 8mm needle and continue in stocking stitch, but knit the first and last 3 sts garter (for split). When back measures 12 cm, discontinue the split and cast on 1 new st each side (edge st) = 50-54-58-62-68 sts. Continue in stocking stitch over all sts and decrease 1 st each side when back measures 20 cm and again at 40 cm = 46-50-54-58-64 sts. When back measures 49 cm, finish the piece in garter stitch. At the same time, when back measures 54-55-56-57-58 cm, decrease for armhole each side on every other row as follows: 3 sts 1 time, 2 sts 0-0-1-2-2 times and 1 st 2-3-2-2-4 times = 36-38-40-40-42 sts. When back measures 72-74-76-78-80 cm cast off the middle 8-8-10-10-10 sts and knit each shoulder separately. Shape the neckline by decreasing 1 st on each neck edge = 13-14-14-14-15 sts left on each shoulder. Cast off when back measures 74-76-78-80-82 cm. Left Front: Cast on 28-30-32-34-37 sts (incl 4 front band sts) using 8mm needle. Change to 7mm needle and knit 4 rows garter stitch. Continue in stocking stitch, but knit 4 front band sts and 3 sts at the side (for split) garter. When front measures 12 cm, discontinue the split and cast on 1 new st at the side (edge st) = 29-31-33-35-38 sts. When the piece measures 20 and 40 cm dec 1 st at the side edge = 27-29-31-33-36 sts. When front measures 49 cm, finish the piece in garter stitch. Read all of the rest before knitting it! Collar: When front measures 50-51-52-53-54 cm, increase for collar within 1 sts on band (see Increasing). After the 5 front band sts, turn and return in garter stitch to the beginning of the band. Knit all sts again and increase (see Increasing) 1 st on every row 4 times, 1 st on every other row 6 times and thereafter 1 st every 4 row 2 times = 13 sts increased for collar – the increased sts are knitted in garter. Neckline: At the same time, when front measures 54-55-56-57-58 cm decrease for neckline (see Decreasing), 1 st every other row 10-10-11-11-11 times. Armhole: At the same time as decreases are made for the neckline, decrease for armhole as on the back. When all decreases for neckline and armhole are made, there are 25-26-27-27-28 sts left. When the front measures 74-76-78-80-82 cm, cast off 12-13-14-14-15 sts for shoulder = 13 collar sts left on needle. Collar: Continue knitting the 13 collar sts in garter as follows: *1st row: garter over all sts, 2nd row: garter over all sts, 3nd row: garter over only the 8 front sts, 4th row: garter over only the 8 front sts*, repeat from *-* until the collar measures 5-6 cm on the inner side (to be stitched to back neckline) – it will measure 10-12 on the outer side. Right Front: Cast on and knit as left front, but mirrored. Additionally, make buttonholes on front band from the right side by knitting the 2nd and 3rd st together and then yarn over needle. On the next row, knit into back of yarn over needle, in order the buttonhole doesn’t get too big. Make buttonholes as follows: Size S: every 13, 23, 32, 41 and 50 cm Size M: every 13, 23, 33, 42, and 51 cm Size L and XL: every 13, 23, 33, 43 and 53 cm Size XXL: every 14, 24, 34, 44 and 45 cm Sleeves: Cast on 23-24-26-26-27 sts (incl 1edge st each side) using 8mm needle. Change to 7mm needle and knit 10 cm garter stitch. Change back to 8mm needle and continue in stocking stitch. At the same time, after the 10 cm garter stitch, increase 1 st each side every 5-5-5-4-3.5 cm a total of 8-8-8-9-10 times = 39-40-42-44-47 sts. When the sleeve measures 49-48-47-45-44 cm, decrease for armhole each side on every other row as follows: 3 sts 1 time, 2 sts 1 time and 1 st until the sleeve measures 56 cm. Cast off 3 sts each side, knit one row and cast off remaining sts. Armhole measures approx 57 cm. To make up: Join shoulders. Stitch together collar centre back and attach collar to back neckline. Set in sleeves and join side and arm seems. Sew on buttons. Belt: Cast on 7 sts using 7mm needle and knit 120-130 garter stitch. Cast off. SCARF: Materials: DROPS VIENNA from Garnstudio 100 gr nr 64, green mix DROPS 7 mm needles, or size needed to obtain correct tension. Tension: 9 sts in Pattern = 10 cm wide. Pattern: Row 1: knit Row 2: knit Row 3: *K 1, yo*, repeat from *-* across row, finish with K 1. Row 4: knit all K sts, letting yo from previous row drop (= long st). Repeat rows 1 - 4. Scarf: Loosely cast on 18 sts. Knit pattern - see instructions above - until piece measures approx. 179 cm. Finish with 2 rows garter st, cast off. |
|
|
|
|
Have you made this or any other of our designs? Tag your pictures in social media with #dropsdesign so we can see them! Do you need help with this pattern?You'll find tutorial videos, a Comments/Questions area and more by visiting the pattern on garnstudio.com. © 1982-2024 DROPS Design A/S. We reserve all rights. This document, including all its sub-sections, has copyrights. Read more about what you can do with our patterns at the bottom of each pattern on our site. |


With over 40 years in knitting and crochet design, DROPS Design offers one of the most extensive collections of free patterns on the internet - translated to 17 languages. As of today we count 304 catalogues and 11422 patterns - 11422 of which are translated into English (UK/cm).
We work hard to bring you the best knitting and crochet have to offer, inspiration and advice as well as great quality yarns at incredible prices! Would you like to use our patterns for other than personal use? You can read what you are allowed to do in the Copyright text at the bottom of all our patterns. Happy crafting!
Comments / Questions (12)
Bij het patroon hierboven is mij niet duidelijk hoe ik de kraag moet breien. Bij het linkervoorpand: je moet bij de kraag meerderen aan de middenzijde, maar tegelijkertijd ook minderen aan deze zijde. Ik loop nu vast. Kunt u een tekening of video laten zien van hoe de kraag gemaakt moet worden. Moet de kraag los van het voorpand gebreid worden? Of begrijp ik het niet goed?
20.12.2021 - 07:56DROPS Design answered:
Dag Bregje,
Op de foto zie je dat kraag in een v-vorm loopt richting de hals, maar dat de kraag ook breder wordt. Als je hem omvouwt krijg je dus een vouwlijn in de vorm van een v-hals. Hiervoor worden de minderingen gemaakt. Het meerderen doe je vlak na de eerste steek van de kraag, zodat de kraag breder wordt.
06.01.2022 - 11:24Drops-wish-mix-13-donker-olijf-blowgaren kan ik deze wol gebruiken voor deze jas?
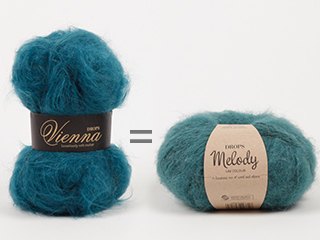
06.12.2021 - 18:48Het garen DROPS Highlander van Garnstudio is niet meer te koop. Welk garen kan ik dan gebruiken? Het is me niet duidelijk.
05.12.2021 - 16:10DROPS Design answered:
Dag Bregje,
Hiervoor kun je de garenvervanger gebruiken. De link hier naar toe vindt je bij ieder patroon onderaan de lijst met benodigdheden.
07.12.2021 - 17:16What is meant by the split when knitting the back?
10.09.2020 - 01:05DROPS Design answered:
Dear Liz, the jacket has vents on each side, this mean when piece measures 12 cm you cast on 1 new st on each side on back piece for seam allowance, when sewing pieces together you will sew sides leaving the bottom 12 cm open. Happy knitting!
10.09.2020 - 10:02Hej, når man har strikket begge forstykker med krave, skriver I at man skal sy kraven sammen med maskesting, ville det ikke være bedre at strikke dem ret sammen? I har en video som viser hvordan man strikker glatstrikning sammen, kan den ikke bruges bare i retstrikning, som nu kraven er strikket i? Det er en jakke med meget god pasform og rigtig flot når den er færdig.
19.04.2014 - 19:15DROPS Design answered:
Hej Lise. Det kan du ogsaa sagtens göre hvis du selv synes det er paenere. God fornöjelse.
22.04.2014 - 17:10Is the amount of yarn required for this pattern accurate? This pattern says I will need 650 g for XXL of Eskimo which I purchased. When I compare this pattern to pattern #109-8, same length but has a hood, the required yarn is 1300 g of Eskimo for the same size. Even pattern 73-23 calls for more yarn and this is a shorter, more fitted sweater without a collar. I'm worried about starting if I won't have enough yarn.
23.03.2014 - 19:10DROPS Design answered:
Dear Cindy, materials for this jacket is Drops Highlander (50 g/80 m), Drops Eskimo is an alternative (same tension), but is 50 g/50 m. Please click here to know how to calculate required amount of Eskimo for your size. Happy knitting!
24.03.2014 - 09:42Gøy å strikke,god passform.
29.10.2012 - 11:17Hi Kathy, 10 sts in width is great, you will not be able to get 16 rows, but that is ok, you will anyways follow the measures in height in the pattern. THe older patterns are not converted into inches through the pattern, and you will need to use a tape measure with inch on one side and cm on the other side. That usually works well.
17.01.2012 - 23:54I am able to get the guage for the stitches (10 = 4"), but the 13 rows + 4", using a size 13 needle. Any suggestions?
17.01.2012 - 23:48Do I have use CM/Inch converter for each measurement or can I access a page where the pattern is converted for me?
17.01.2012 - 23:46