
Popular categories
Looking for a yarn?


|
|||||||||||||
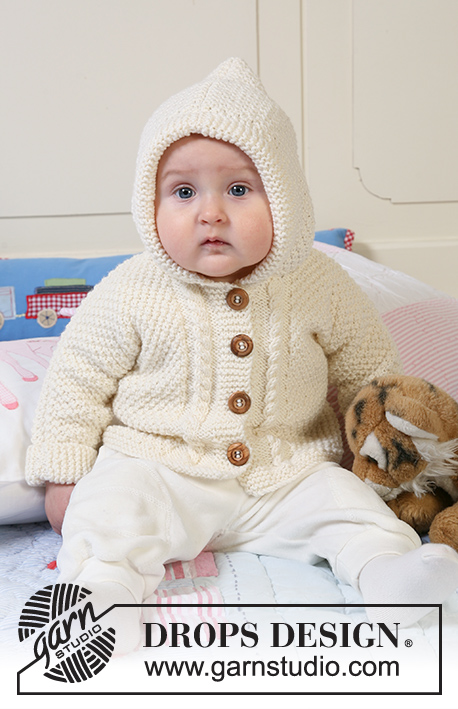
Little Pixie |
|||||||||||||
 |
 |
||||||||||||
Jacket in moss st knitted in one piece with hood, textured pattern and cables for baby and children in DROPS Merino Extra Fine
DROPS Baby 19-5 |
|||||||||||||
|
JACKET: GARTER ST (back and forth on needle): K all rows. PATTERN: See diagram M.1 to M.3. Diagram shows the pattern from RS. First row in M.1 and M.3 = WS. BUTTONHOLES: Make buttonholes on right front band. 1 buttonhole = K tog 2nd and 3rd st from mid front and make 1 YO. K YO on next row. Make buttonholes when piece measures: Size 1/3 months: 4, 10, 16 and 22 cm. Size 6/9 months: 4, 11, 18 and 24 cm. Size 12/18 months: 3, 9, 15, 21 and 27 cm. Size 2 years: 3, 10, 17, 24 and 31 cm. Size 3/4 years: 3, 11, 19, 27 and 34 cm. -------------------------------------------------------- -------------------------------------------------------- JACKET: Worked back and forth on circular needle from mid front up to the armhole. Then front and back pieces are worked separately and new sts cast on each side for sleeves. The jacket is assembled sewing the upper arm/shoulder and under arm seams. BODY PIECE: Cast on 117-131-145 (155-169) sts (includes 6 front band sts each side towards mid front) on circular needle size 4 mm with Merino Extra Fine. Work 6 rows GARTER ST – see above (first row = RS), then K 1 row from RS, AT THE SAME TIME inc 1 st in the 10th and 11th st from mid front, repeat the inc at the end of row (in 11th and 10th st on needle) = 121-135-149 (159-173) sts. Insert a marker 34-38-42 (44-48) sts in from each side (= 53-59-65 (71-77) sts between markers on back piece). Now work next row as follows from WS: 6 garter sts (= front band), M.3 (= 10 sts), M.2 on the next 89-103-117 (127-141) sts, M.1 (= 10 sts) and 6 garter sts (= front band). Continue in pattern like this - REMEMBER BUTTONHOLES ON RIGHT FRONT BAND - see above. REMEMBER THE KNITTING TENSION! When piece measures 16-17-20 (23-25) cm divide piece by markers and complete front and back pieces separately. RIGHT FRONT PIECE: = 34-38-42 (44-48) sts. Continue in pattern as before, AT THE SAME TIME cast on new sts for sleeve at the end of every row towards the side as follows: 4 sts 2-2-3 (3-3) times, 8 sts 1-1-1 (1-3) times, 10 sts 1-1-1 (2-1) times and 19-22-23 (23-24) sts 1 time = 79-86-95 (107-118) sts - NOTE: incorporate inc sts in M.2 as you go along. After the last inc continue as before but work 10 sts towards sleeve edge in garter st (= folding edge on sleeve). When 1 row remains before piece measures 23-25-28 (32-35) cm – adjust to a row from WS - dec 2 sts over cable by P2 tog twice on the 4 cable sts. On next row from RS slip 9-11-12 (12-13) sts towards mid front on a stitch holder for neck. Cast off to shape the neckline at the beg of every row from mid front: 2 sts 2 times and 1 st 2-2-3 (3-3) times = 62-67-74 (86-96) sts left on needle (= shoulder + sleeve). Continue in M.2 and cast off when piece measures 27-29-33 (37-40) cm. LEFT FRONT PIECE: Like right front piece but mirrored. BACK PIECE: = 53-59-65 (71-77) sts. Continue in M.2 as before, AT THE SAME TIME cast on new sts each side at the end of every row as described for front piece = 143-155-171 (197-217) sts. Now continue in M.2 with 10 garter sts each side on sleeve edges. When piece measures 25-27-31 (35-38) cm cast of the middle 17-19-21 (23-23) sts for neck and complete each shoulder/sleeve separately. Cast off 1 st on neckline on next row = 62-67-74 (86-96) sts left on needle (= shoulder + sleeve). Cast off when piece measures 27-29-33 (37-40) cm. Repeat on the other side. ASSEMBLY: Sew shoulder/upper arm seams, edge to edge with neat sts. Sew under arm seams. Sew on buttons. Fold the bottom 5 cm on both sleeve edges towards RS, if needed attach with a few sts. HOOD: Pick up from RS approx 55 to 75 sts round neck (includes sts from stitch holders at front) on circular needle size 4 mm with Merino Extra Fine. K 1 row from WS, then K 1 row from RS, AT THE SAME TIME inc evenly to 85-89-93 (97-101) sts. Continue in M.2 with 6 sts each side in garter st - AT THE SAME TIME cast on 6 new sts at the end of the next 2 rows for folding edge = 97-101-105 (109-113) sts – work these 6 sts in garter st. Continue in M.2 with 12 garter sts each side until hood measures 21-23-25 (27-28) cm, cast off. Fold hood double and sew tog at the top. Fold the garter st edge double towards RS and attach at the bottom each side. |
|||||||||||||
Diagram explanations |
|||||||||||||
|
|||||||||||||

|
|||||||||||||
|
Have you made this or any other of our designs? Tag your pictures in social media with #dropsdesign so we can see them! Do you need help with this pattern?You'll find tutorial videos, a Comments/Questions area and more by visiting the pattern on garnstudio.com. © 1982-2024 DROPS Design A/S. We reserve all rights. This document, including all its sub-sections, has copyrights. Read more about what you can do with our patterns at the bottom of each pattern on our site. |
|||||||||||||


With over 40 years in knitting and crochet design, DROPS Design offers one of the most extensive collections of free patterns on the internet - translated to 17 languages. As of today we count 304 catalogues and 11422 patterns - 11422 of which are translated into English (UK/cm).
We work hard to bring you the best knitting and crochet have to offer, inspiration and advice as well as great quality yarns at incredible prices! Would you like to use our patterns for other than personal use? You can read what you are allowed to do in the Copyright text at the bottom of all our patterns. Happy crafting!
Comments / Questions (117)
If the charts show the RS only, how do you know what to do on the WS please? Thank you for your assistance
17.02.2016 - 11:35DROPS Design answered:
Dear Mrs Hev, in diagrams 1 square = 1 st x 1 row. The x symbol= reversed stocking st (= P from RS but K from WS) and the white symbole = stocking st (= K from RS but P from WS), as explained under diagram text. So that M.1 is worked over 10 sts and 4 rows. Happy knitting!
17.02.2016 - 11:49If the charts show the RS only, how do you know what to do on the WS please? Thank you for your assistance
16.02.2016 - 13:20DROPS Design answered:
Dear Mrs Hev, diagrams show all rows both from RS and from WS - read more here. Happy knitting!
16.02.2016 - 15:50On the M2 chart- is this supposed to be seed stitch where you knit the purl stitches and purl the knit stitches on alternate sides? Because it does not look like that's what the chart says. Please can you explain in MORE detail?
16.02.2016 - 13:17DROPS Design answered:
Dear Mrs Hev, M.2 is seed stitch worked double in height - see also video below. Happy knitting!
16.02.2016 - 15:50Can you explain how to follow the pattern charts for this particular sweater as it is confusing. It says "see diagram M.1 to M.3. Diagram shows the pattern from RS. First row in M.1 and M.3 = WS." Does this mean you start from the left of the chart instead of the right and then alternate sides you start from on the charts?
16.02.2016 - 13:17DROPS Design answered:
Dear Mrs Hev, that's correct, in M.1 and in M.3 start reading from the bottom corner on the left side and read towards the right from RS then from RS, read from the right towards the left. Happy knitting!
16.02.2016 - 15:48Er staat in het patroon voor rechtervoorpand: zet in vlg naald aan goede kant 9 st middenvoor op hulpdraad voor de hals. Welke steken zijn dit? Aan het begin v d naald moeten er namelijk al 6 st in totaal afgekant worden in drie volgende naalden.
16.02.2016 - 12:50DROPS Design answered:
Hoi Tamar. De eerste 9 st middenvoor zet je op de hulpdraad zoals er staat. In volgende nld kant je af aan het begin van de nld (dus er wordt in feite afgekant tussen st op hulpdraad en voorpand).
16.02.2016 - 16:44Can you explain in detail and/or post a video on how to follow the m.1, m.2 and m.3 charts please?
13.02.2016 - 19:30DROPS Design answered:
Dear Mrs Hev, please read more about diagrams here. Happy knitting!
15.02.2016 - 10:25Garnmængden til str 3/4 passer ikke. Der bruges 450 g garn og ikke 350 g
16.11.2015 - 20:14Zelfs op naalden 3 1/2 is hij te groot...jammer!
27.08.2015 - 15:24Hallo, ich verstehe leider die Stelle "Bei der nächsten R. von der Vorderseite die äußersten 9-11-12 (12-13) M. auf einen Hilfsfaden legen." nicht. Wo ist die Vorderseite und was passiert später mit diesen Maschen?
21.08.2015 - 09:33DROPS Design answered:
"von der Vorderseite" soll bedeuten, dass Sie die Maschen am Anfang der Hin-R auf einen Hilfsfaden legen (d.h. stilllegen). Das erfolgt für den Halsausschnitt, man könnte diese Maschen auch abketten, aber da man später noch die Kapuze anstrickt, werden diese Maschen wieder gebraucht, daher legt man sie still.
21.08.2015 - 20:35Beste, Ik ben tot tweemaal toe begonnen aan dit patroon, maar het werd steeds vele malen breder dan vermeld staat. Bij de gegevens voor 6/80 maanden werd mijn breiwerk 5 centimeter breder dan op de tekening staat! Een tweede keer breide ik de kleinste maat, maar ook dan viel het veel te groot uit. Ik heb een proeflapje gebreid en dit was wel volledig met de juiste verhoudingen. Klopt er iets niet in het patroon?
13.08.2015 - 23:00DROPS Design answered:
Hoi Yinka. Ik heb de afmetingen bekeken in vergelijking met de stekenverhouding. Met de juiste stekenverhouding zou je wel uitkomen op ongeveer 28 cm voor het achterpand (59 st) en 18 cm per voorpand. Daarbij trekt het kabeltje / gerstekorrel wat meer samen dan tricotsteken.
14.08.2015 - 12:44